
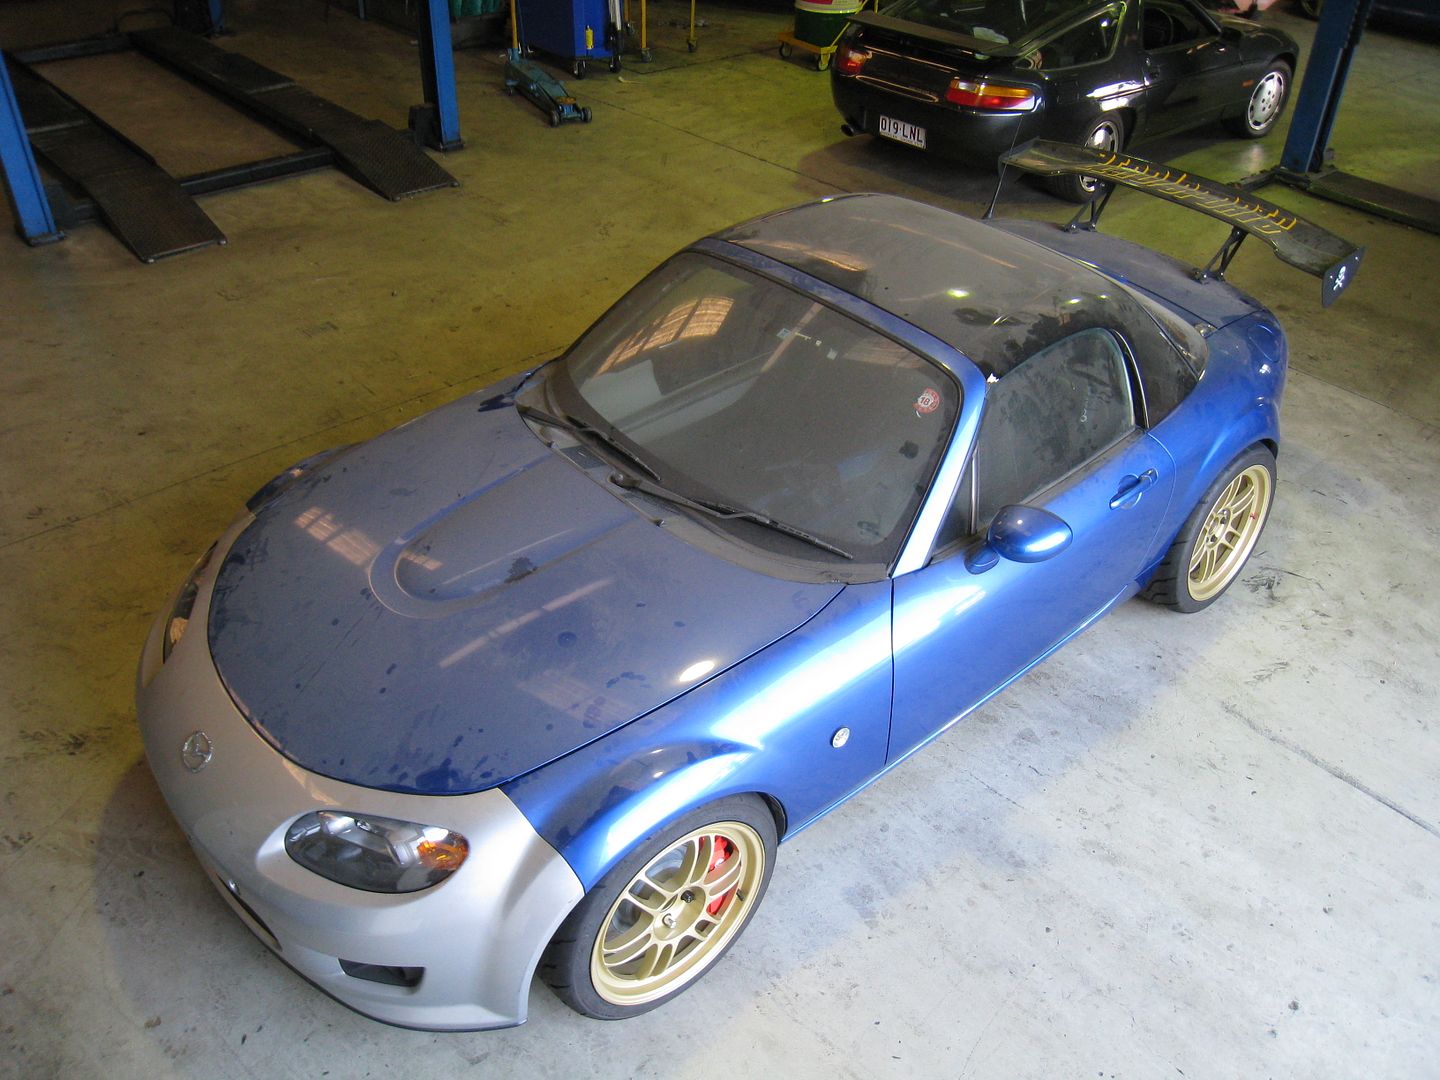
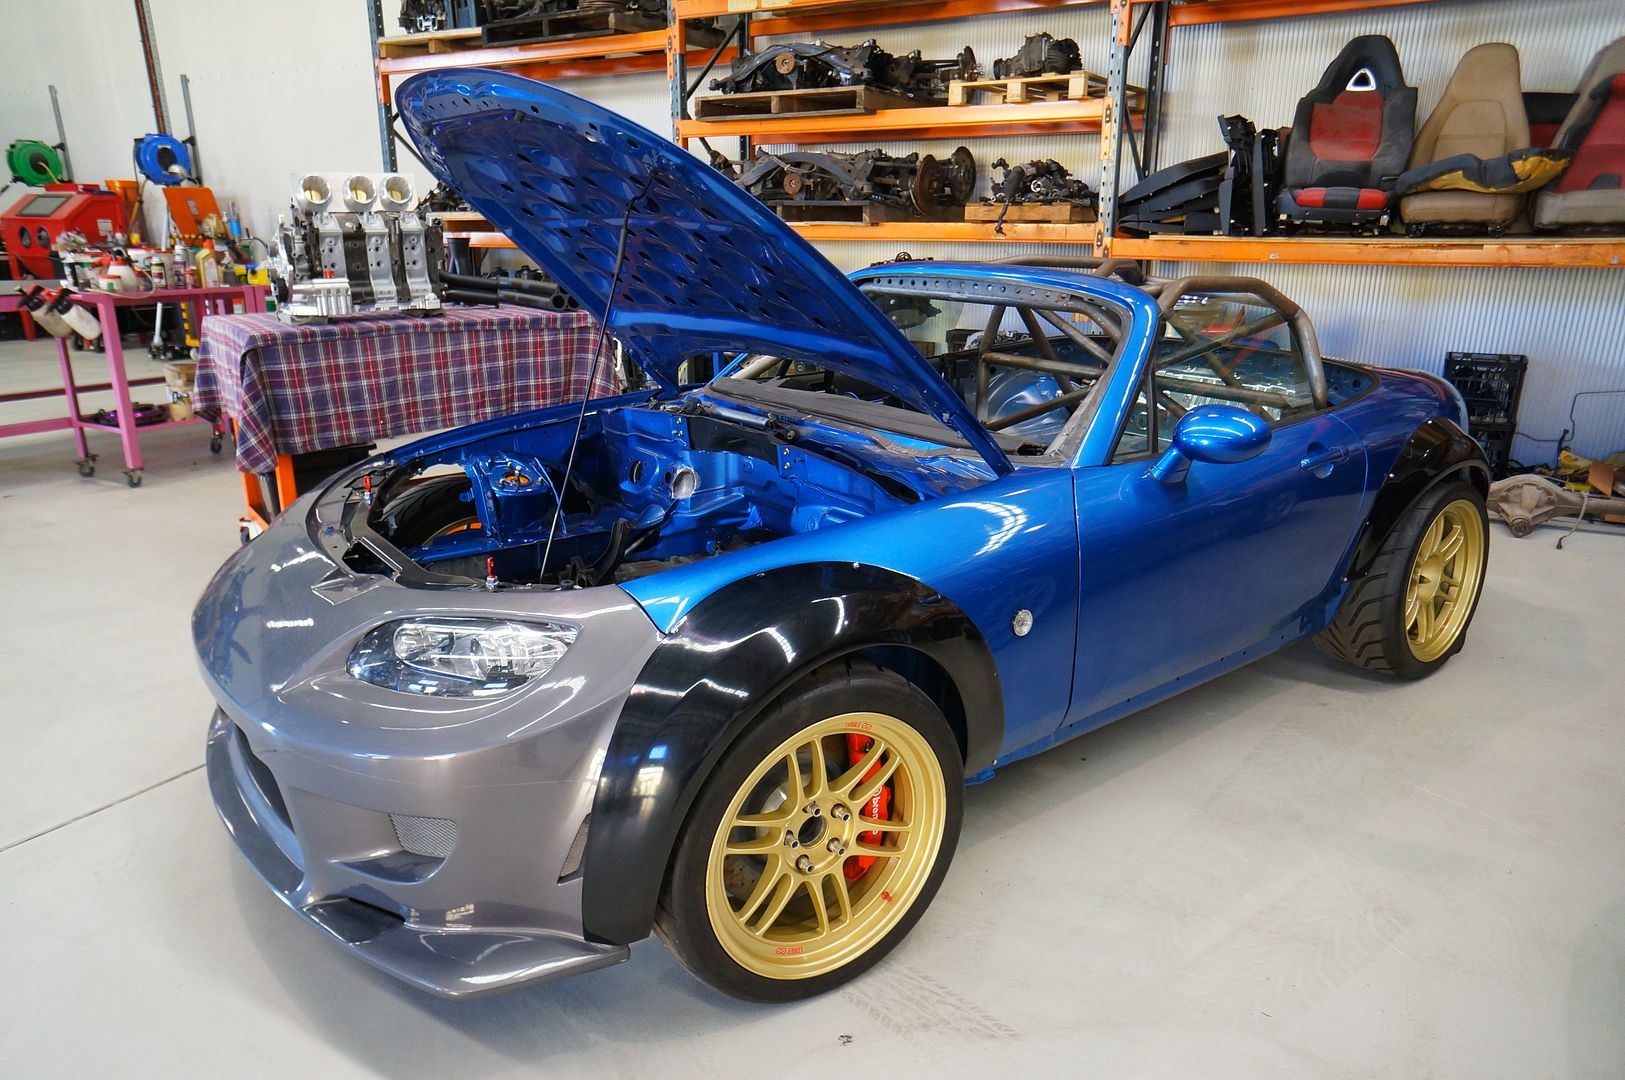
The build of Danny Irvine’s 20B Miata..
Every week there are cars that pop up on my facebook news feed that everyone shares and seems to love. Well me being the Mazda lover, this Miata caught my attention. I dug and followed the links back to the shop and the ended up finding the build thread on MX5cartalk.com , The car is being built in Australia at a shop called Automotive Plus by Danny Irvine. When I started reading the thread I started to put some things together. And I realized that he was the same guy that had built a really nice 13b Turbo 1st gen Mazda 626. I owned a 1980 Mazda 626 about 2 years ago, and his build with that car helped me learn a lot about my old Mazda. I had no idea what kind of builder Danny was at that time. As you will see in this post, his shop does some serious work.
I just wanted to share a quick rundown of the build in this post. The build is very extensive and highly detailed. Gives you a good idea of what it takes to put together something like this the right way. The thread is full of tons more photos if these are not enough for you. Even the process of Danny creating a lot of the metal pieces from scratch to make the build work. I included comments from the build thread with the proper photos.
Automotive Plus’s Facebook page
20B PP powered Mazda MX5 Track Car
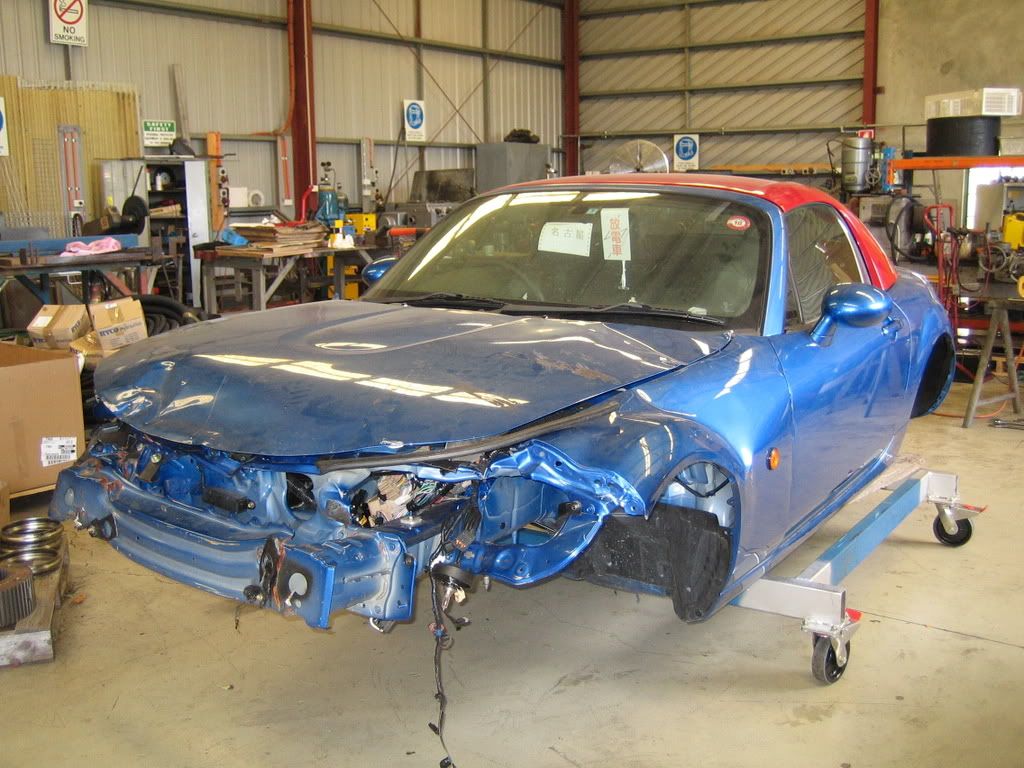
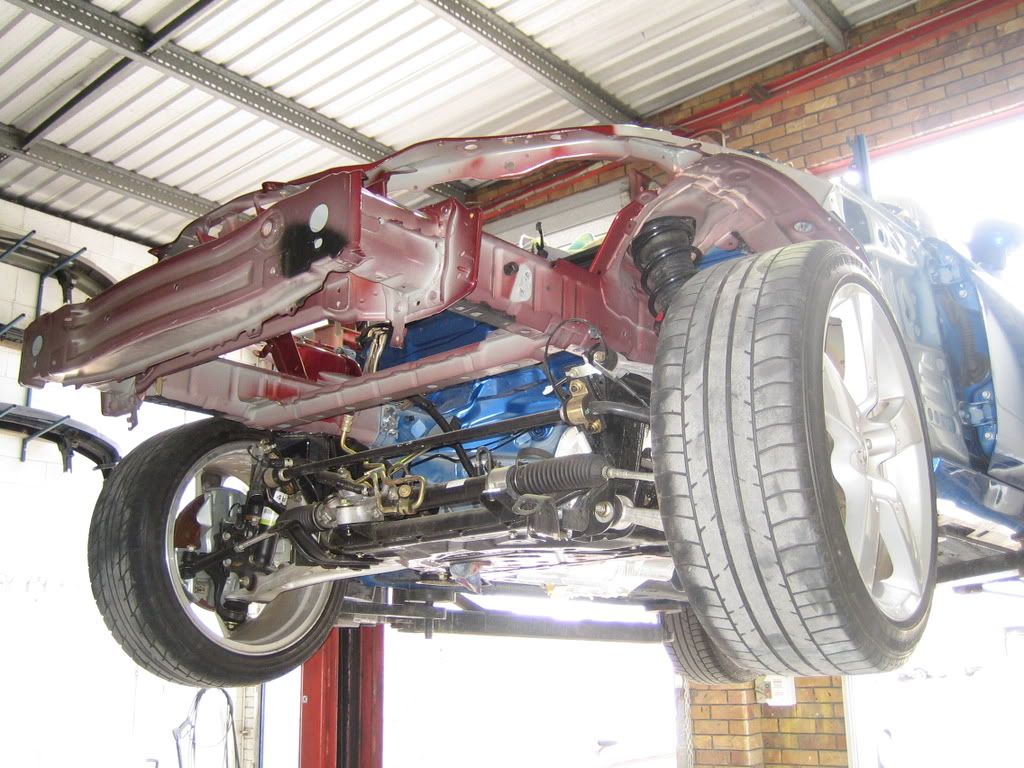
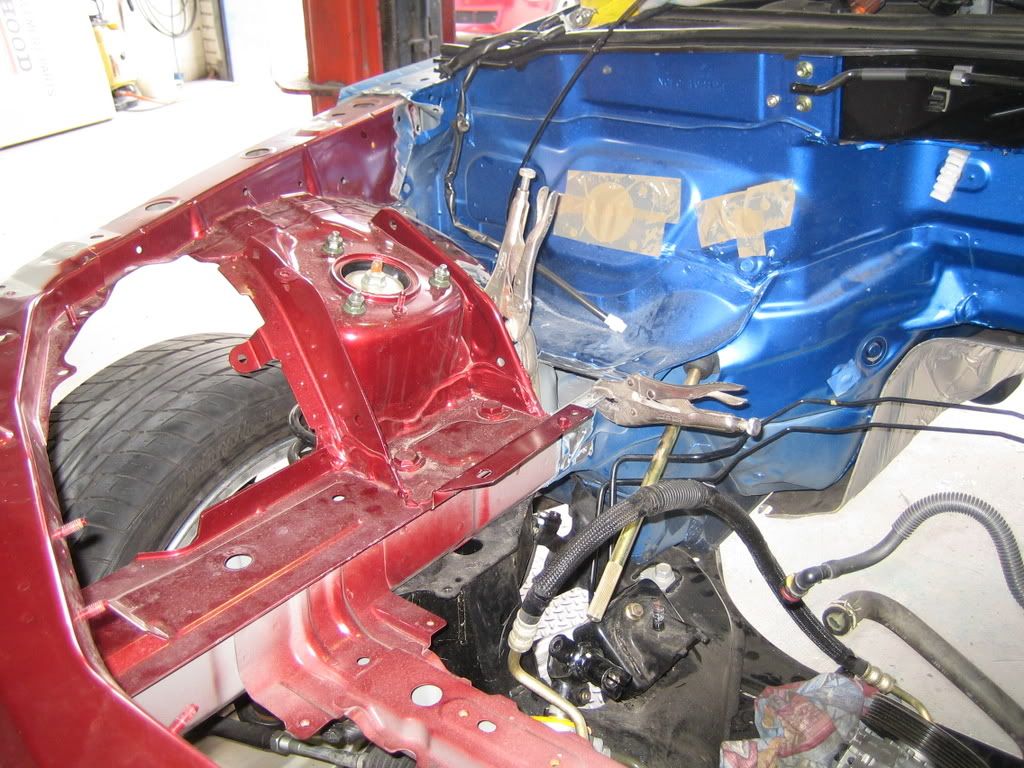
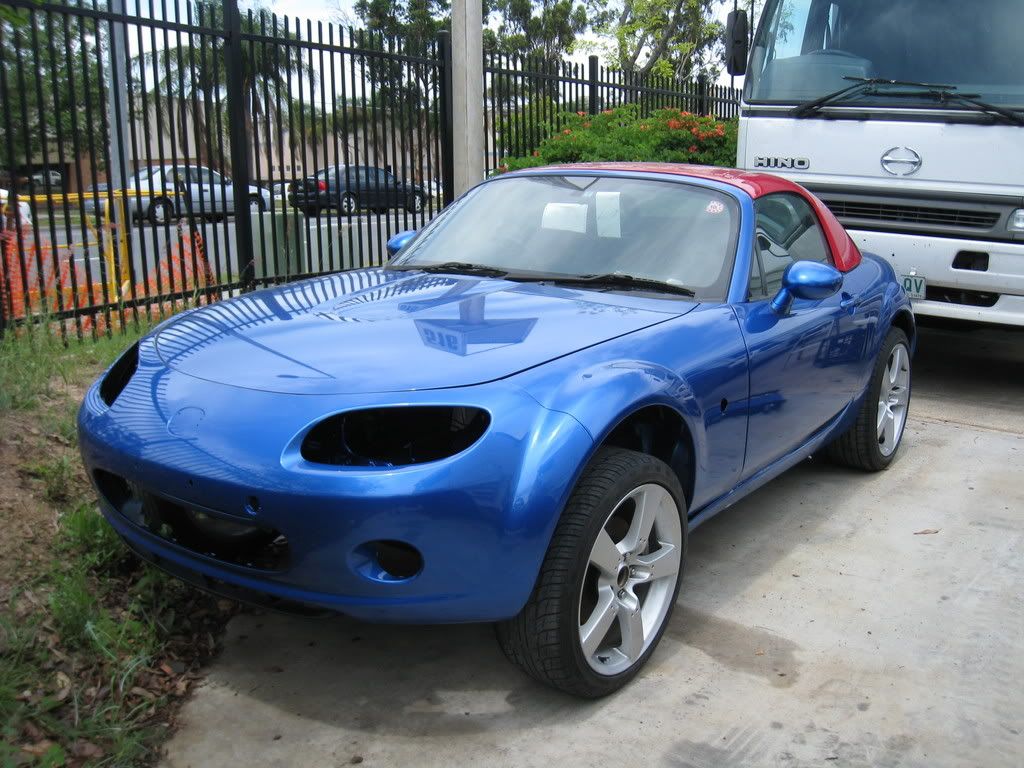
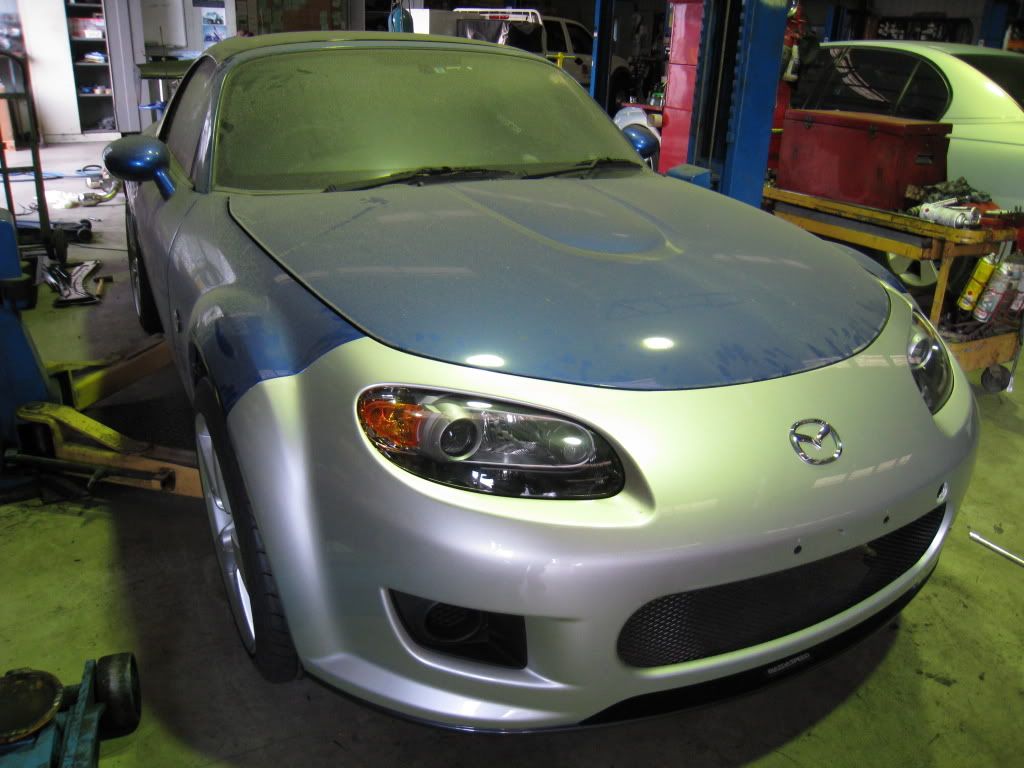
In September ’06 a suitable damaged chassis became available in Japan. An ’05 model NC in Winning Blue (my favourite colour) with less than 3,000km on it
. It was the base model fitted with 16\” wheels and 5-speed…however it did have the Bose audio option. After a few anxious e-mails I’d secured it!
I found another NC that was complementary to the Winning Blue one…ie had most of the bits I needed for the repair
.
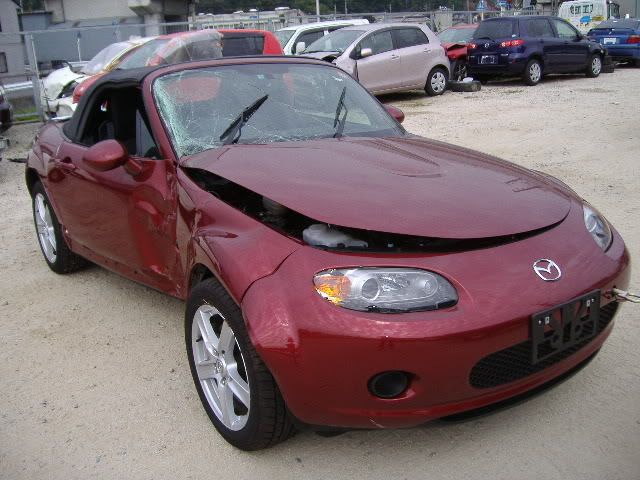
It was also an ’05 base model, however it was Wine in colour and had taken quote a hit on the drivers side at the A-pillar and drivers door. It also had low km, only 9336km.

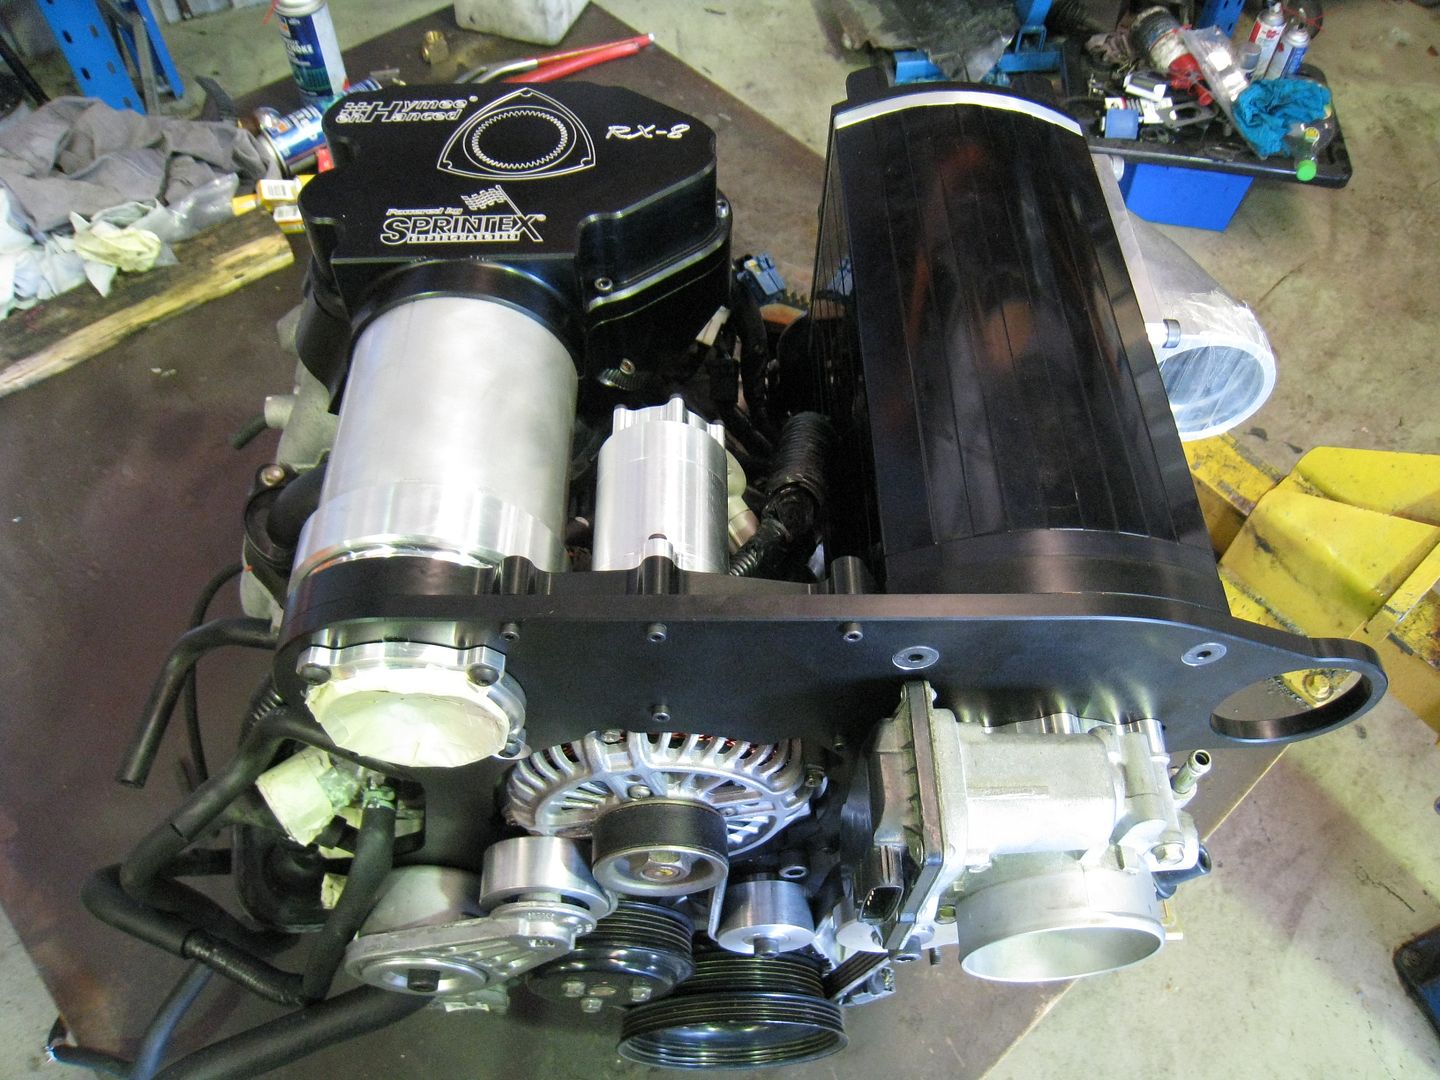
So after stumbling across a new Blitz non-intercooled supercharger kit I decided to put the R & D of an intercooled Eaton M90 supercharger on the back burner and purchased the Blitz kit.
Today, with the help from one of my employees (TIG welding Guru – because I can’t TIG weld
) I completed the exhaust system.
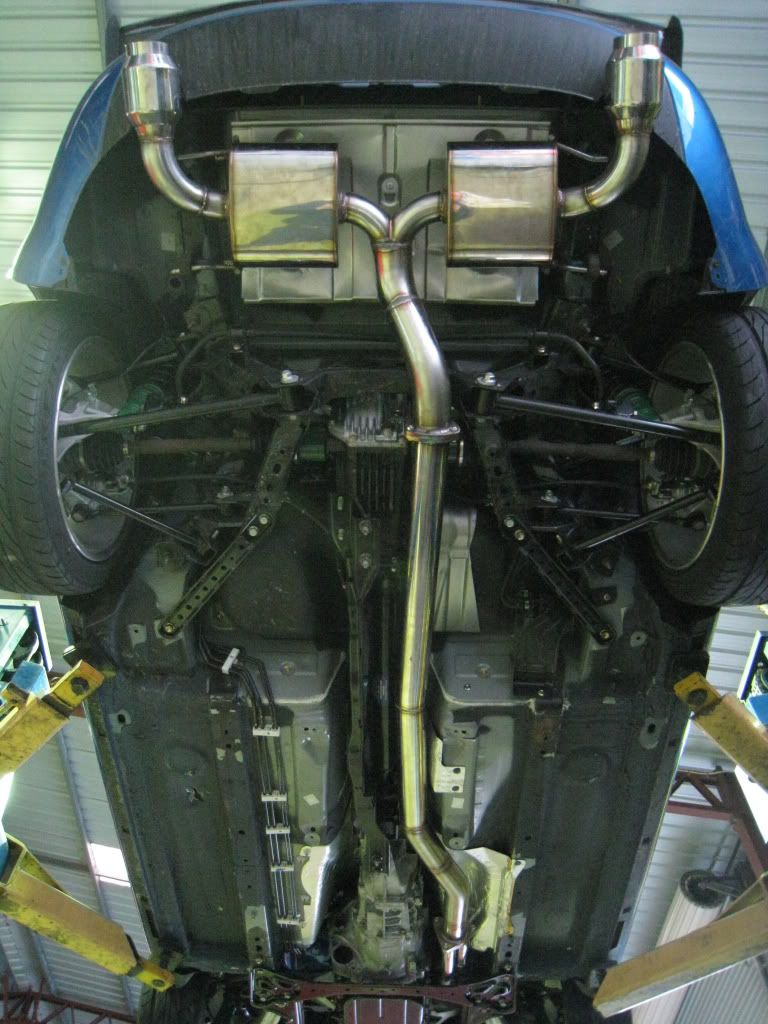
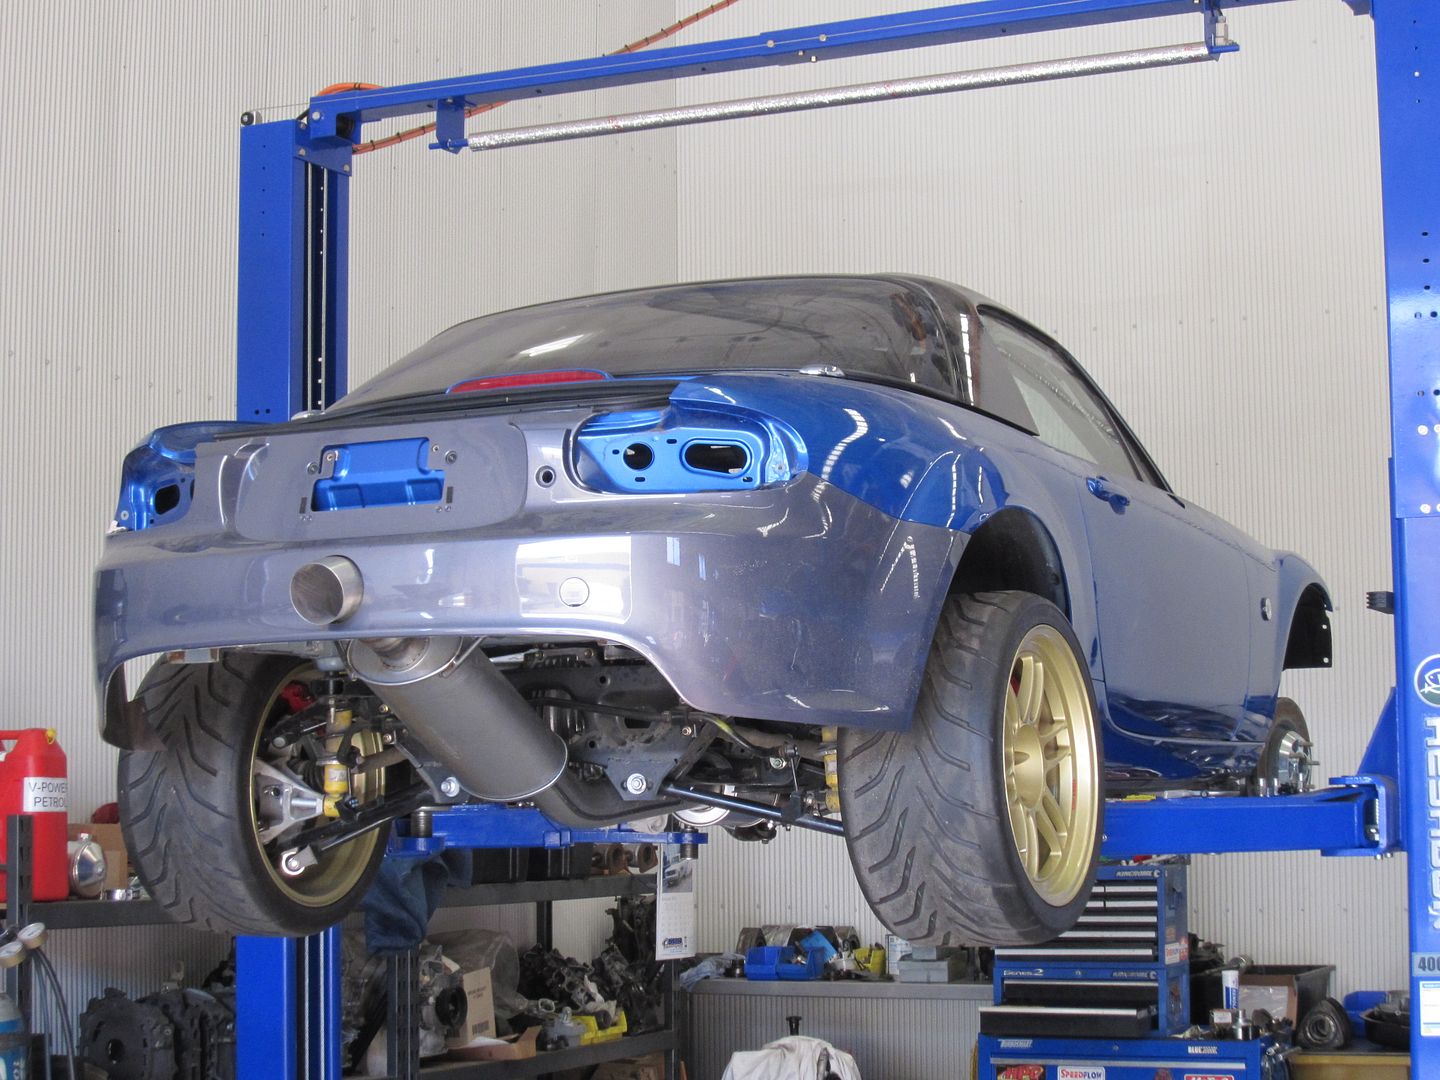
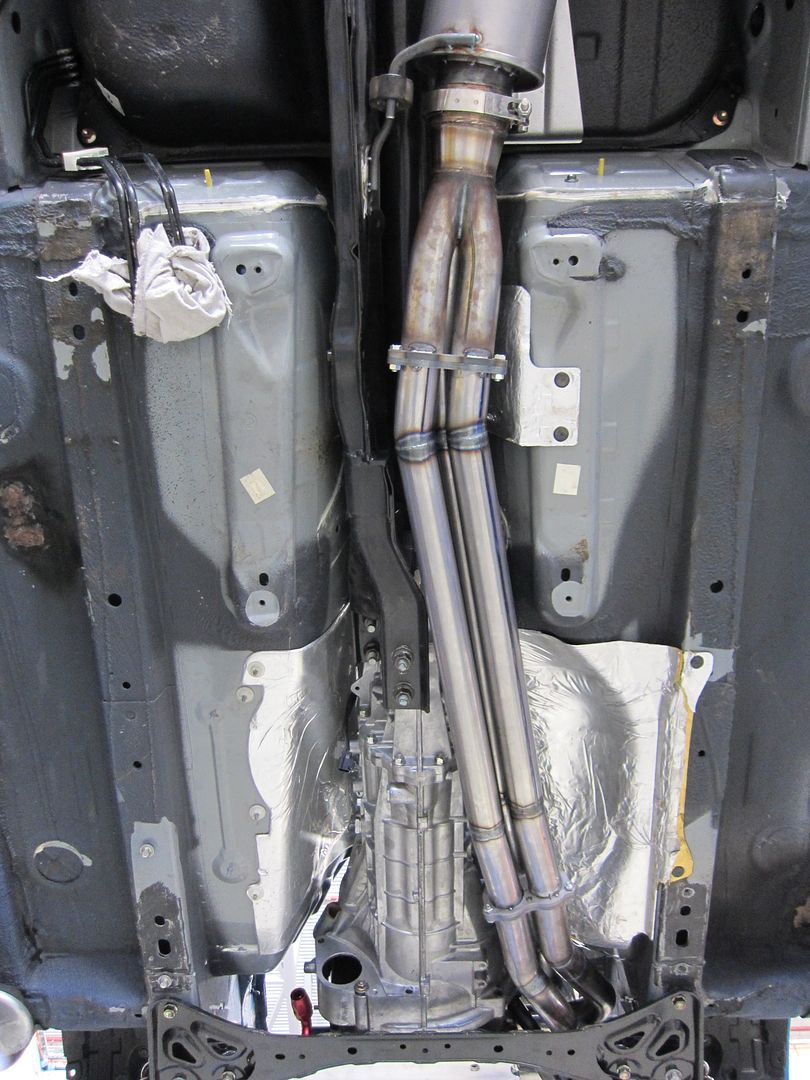
It took a bit of effort…and I’m stoked with the result. You may remember from an earlier post that I was using a JDM aftermarket NC rear muffler assembly. It had a 2.5″ inlet that split into two 2.5″ pipes. However, due to the higher flow requirements of my engine, a 3.0″ front section is required. Two 2.5″ pipes have about a 39% larger cross-sectional area when compared to a single 3.0″ pipe. So I lopped off the 2.5″ inlet and massaged a 3.0″ to the profile of the 2 x 2.5″ junction.
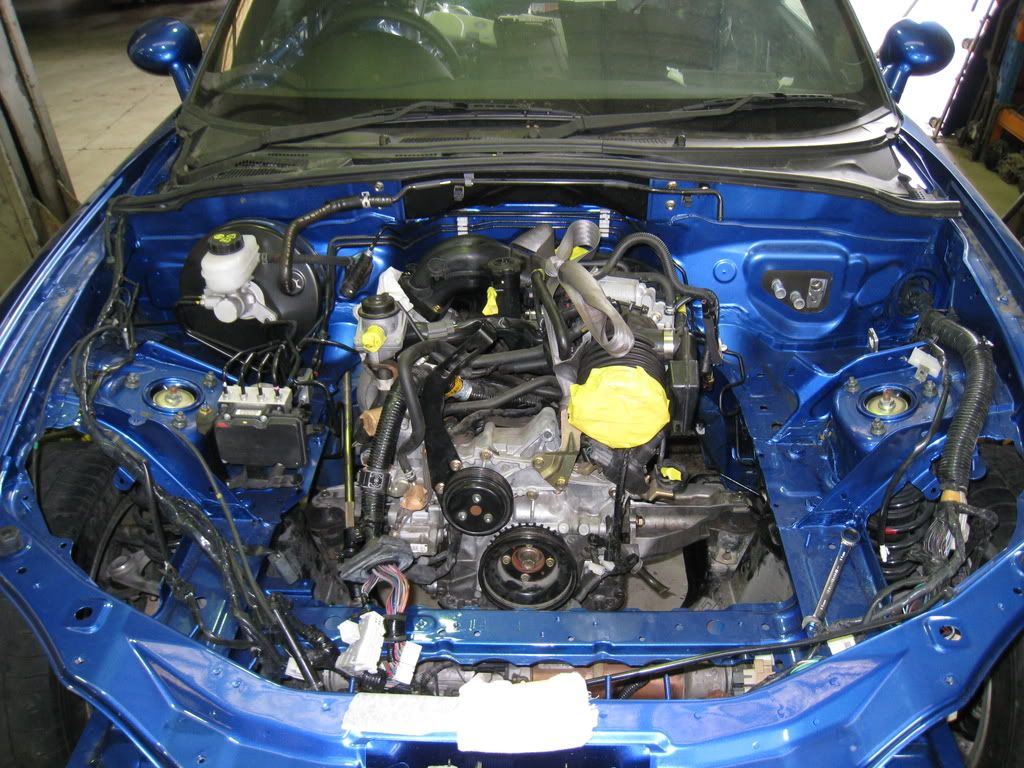
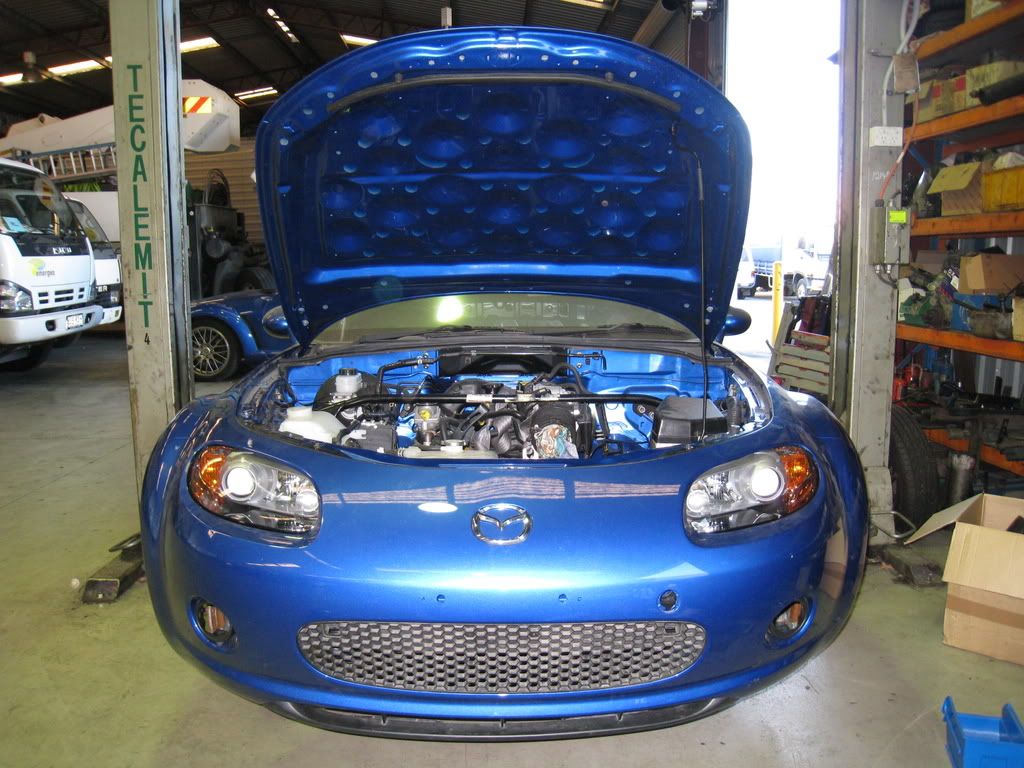
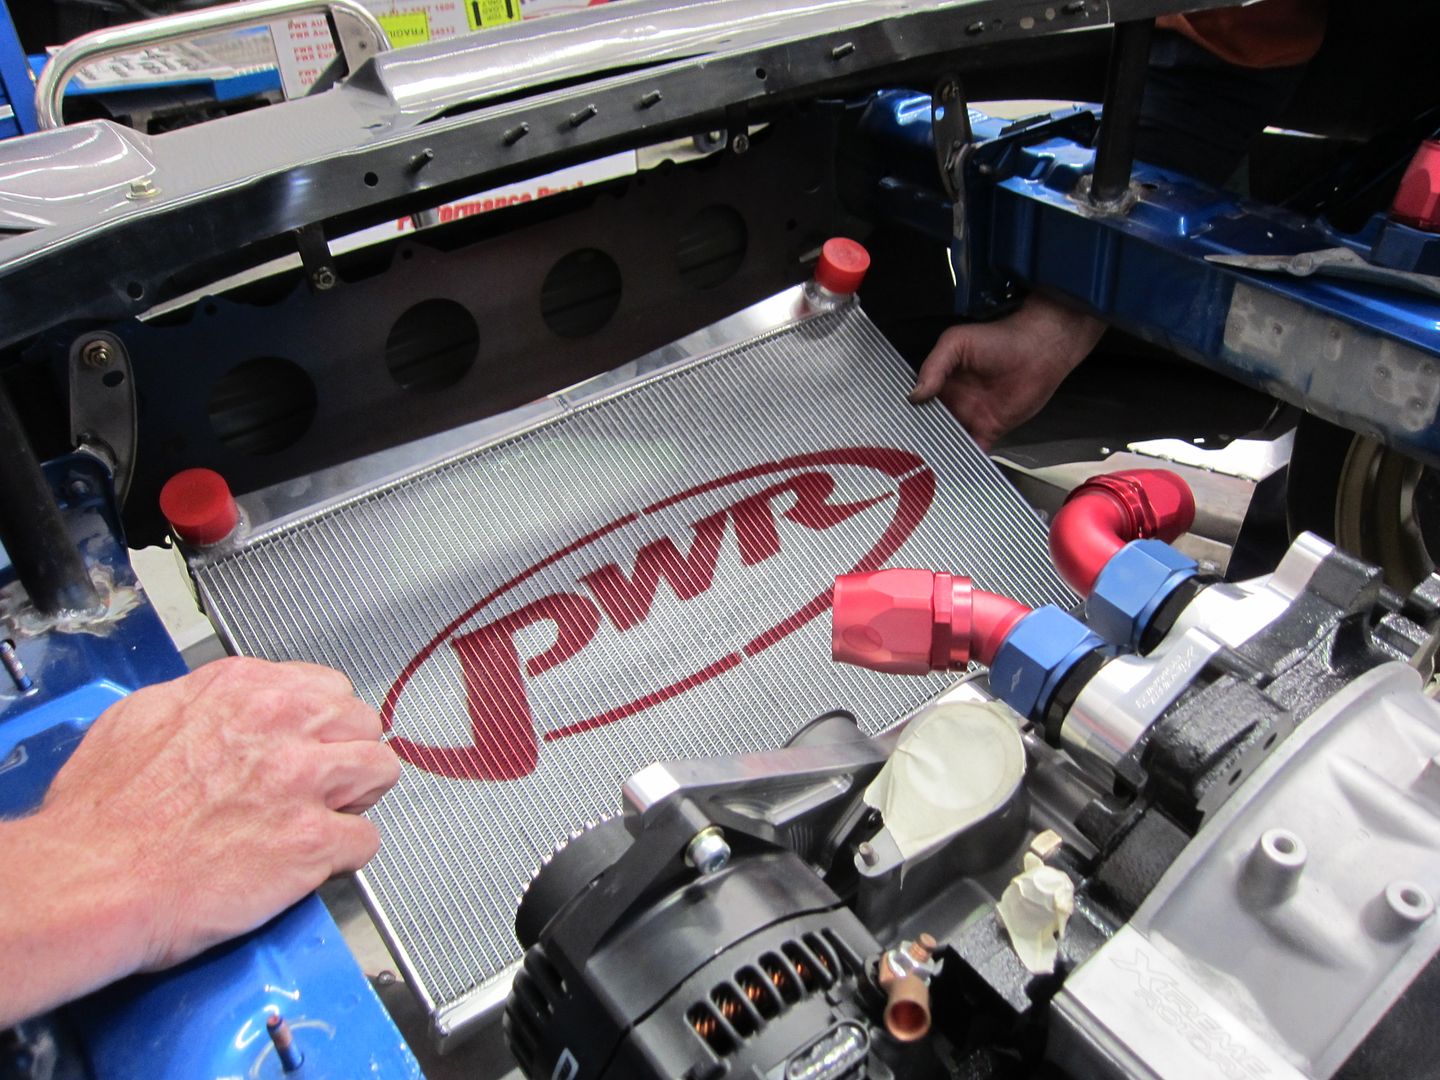
I also took the opportunity to fit the Mazdaspeed front bar. It certainly provides a bigger aperture for ambient air to access the radiator.

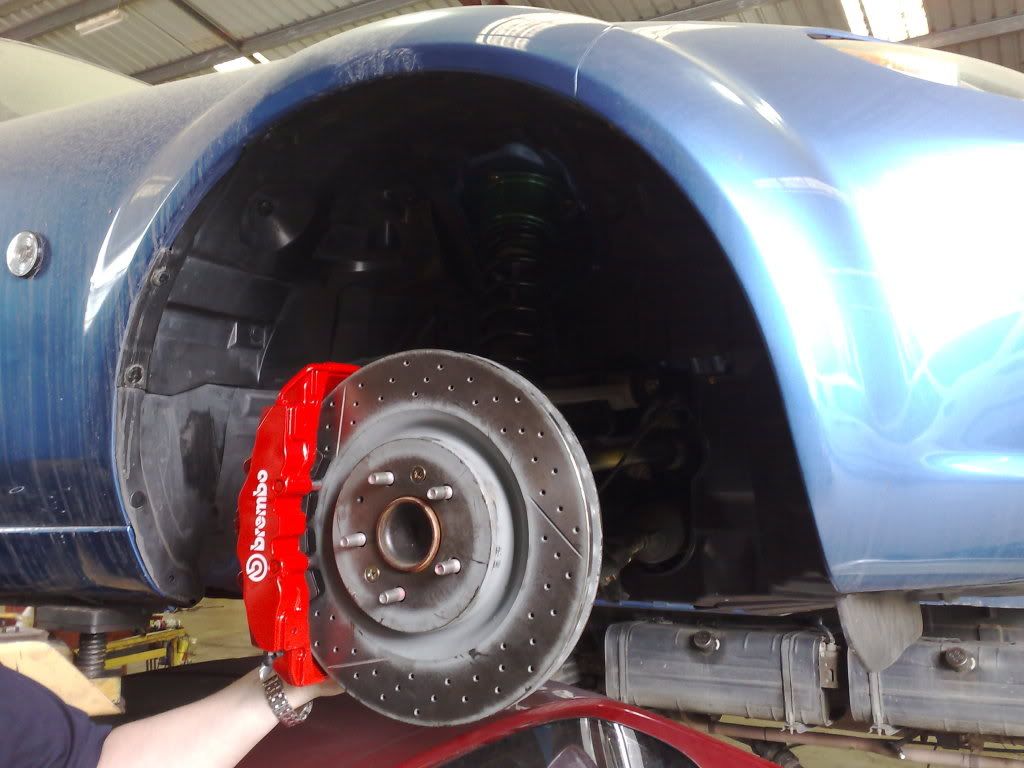
The last test was to see whether the track rims (Enkei RPF in 18 x 8.5) would clear the brake assembly.
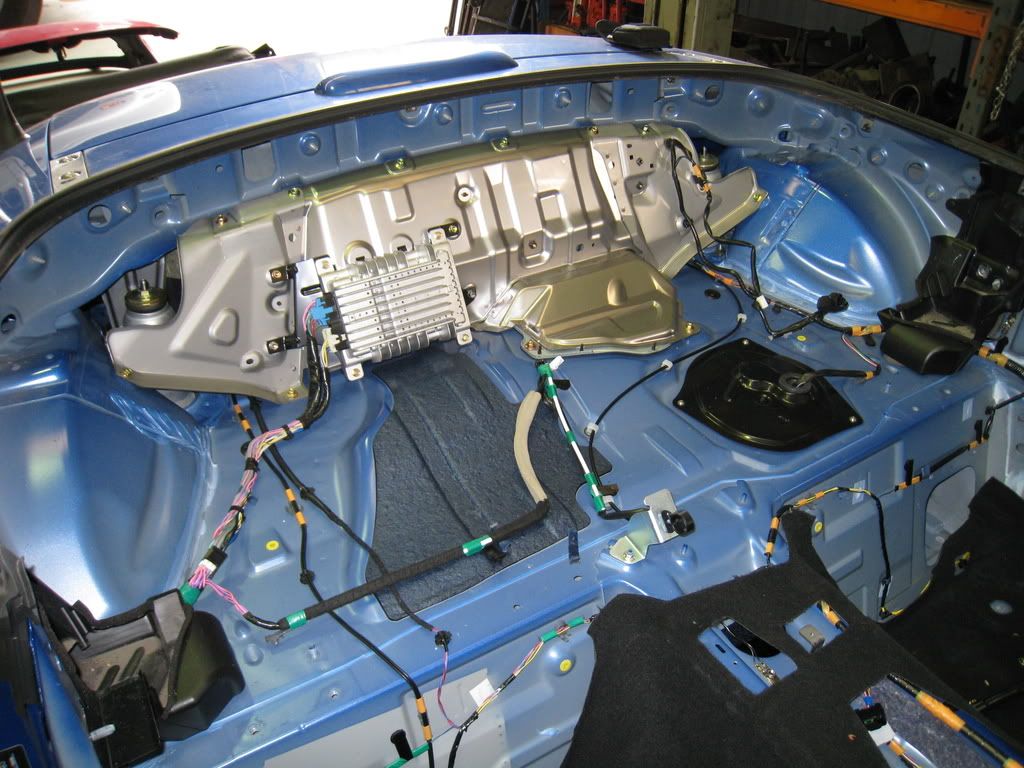
With a view to getting stuck into the car this weekend I had a crack at removing the five sections of sound deadener from the floor pan. This is how it looked before attacking it with dry ice pellets.
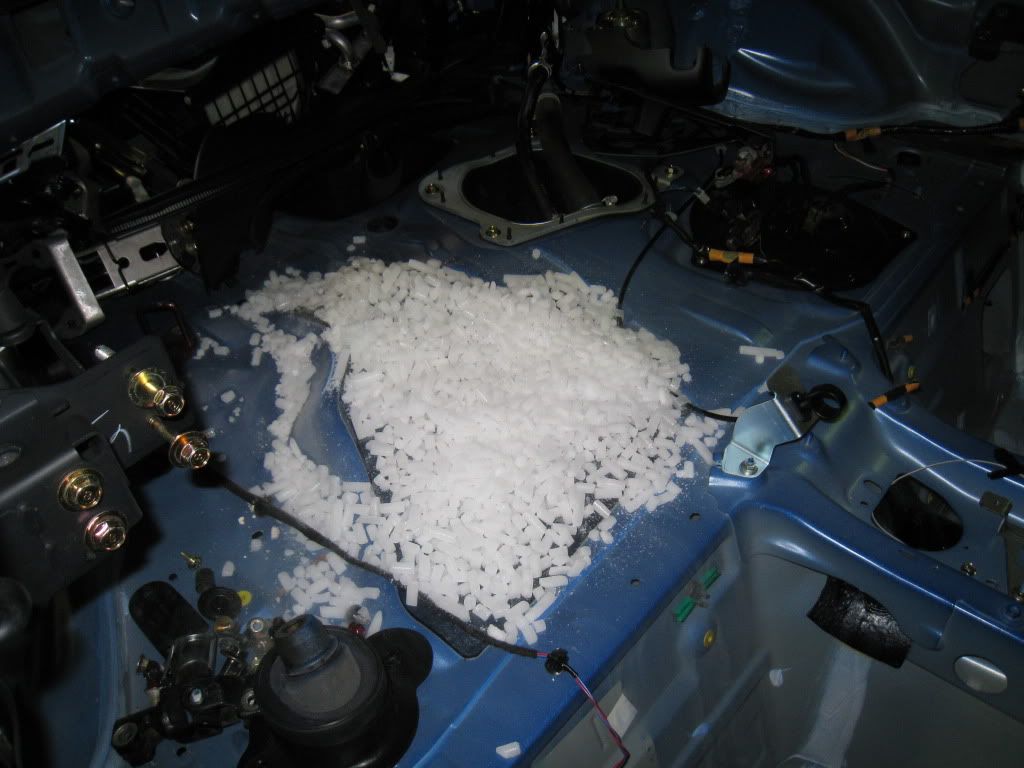
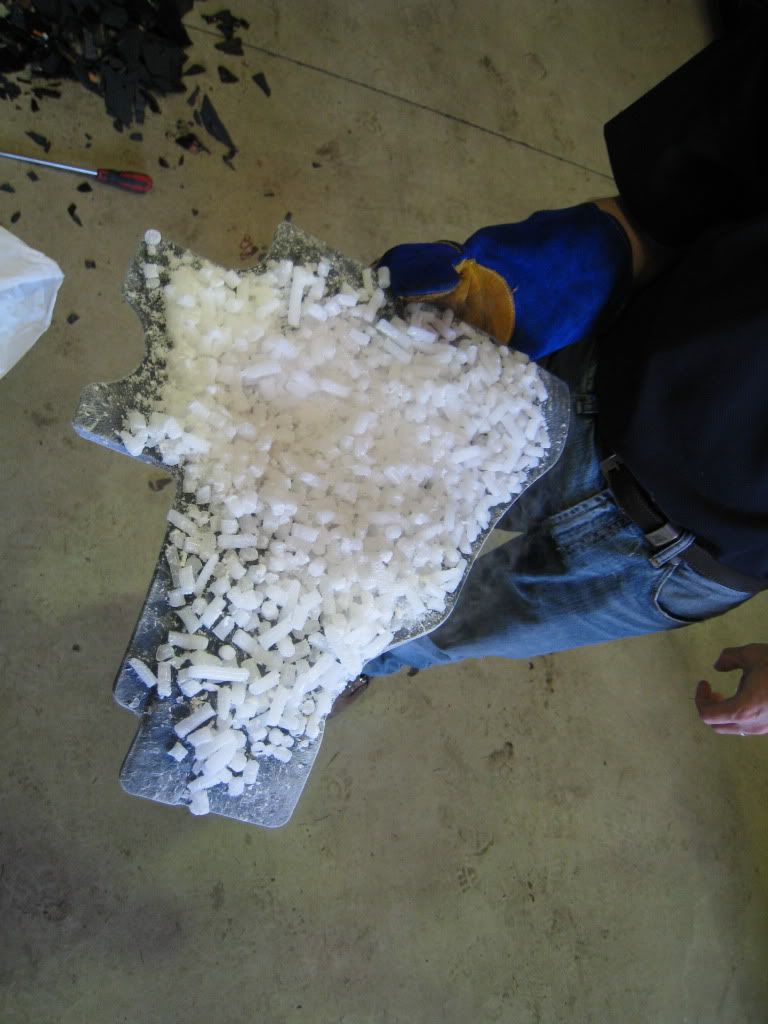
The dry ice pellets worked an absolute treat!!!
It was pinch of p155 on horizontal surfaces, but as you’d expect, harder on inclined surfaces. You need to allow around 5 mins of contact to freeze the sound deadener and break the adhesion to the floor pan. Then tap and chip away to your hearts content.
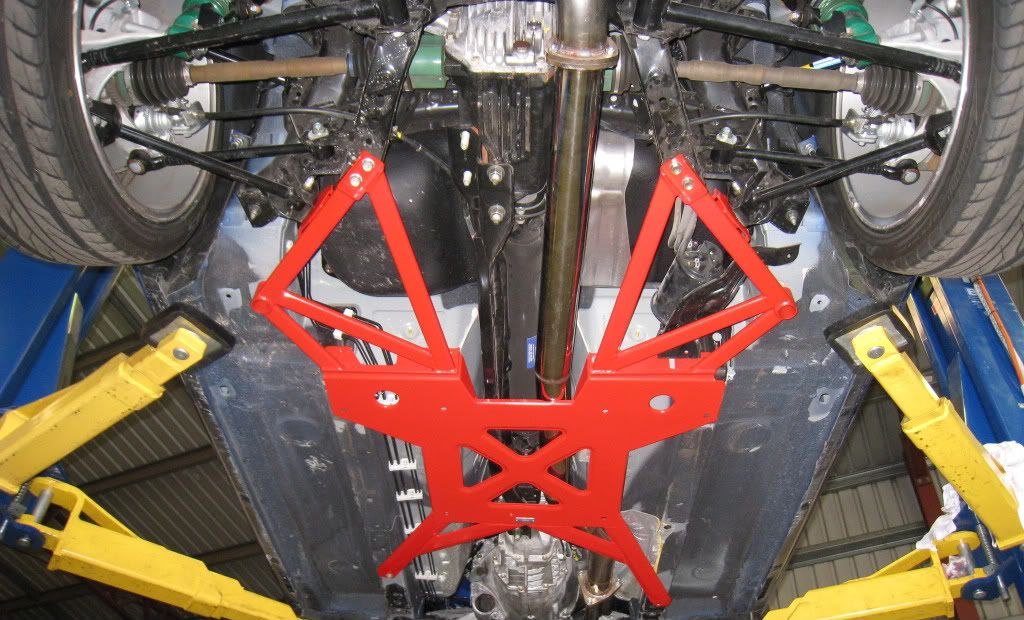
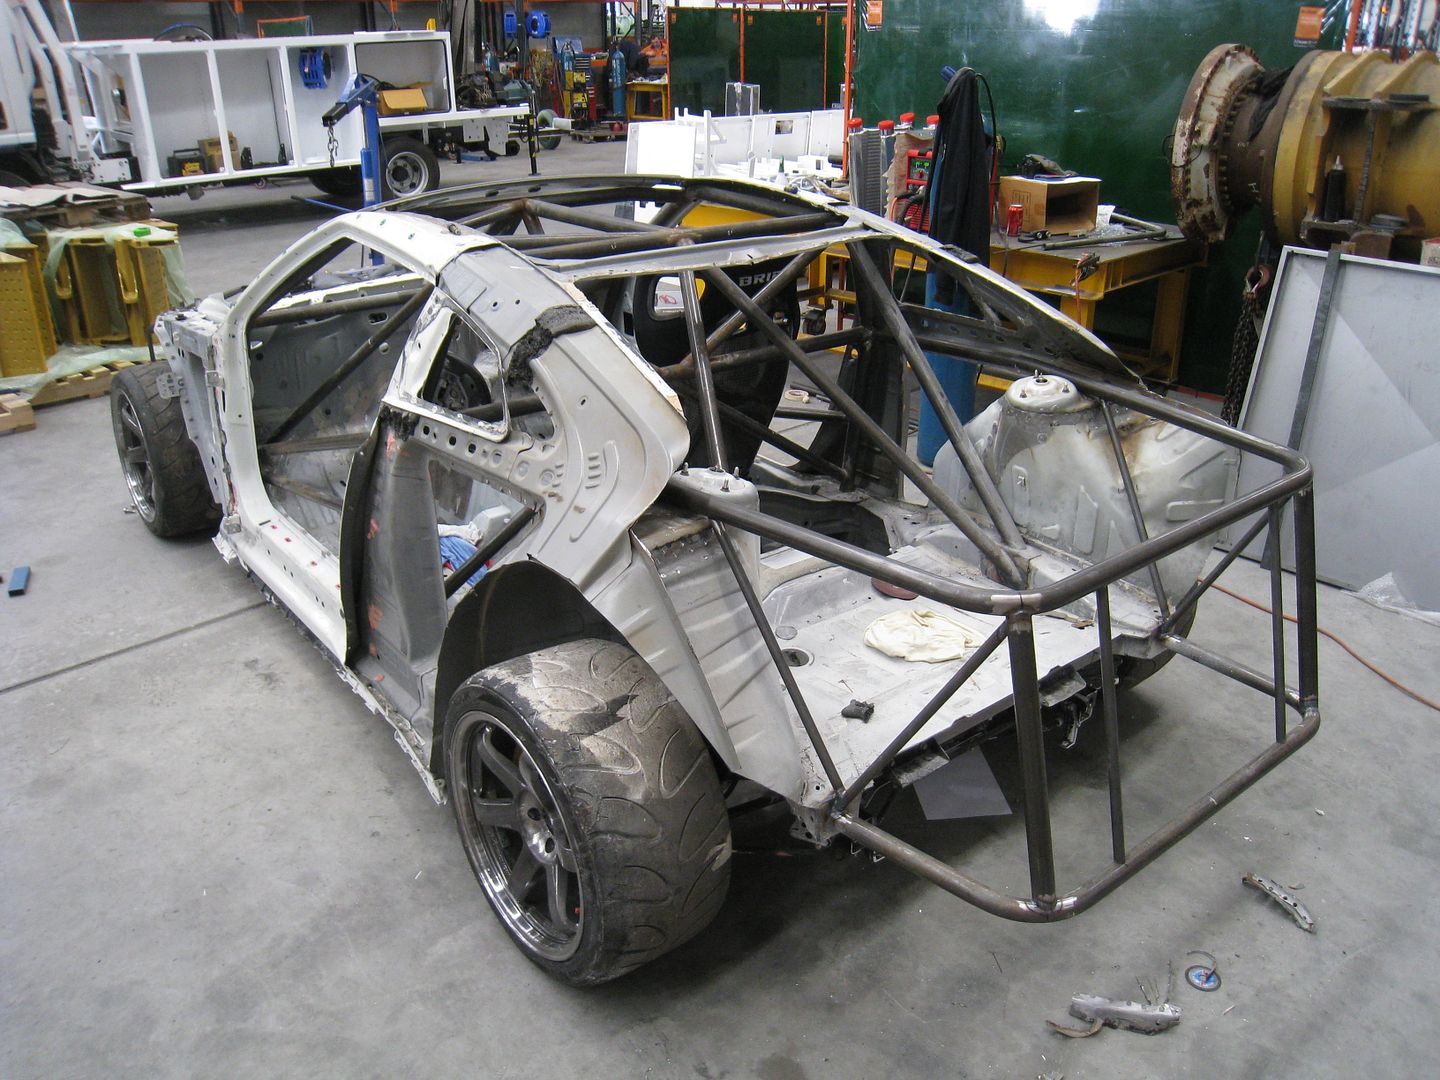
Last an most important part of the day was to get the roll cage underway. After a couple of main hoop variations…mainly in width between the vertical legs…I finally got the geometry right. The key was to have the main hoop fit as close to the inside of the hard top, but still have enough clearance to allow the hardtop to slide rearward for the rear brackets to disconnect from the frankstein bolts.
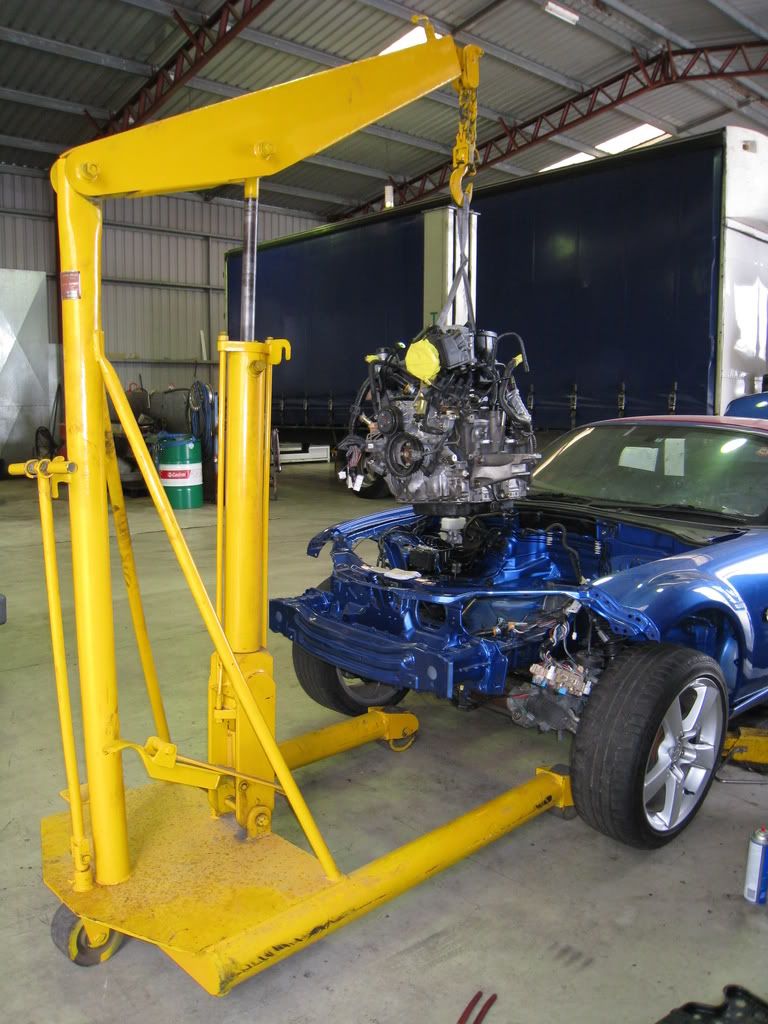
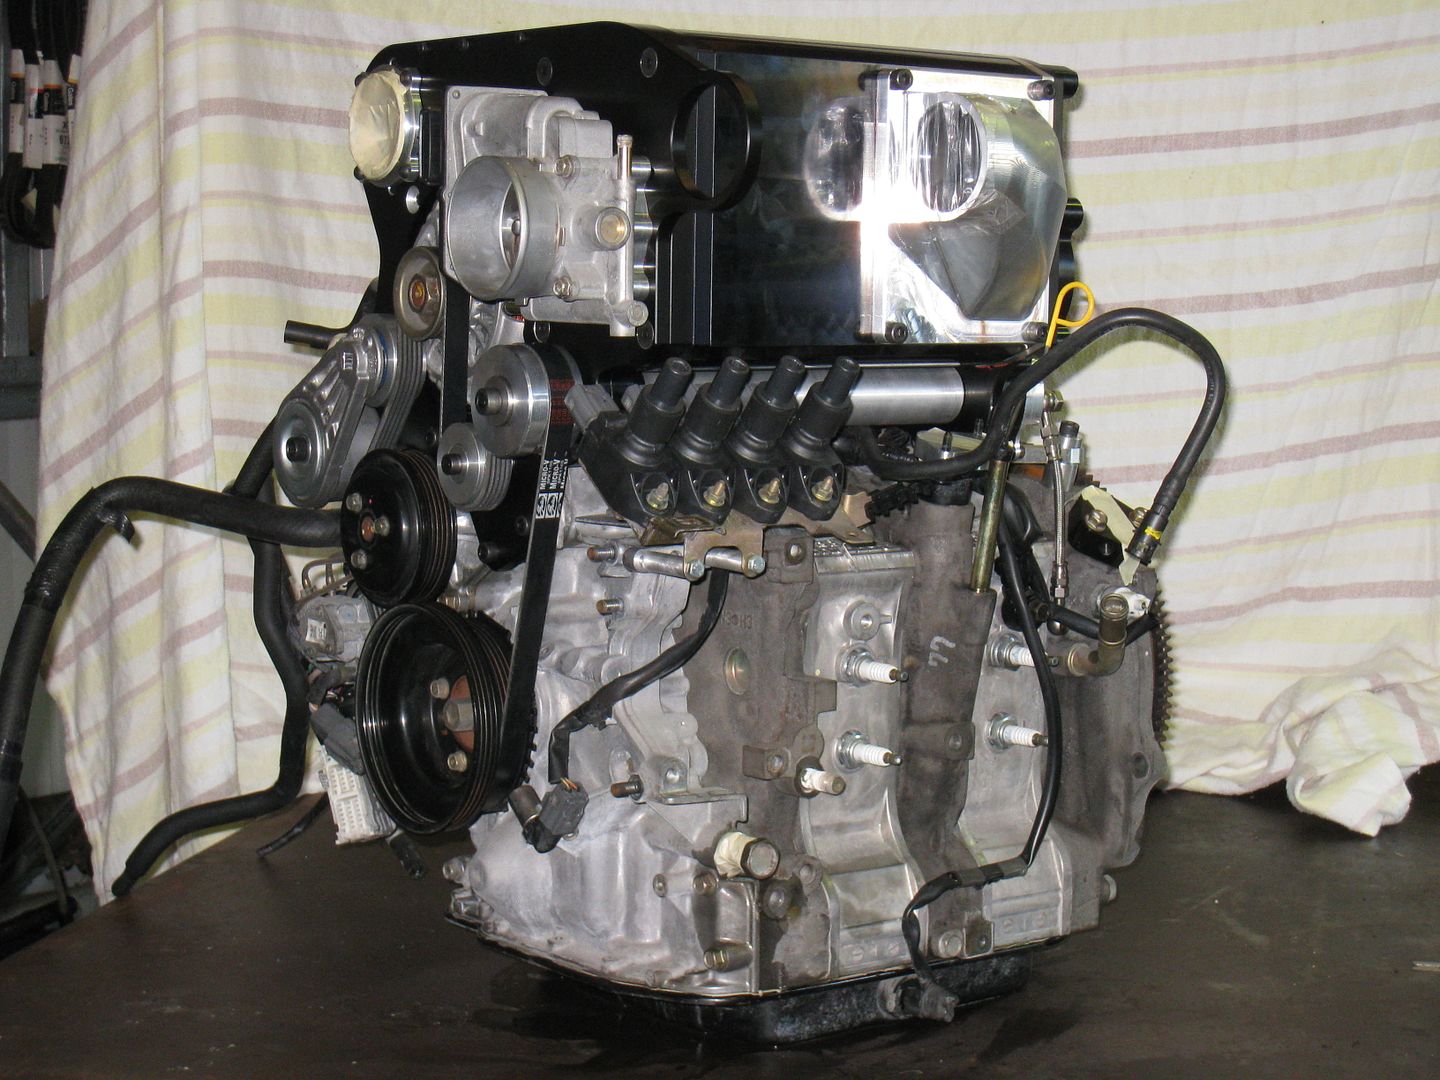
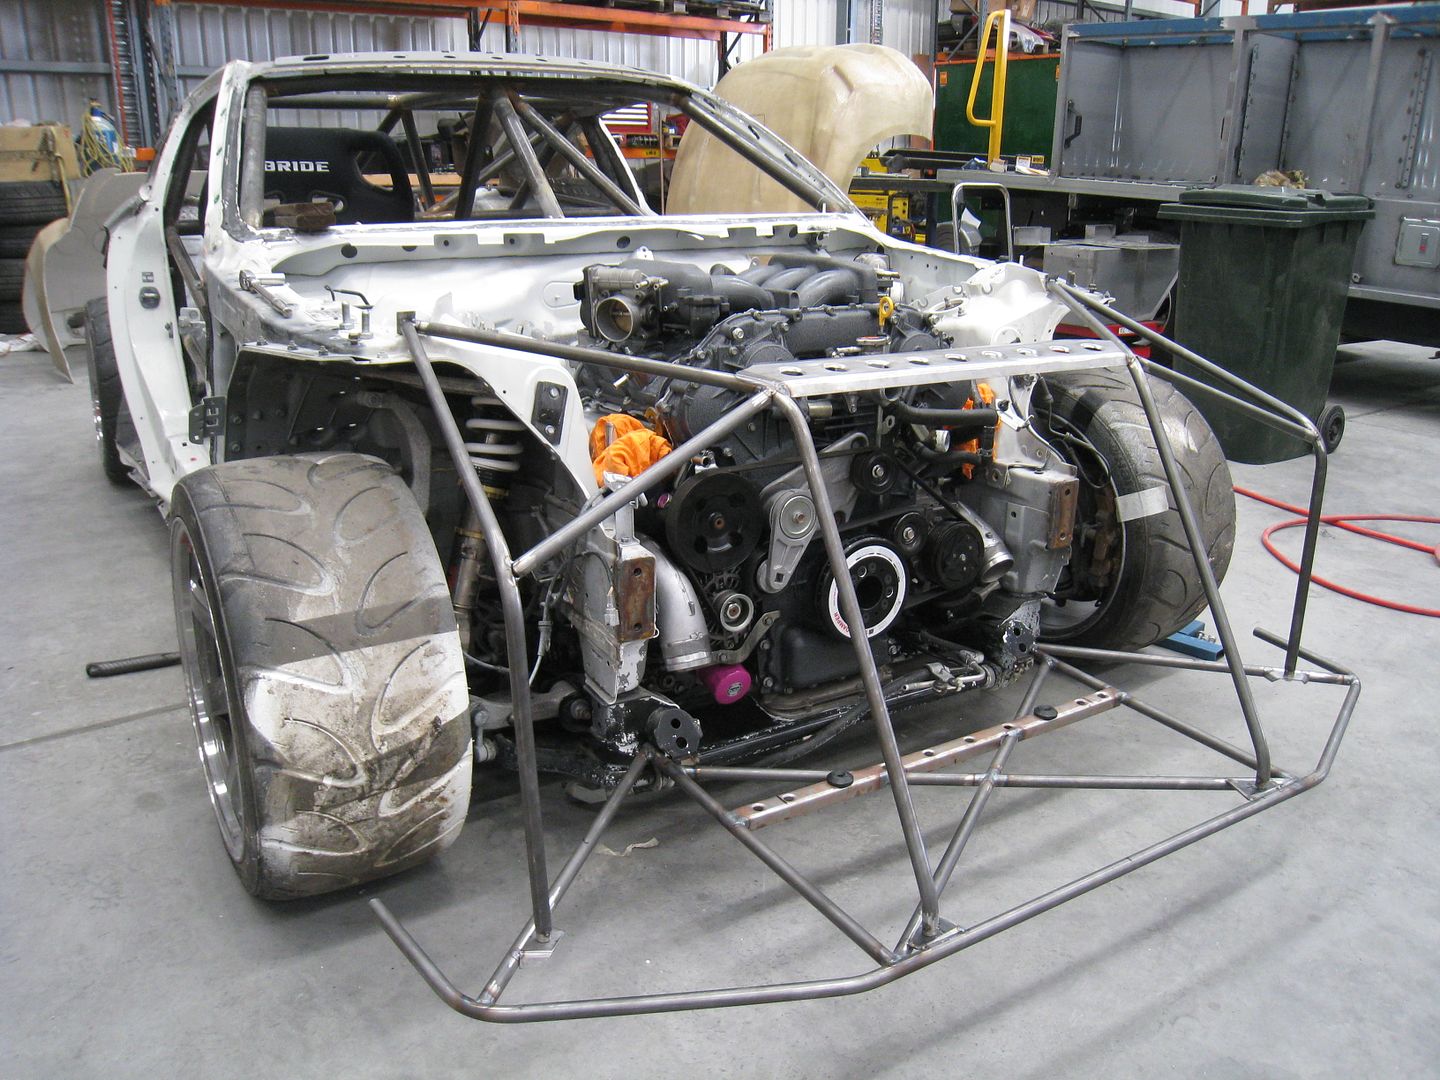
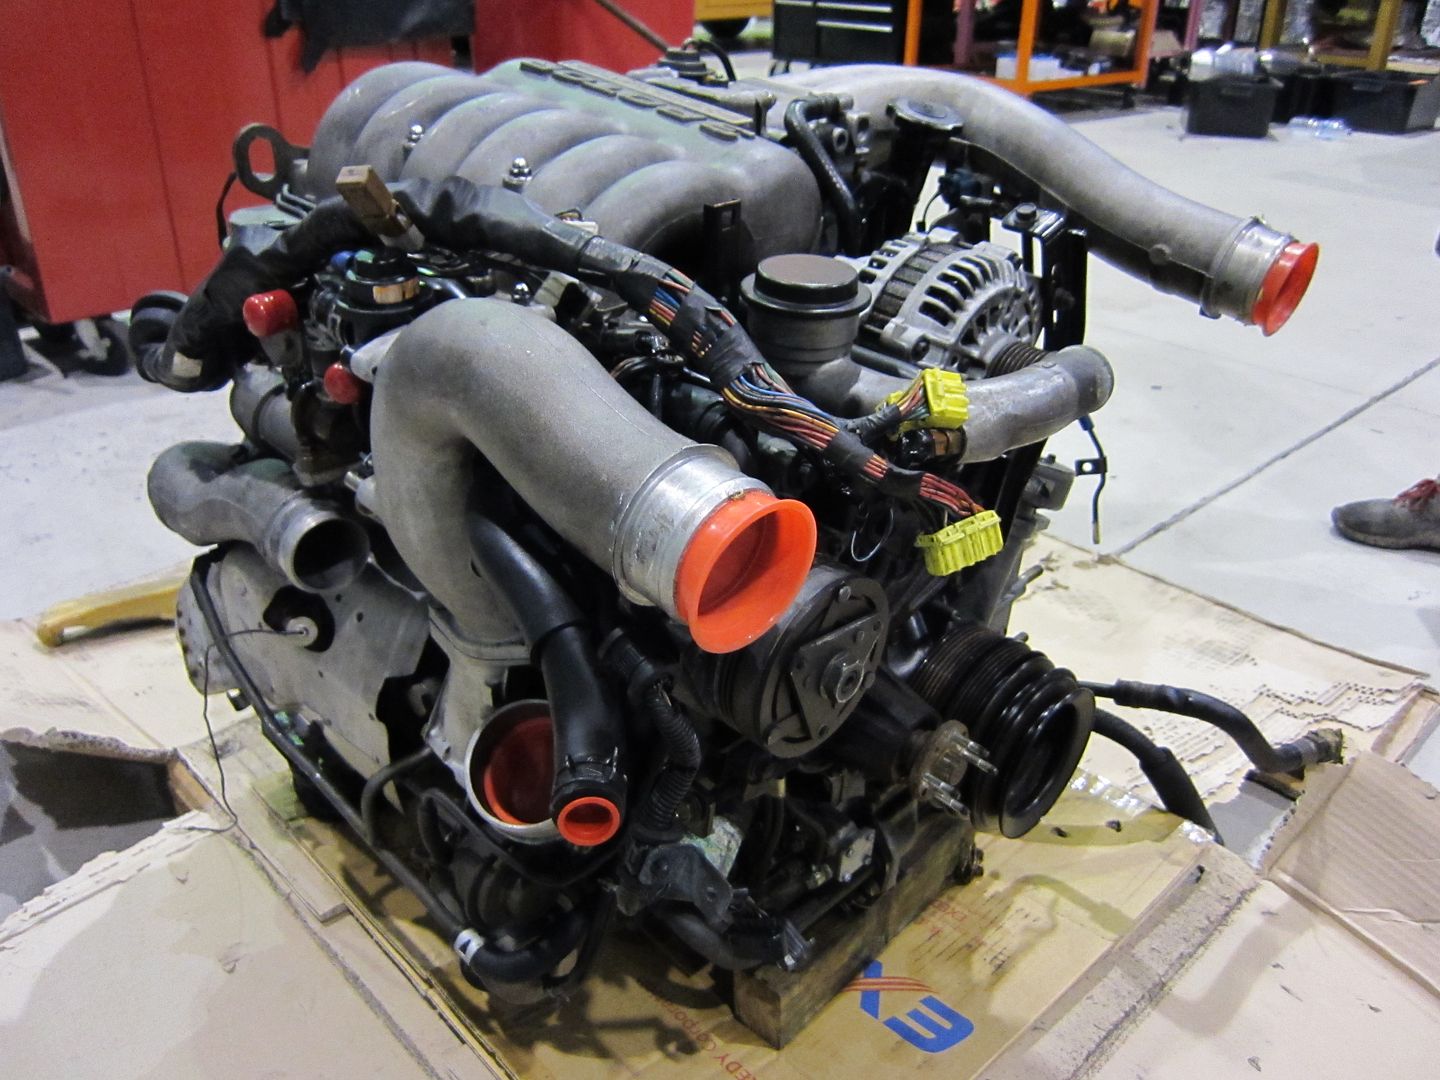
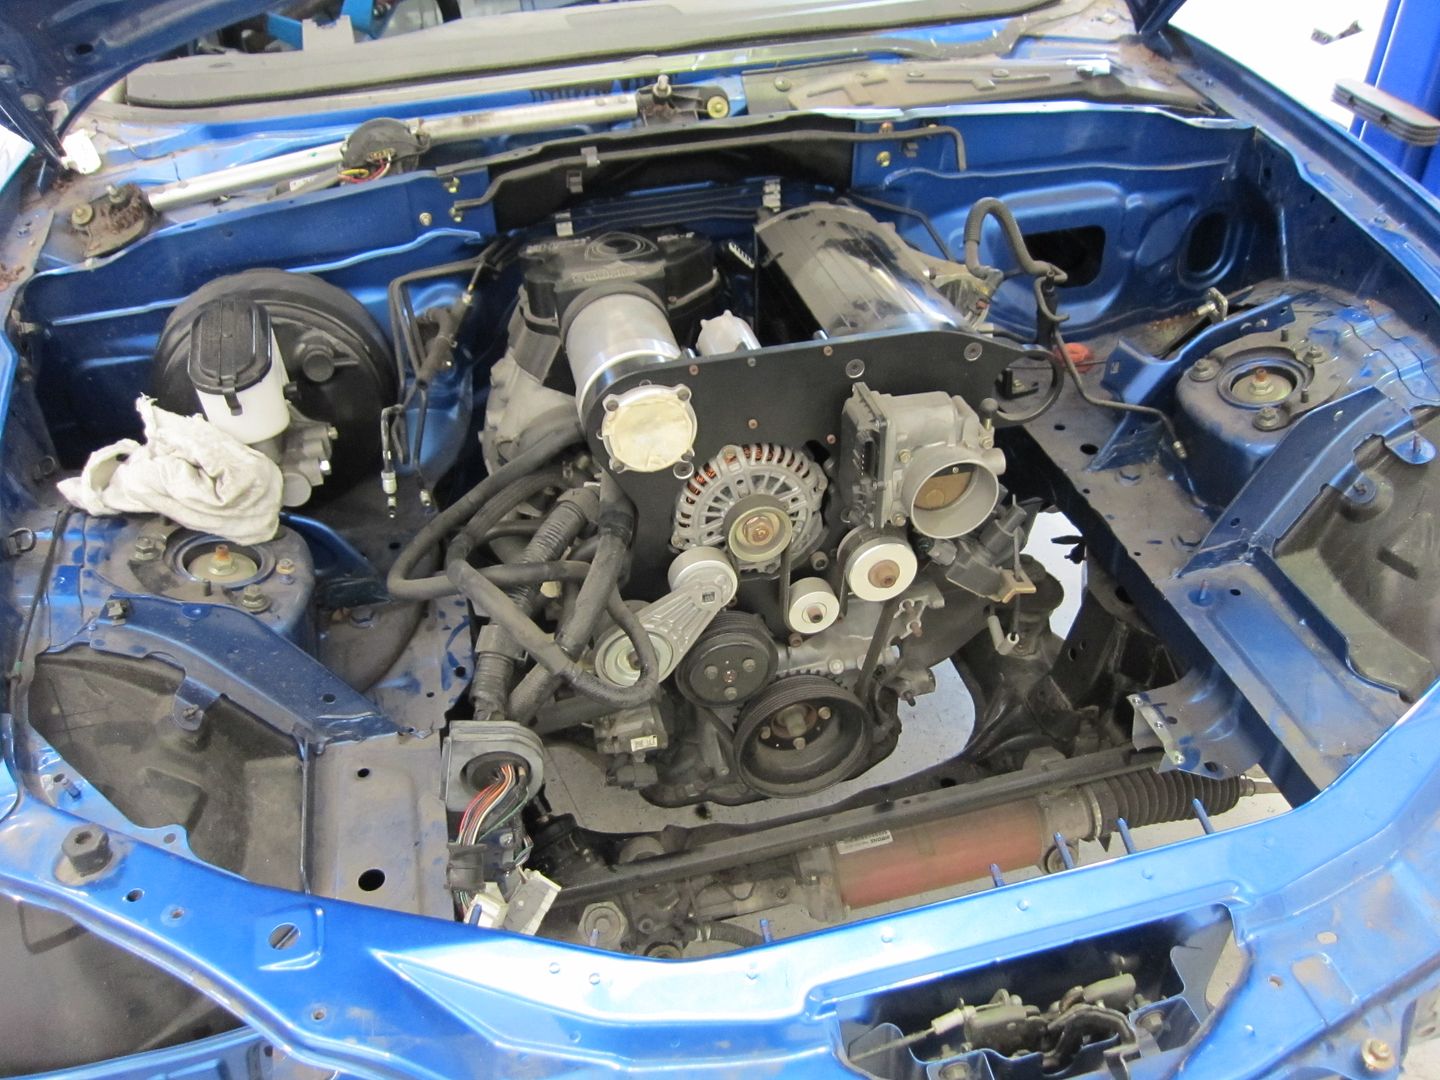
Today was indeed a “Milestone” for the Renesis NC project with the installation of the supercharger kit getting underway.
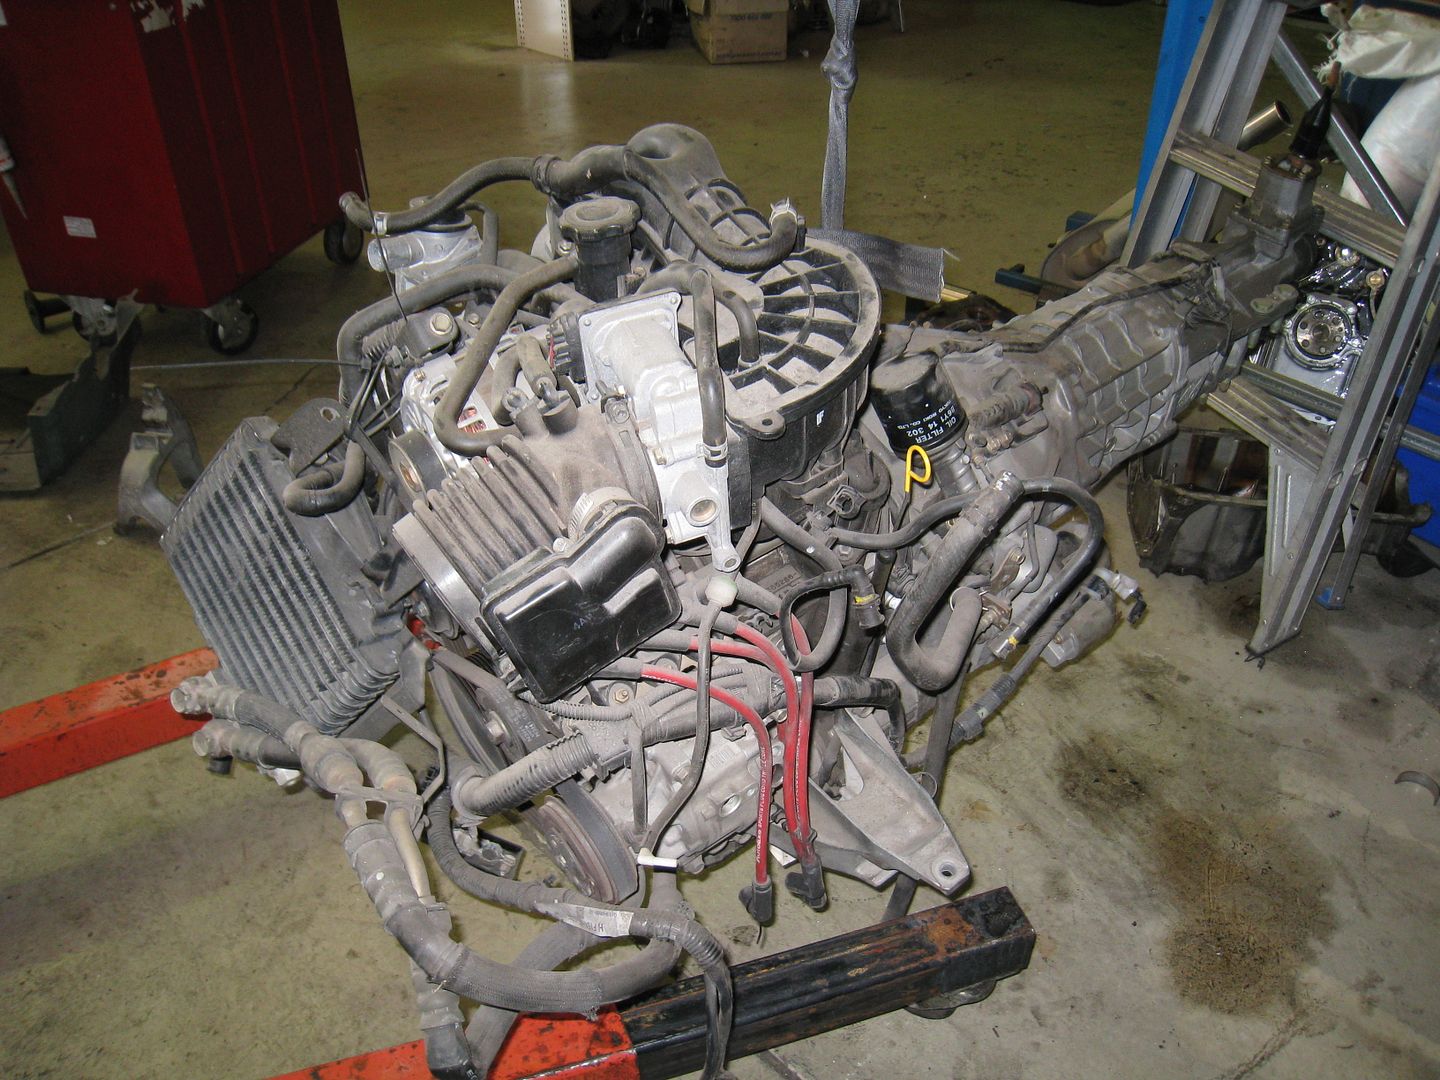
First up this morning was the removal of unnecessary components and cleaning of the engine in anticipation of the supercharger installation. The engine is from a FY 2005 JDM RX-8 and has 33,000km on it. It has been in storage for almost 12 months so it was pretty dusty. A quick hit with citrus cleaner and a pressure washer was exactly what was required as I couldn’t let the engine detract from the awesomeness that was about to be bolted to it.
However! I’ve spent the past 10 months finding and building a new home for the car
.
We’ve been in a couple of weeks now and the place is starting to take shape. Here’s some recent photos.
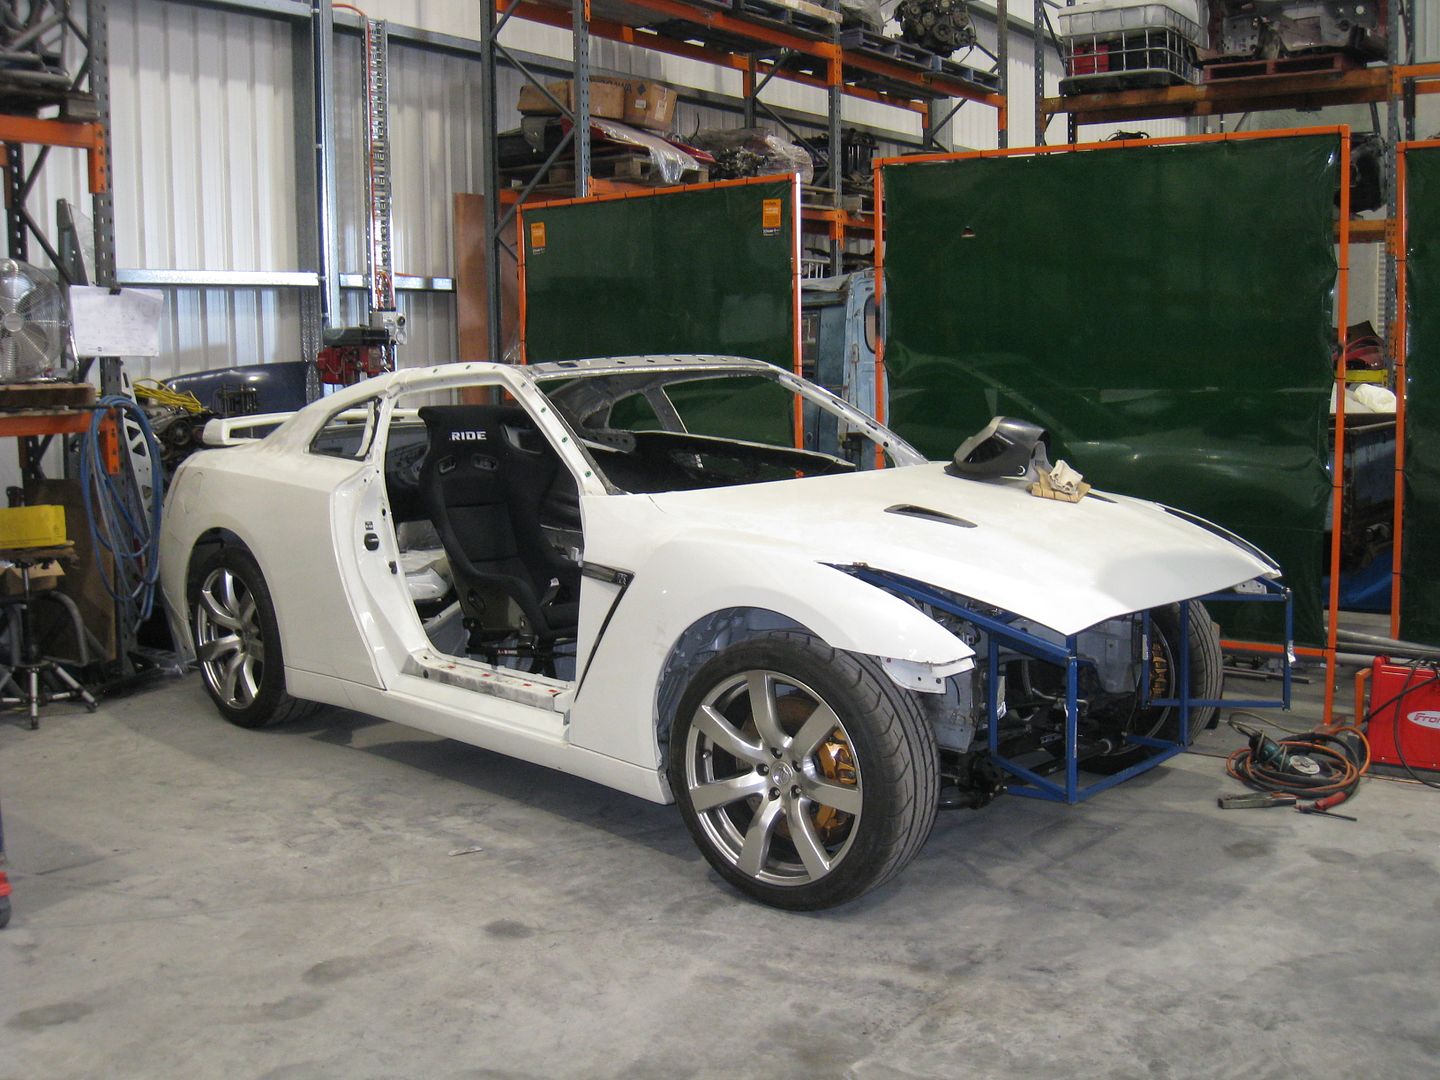
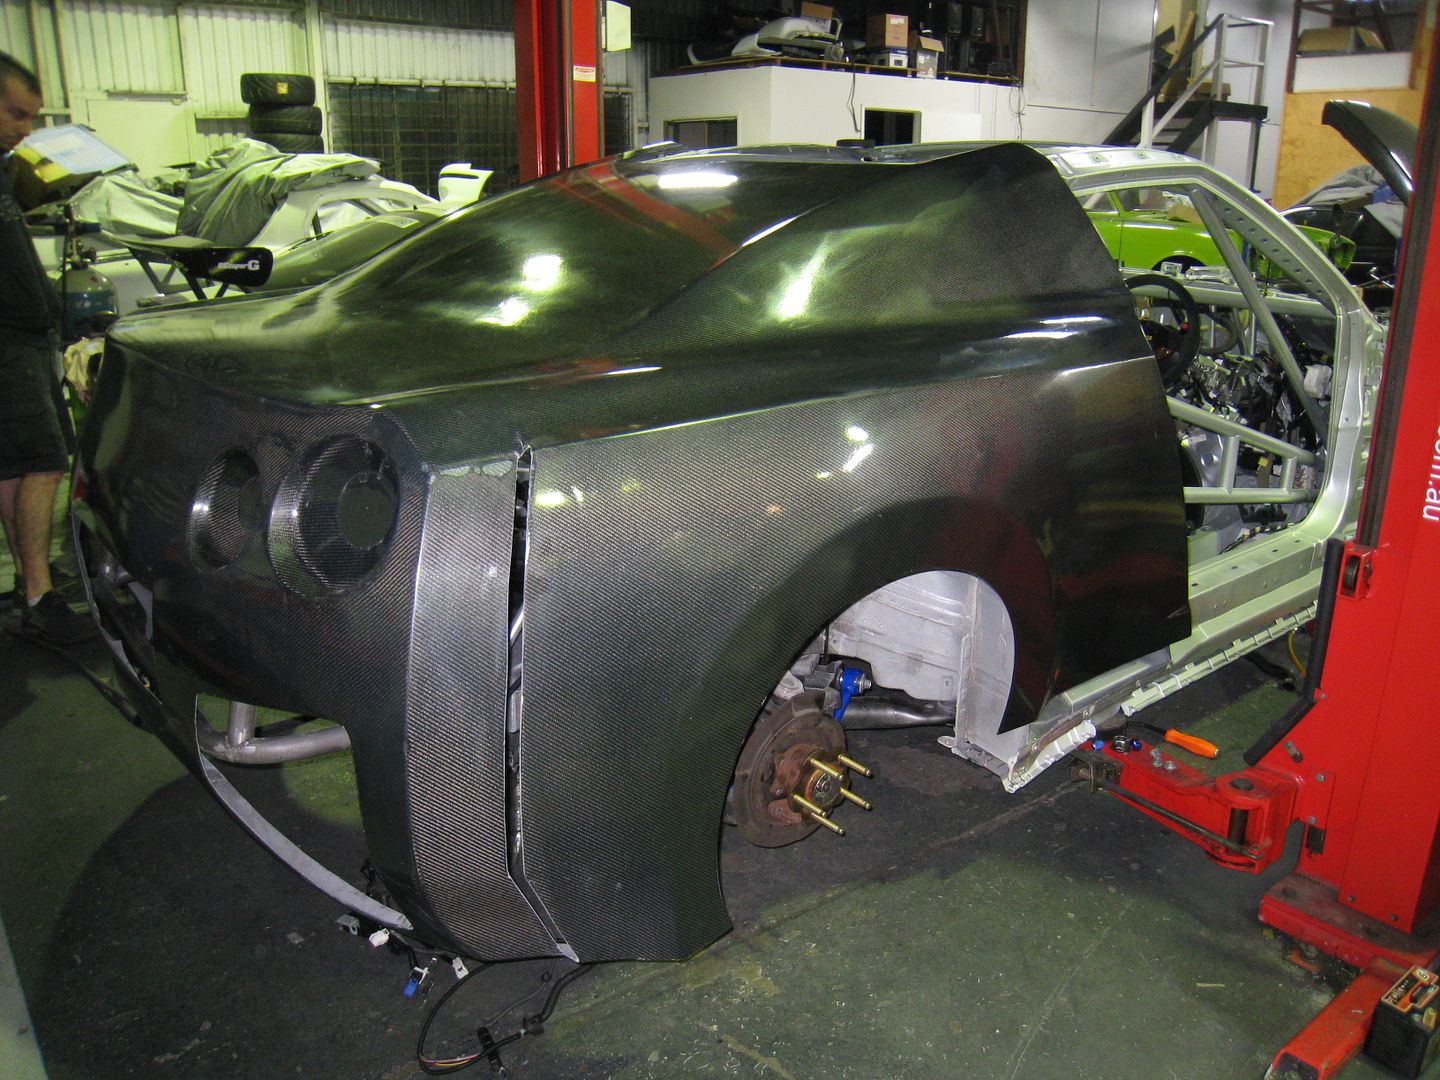
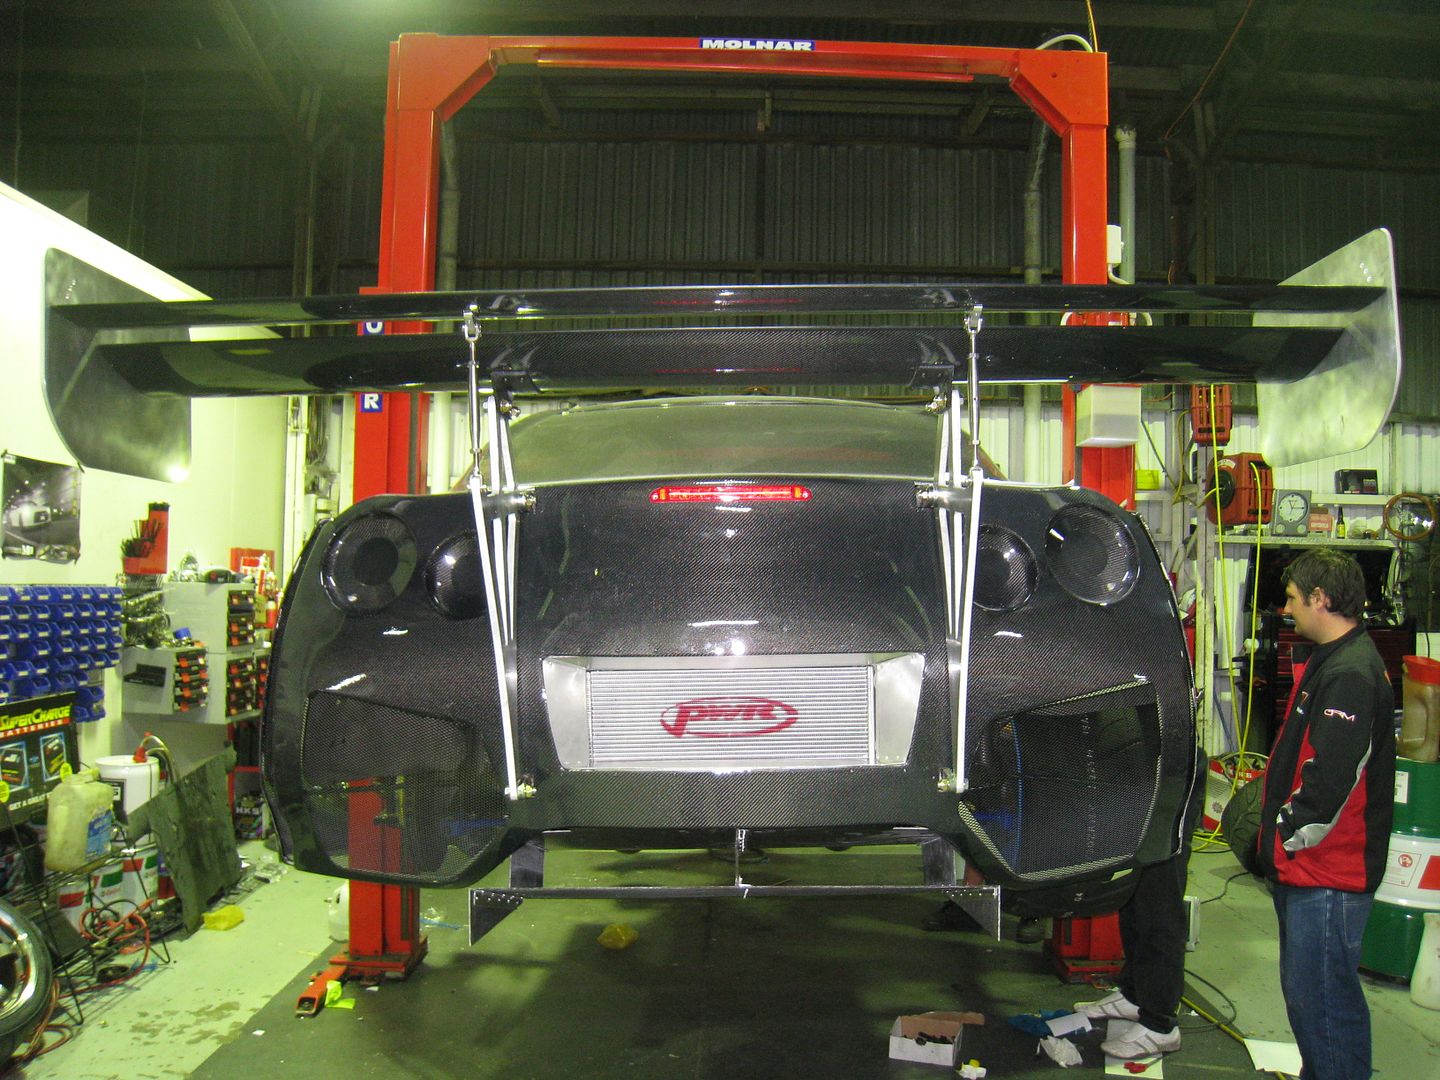
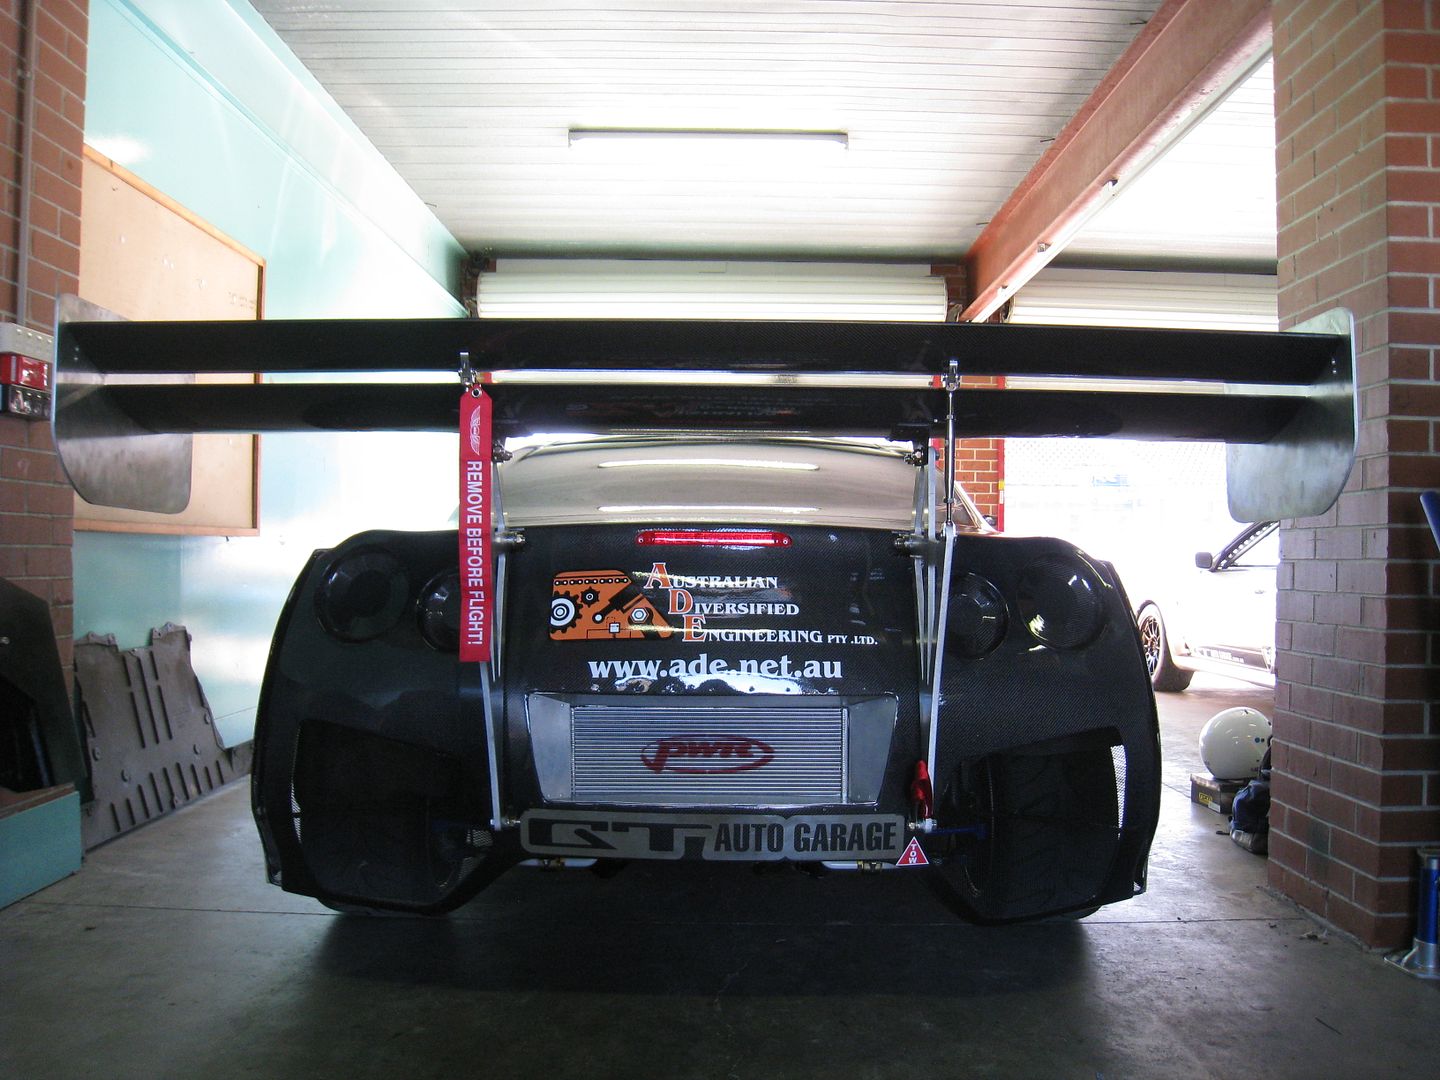
As Okibi previously eluded to, I had another distraction of the automotive type this year. In March I was approached by GT Auto Garage to assist them with the engineering aspects of the build of a Pro-class entry for this years World Time Attack 2011 (Superlap) event at Eastern Creek (4-6 August). Although the vehicle was not a Mazda, there was no way in the world I was going to knock back such an opportunity. Especially when no other R35 in the world had been modified to this level before.
The only problem was that the chassis wasn’t available yet and wouldn’t be until the first week of May….which meant that we only had some 13 weeks to build and test the car before the event!
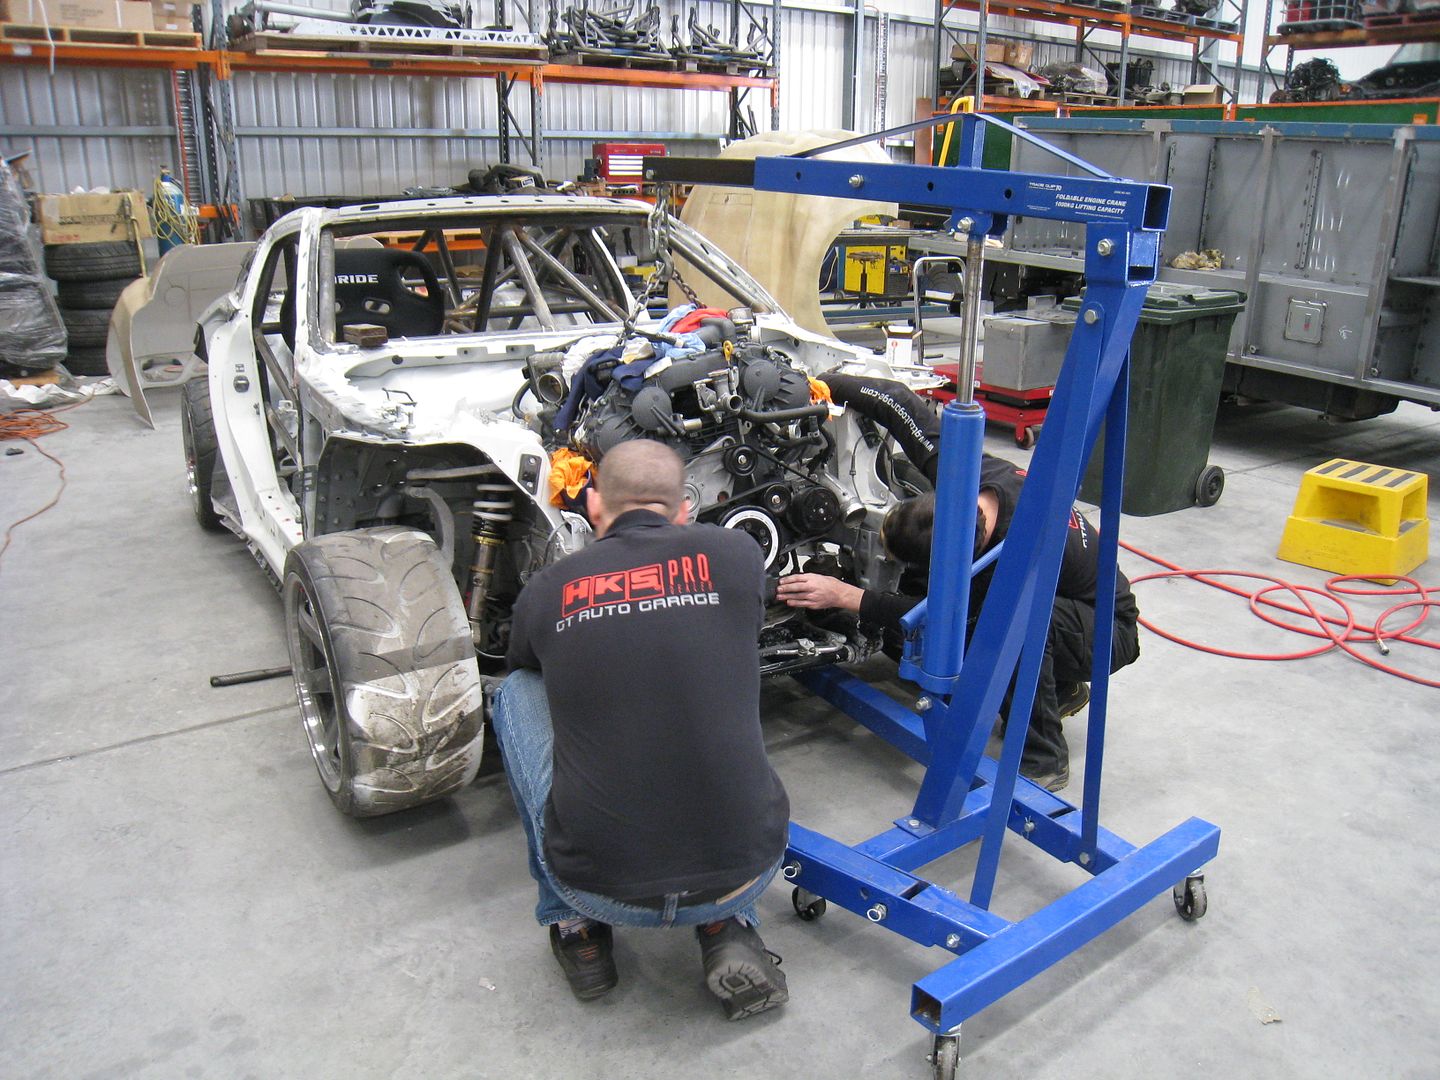
It was put on a bit of a diet….throughout the build we monitored the weight as these beasts of a car aren’t particularly light at almost 1,800kg in road trim. Any reduction in weight was always going to be beneficial to the cause. My first contribution was to design and manufacture the roll-over protection structure in no more than 1 week. This was so that the chassis could be sent to Sydney to get the carbon body work could get underway. Whilst this part of the build was happening the engine and transmission upgrades were being addressed.
Due to the weight saving process necessary with building a Pro-Class entry for Superlap (World Time Attack), our approach to designing the roll cage for GT Auto’s R35 GTR was somewhat less than traditional (CAMS compliant). Besides ensuring that the critical safety aspects of the roll cage were met, considerable effort was put into enhancing the beaming strength and torsional rigidity of the chassis. This was achieved through the addition of unconventional structural members (in on-road roll cages) between key node points for superior structure triangulation, and through the selection of structurally competent footplate attachment points on the GTR chassis. The weight penalty that goes hand in hand with the installation of a roll cage was minimised with the use of appropriately sized cold drawn seamless chrome-moly tubing. Here’s some piccies of the roll cage fabrication….
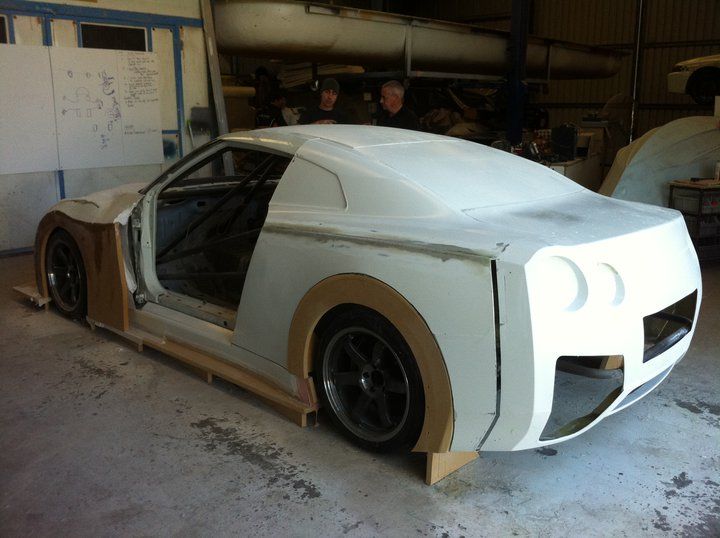
Here’s a couple of photos of the molds being made for the carbon body…
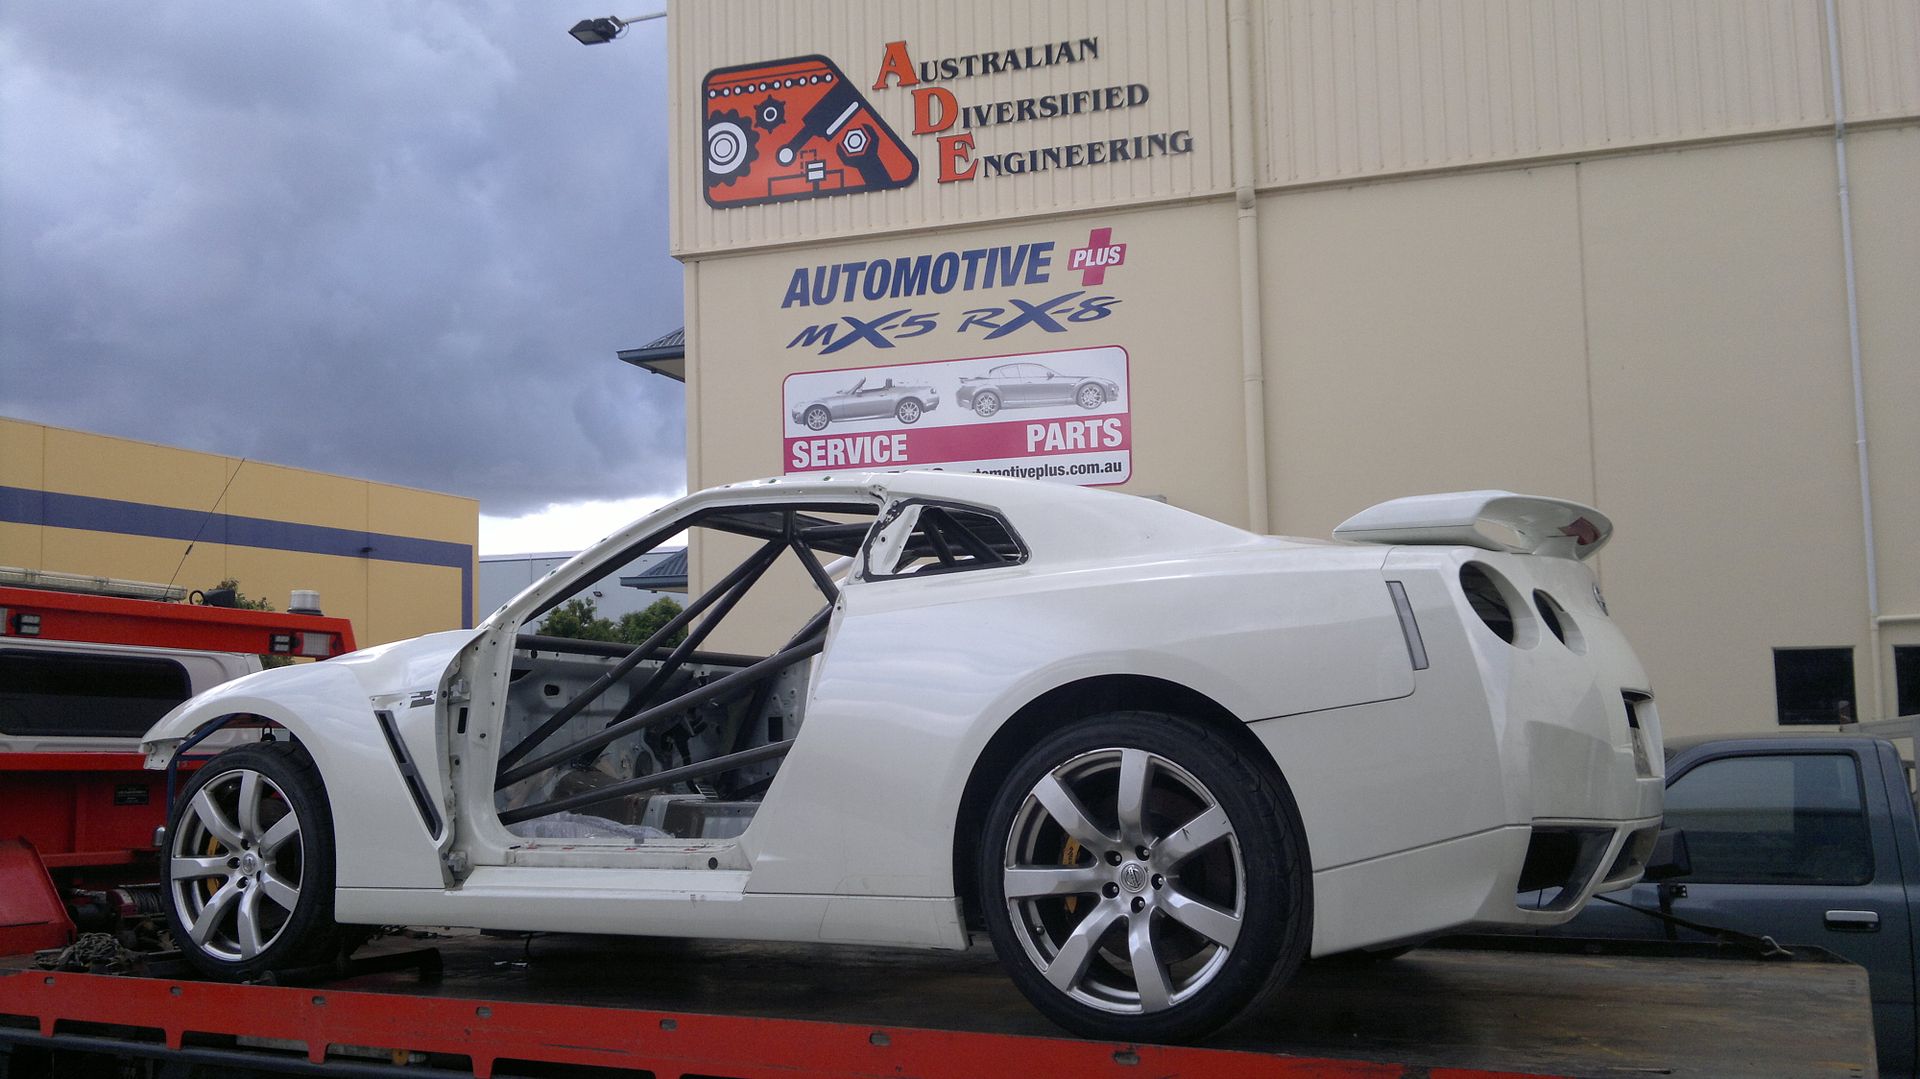
It was some 7 weeks before we got the chassis back from Sydney and we could proceed with tidying up the roll cage structure and start to workout how all the gear forward of the front axle and rearward of the rear axle would need to be arranged. The next series of photos tell the story.
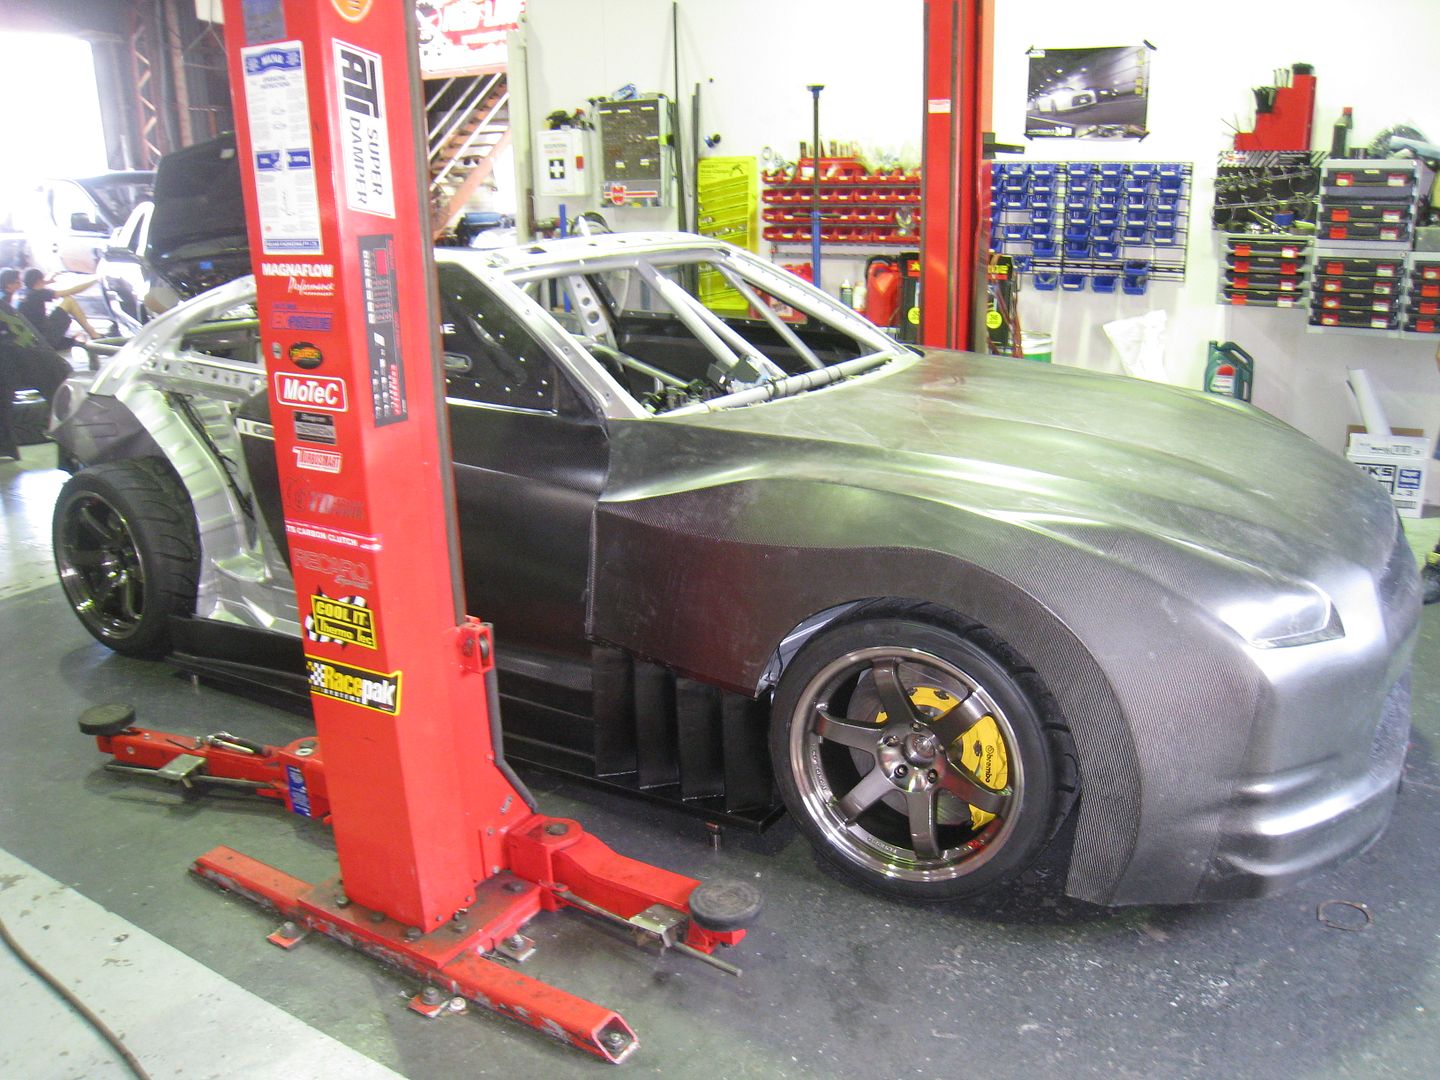
With less than 3 weeks to go we finally received the first piece of the carbon body…
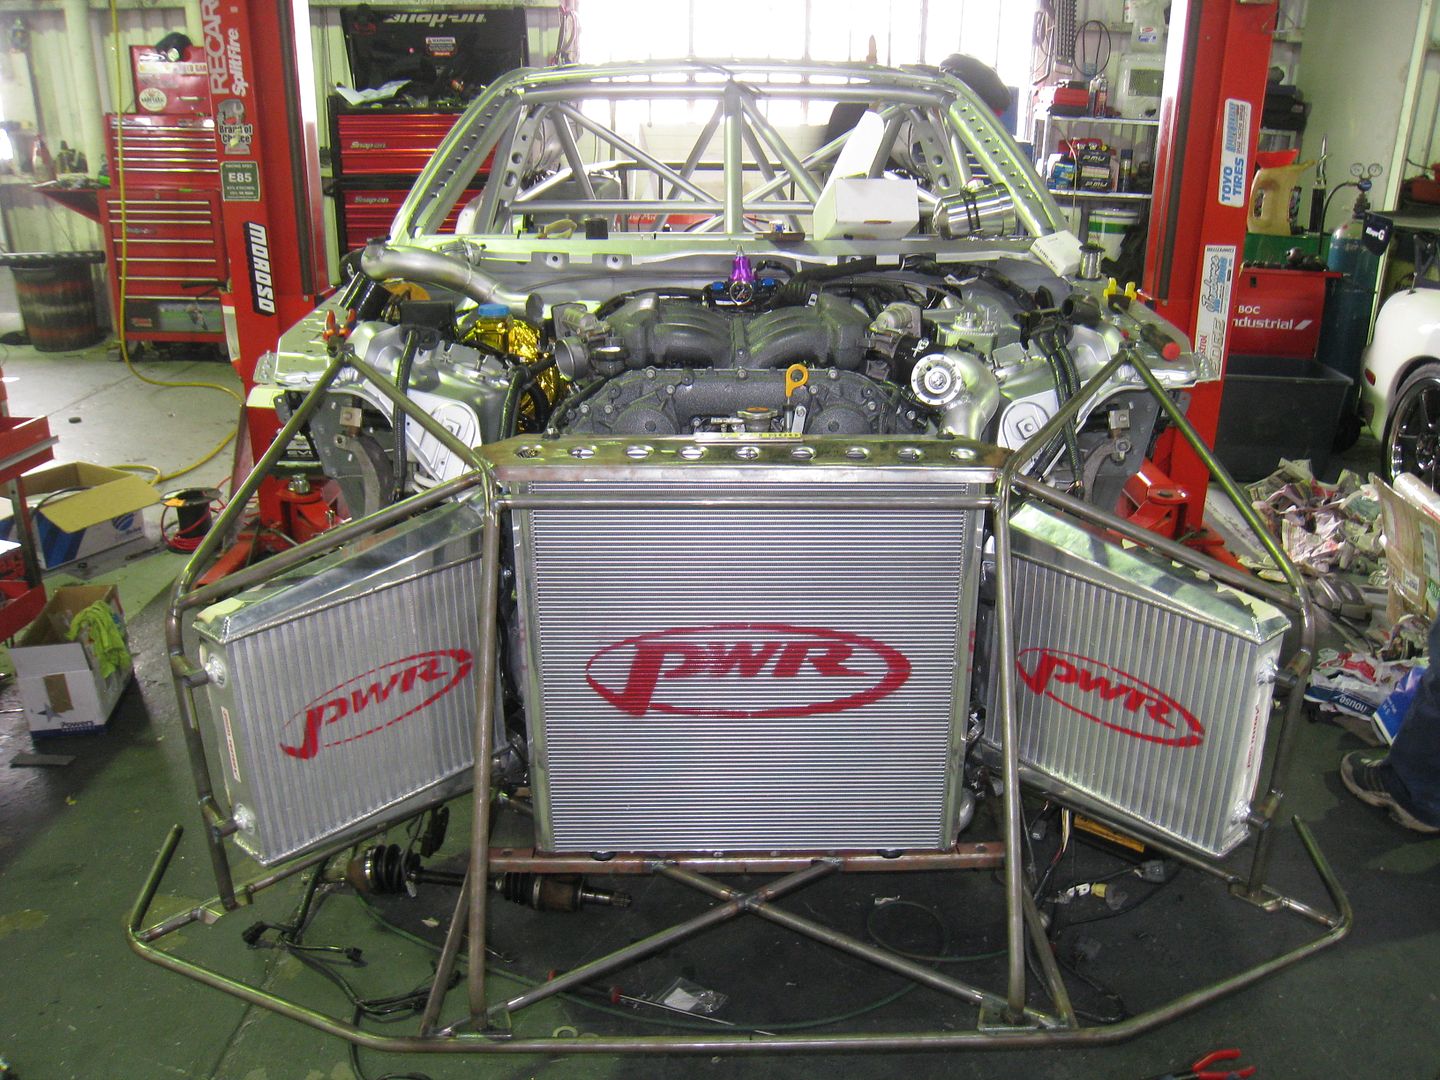
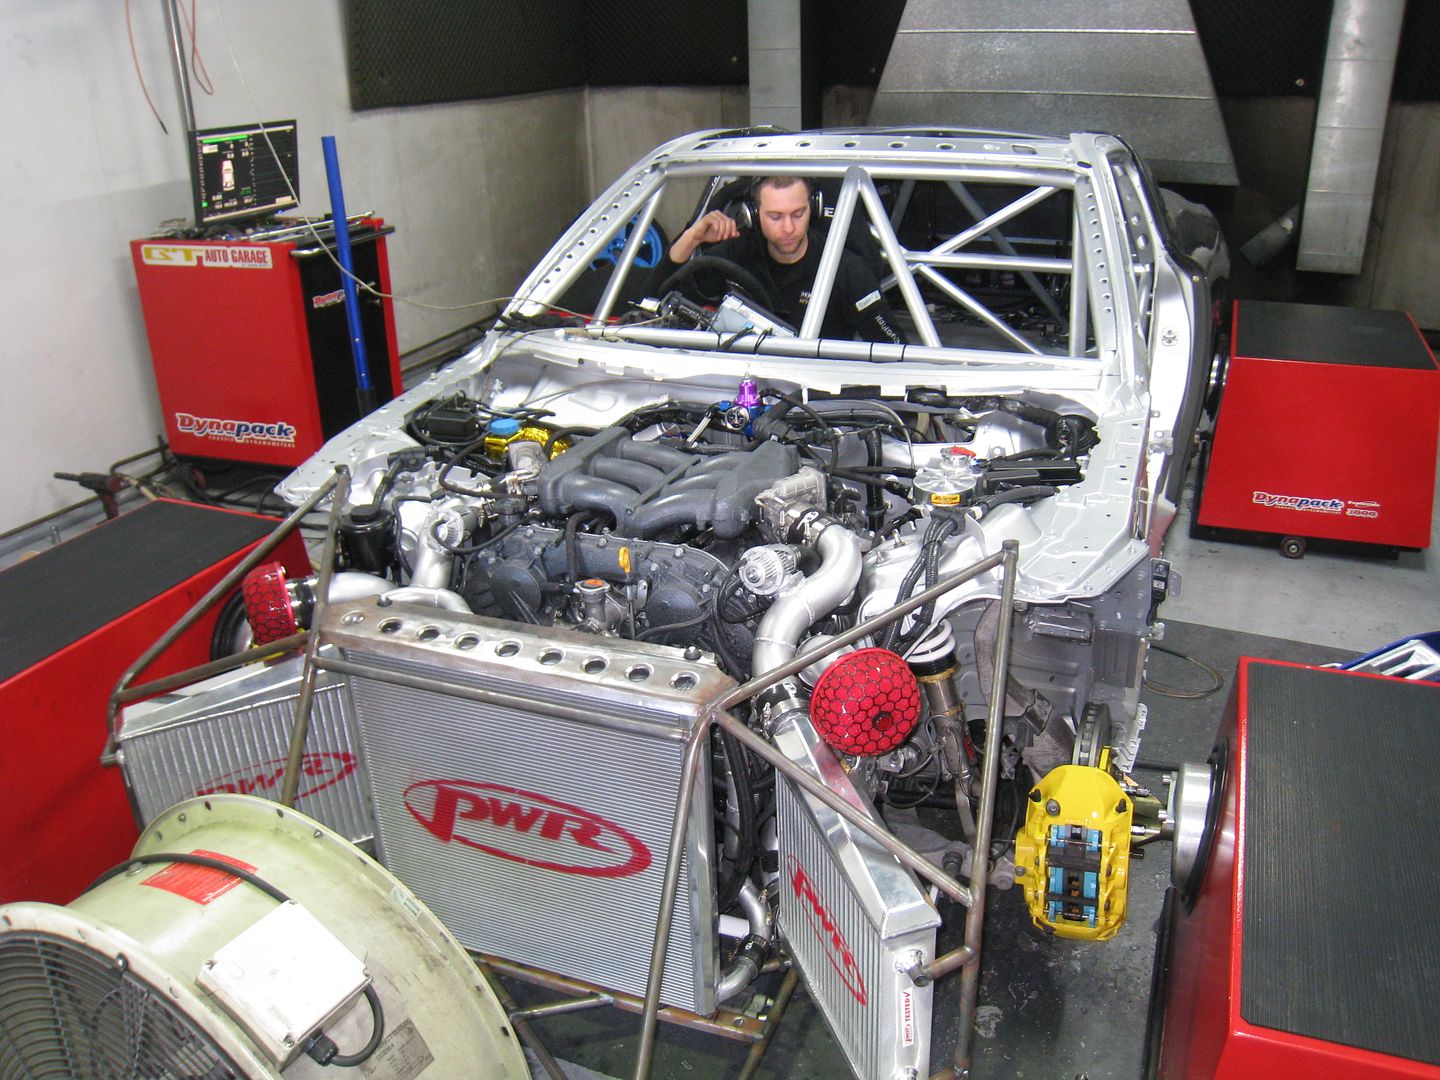
Man this engine makes easy torque and hp. The engine was run at 17psi and 22psi power levels. On 17psi it made 490kw ATW and just over 800nm engine torque (uncorrected). At 22psi it made just under 600kw ATW and 1100Nm engine torque (uncorrected). The engine has been built to operate at 30 psi so it has more up its sleeve. It’s quite a beast!!!
1 week left to go and we still didn’t have the rest of the carbon body!
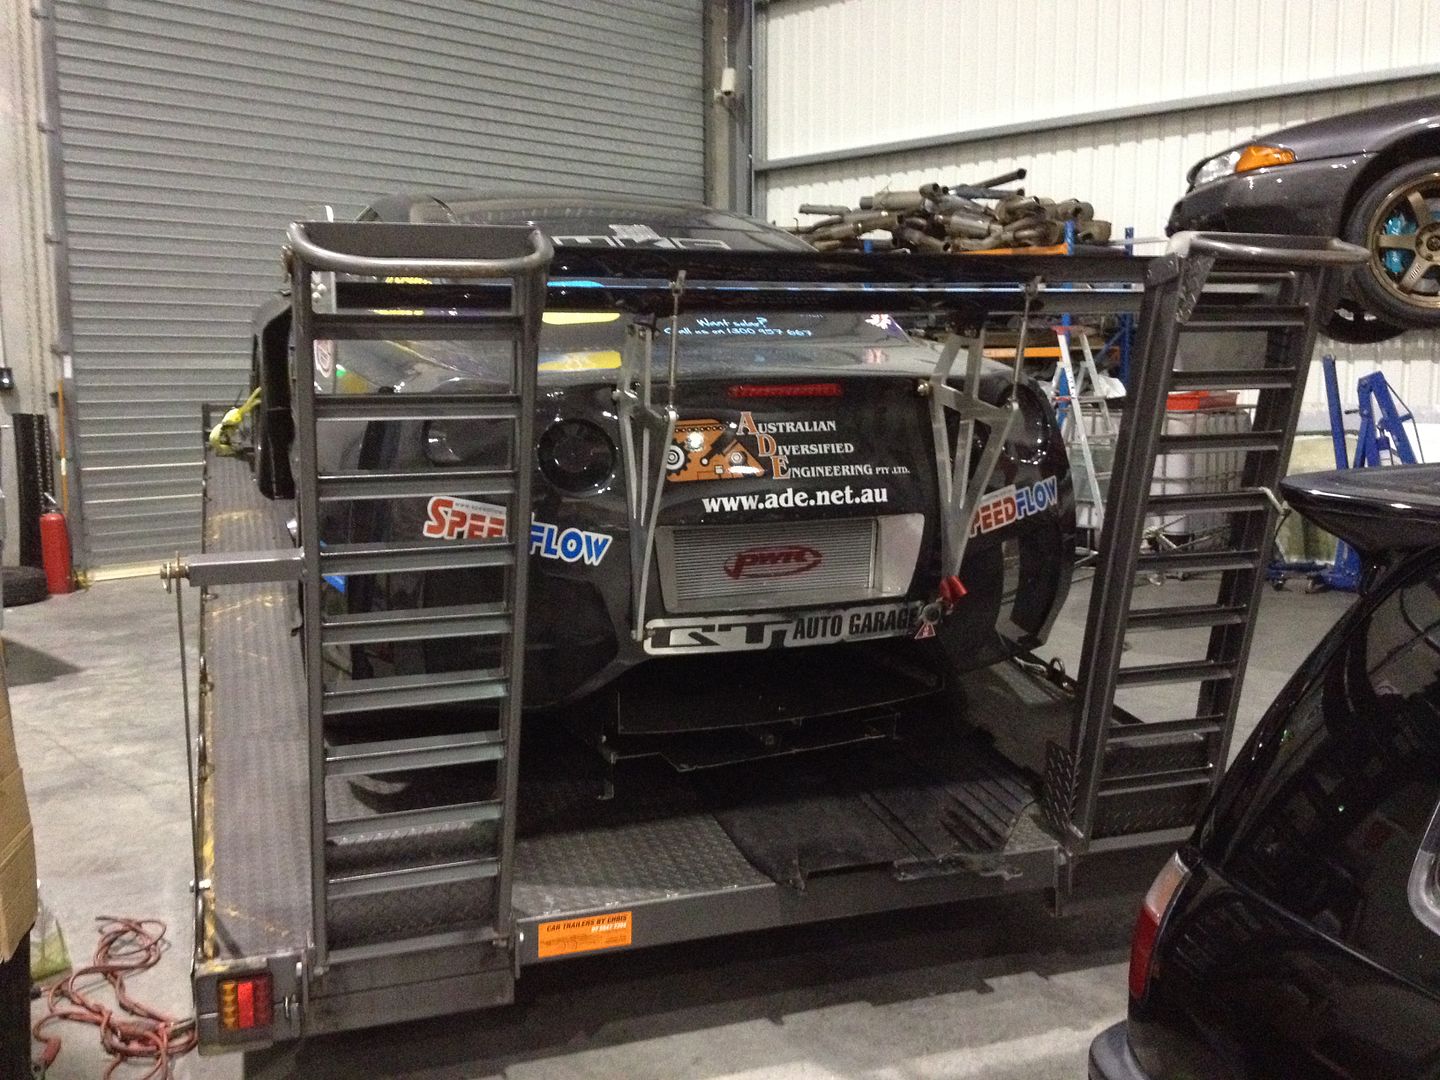
After numerous phone calls and weighty discussions and agreement was reached and the parts became available…we just had to live with the lessor quality and poor execution of some aspects. The final 6 days leading up to when the R35 had to be loaded into a transporter was and still is a blur. The team worked from 7am to midnight each of those 6 days to meet the deadline. Here’s a few photos from the final stages. As you would have realised by now…we never got to a race track for any testing…guess we’re gonna have to do it at WTAC!
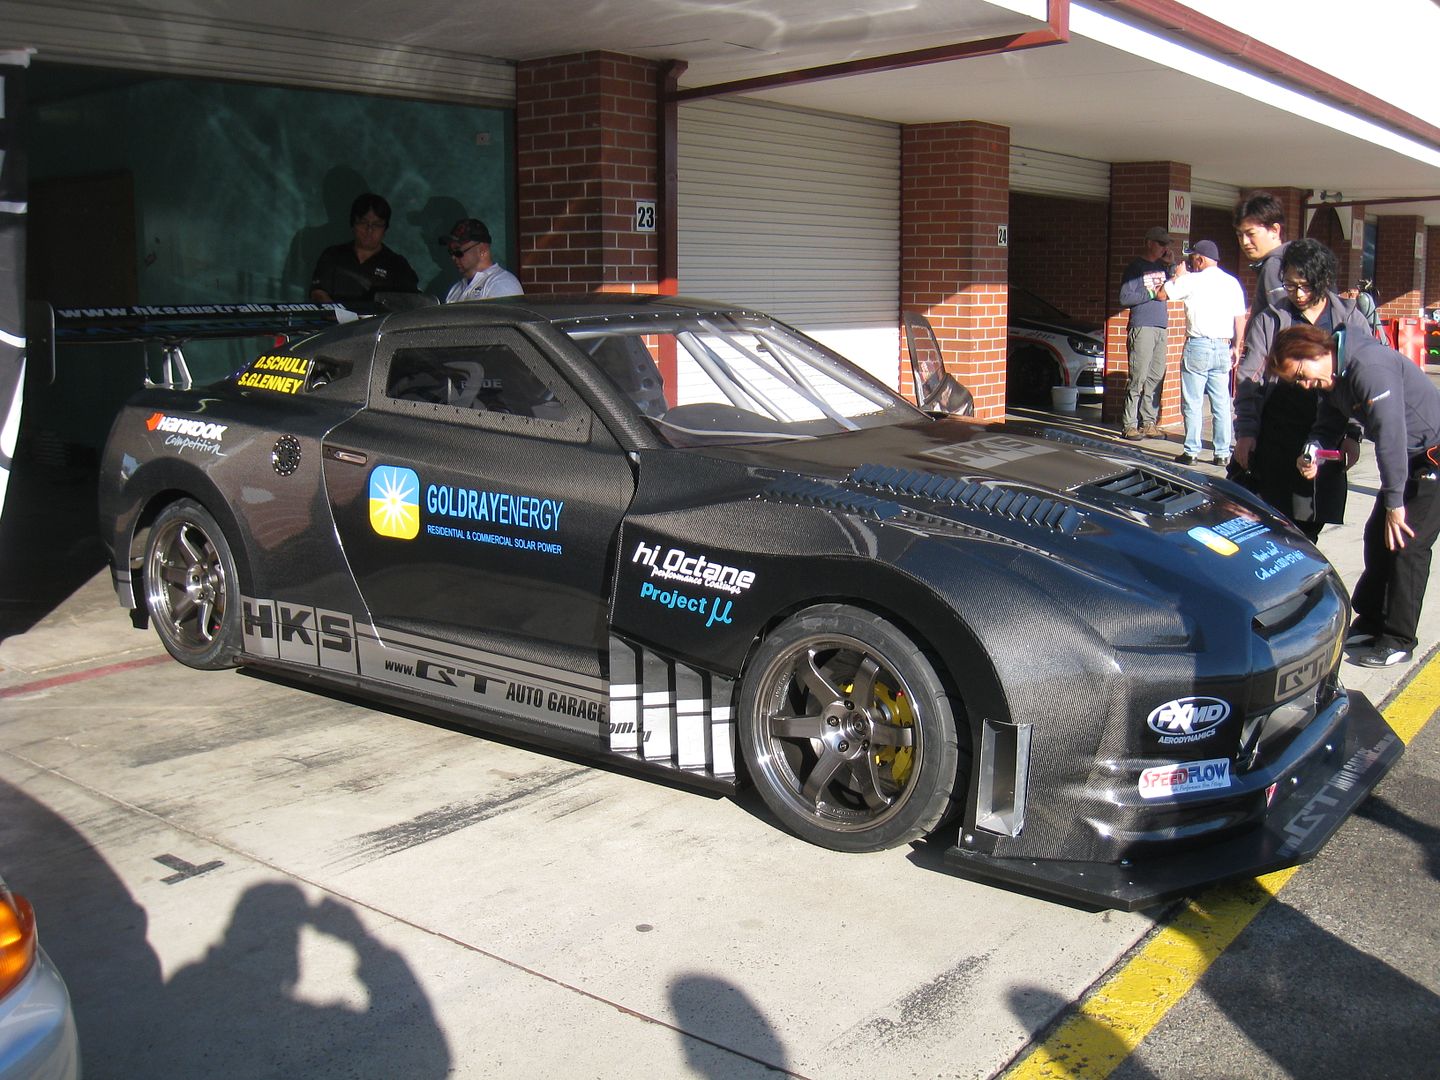
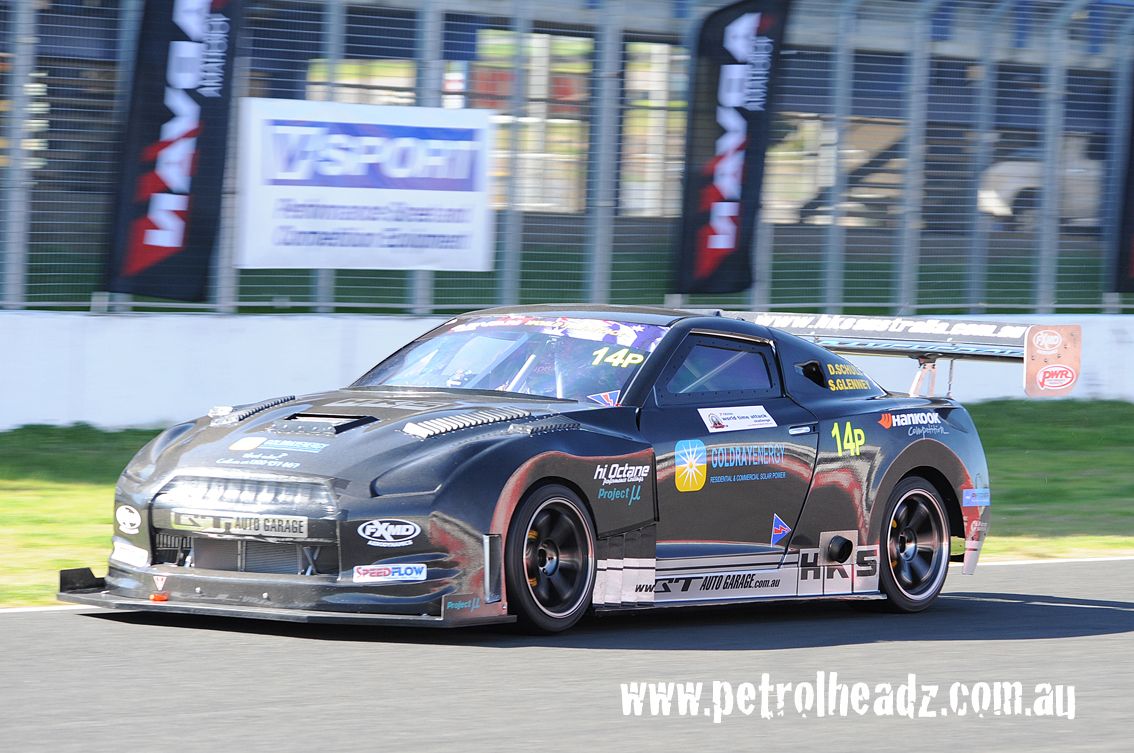
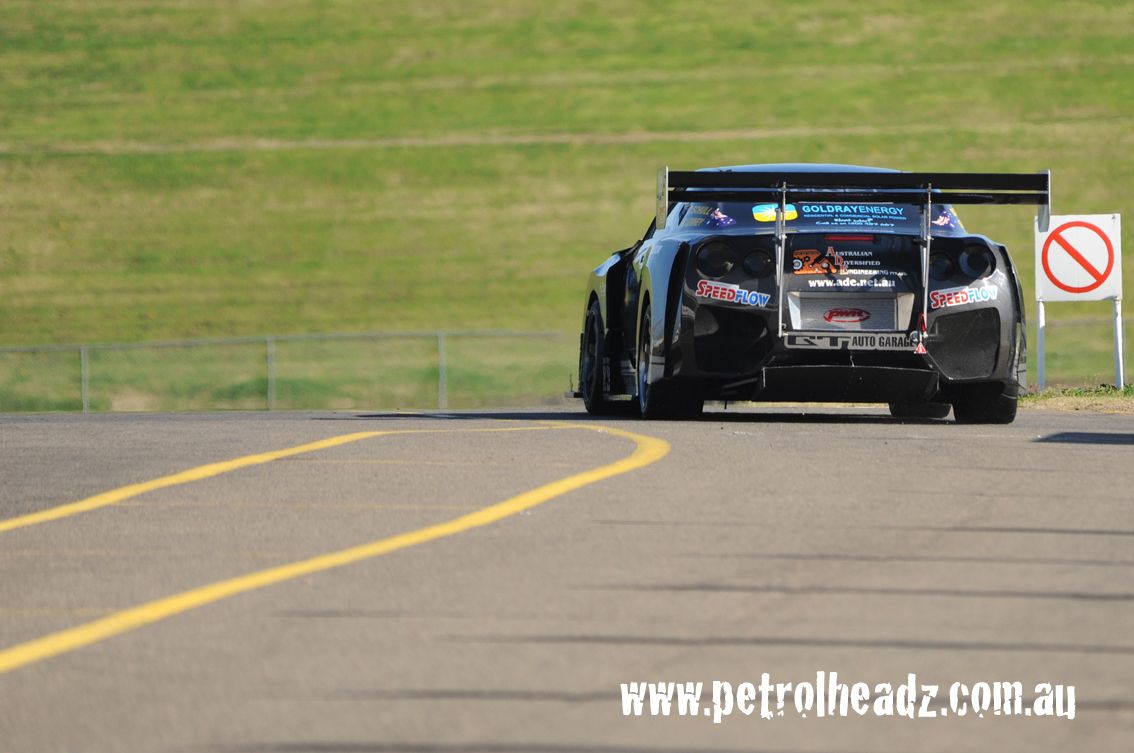
Well what can I say about the event….an absolute blast and one of my all time highlights….we ending up getting 9th outright with a 1 minute 32.4 second lap of Eastern Creek. Some 1.5 seconds of last years winning lap time and only 3.5 seconds of this years winning lap time. Not bad considering that we’re up against seasoned some race teams and cars that have had millions of dollars of money invested. I believe that the Sierra Sierra Evo’s engine development budget was over USD1.5 million! Mind you this was a Cosworth development. There is so much room for improvement in the aero department on the R35 as the design wasn’t executed by the carbon guy particulary well. We were only able to use half of the rear downforce that is available, yet the car still achieved a maximum lateral ‘g’ of over 1.8!!!
The result exceeded our wildest dreams…considering the compressed time frame and zero track time prior to the event. I’ve learnt so much from this build that I’d be insane not to apply it on the NC.
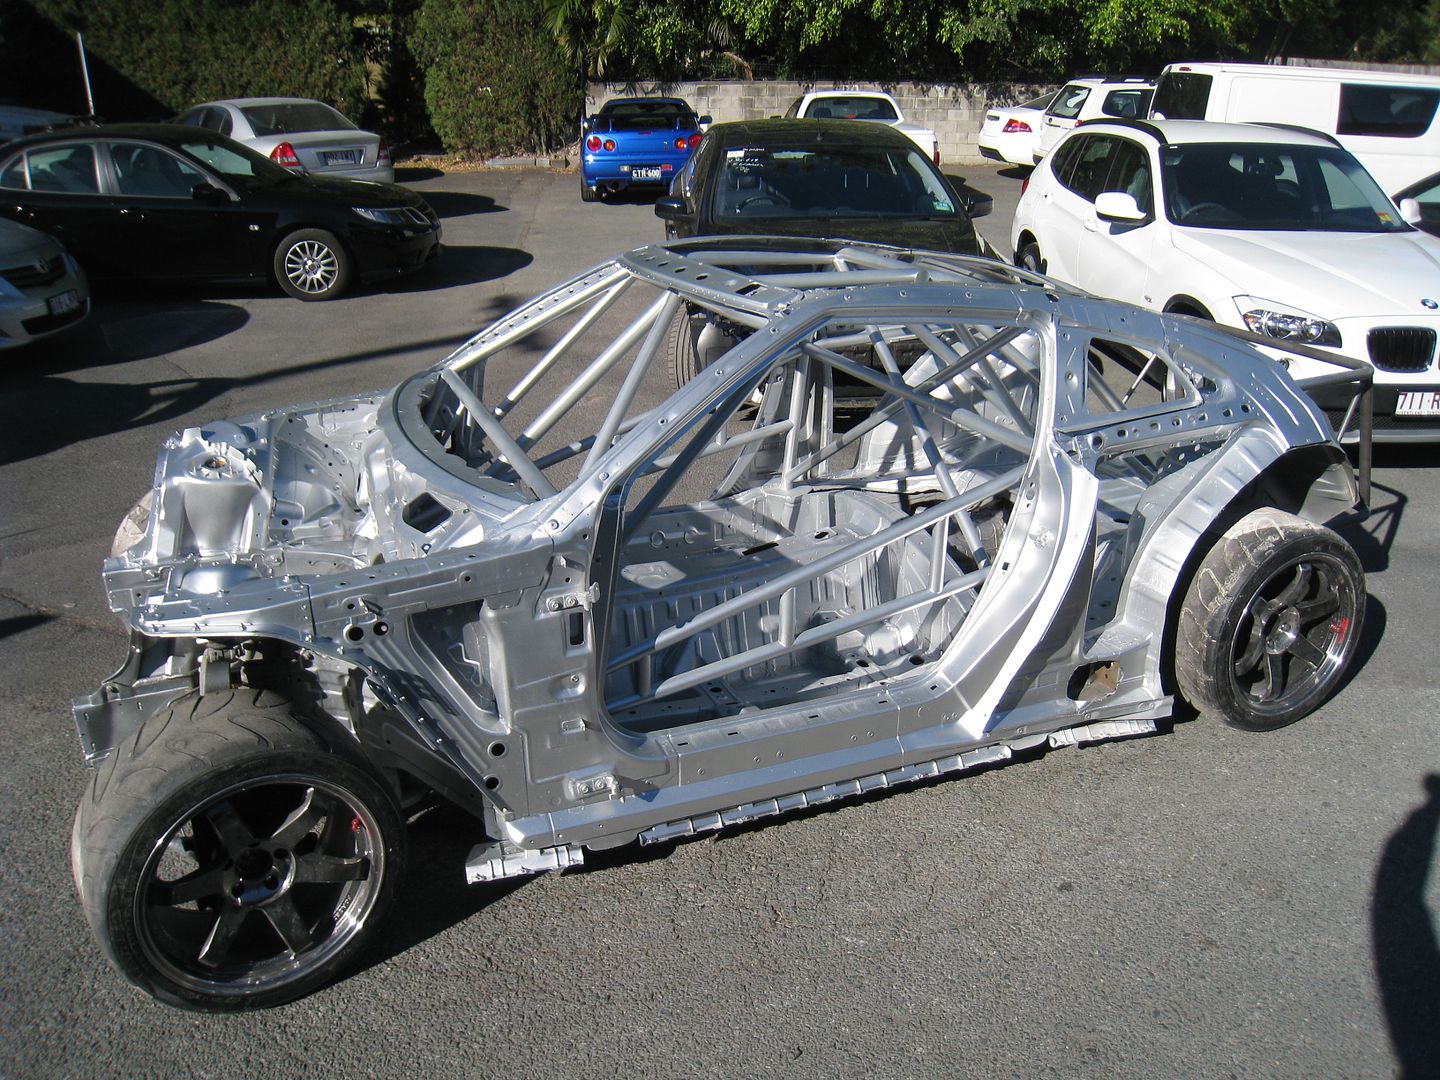
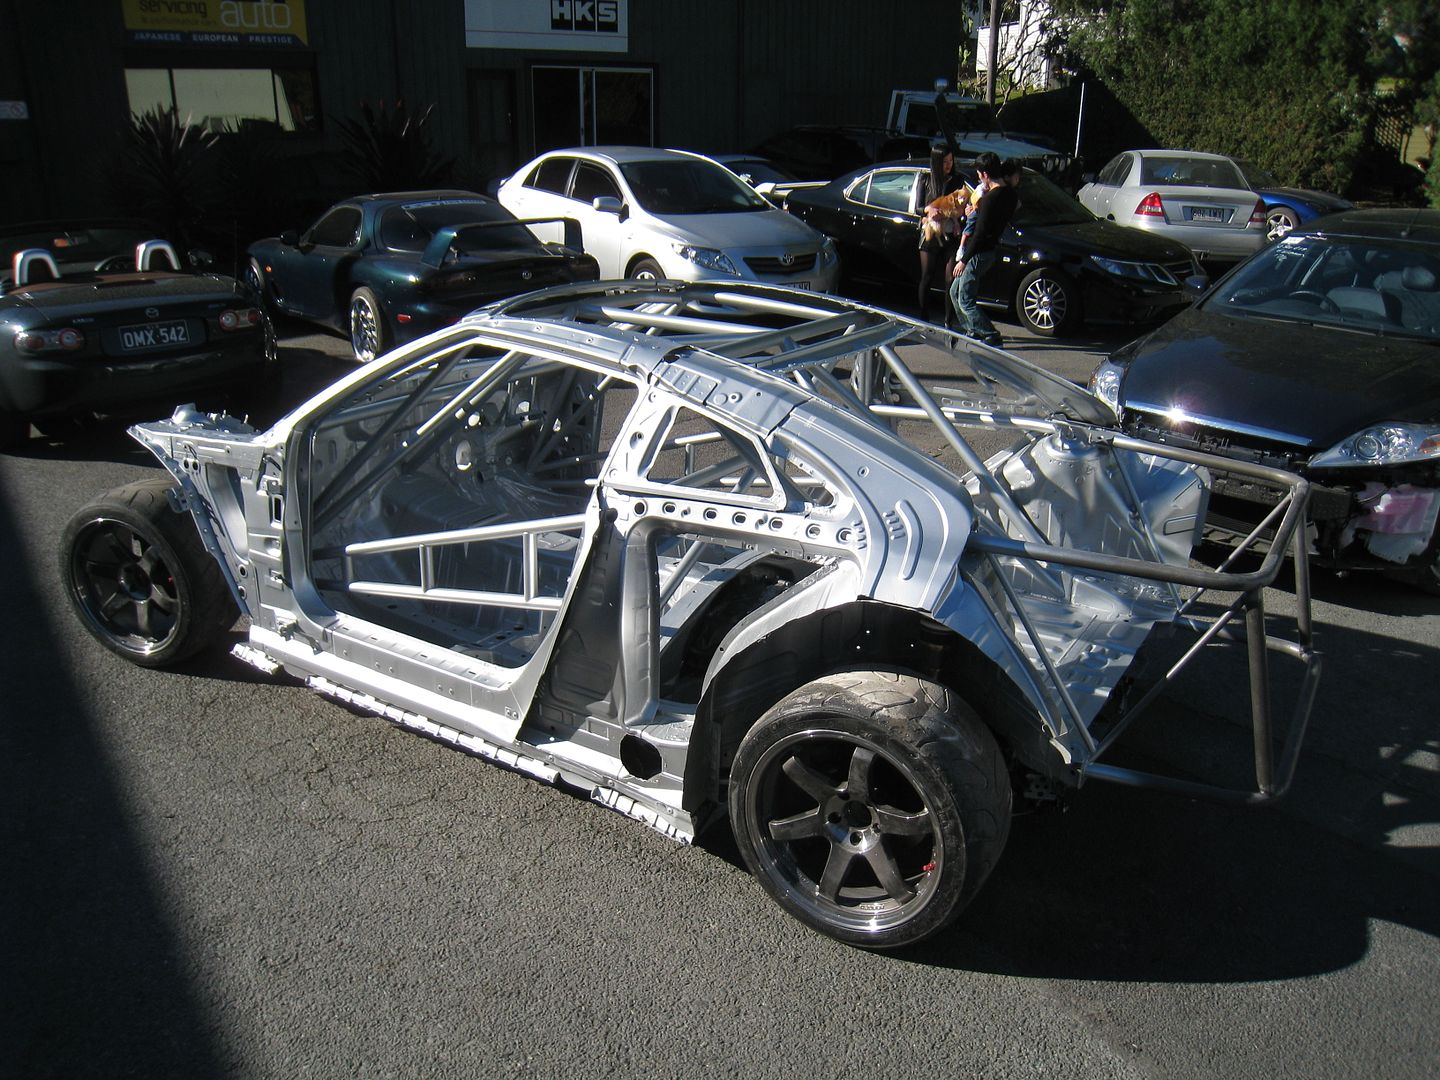
The experience and knowledge gained through the R35 project to date has definitely affected the path I was going down with the NC. What began as a project to build a road racer has really transformed into a project to build a “time attack” weapon. I see so much more opportunity to improve the performance…mind you 6 years has now passed…and when I think about it, I really don’t think it was going to end any other way….not that I’m anywhere near finished!!!
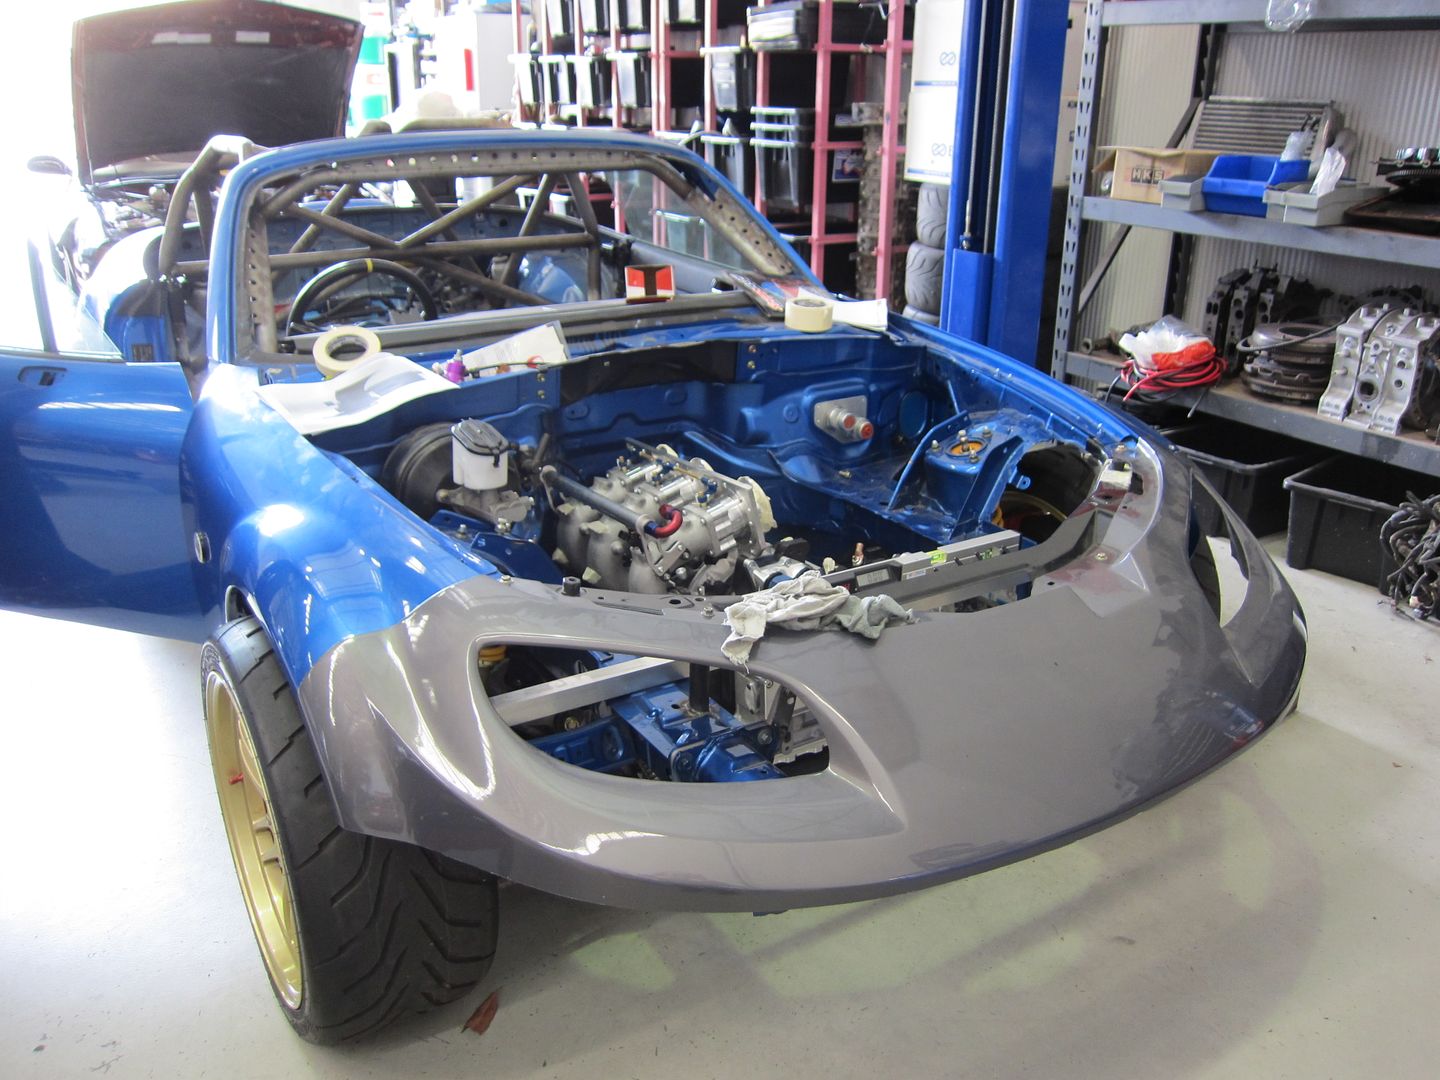
Originally I was going with the genuine Mazdaspeed body kit..you know, the front bar, rear bar and side skirts. But that’s probably a bit too good for a race car and probably not as aero dynamically effective as I was now wanting. So the Mazdaspeed body kit is now on my road registered NC and getting the necessary colour change. I’ll post some piccies once finished. Fibreglass/carbon fibre components are better to suited to the application. I’ve made decisions on the front and rear bars and acquired the below items…they are a bit of a blank canvas as they will be appropriately modified for better aerodynamics.
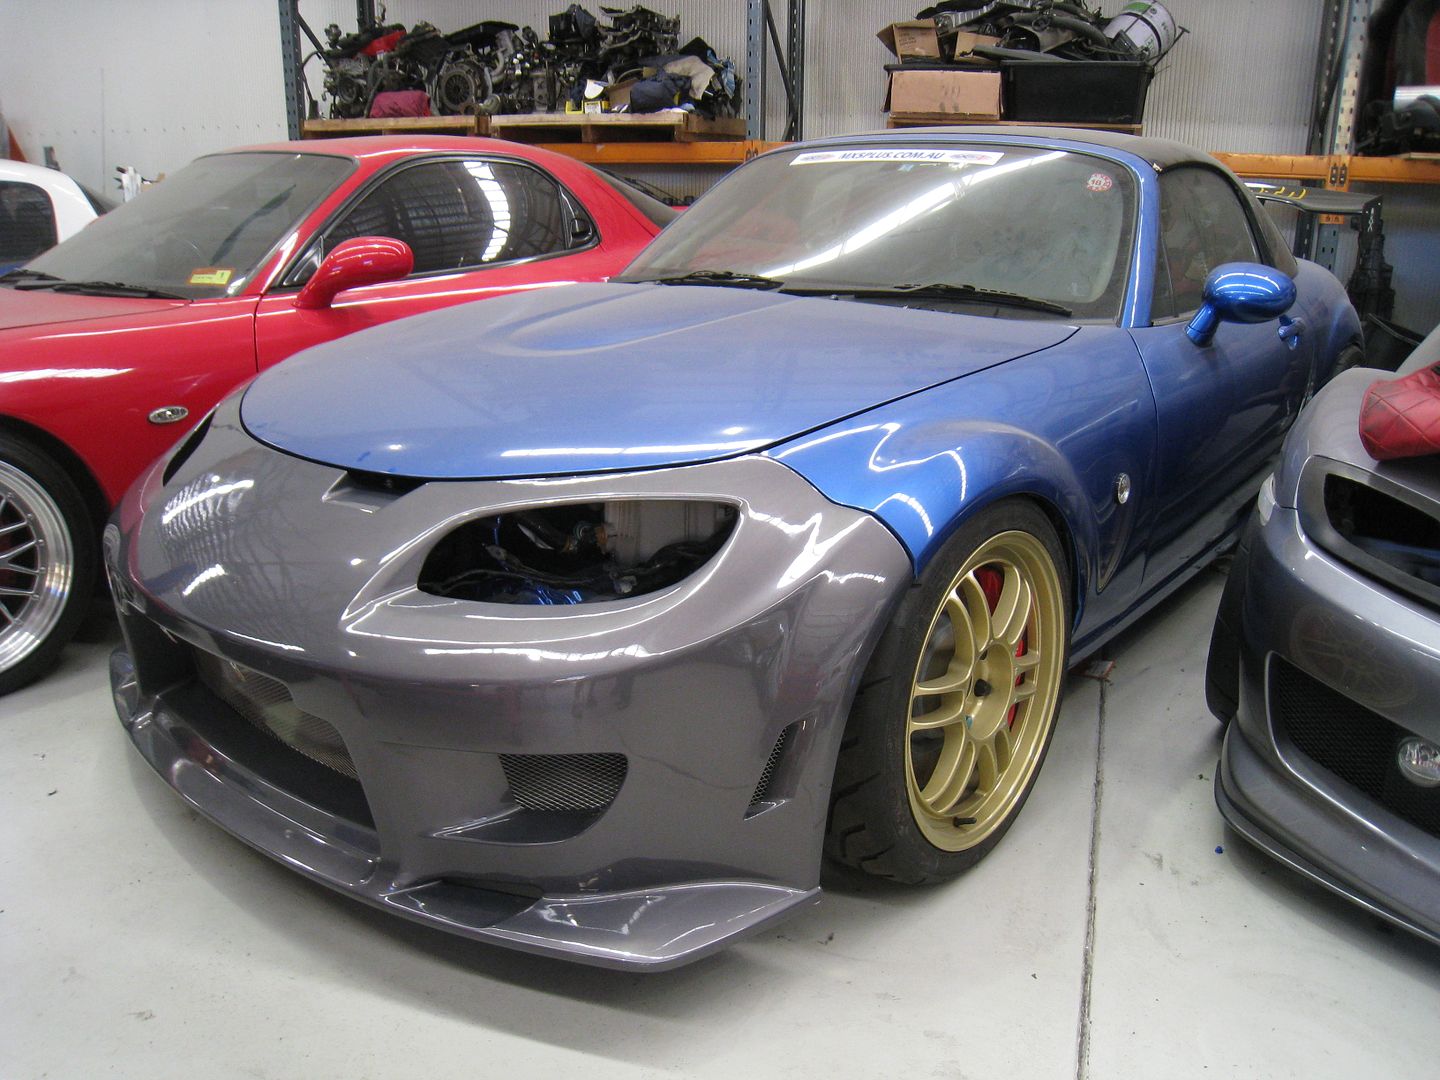
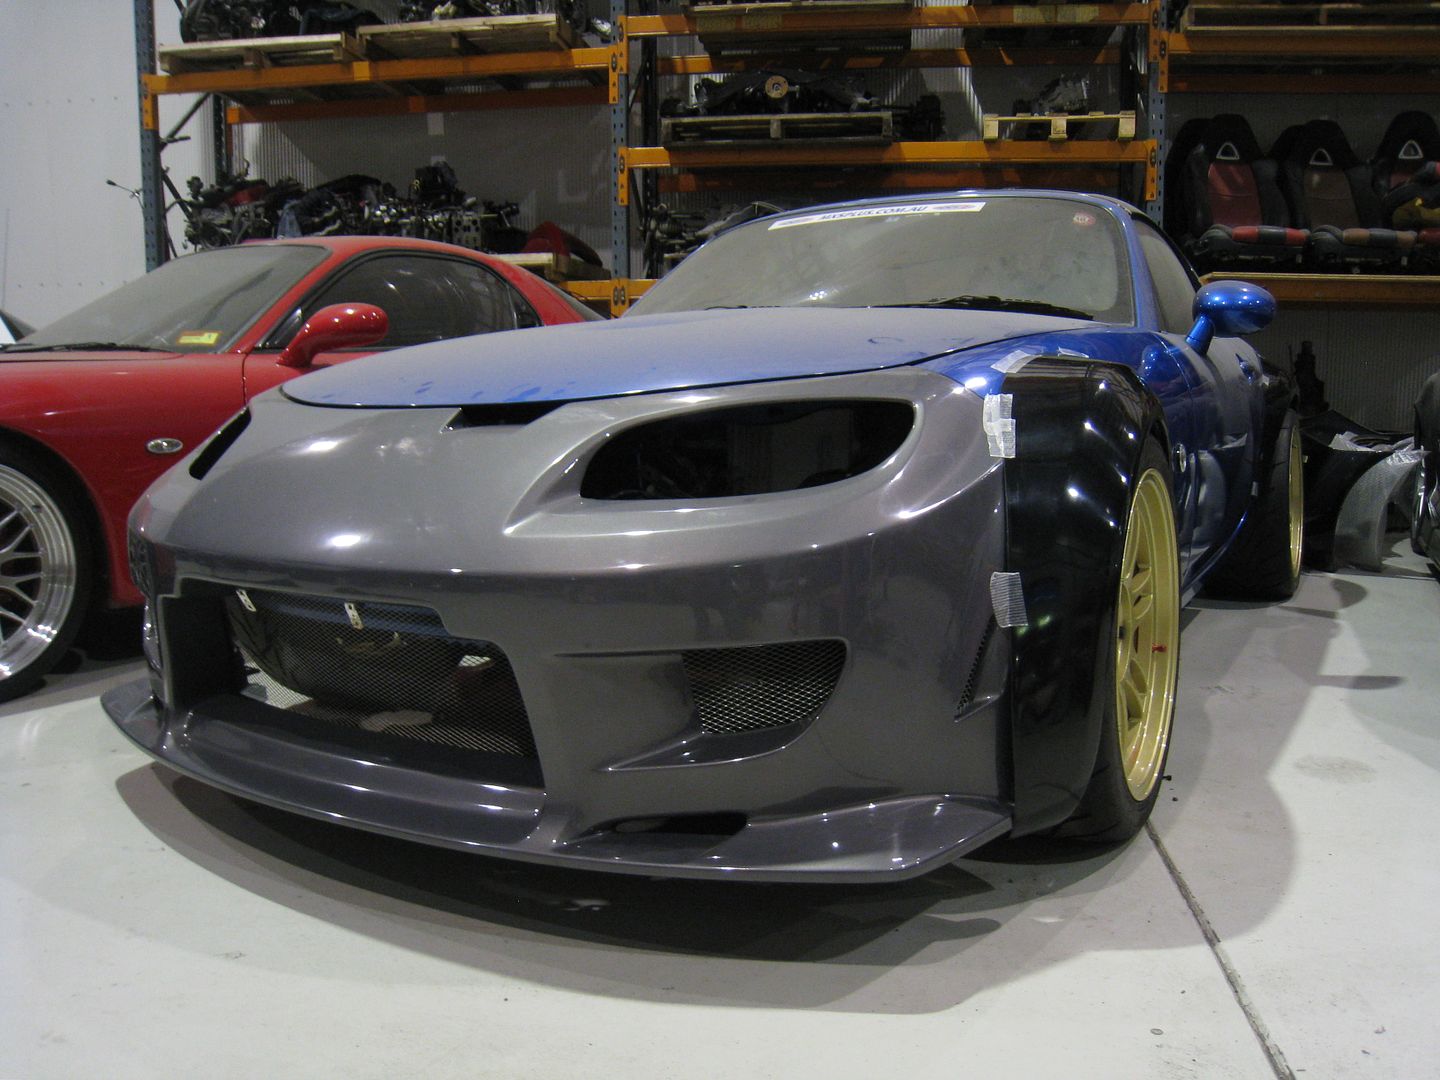
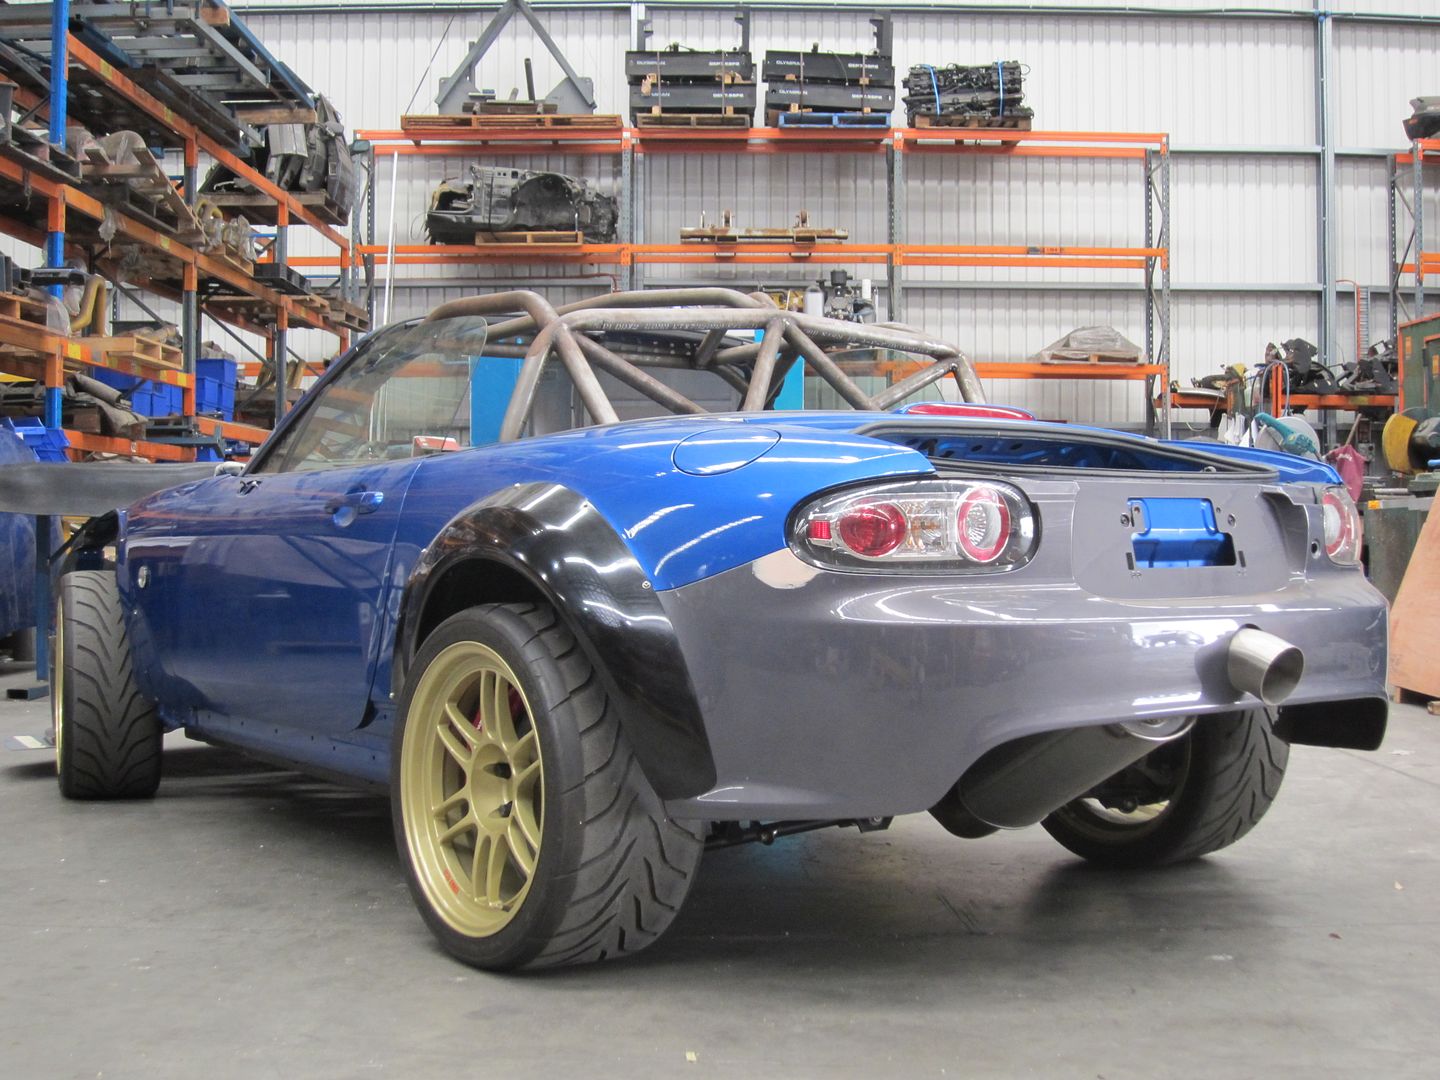
Another major decision has been to go back to the original wheel/tyre combination (well the rear at least) which will require the installation of extended wheel arches and the cutting of steel work to suit. This was really the catalyst for the change in direction…a plasma cutter will be involved!
The wheel/tyre specs are as follows:
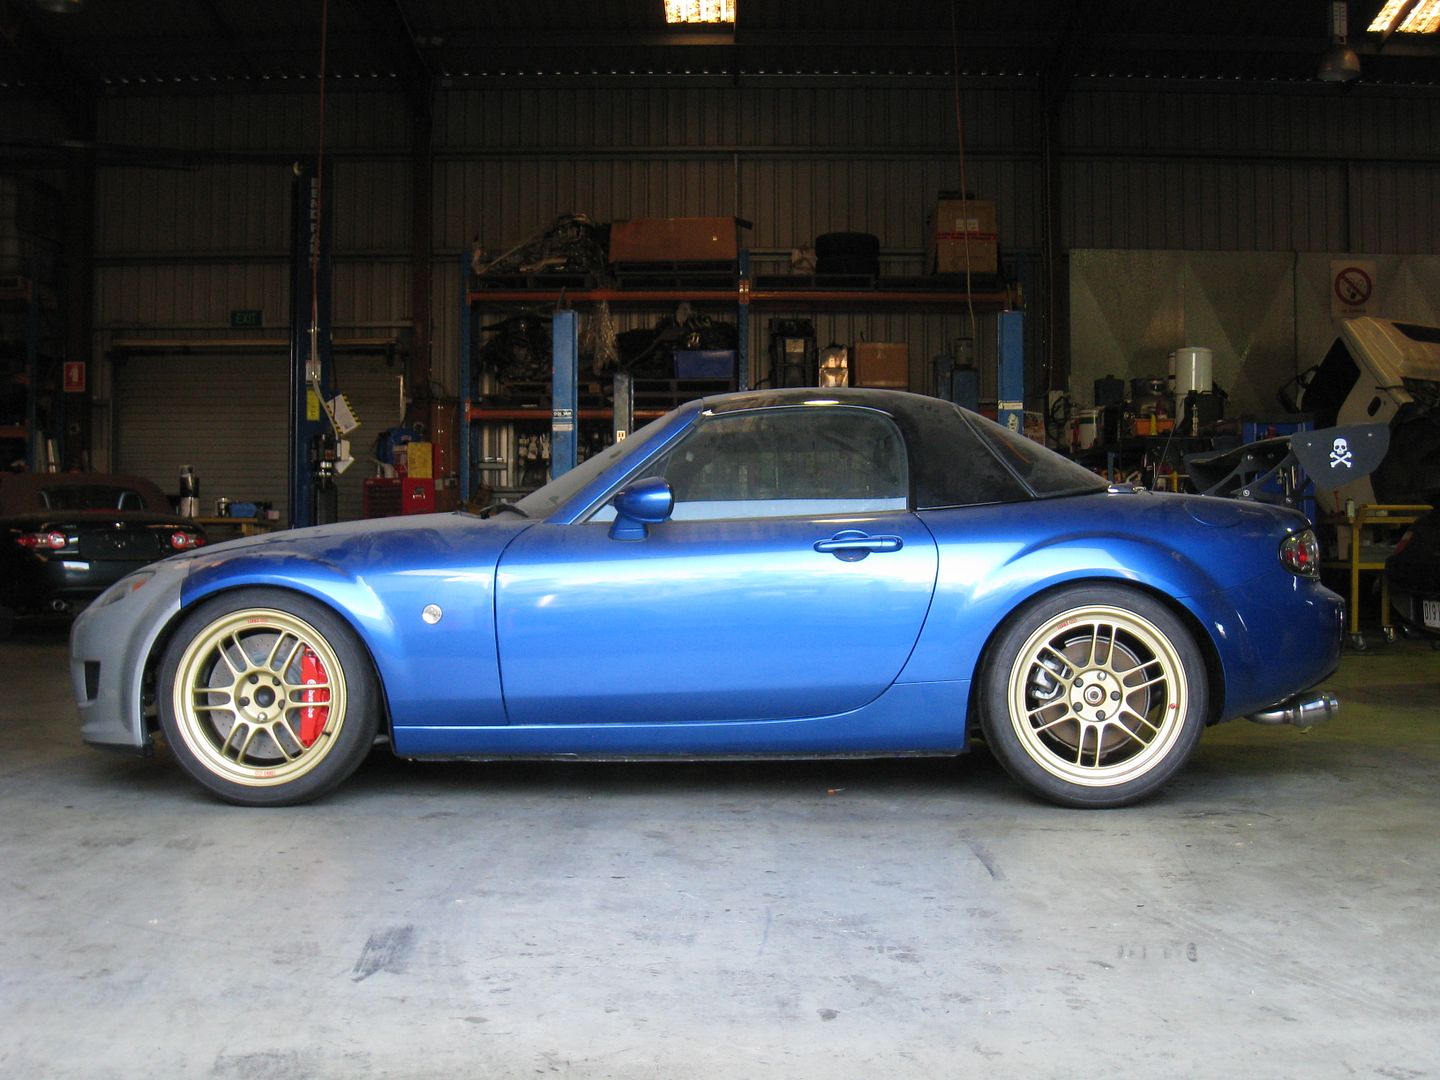
Front: Enkei RPF1 in 18 x 9.5 – 45P offset fitted with Toyo R888 in 255/35 R18
Rear: Enkei RPF1 in 18 x 10.5 – 15P offset fitted with Toyo R888 in 285/35 R18I sourced the CF wheel arch extensions from Moss Motors (I can’t remember who the manufacturer is) and have only stuck them on to get a feel for the work that will be required to get them installed and the work necessary to allow the required wheel travel. Now its looking pretty mean!
The R35 was sold a couple of months back to an overseas buyer (Germany).
he owner’s decision to sell the car was most disappointing to everyone who was involved with building the car from scratch in just 13 weeks. We dearly would have loved to improve the aero package and take it to the overseas teams at the 2012 WTAC…but it was beyond our control!
I can’t spare the time that is required to develop the supercharger kit to a level that would make it a robust/reliable engine package. It’s pretty obvious that after three years of nothing in the engine R&D area that another year isn’t going to yield much!
The “third party” supercharger kit was/is lacking in too many areas and the market/demand has contracted for such a product (and the RX-8 ceased production 12 months ago
So that door has closed…however another has opened!
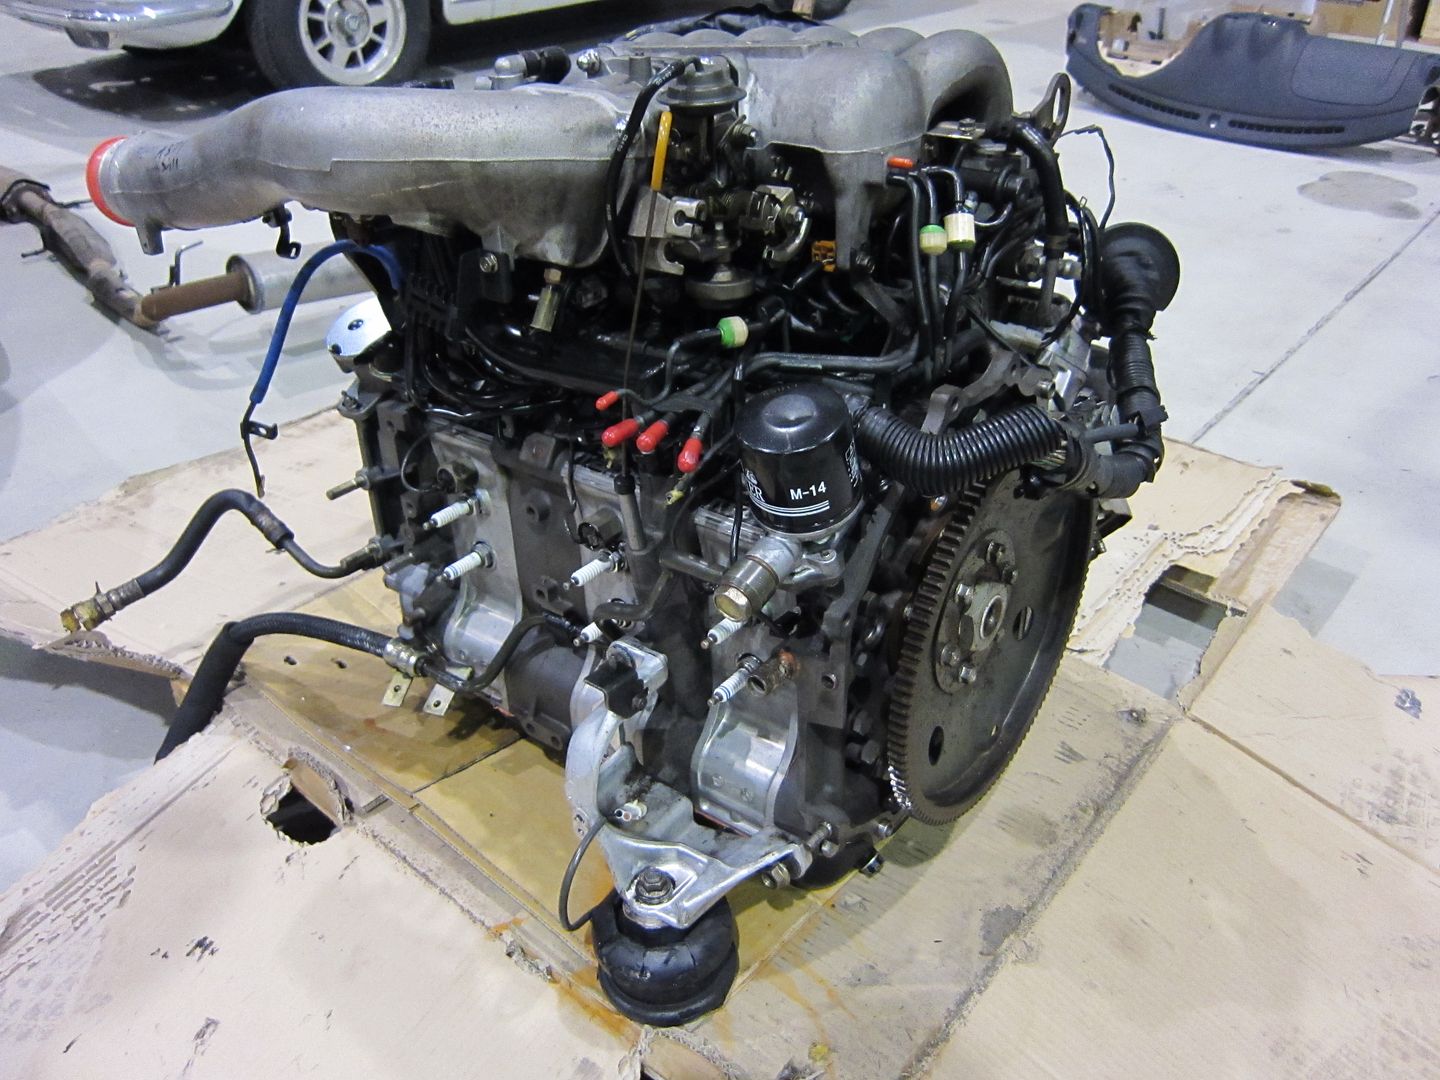
This is the engine I’m based the build on. So much unnecessary crud!
Of course the first thing to do was to extract the ‘old’ donk from the chassis.
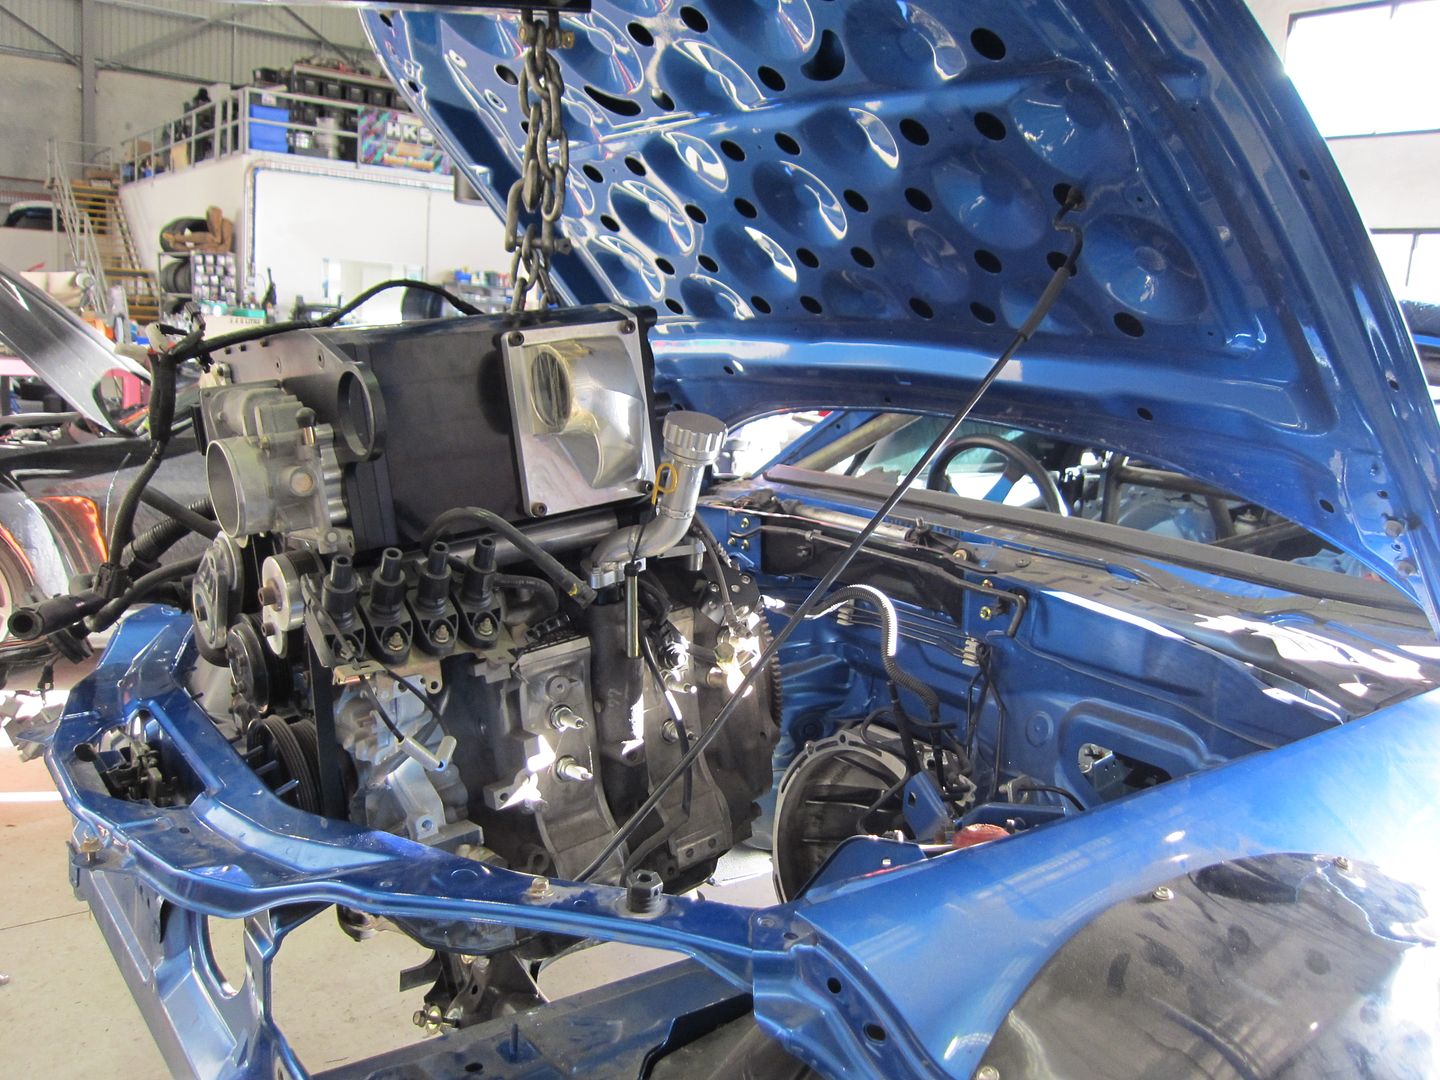
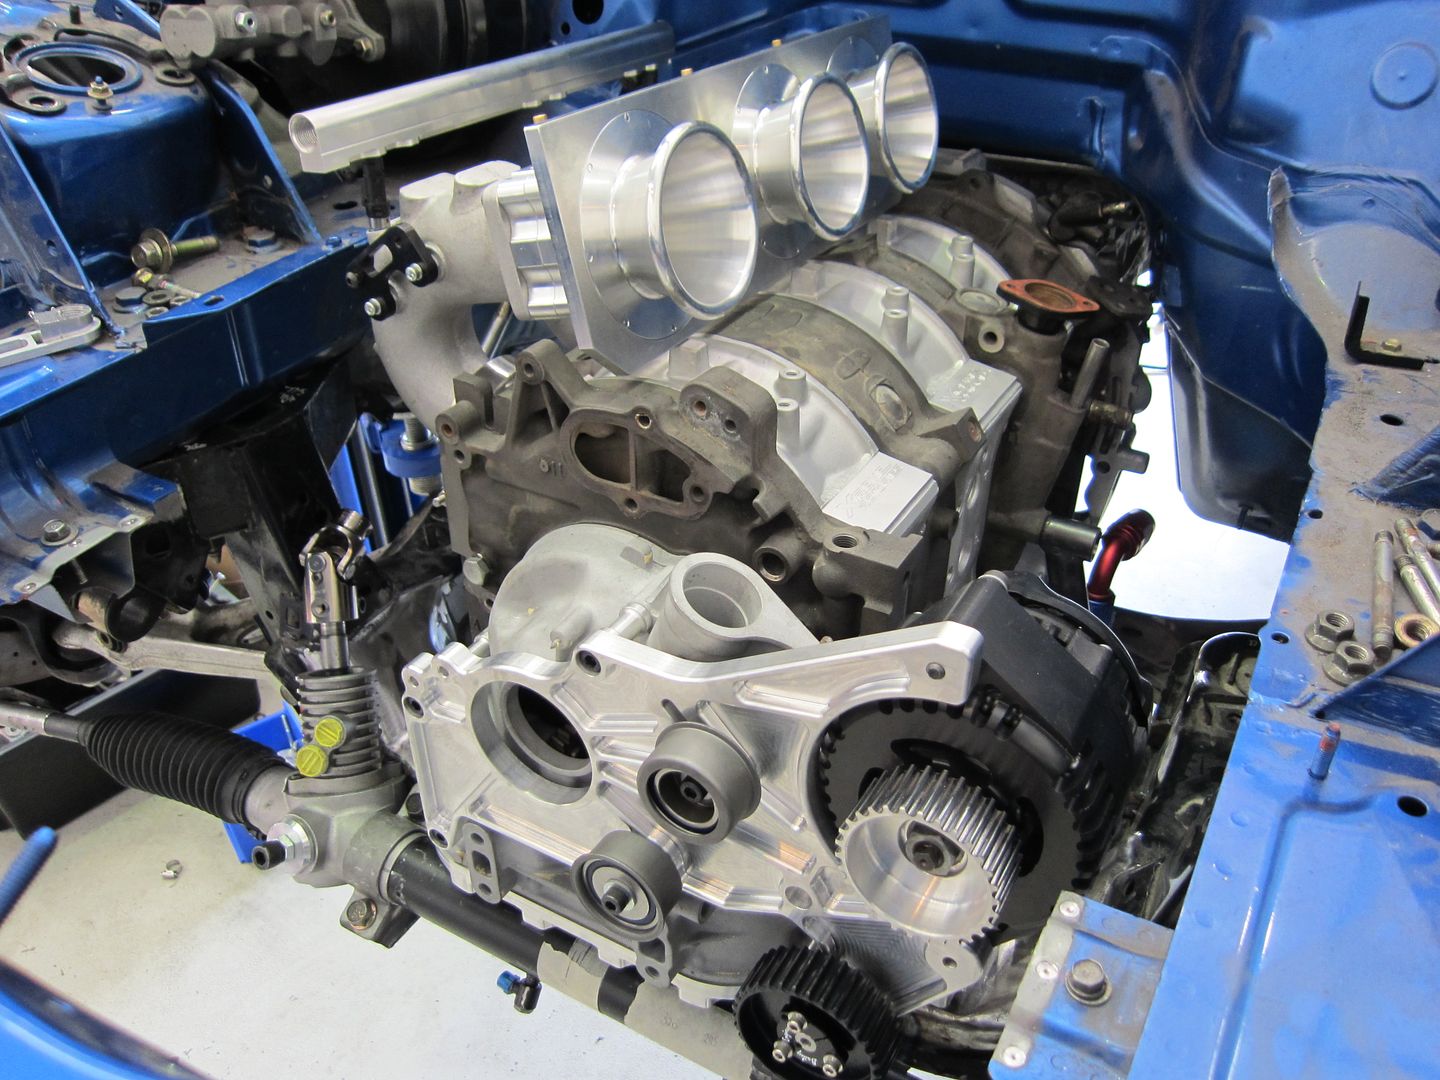
The first item on the critical path was to position the engine in such a way that there’s good clearance to all important engine externals whilst keeping it reasonably low, but not compromising the front aero package.
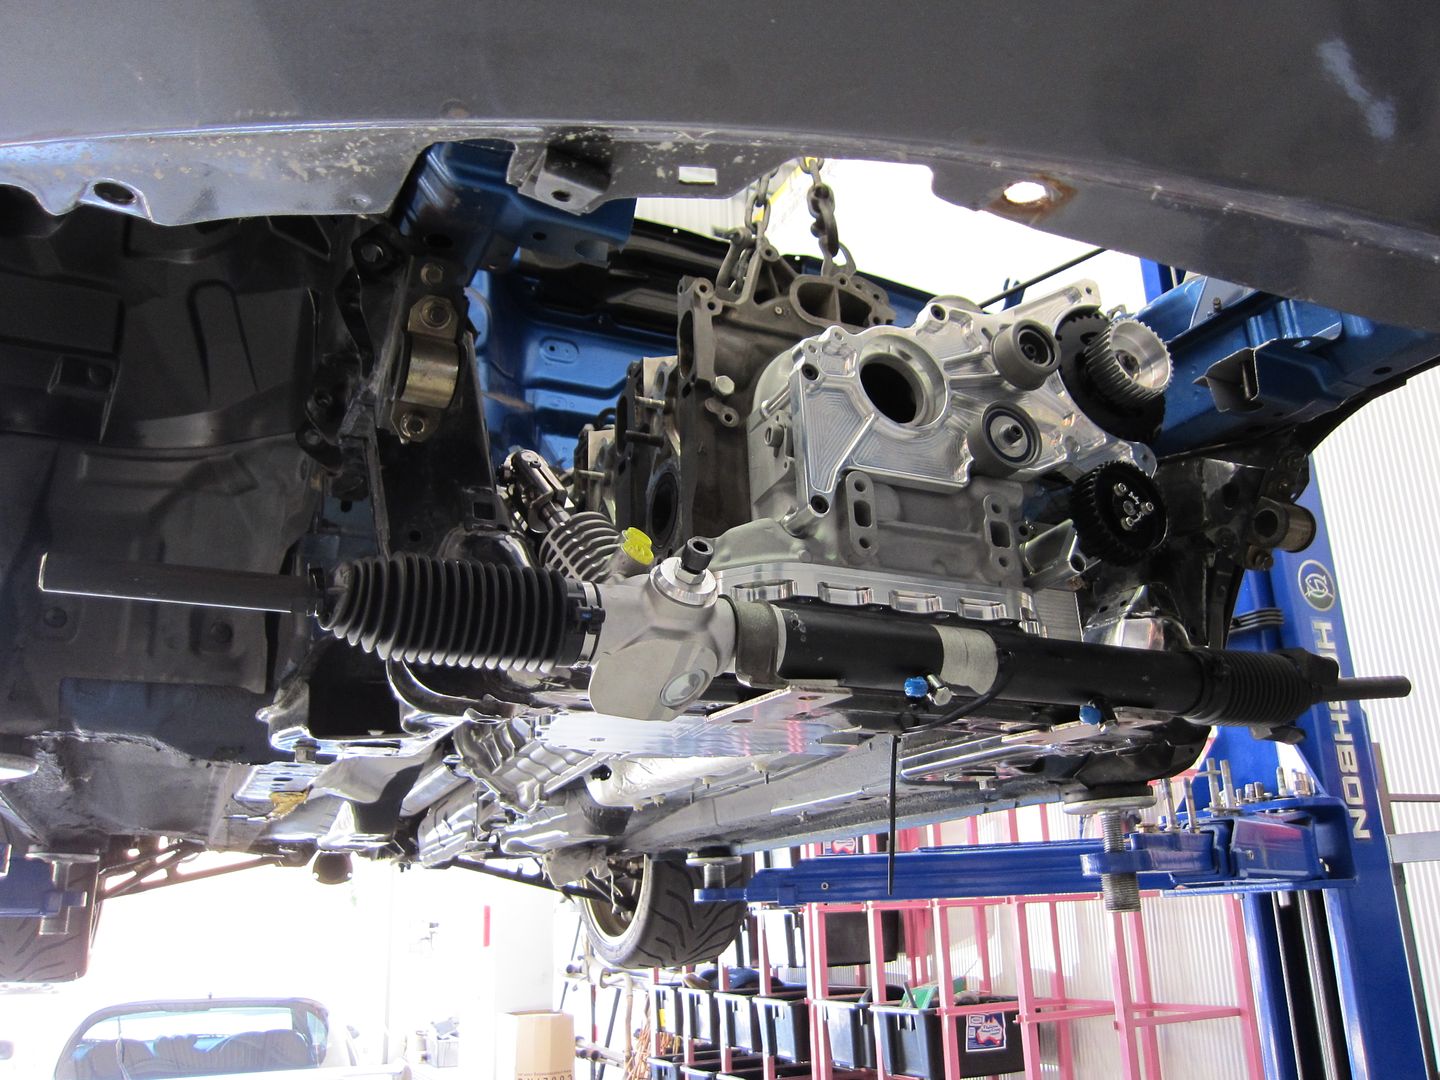
I’m pretty happy with the positioning of the new rack when compared to the OEM electric item. If anything I’m quietly confident that the minor geometry adjustment resulting from the new rack may actually be better than OEM with the appropriate adjustment out at the tie-rod ends. Bump steer and possibly Ackermann will be measured to confirm.

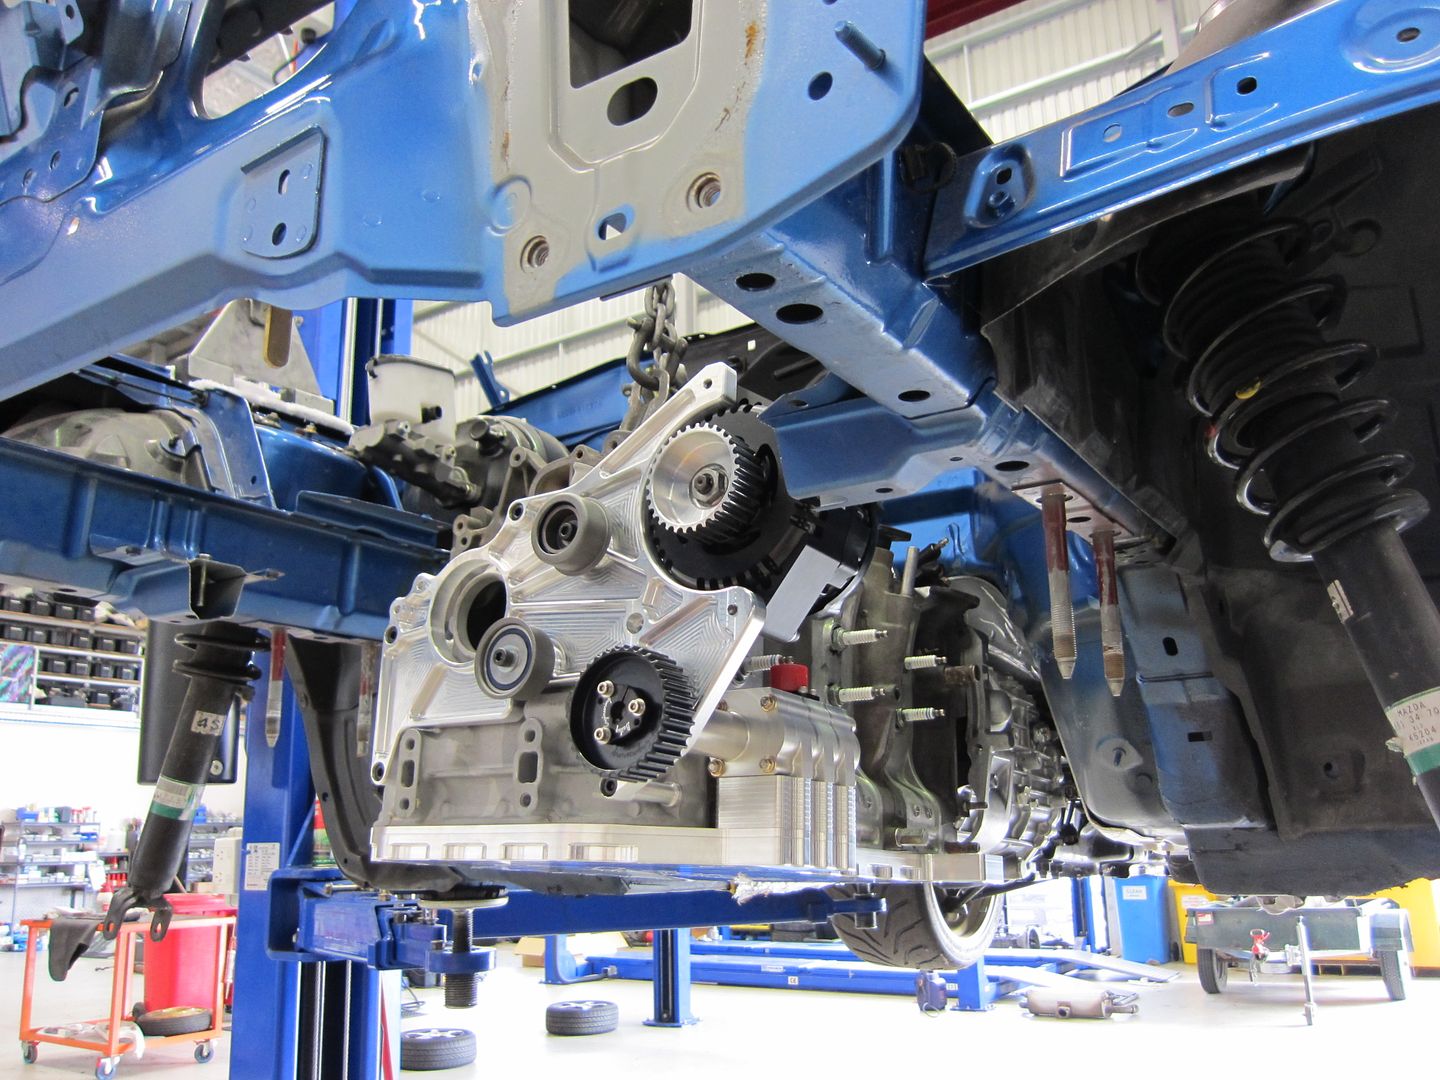
The engine mounts when viewed from below.
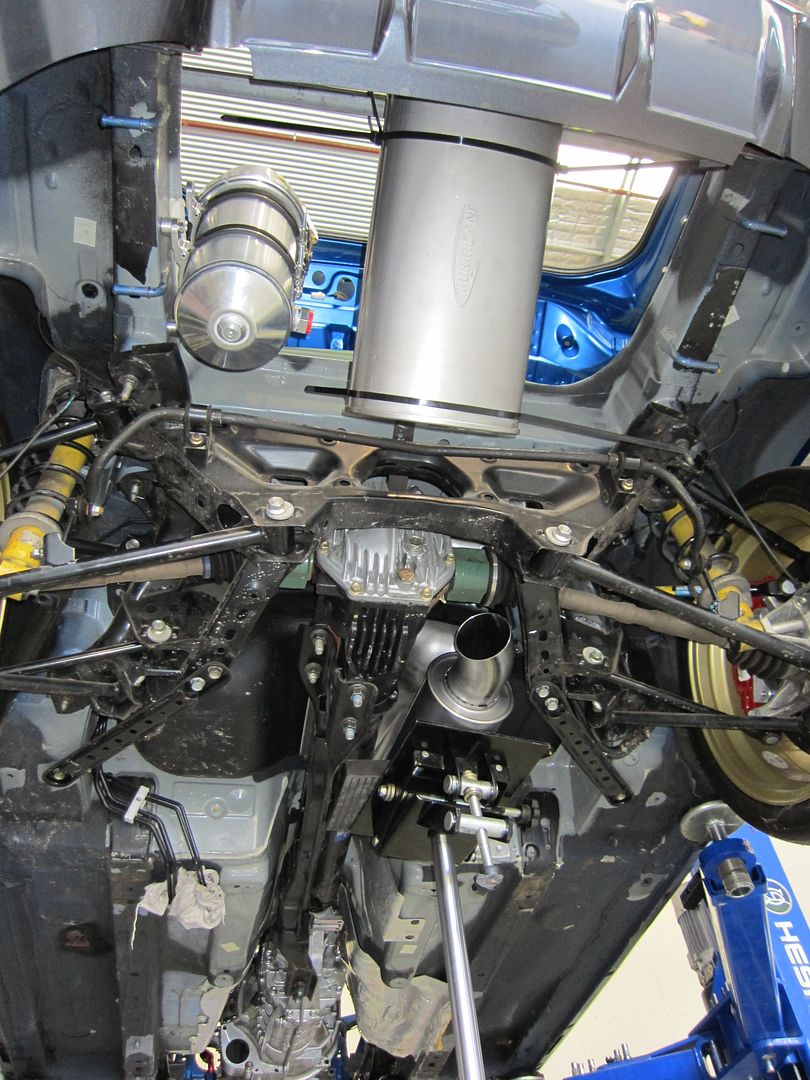
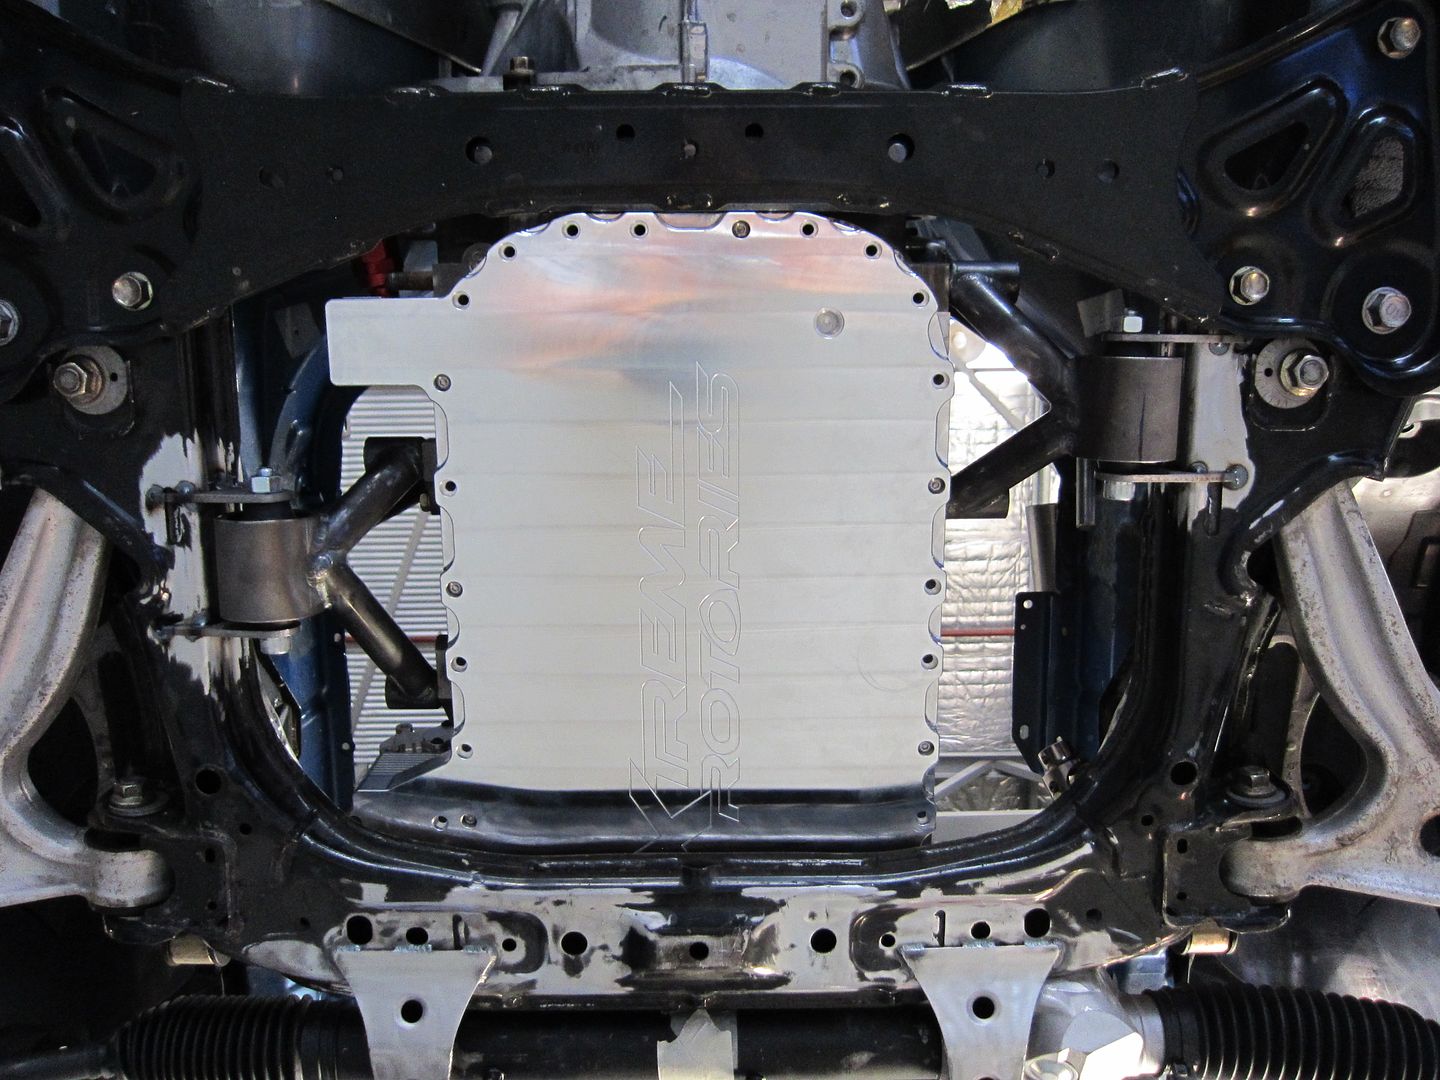
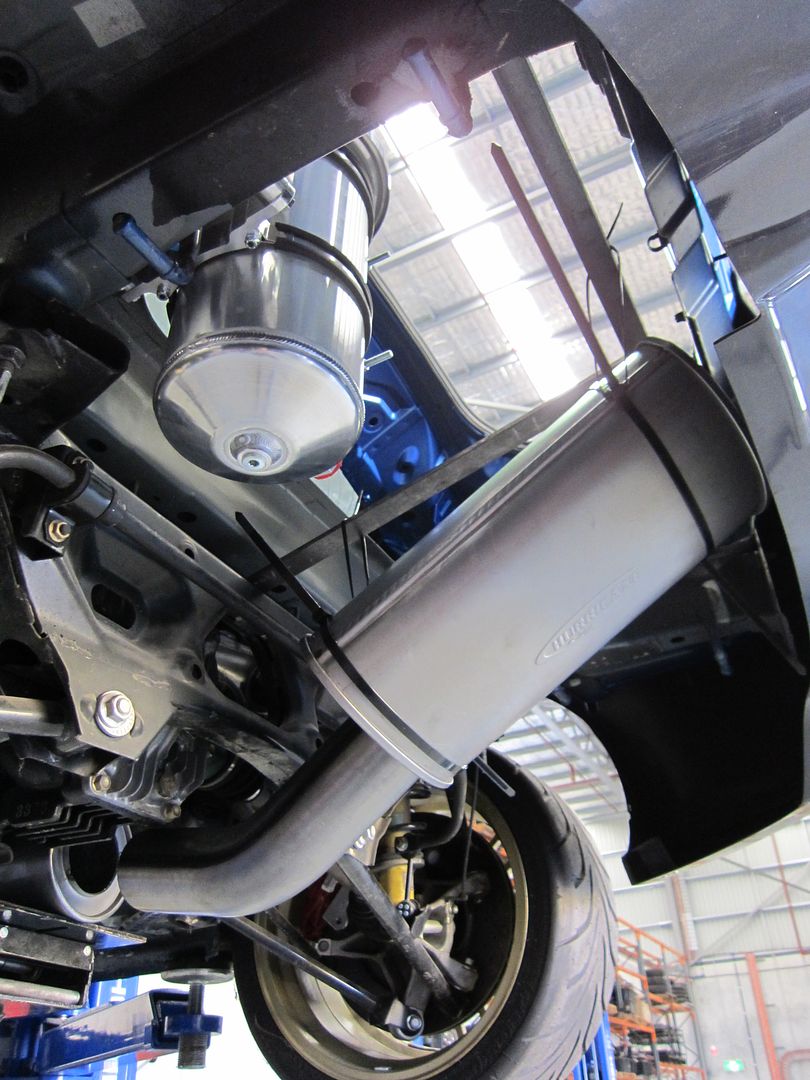
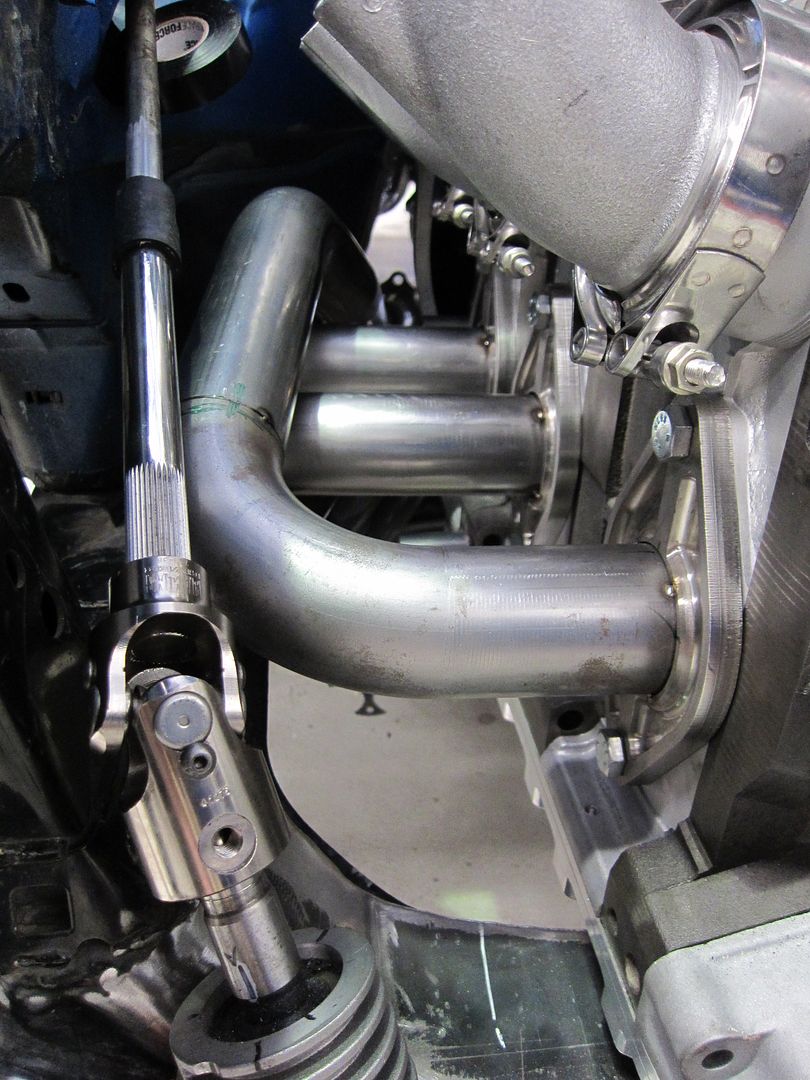
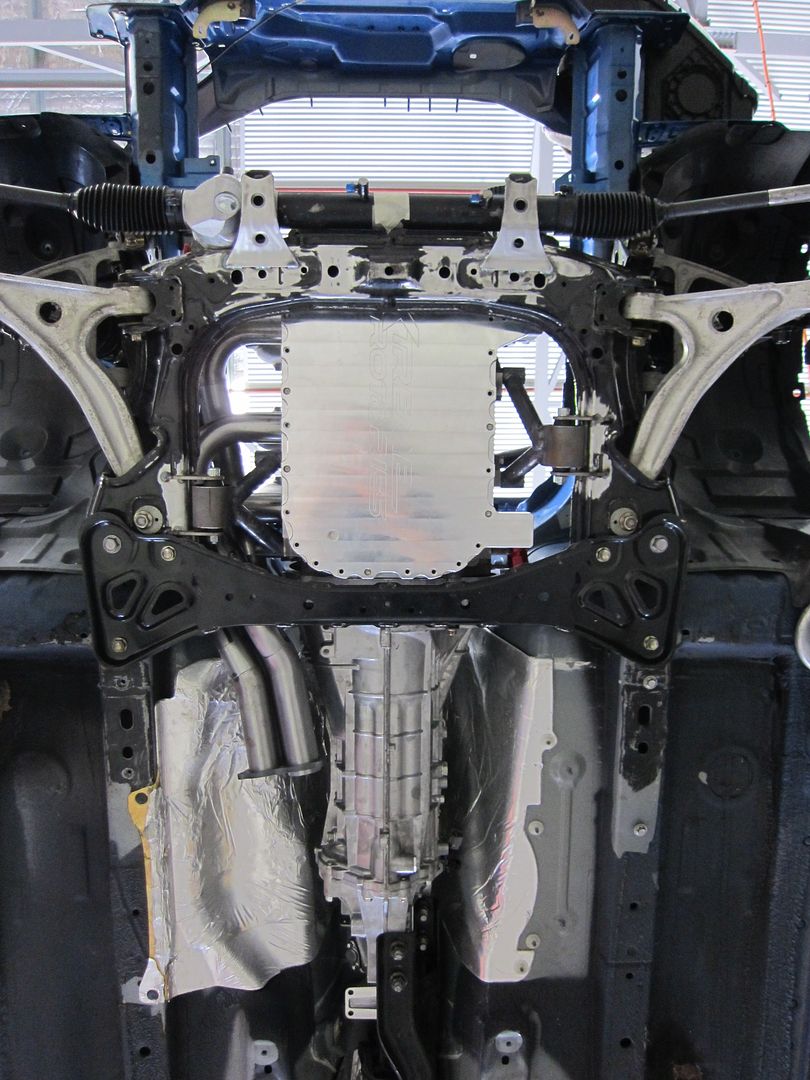
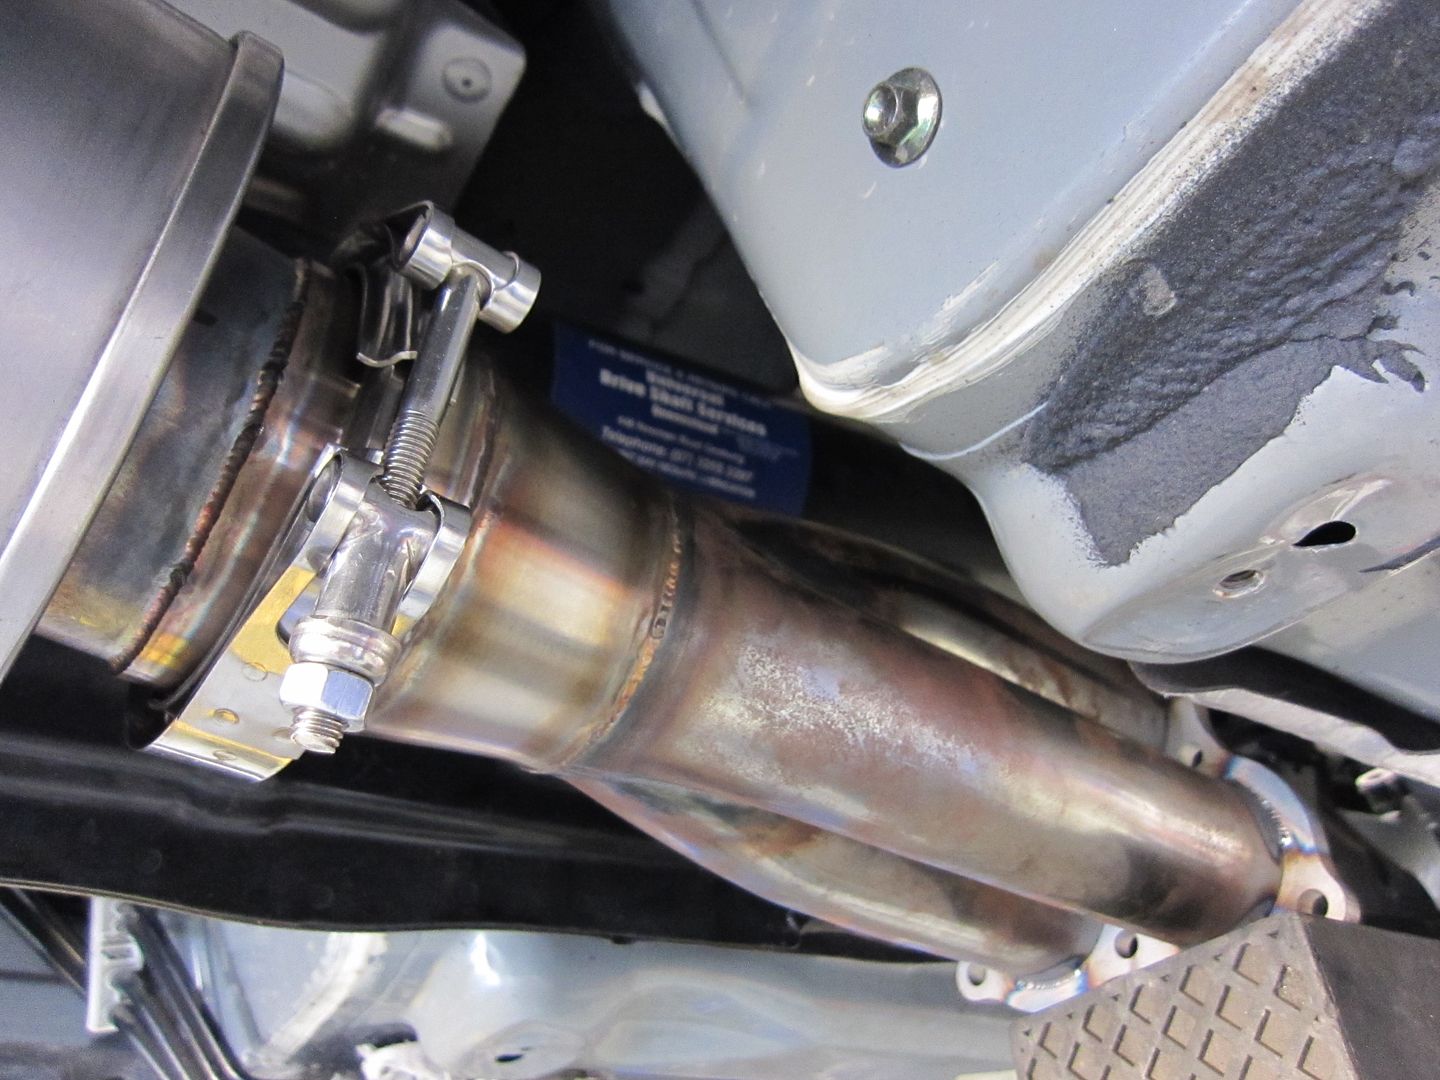
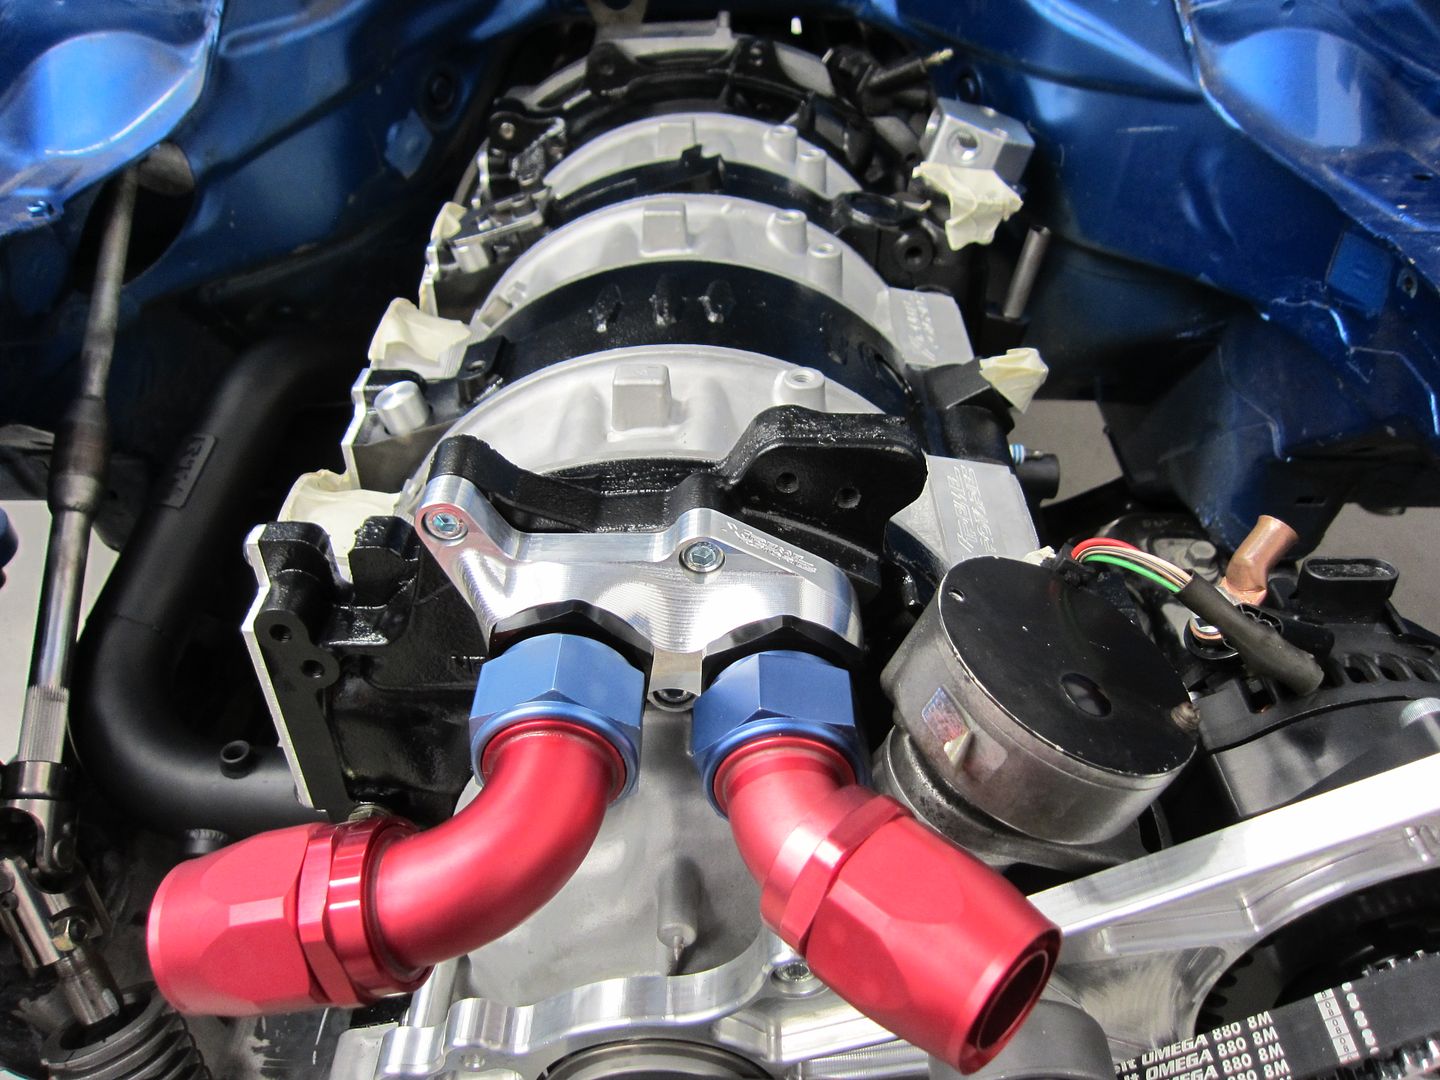
Some thought was also given to the rear section of the exhaust system. As previously mentioned the exhaust primary pipes (3 x 2″) collect into a single 3.5″ tube. I know I’m probably dreaming that I’ll ever get the exhaust noise quiet enough to have a run at Lakeside, but I collected the primary pipes just forward of the rear axle to allow for the largest off-the-shelf resonator I could easily get my hands on. From here the exhaust travels under the rear subframe on the factory route into the largest off-the-shelf muffler I could easily get my hands on. The rear muffler is positioned nice and high, angling up to assist with the rear aero design.

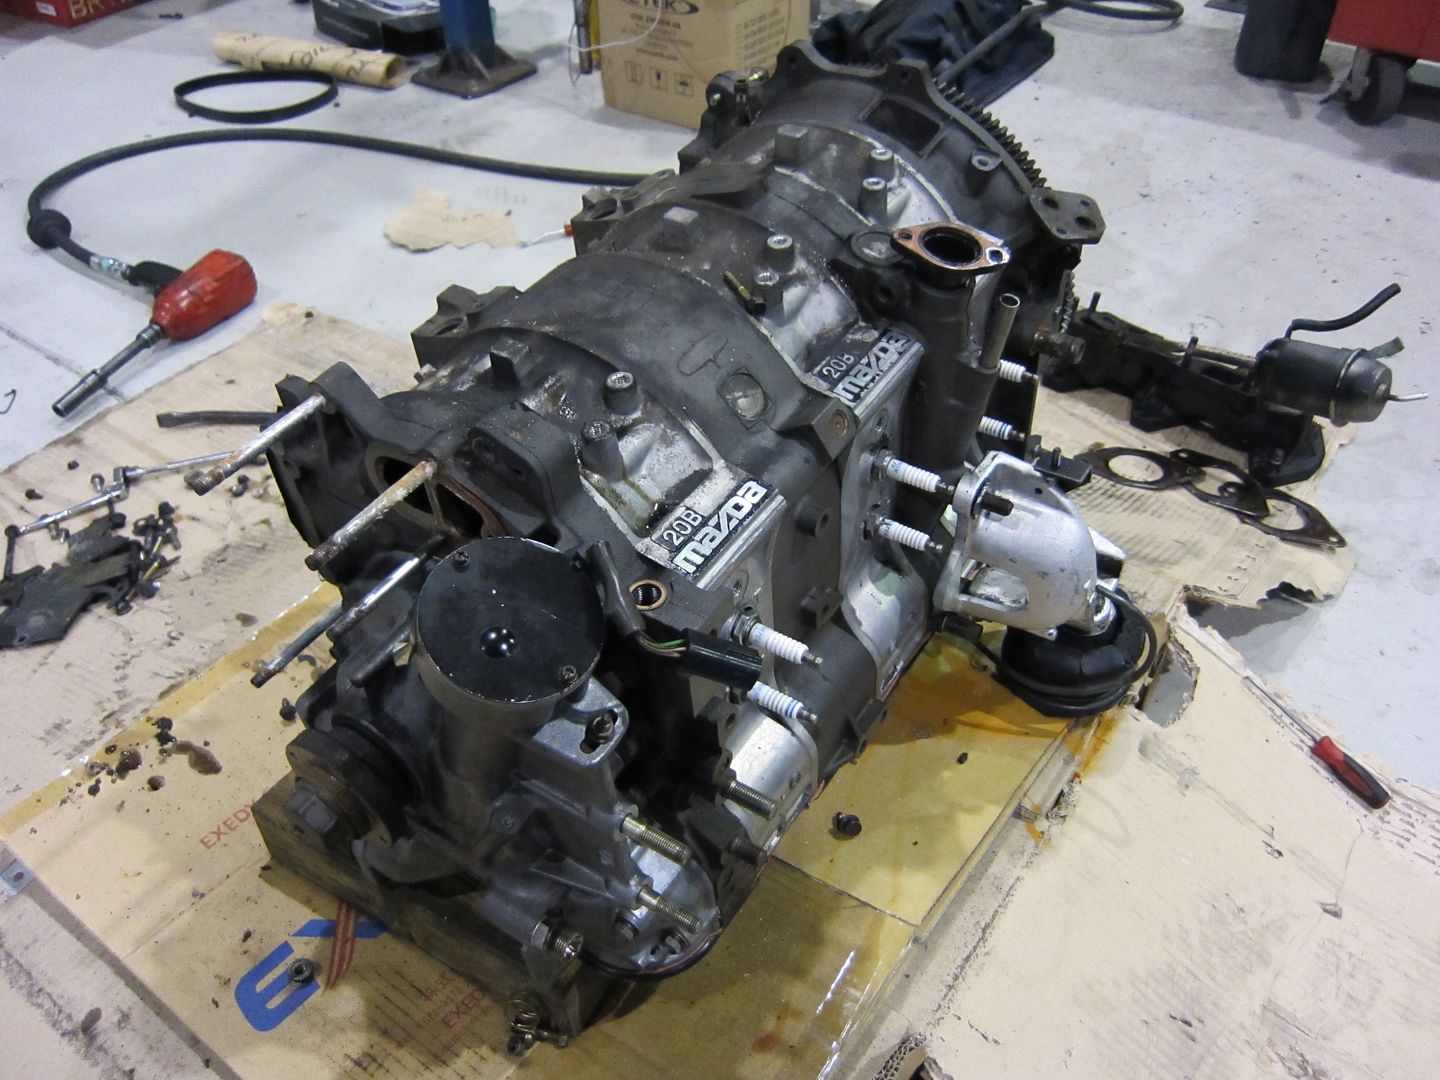
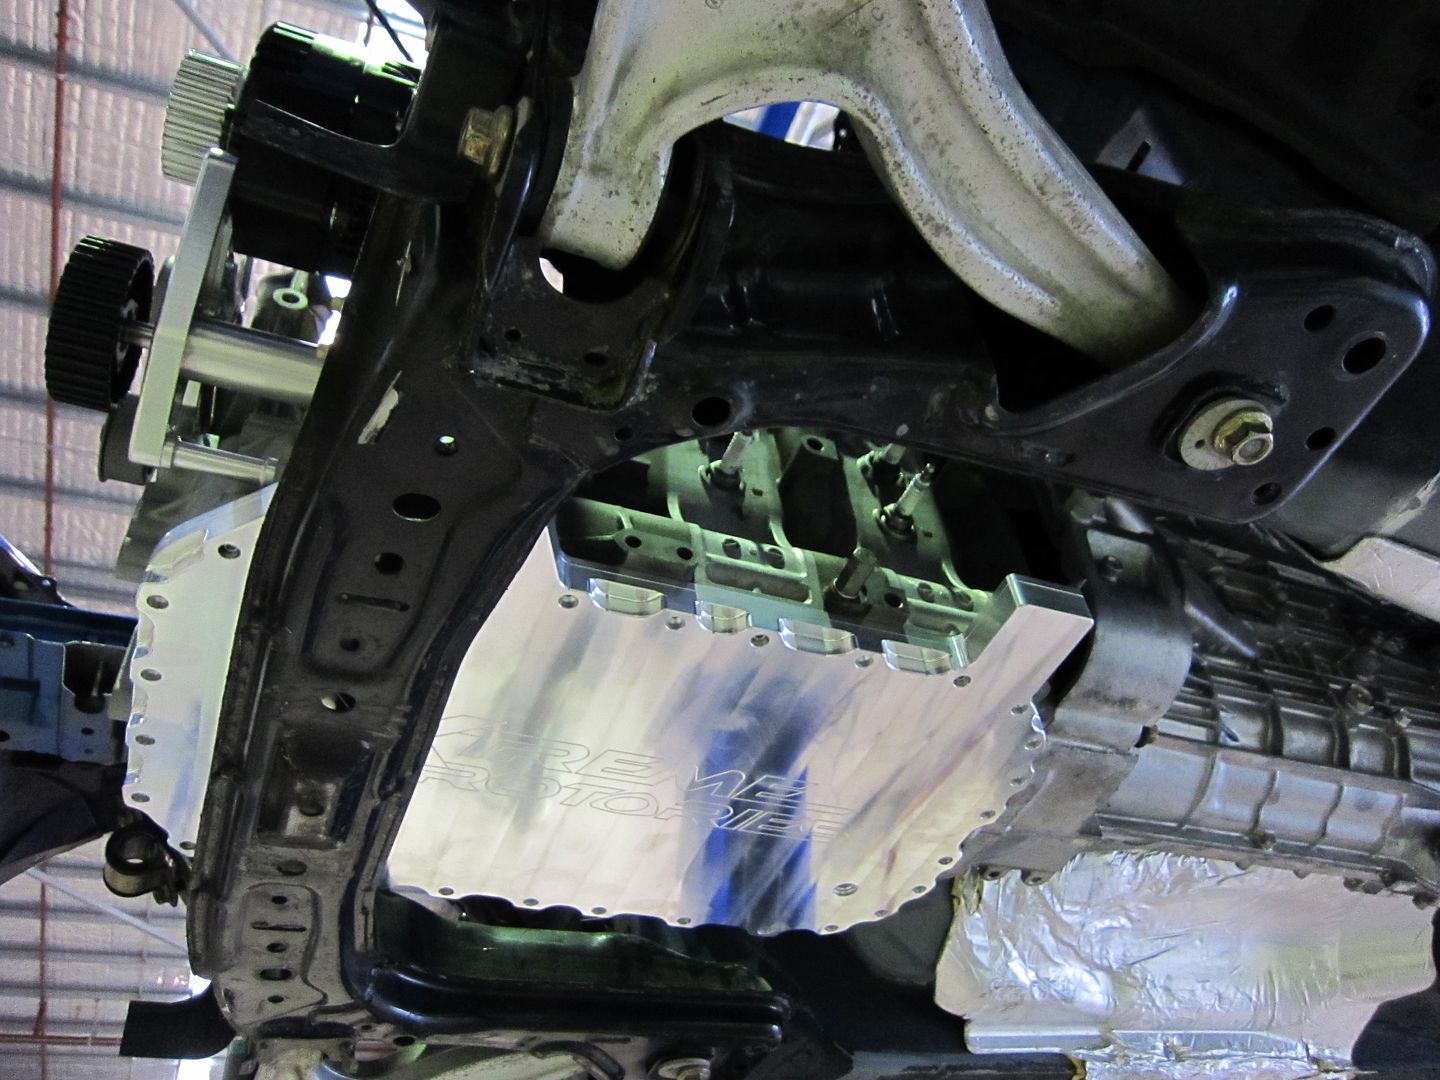
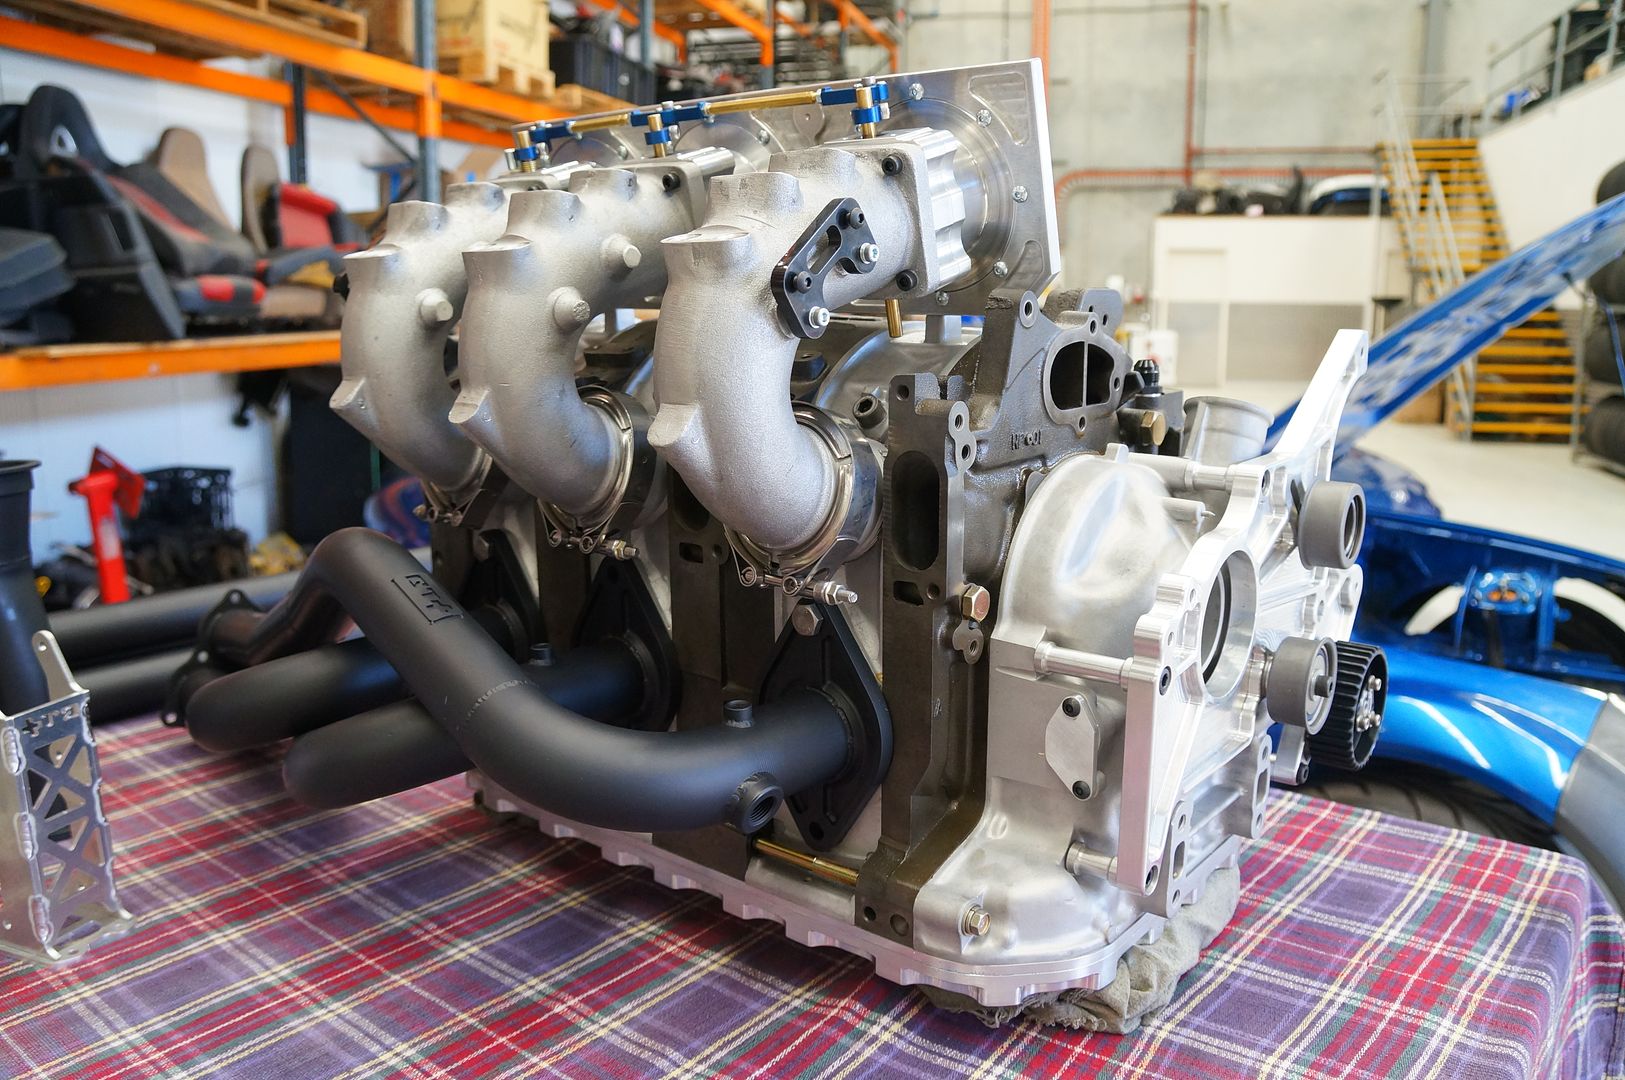
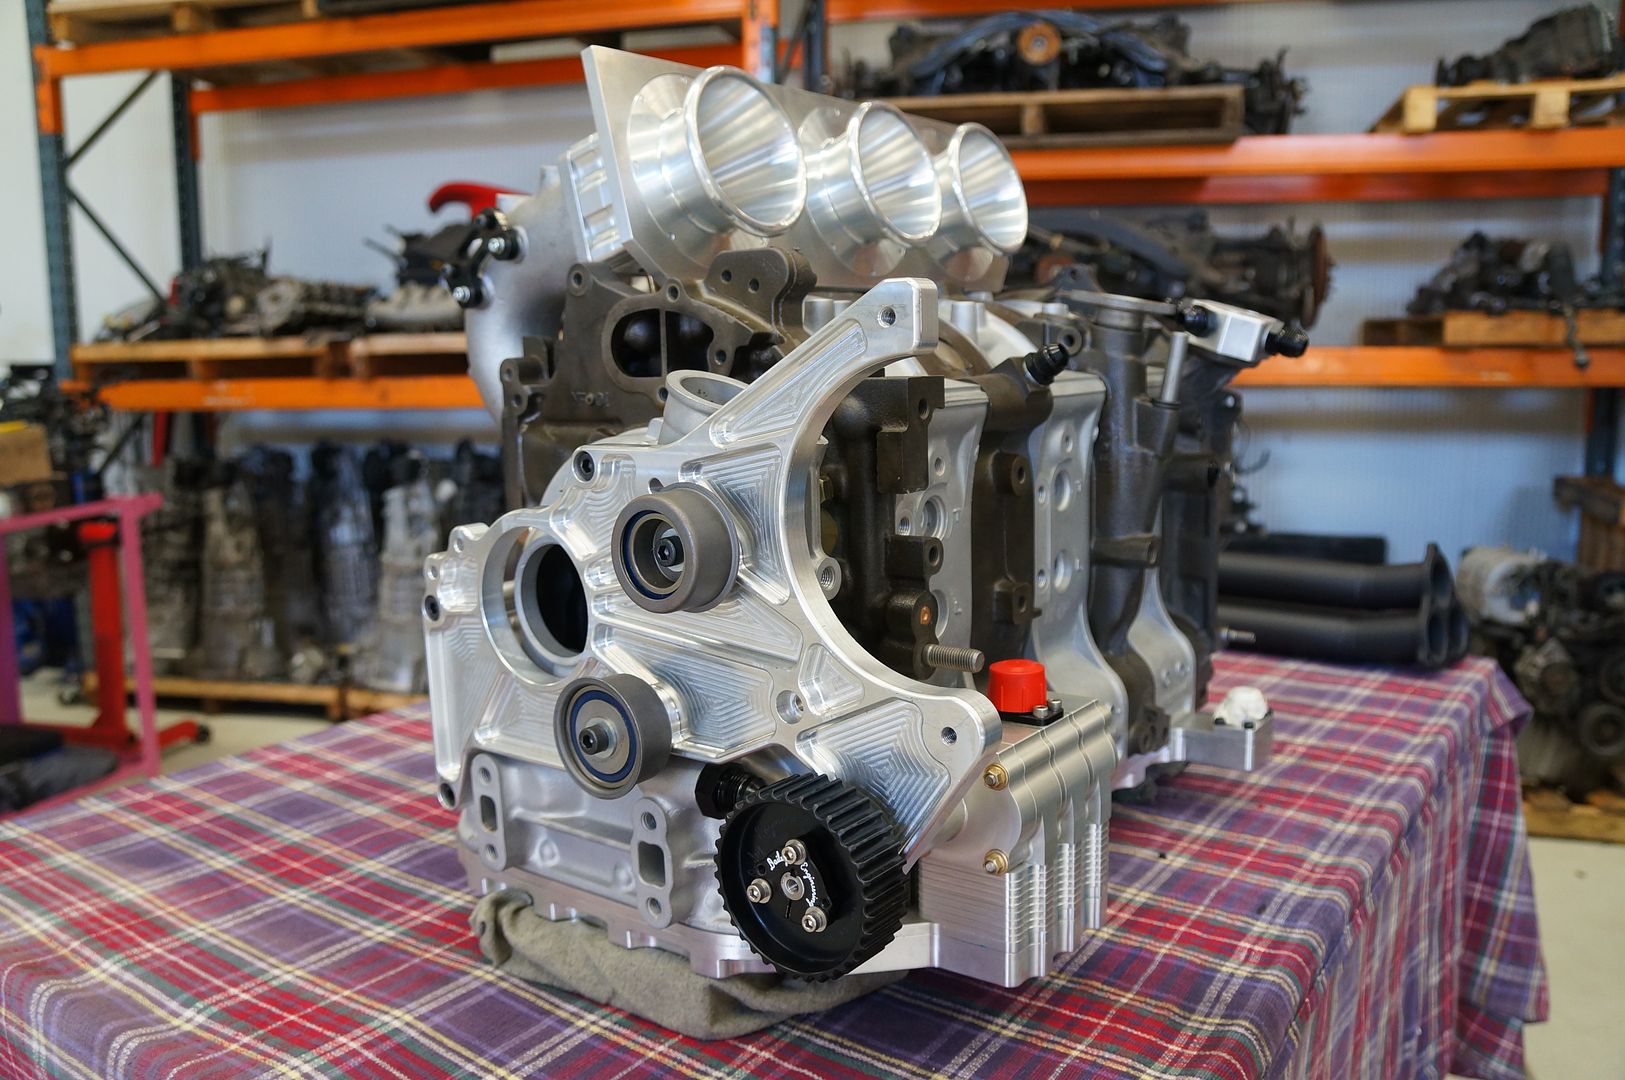
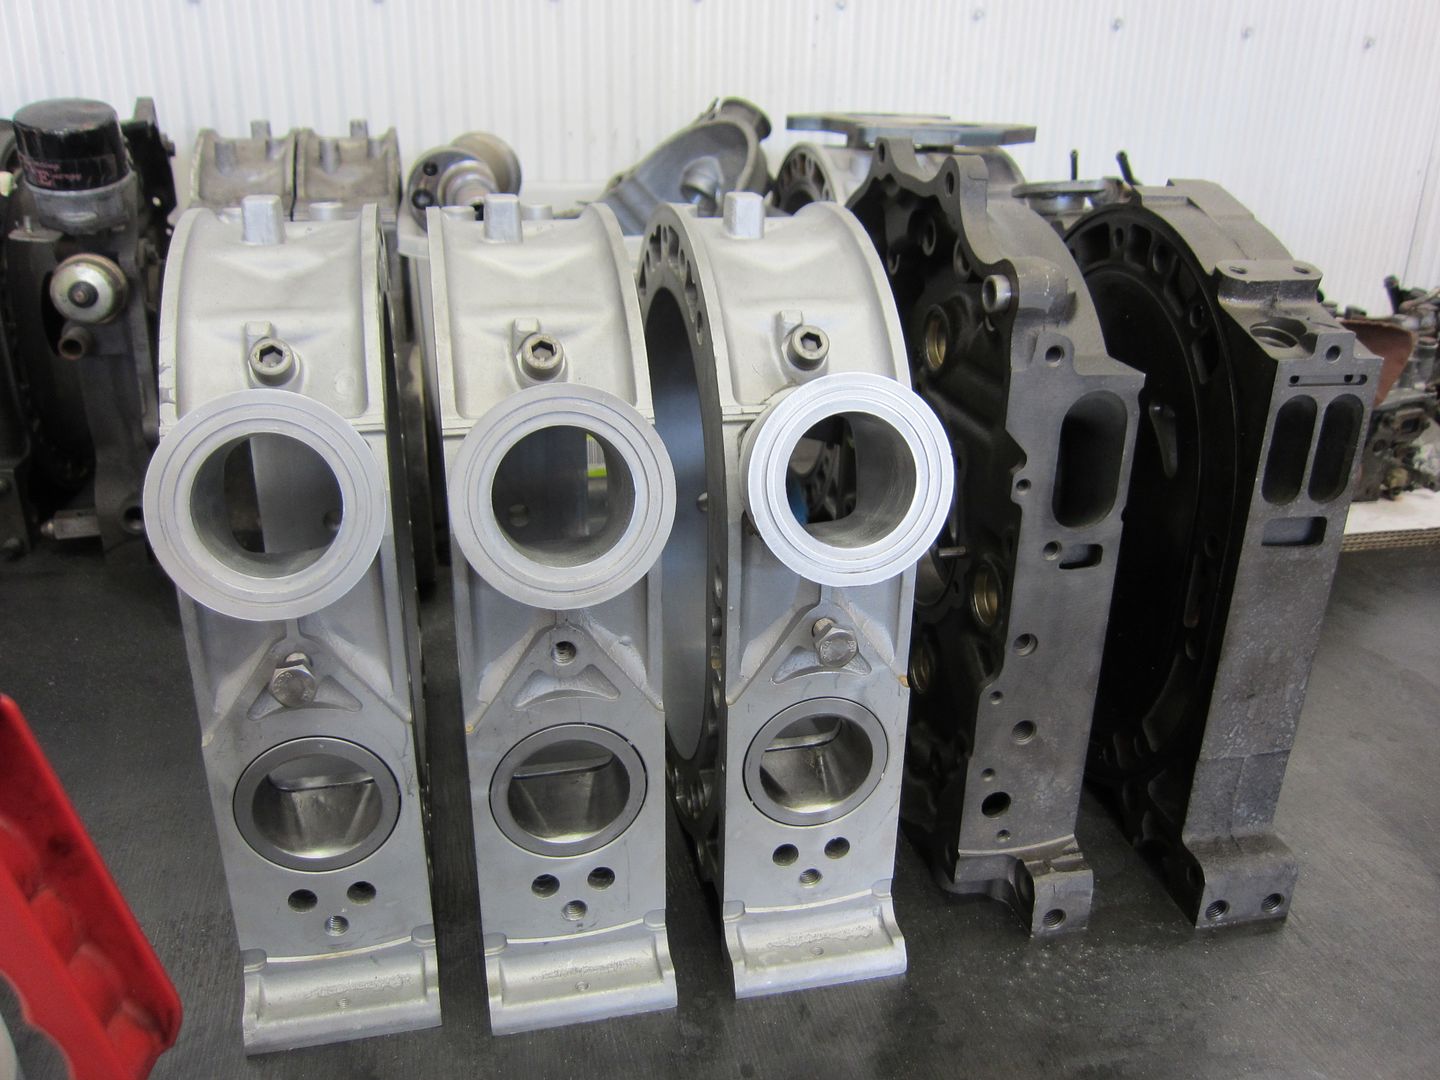
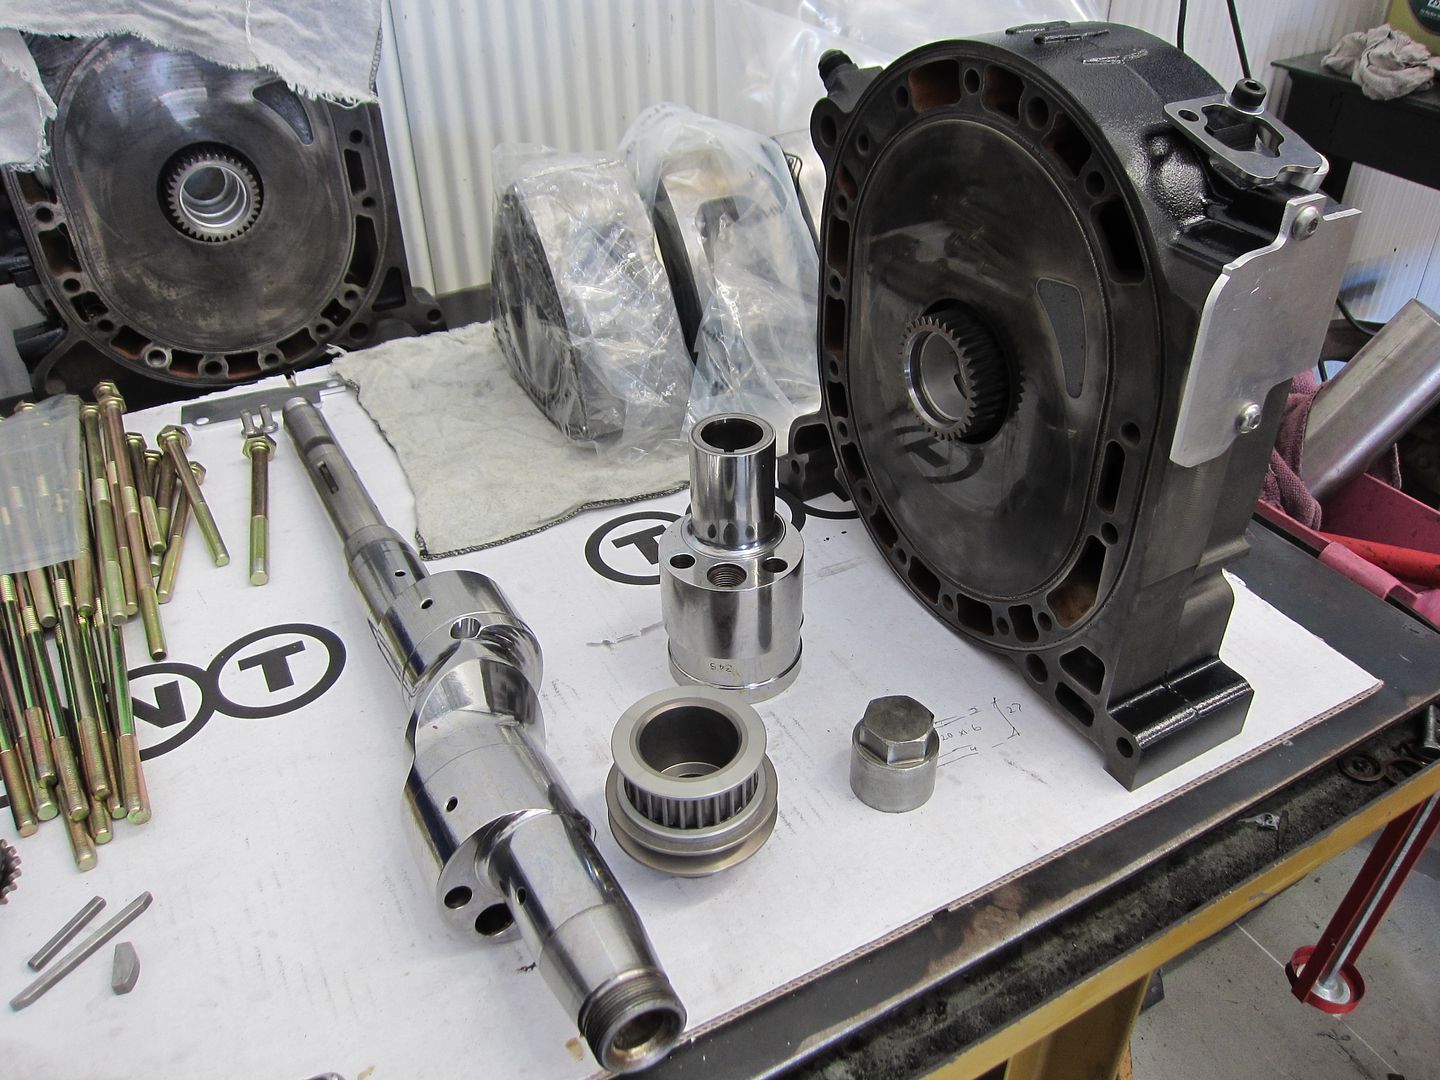
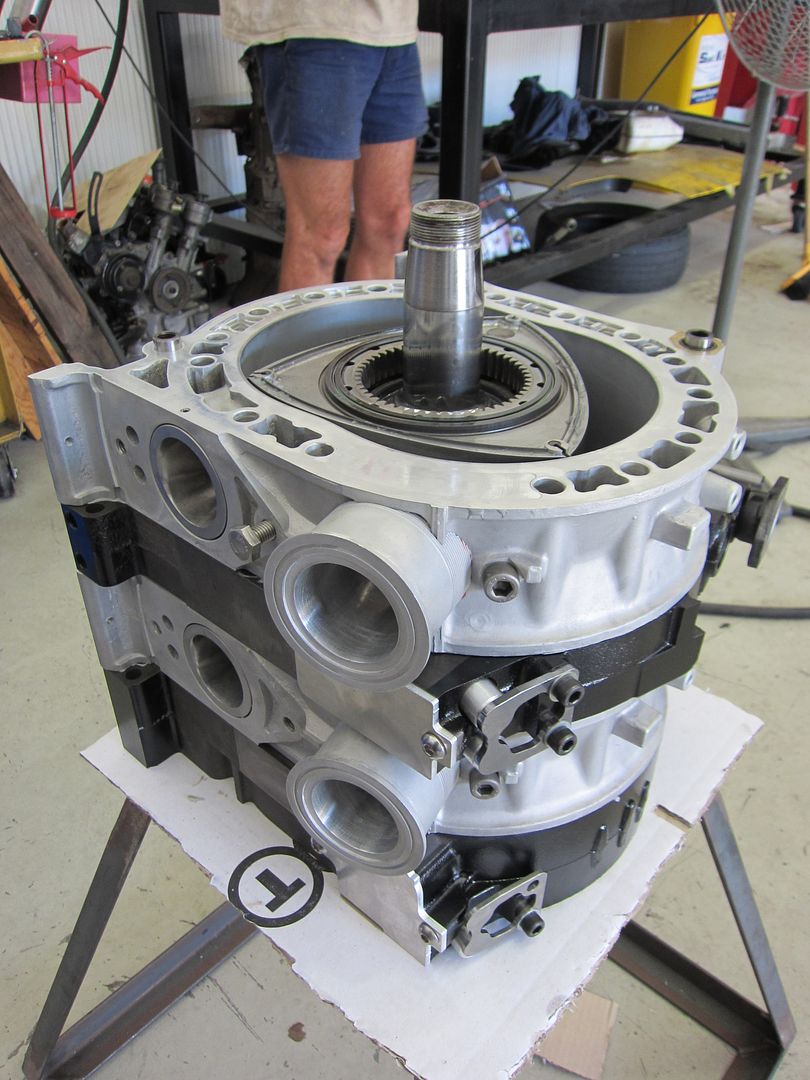
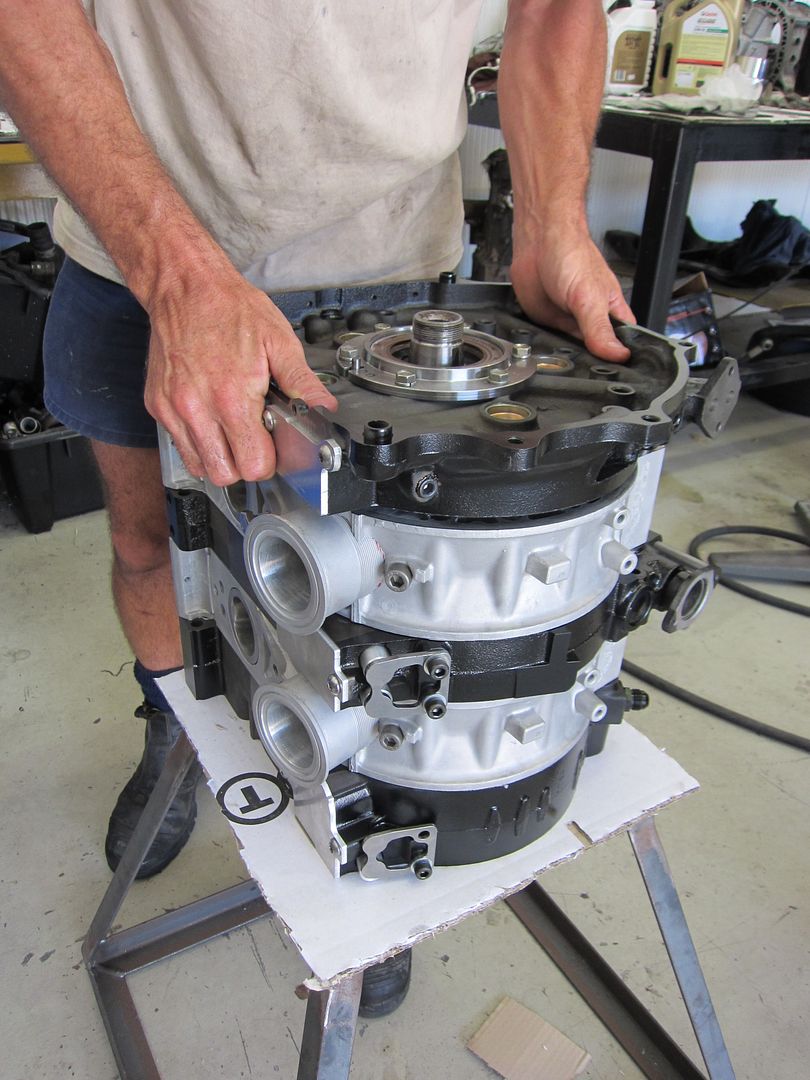
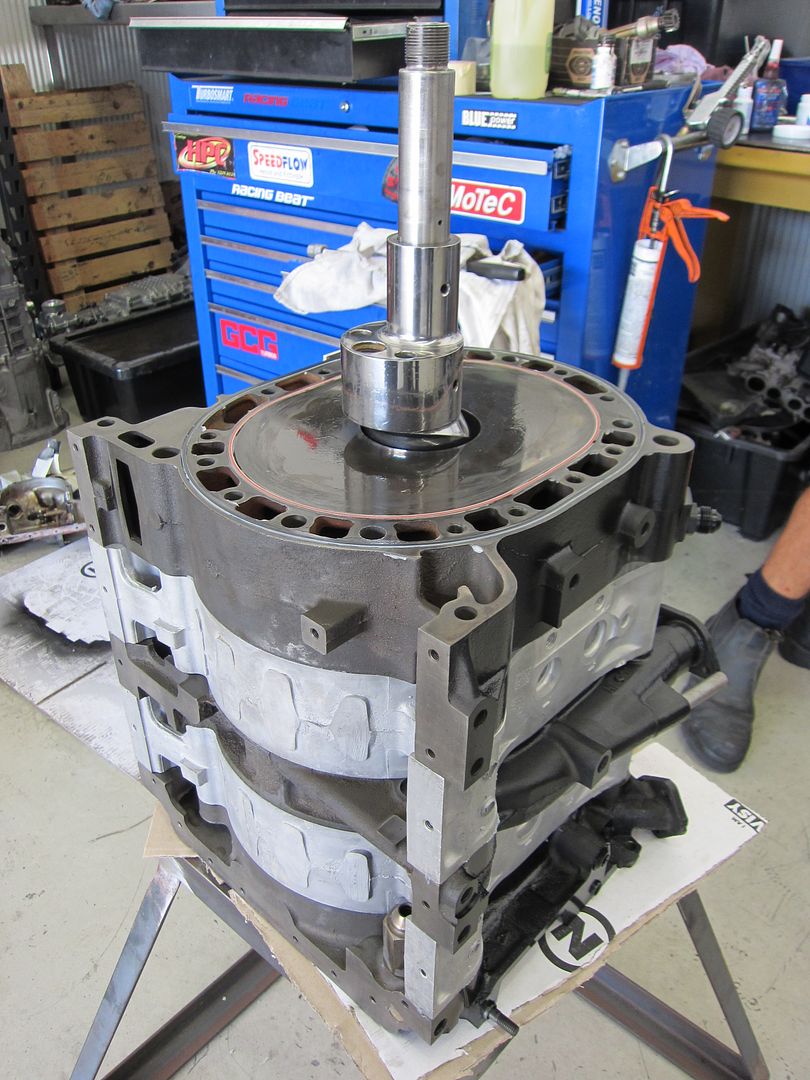
The PP (peripheral port) rotor housings from Rohan @ Extreme Rotaries had arrived!

Exhaust time!
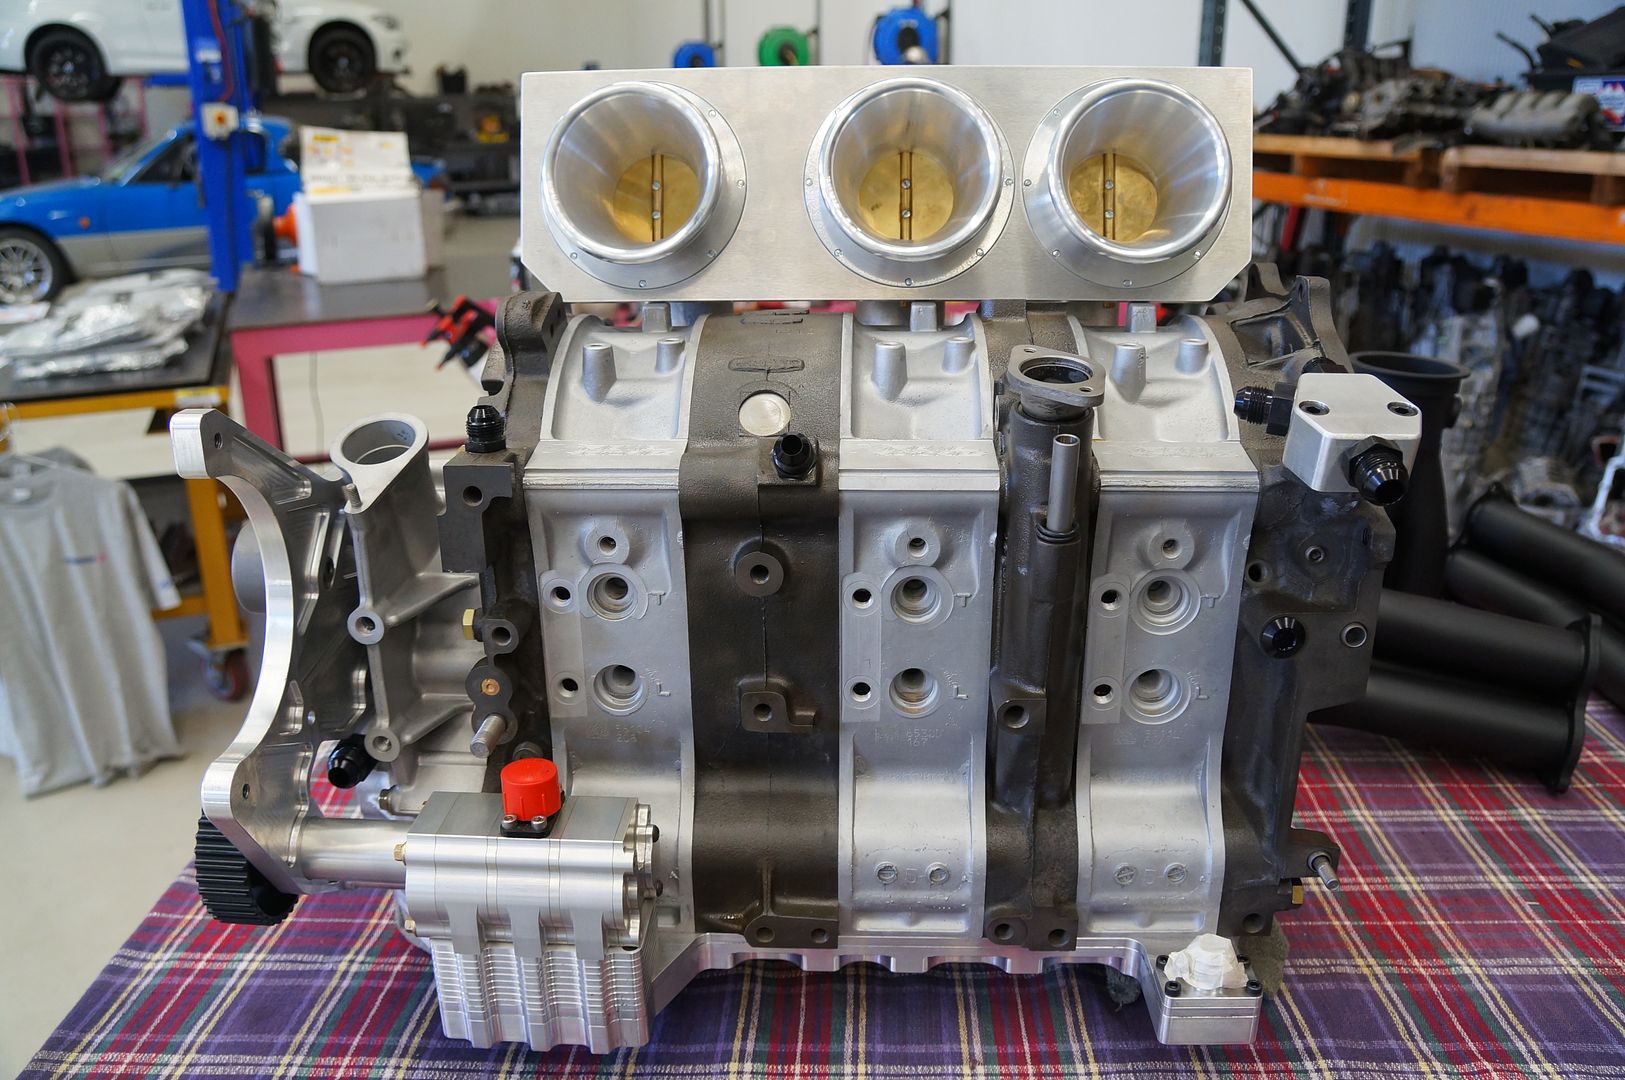
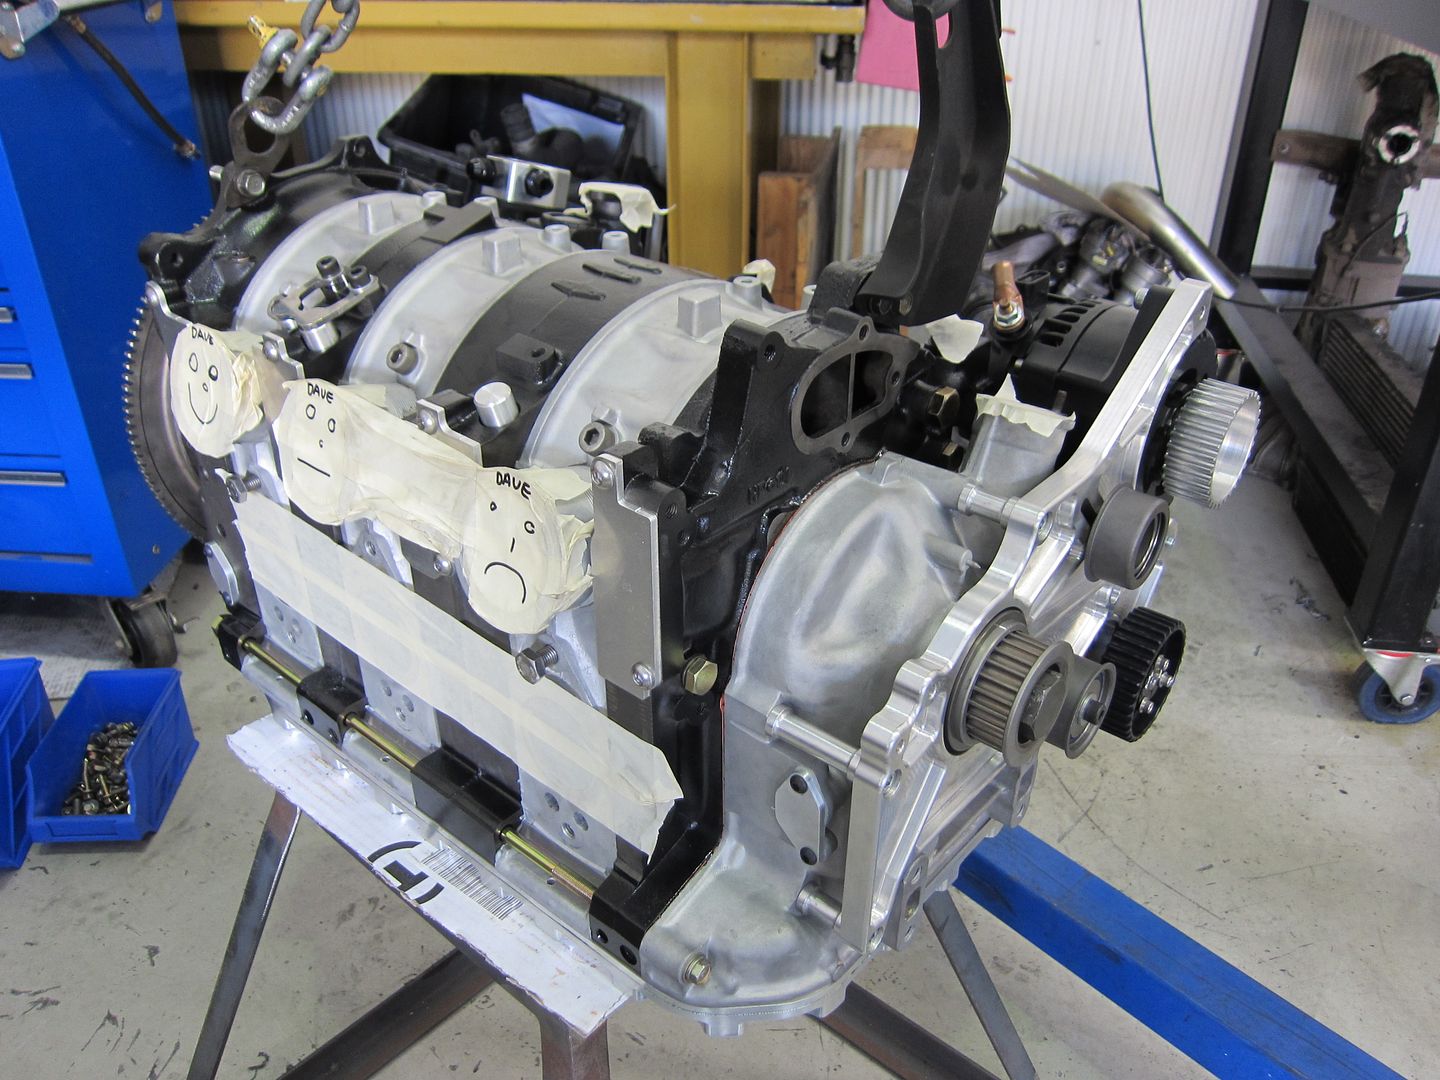
Starting with the headers….it is very important to have the primary pipes exit the engine in the longest possible length of straight pipe before bending and heading rearward. The NC certainly accommodated this requirement. Everything is just tacked together at this stage
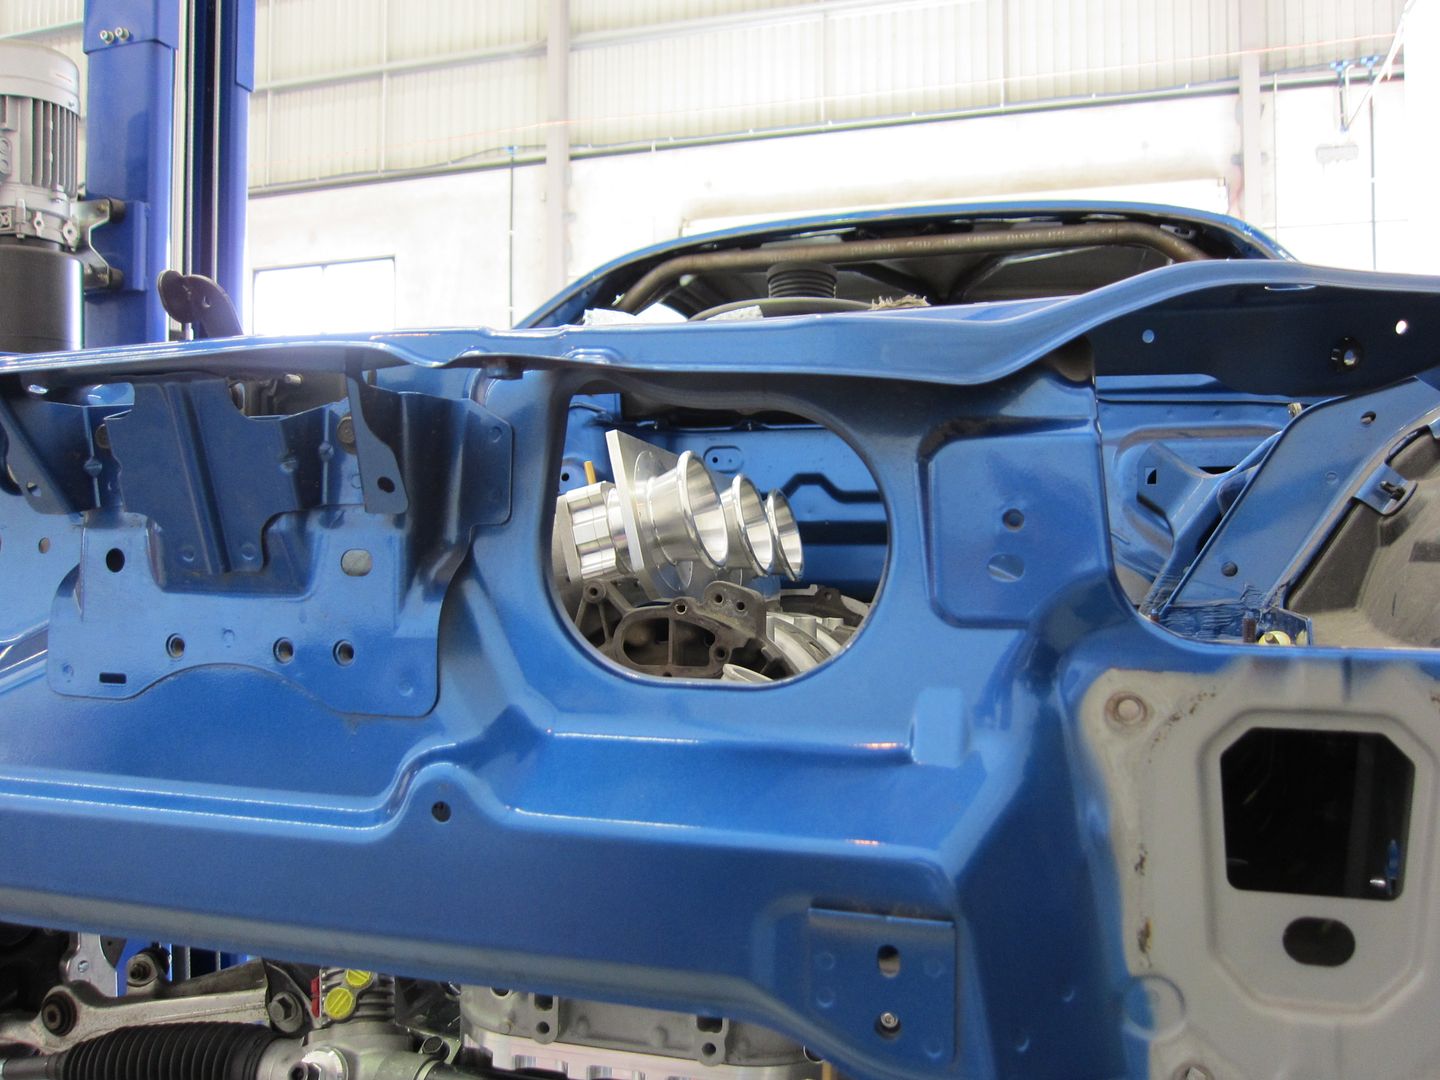
With the engine removed and the finishing work underway my focus moved onto the front end. Those of you who are familiar with WTAC cars, generally the Pro and some Open class cars use a tubular front end. The NC is really quite a good front end (chassis wise)…what I mean is that it is quite light but also structural. So my intent was to maintain as much of the OEM front as possible but also achieve what I need to with regards to ducting for the heat exchangers (radiator and oil cooler) and also adding a suitable structure to support the front aero package (which is still just a concept in my head at this point).
The first thing that was done was unbolting all front end components that can be easily removed. ie. guards and front bar reinforcement etc…
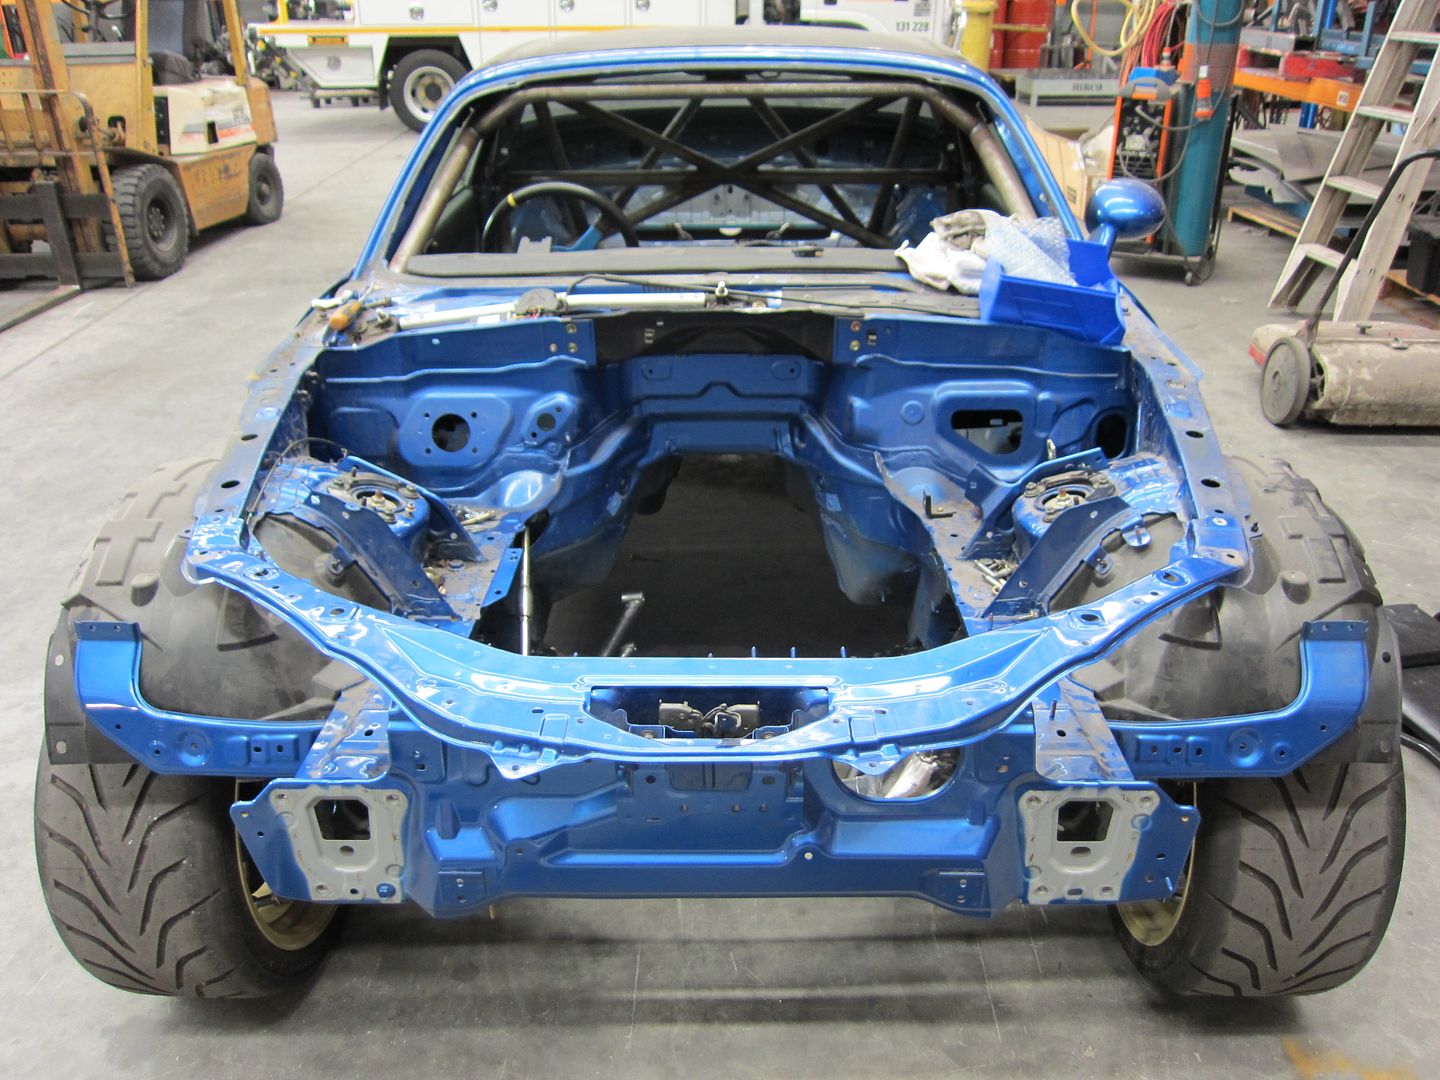

….and with the front bar reinforcement bolted back on. It certainly has increased the amount of useable space forward of the engine.
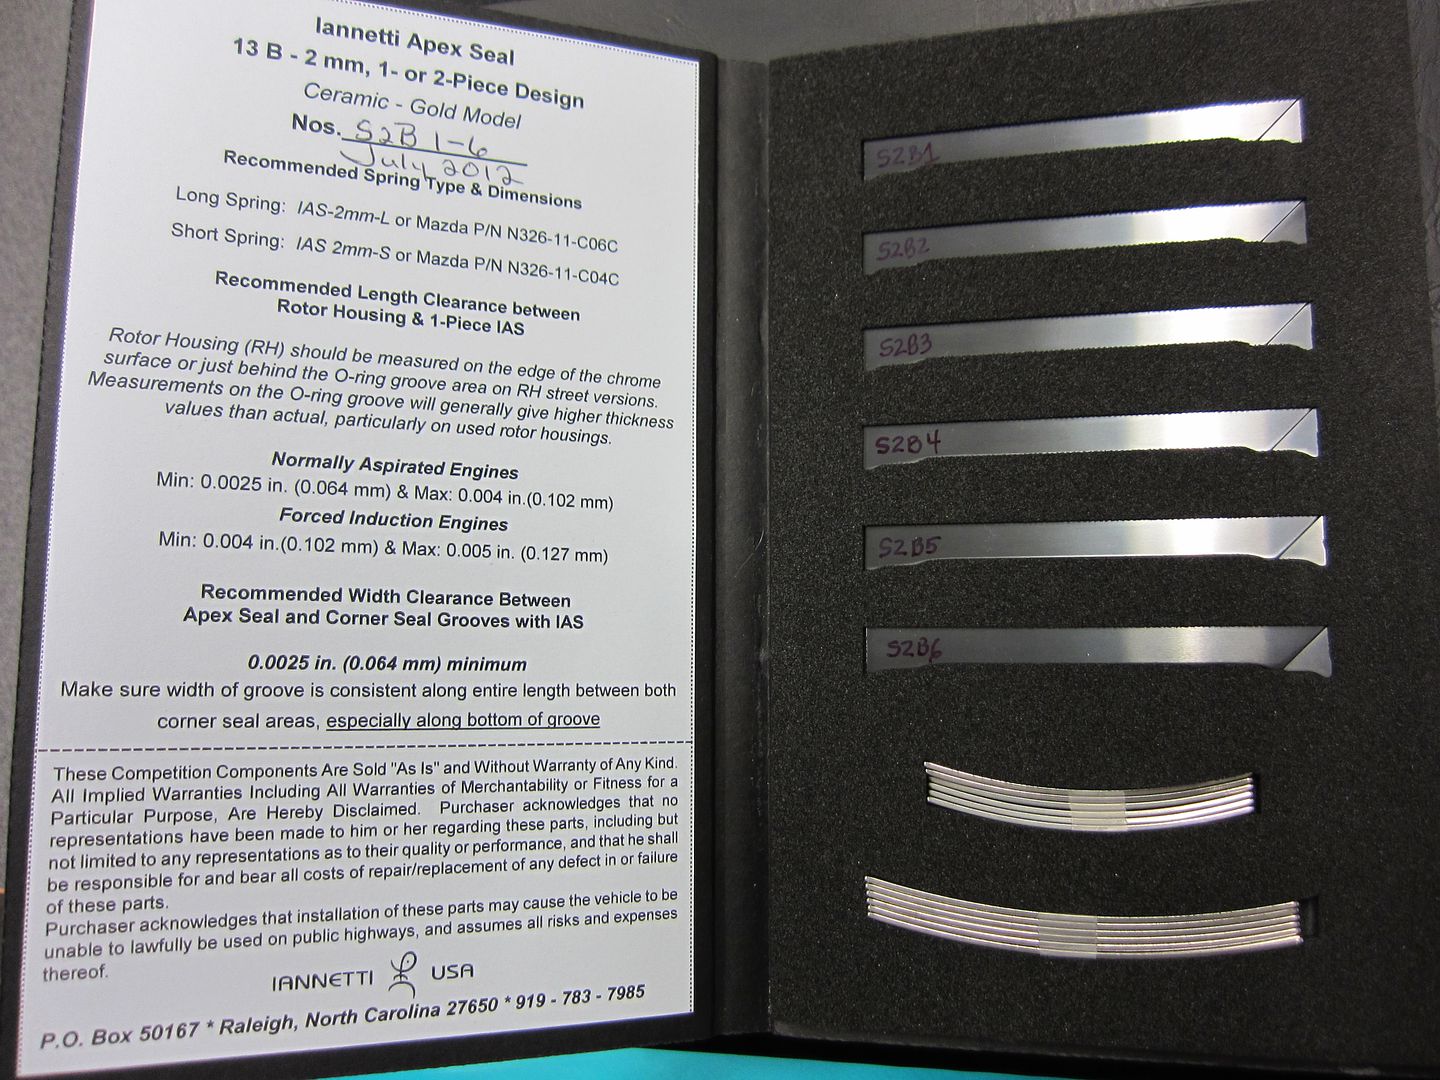

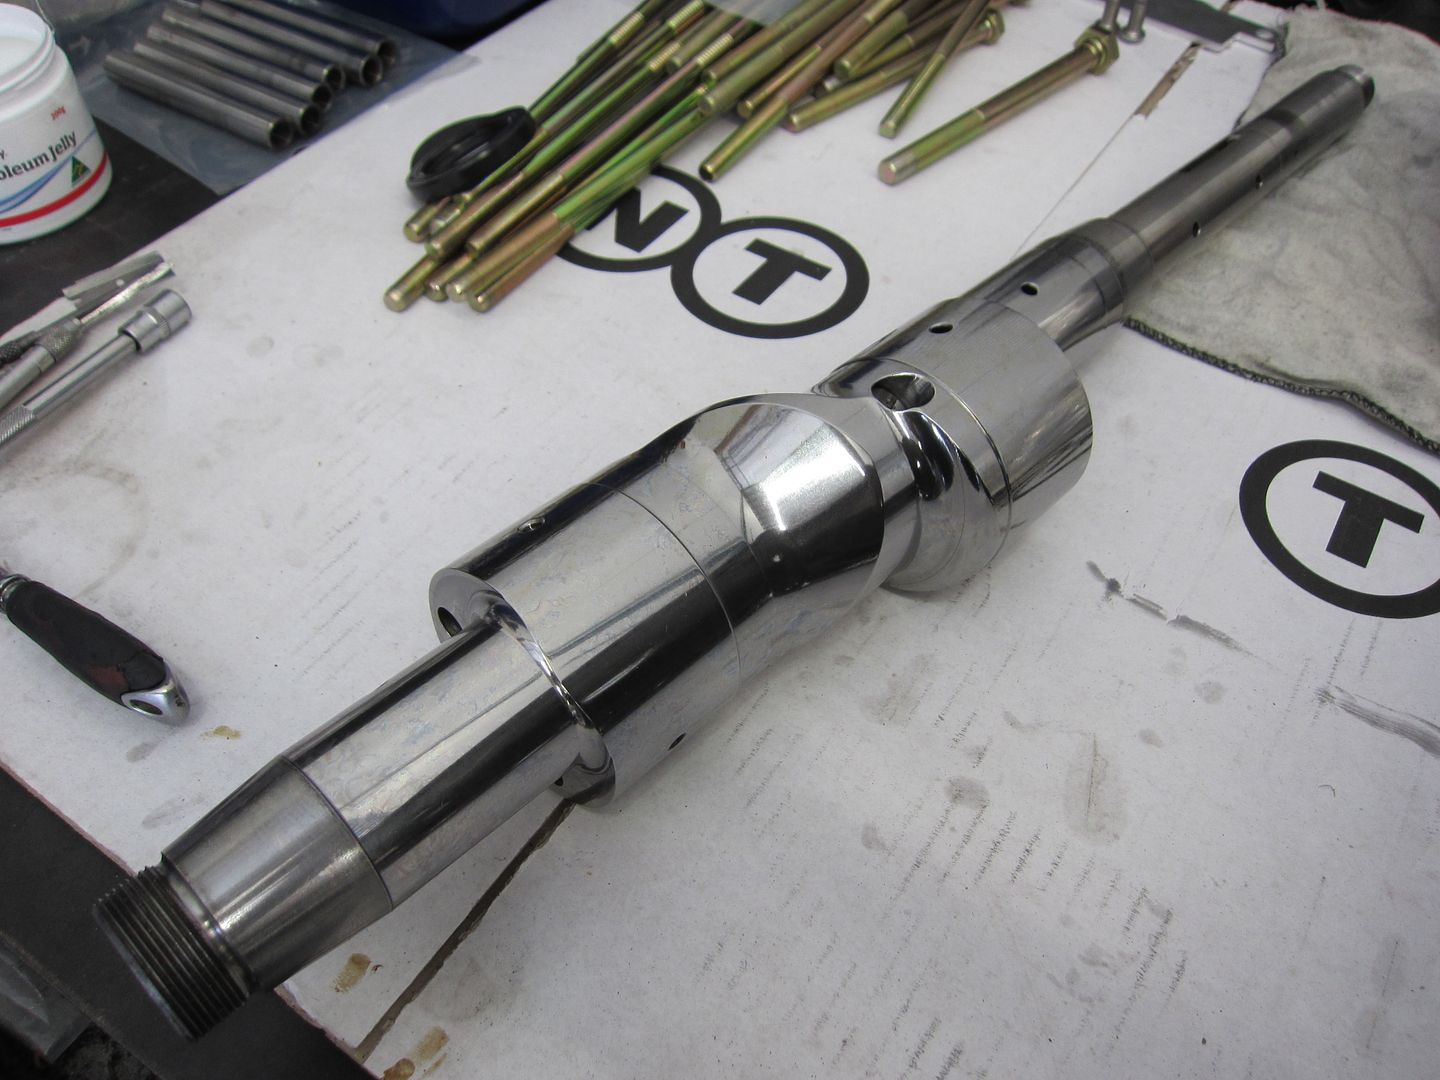
Now this was like buying jewellery!
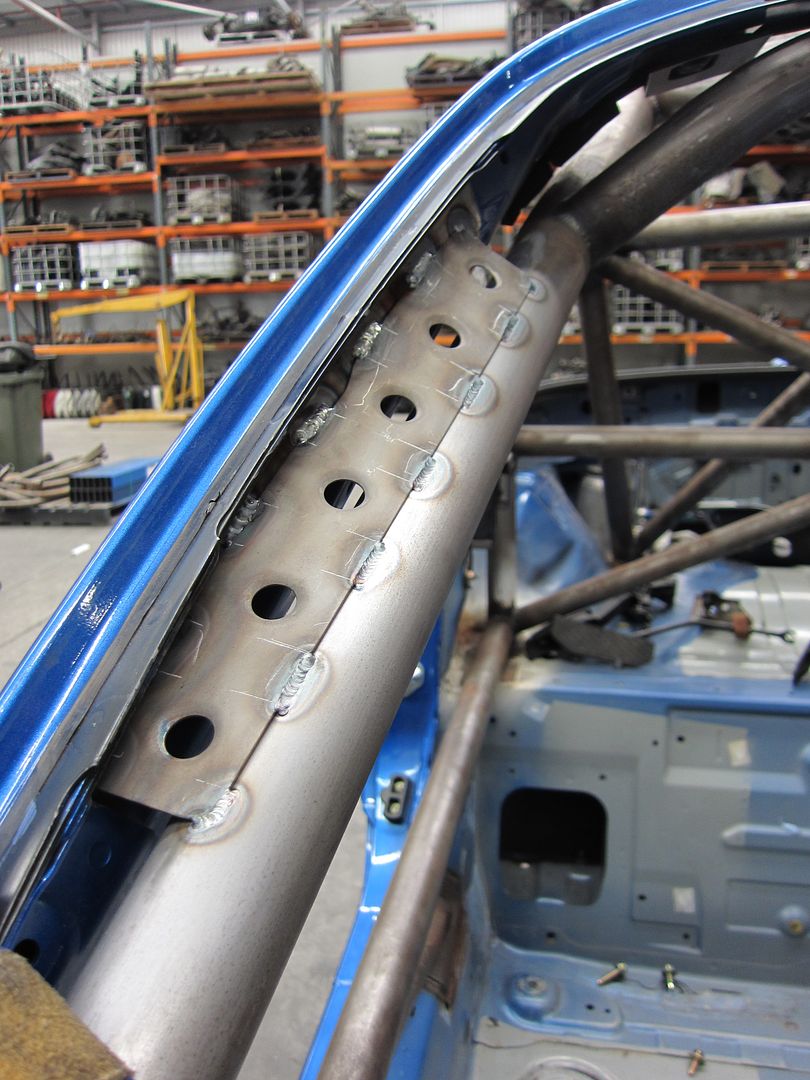
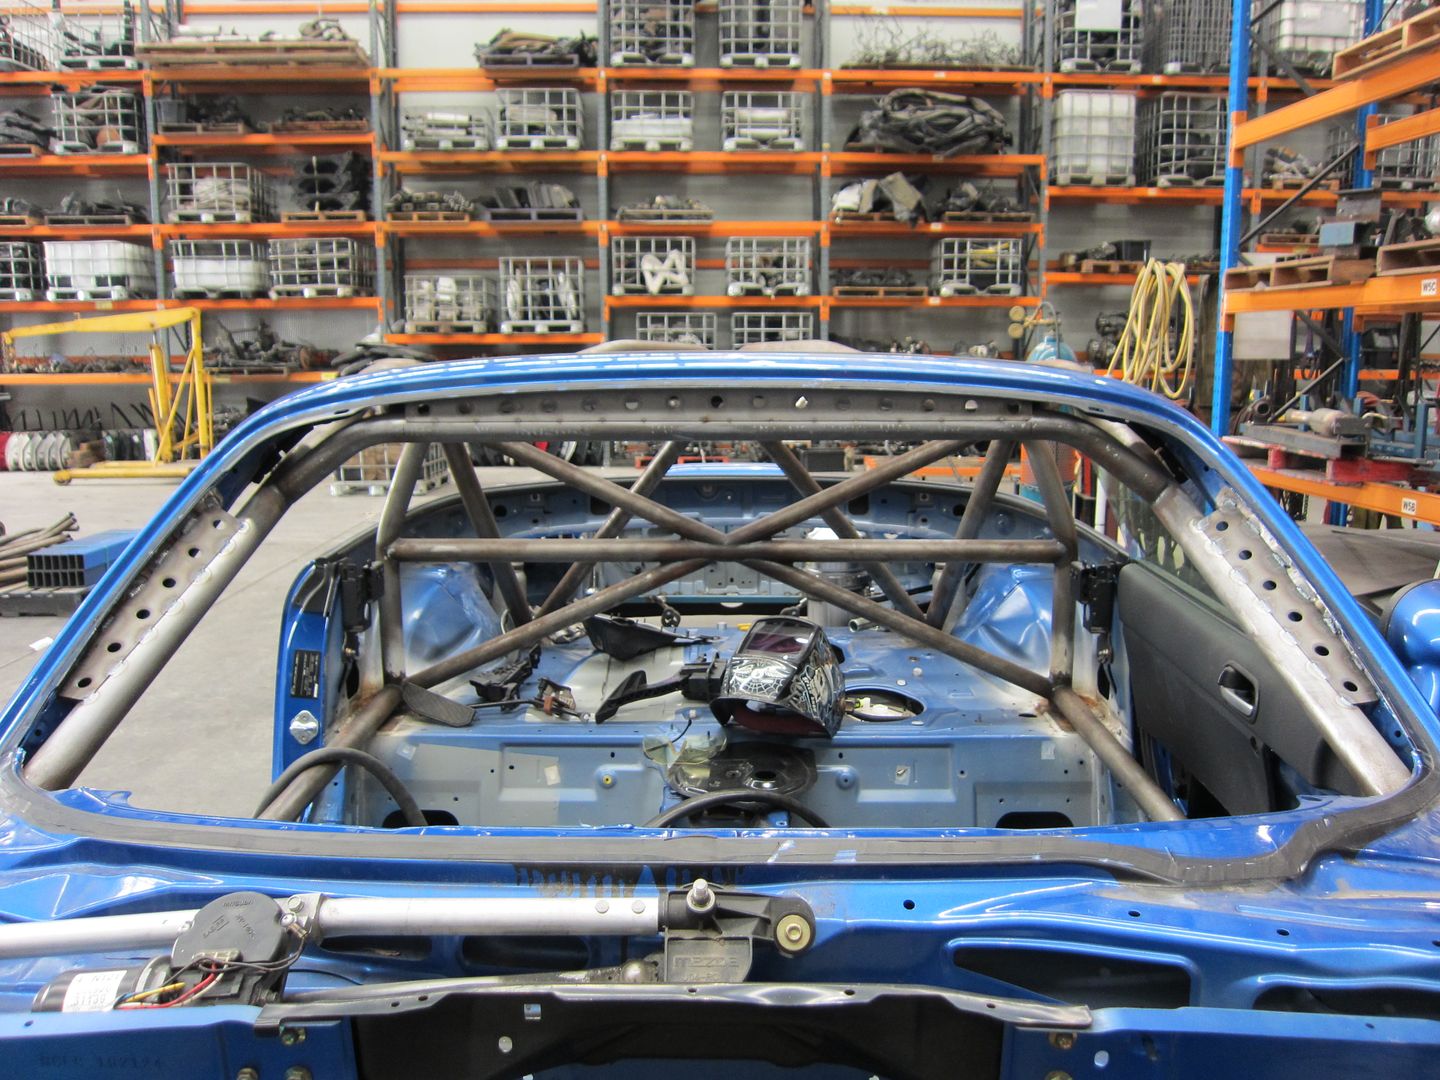
The roll cage received some more attention with attachments to the windscreen (A-pillars) frame being added.
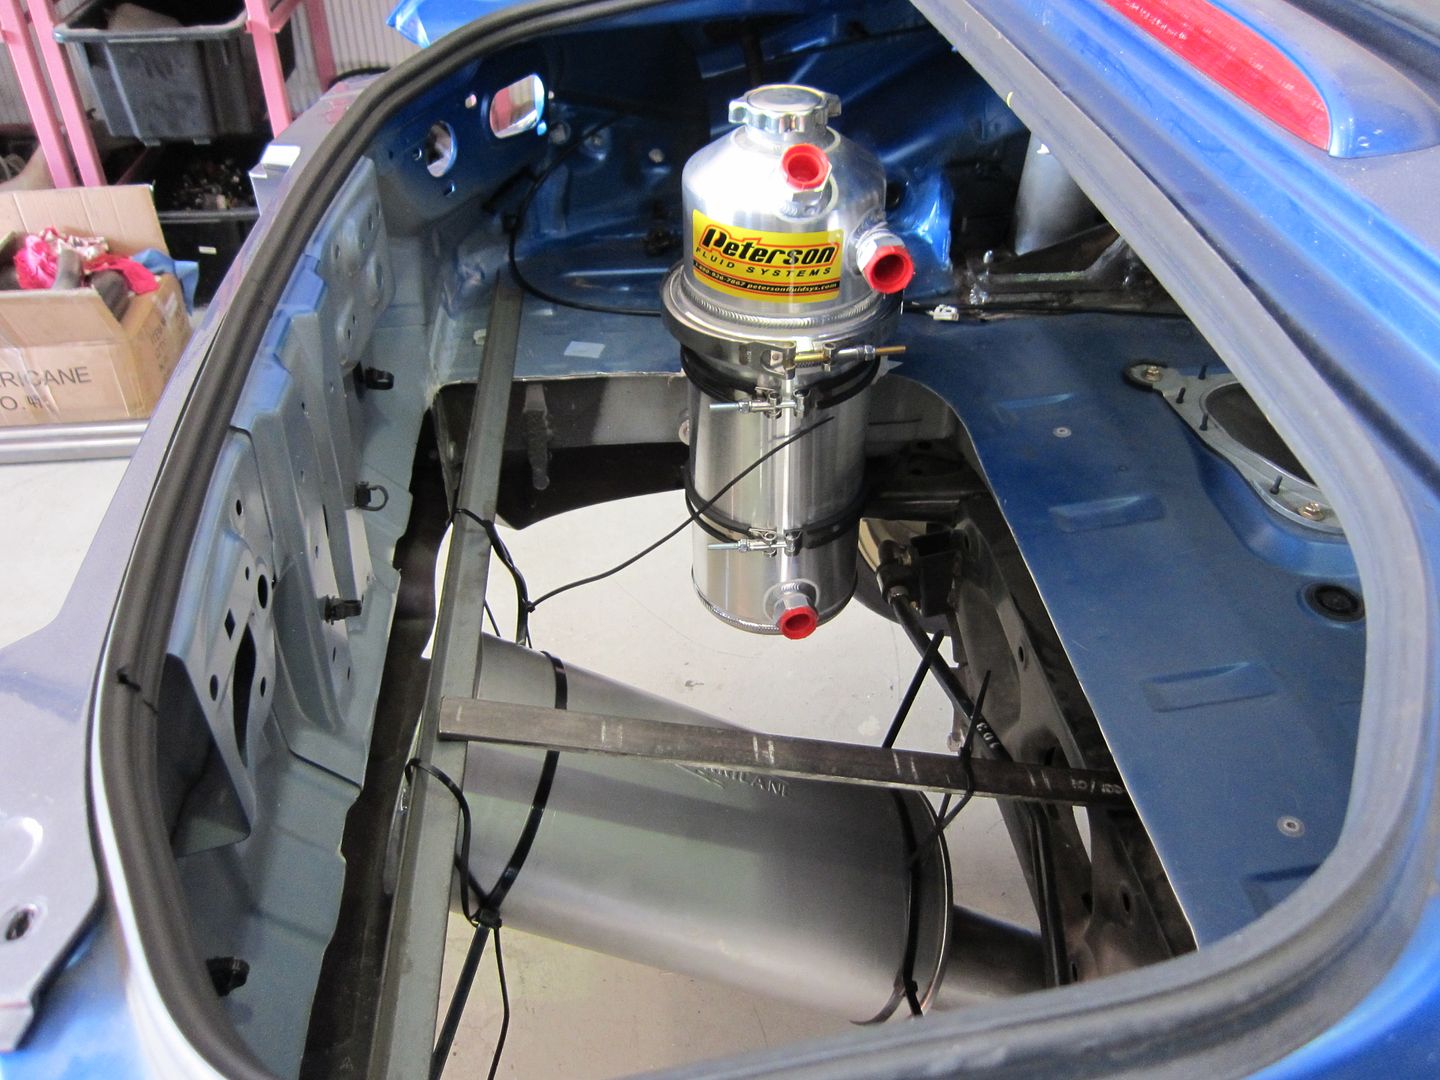
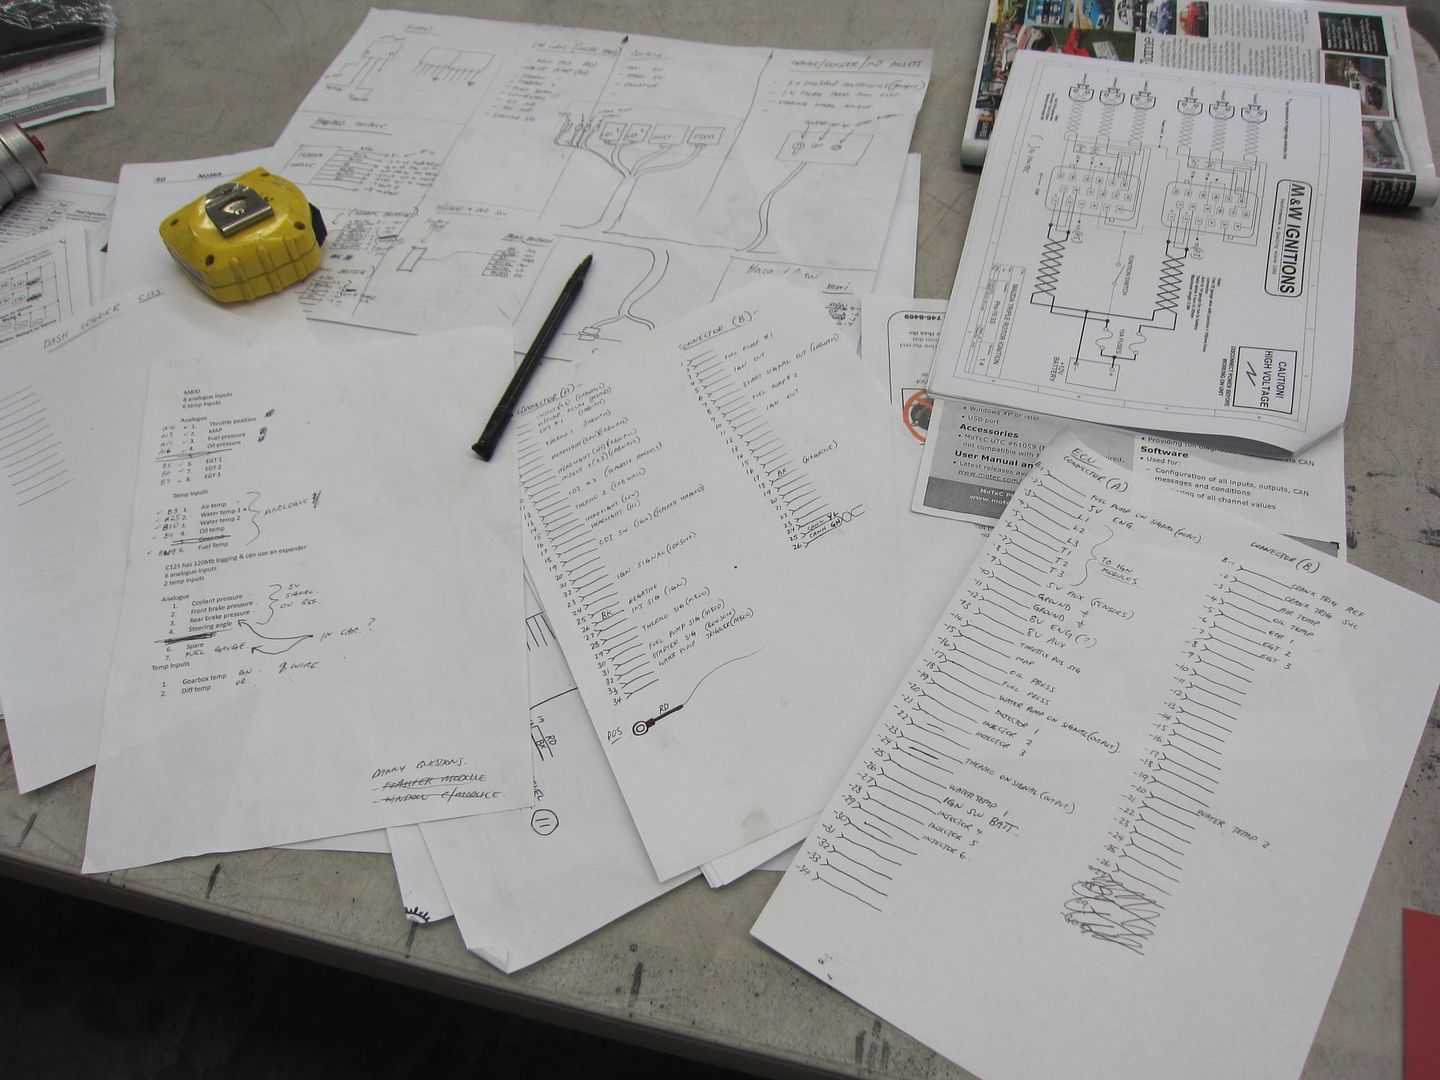
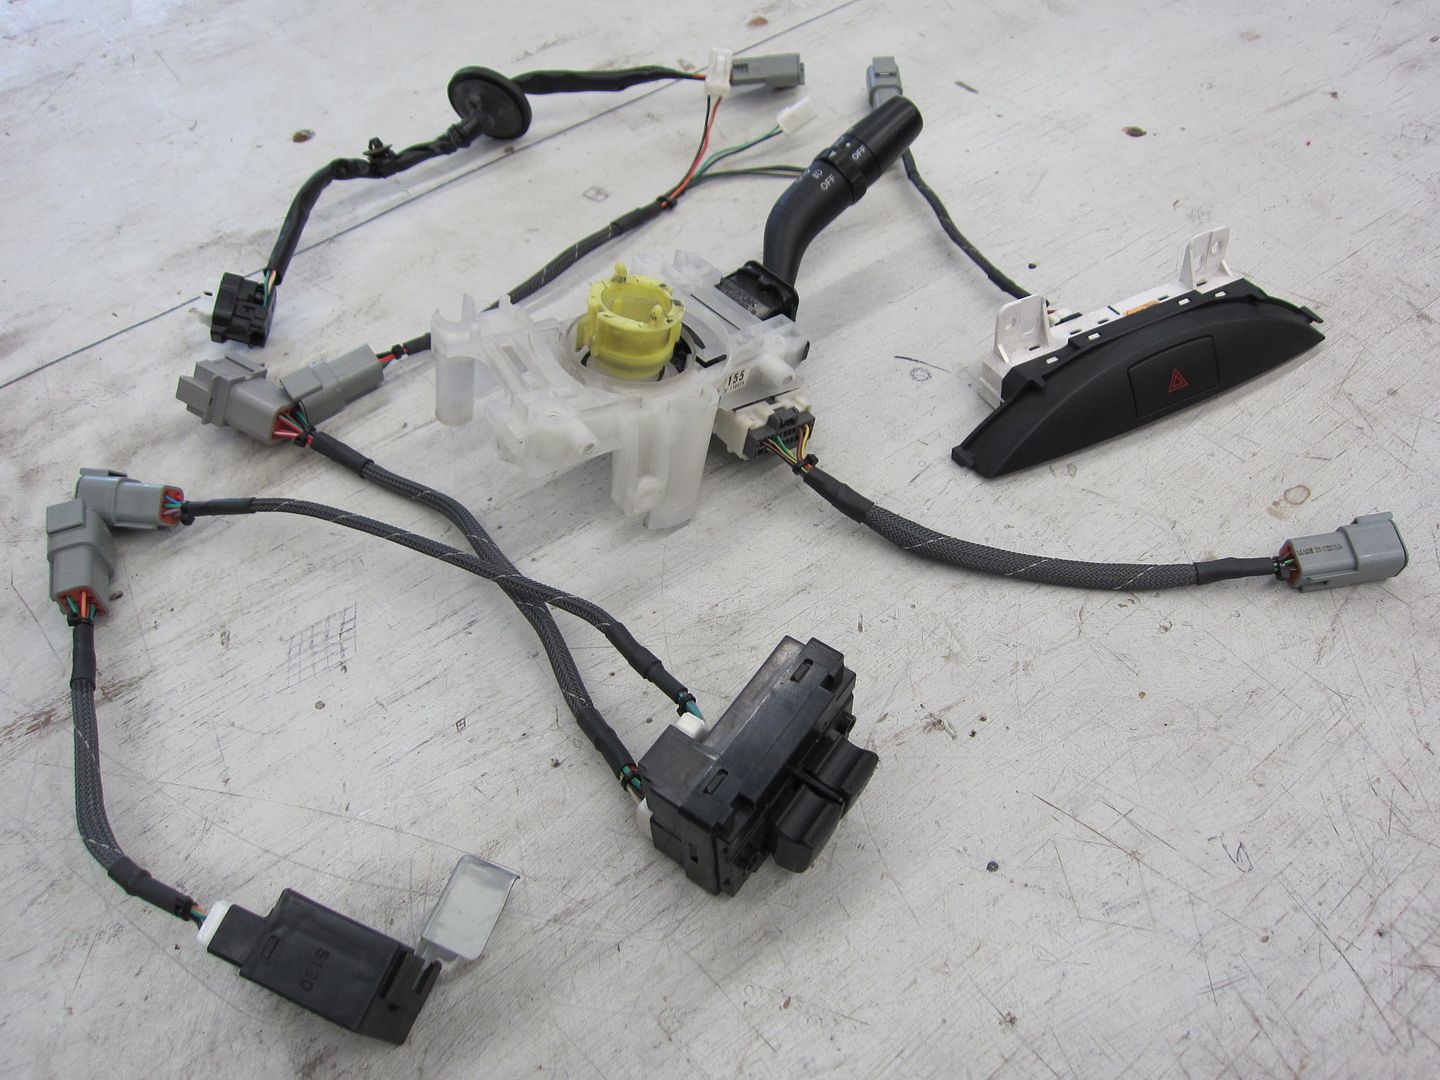
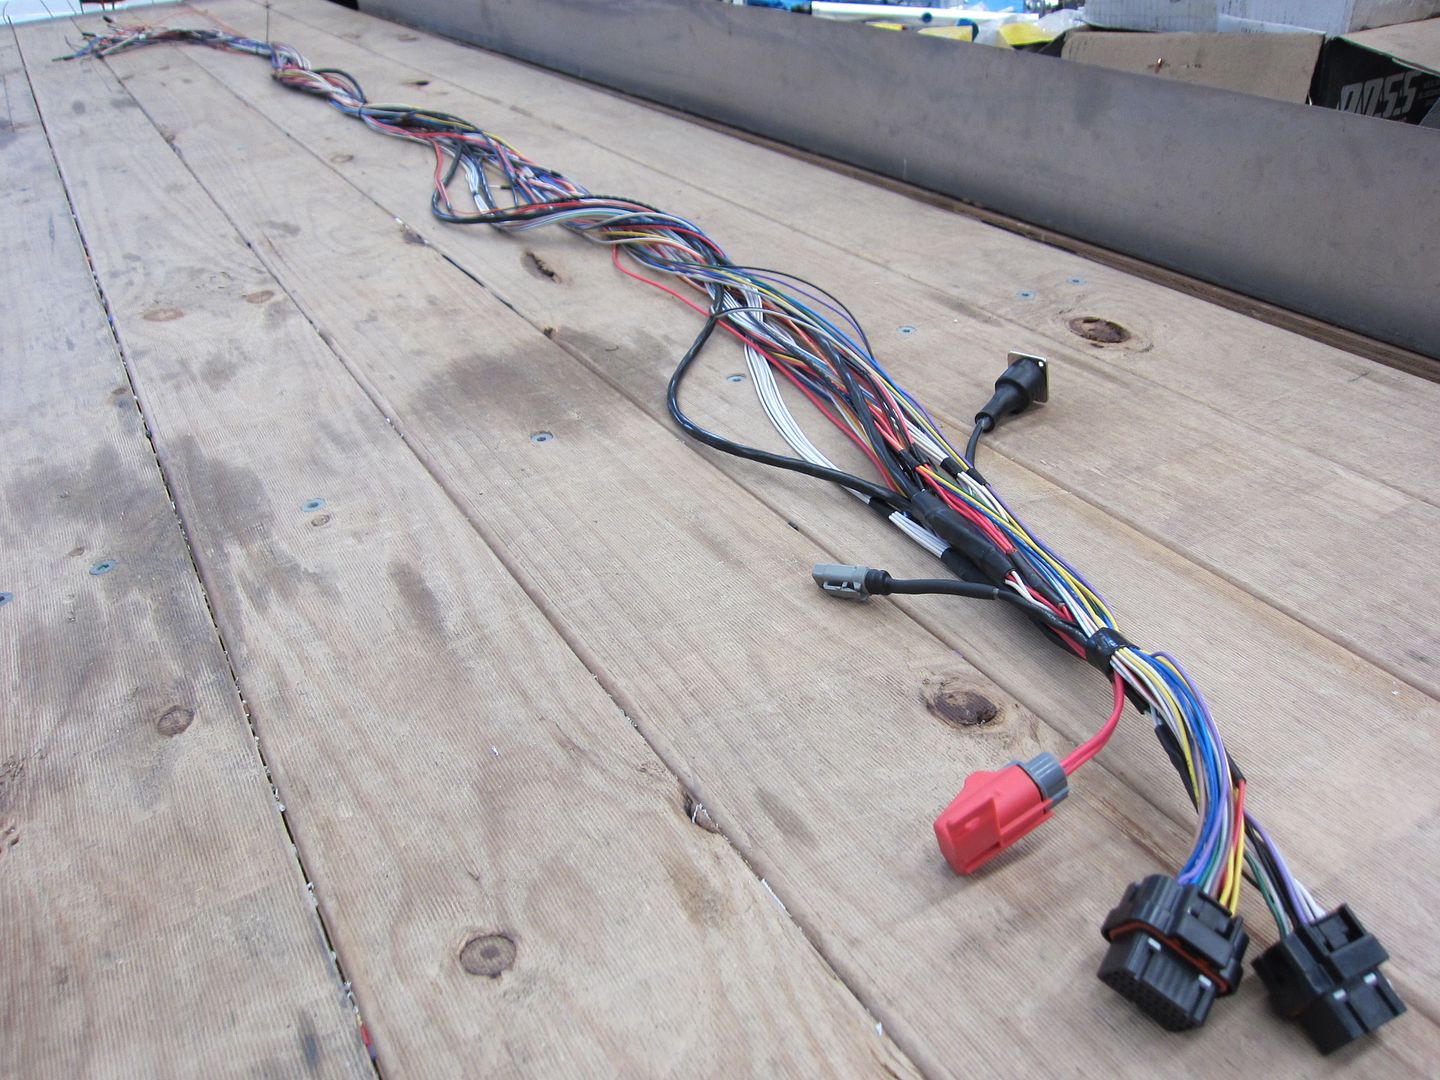
A whole new loom is being made for the car to simplify the electrical system and to remove any unneccessary wiring loom sections and electrical components.
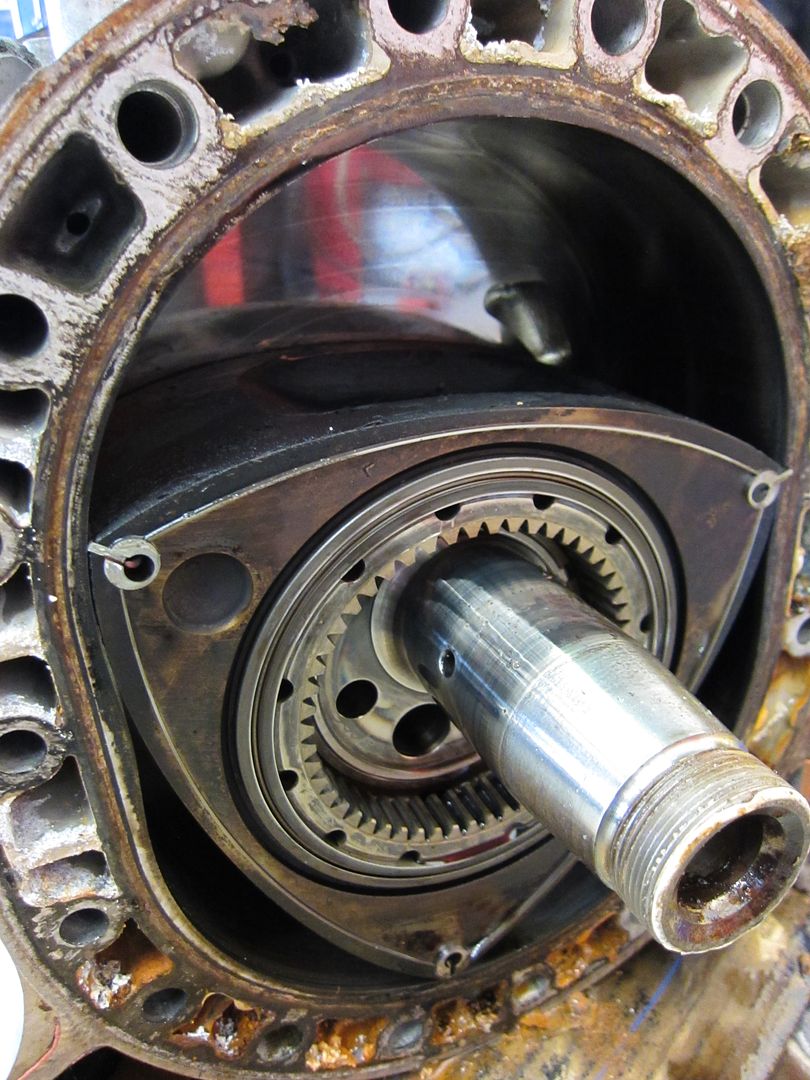
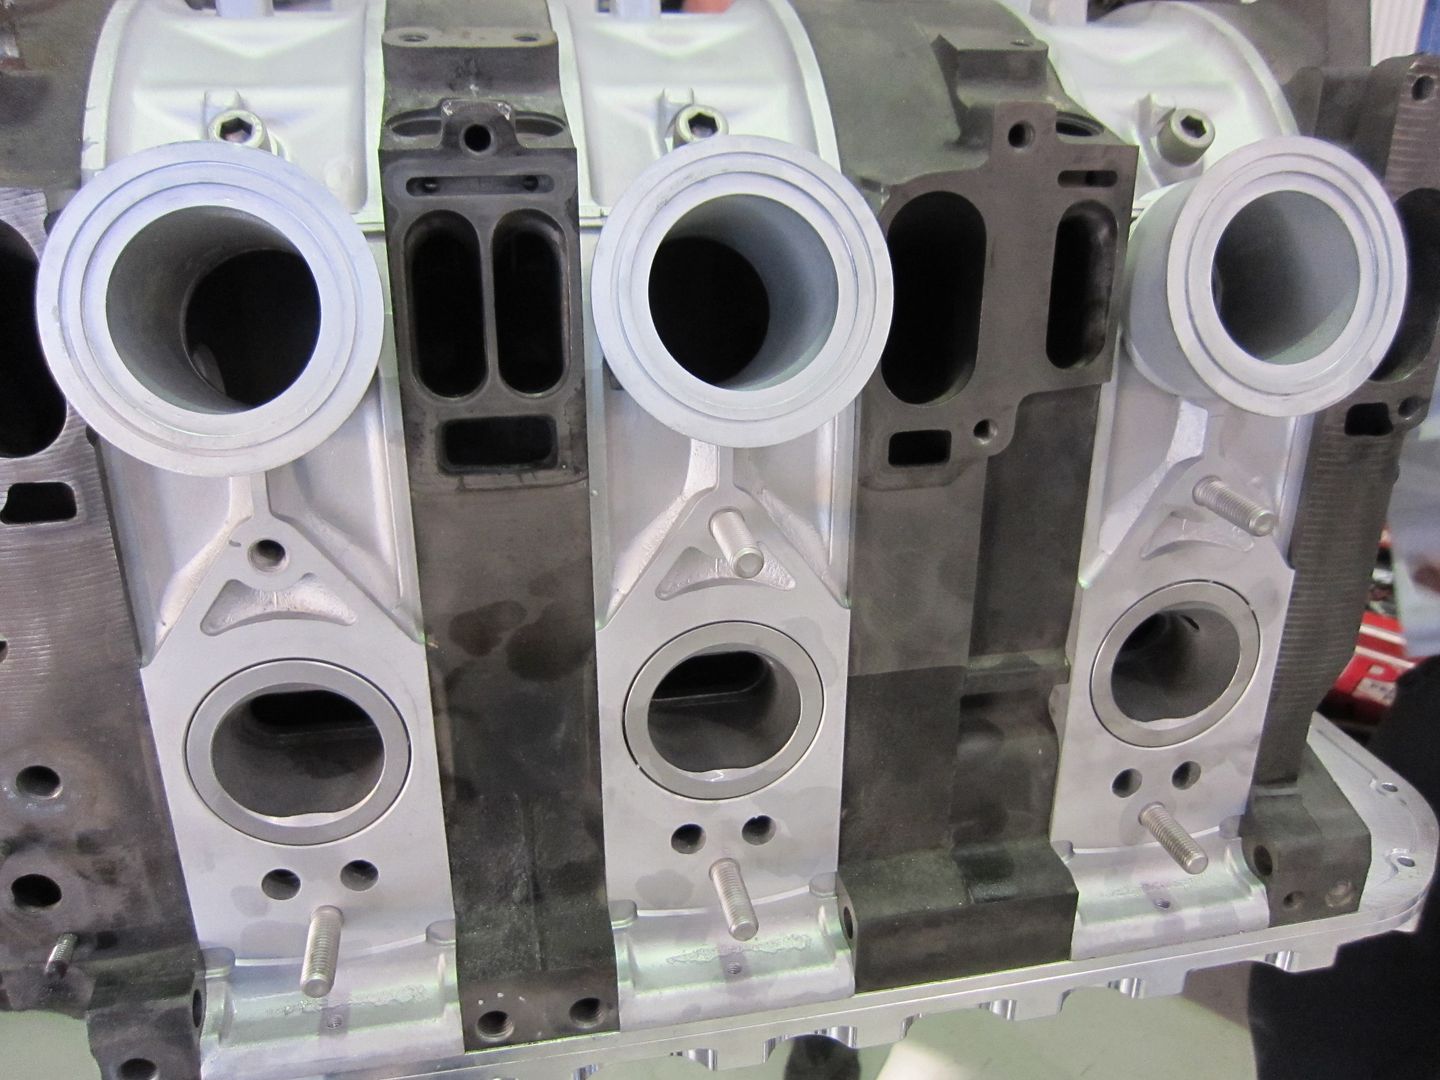
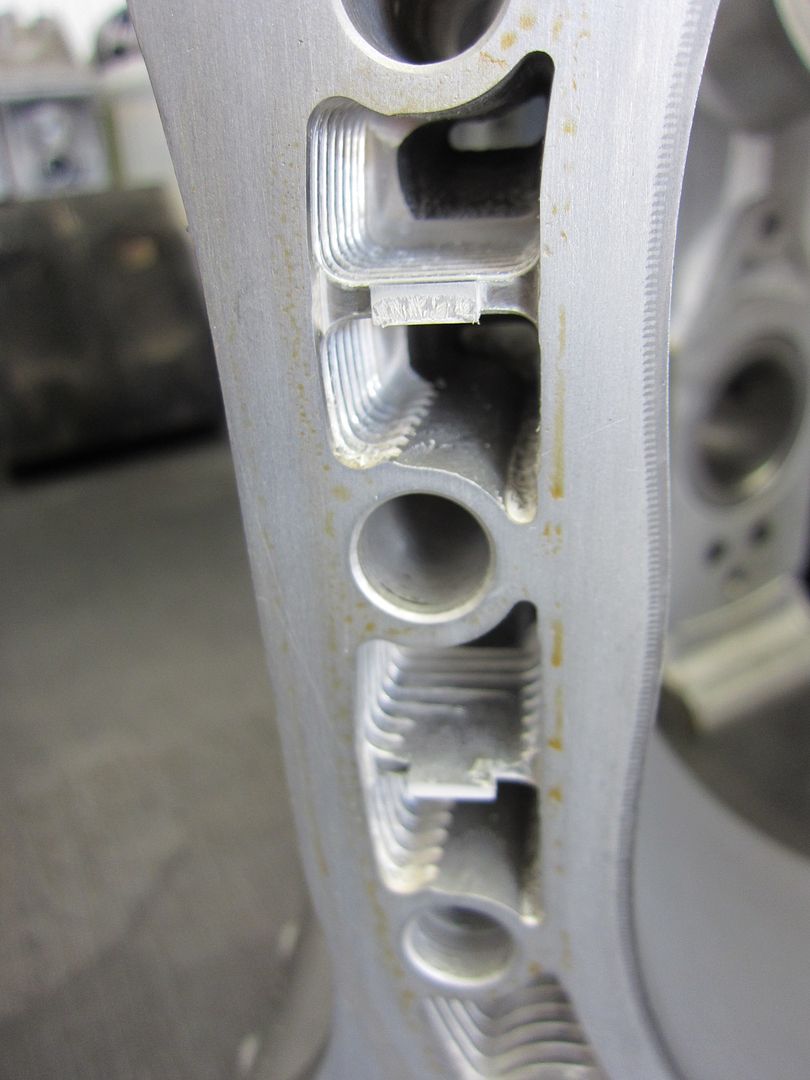
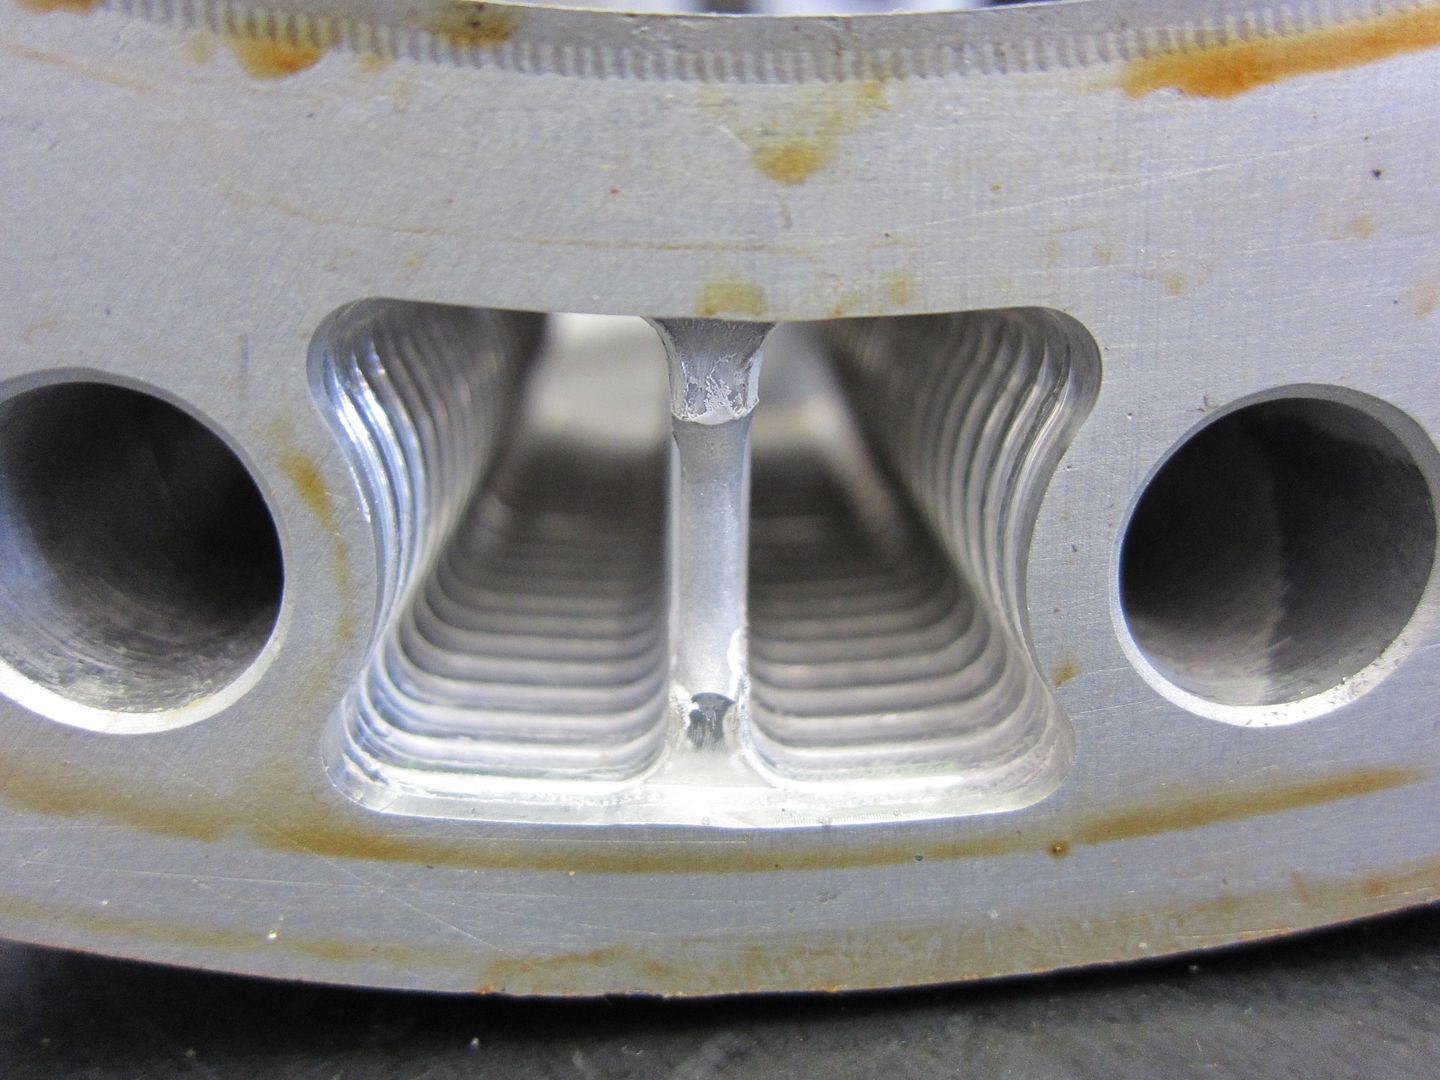
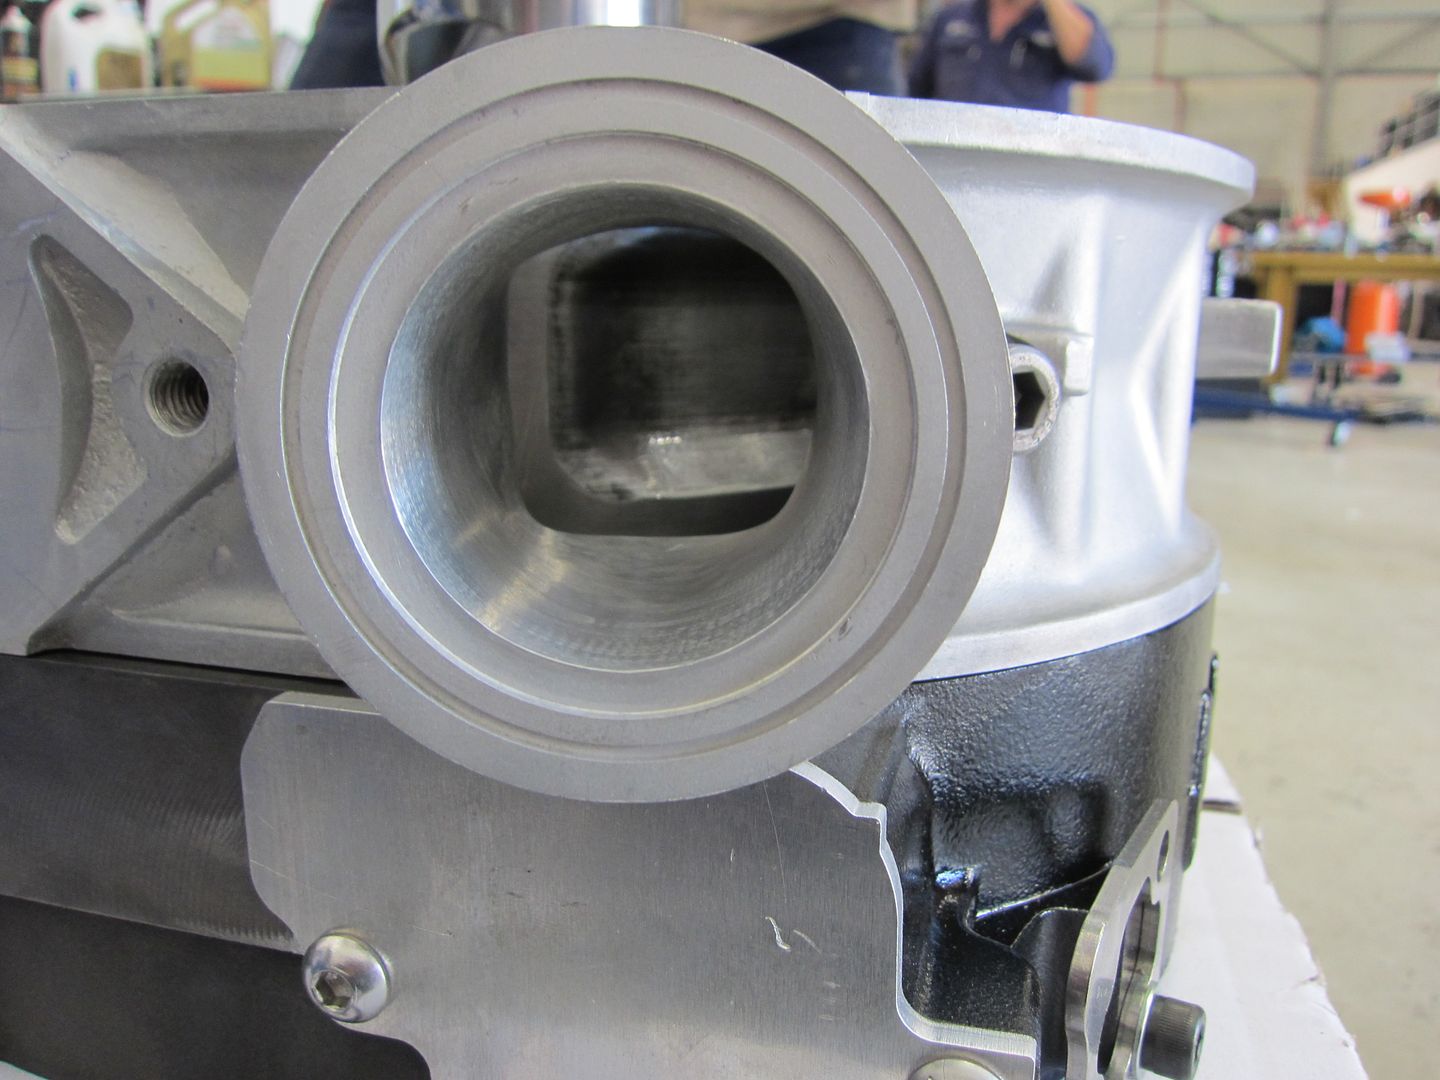
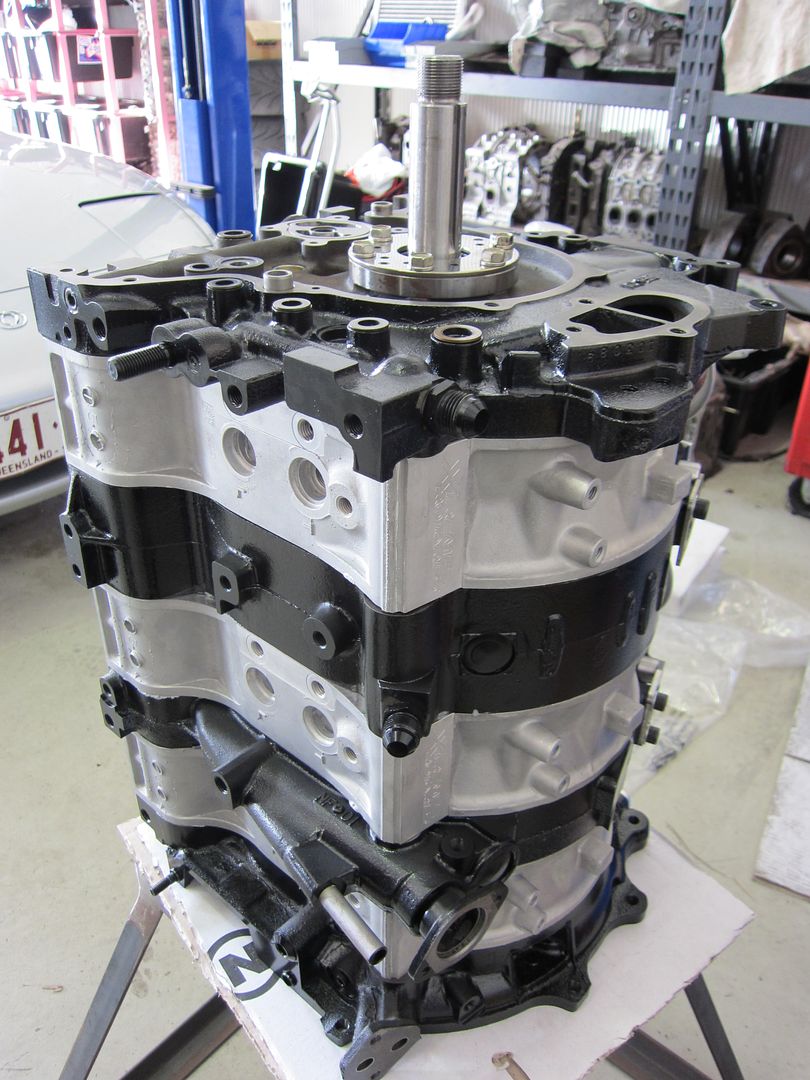
The inlet and exhaust ports in the rotor housings had their final machining and hand finishing completed.
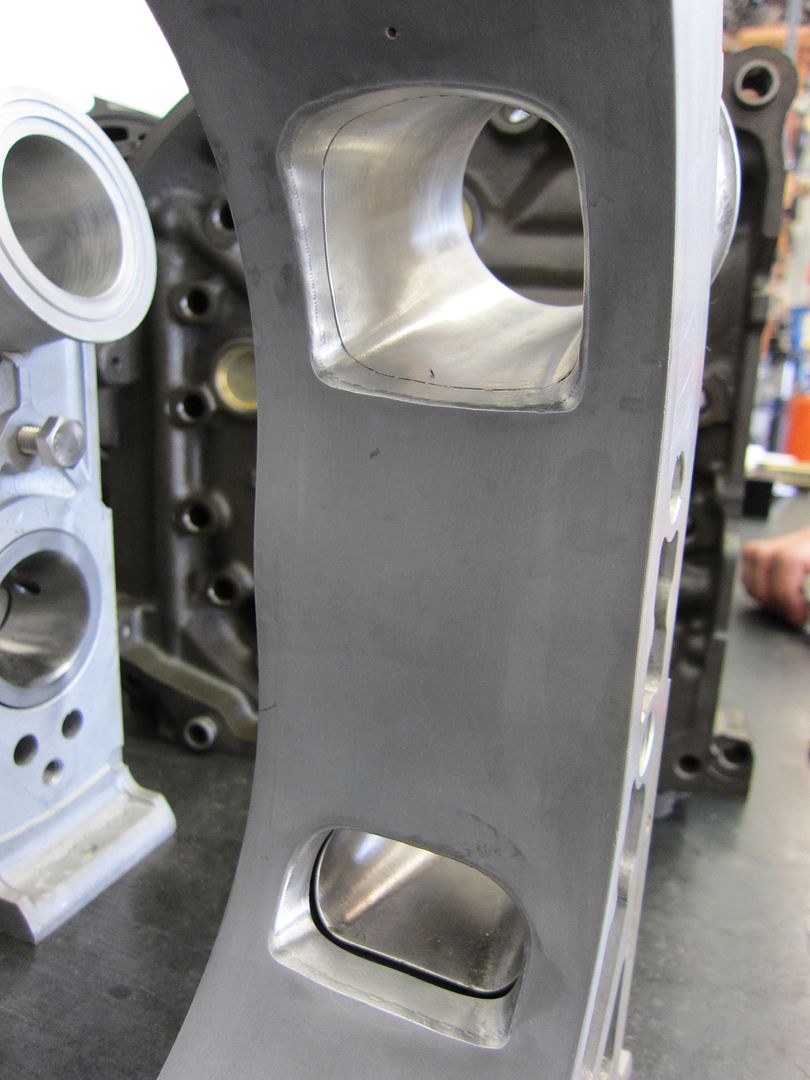
To improve heat transfer in the “hot” area (between the spark plugs and the exhaust port) of the rotor housings, a series of grooves were machined in the water galleries to increase coolant to alloy surface area. This has been long used by Racing Beat in the US to minimise localised dimensional change of the rotor housing in the “hot” area.
The rotors have all been lightened, side clearanced and balanced to 10,000rpm.
Beside the rotors the only other moving part is the eccentric shaft. In 20B engines they are two piece so that the engine can be assembled. It has also been isotropically finished. More info here http://xtremerotaries.com/services/isotropic-superfinishing/isotropic-superfinishing
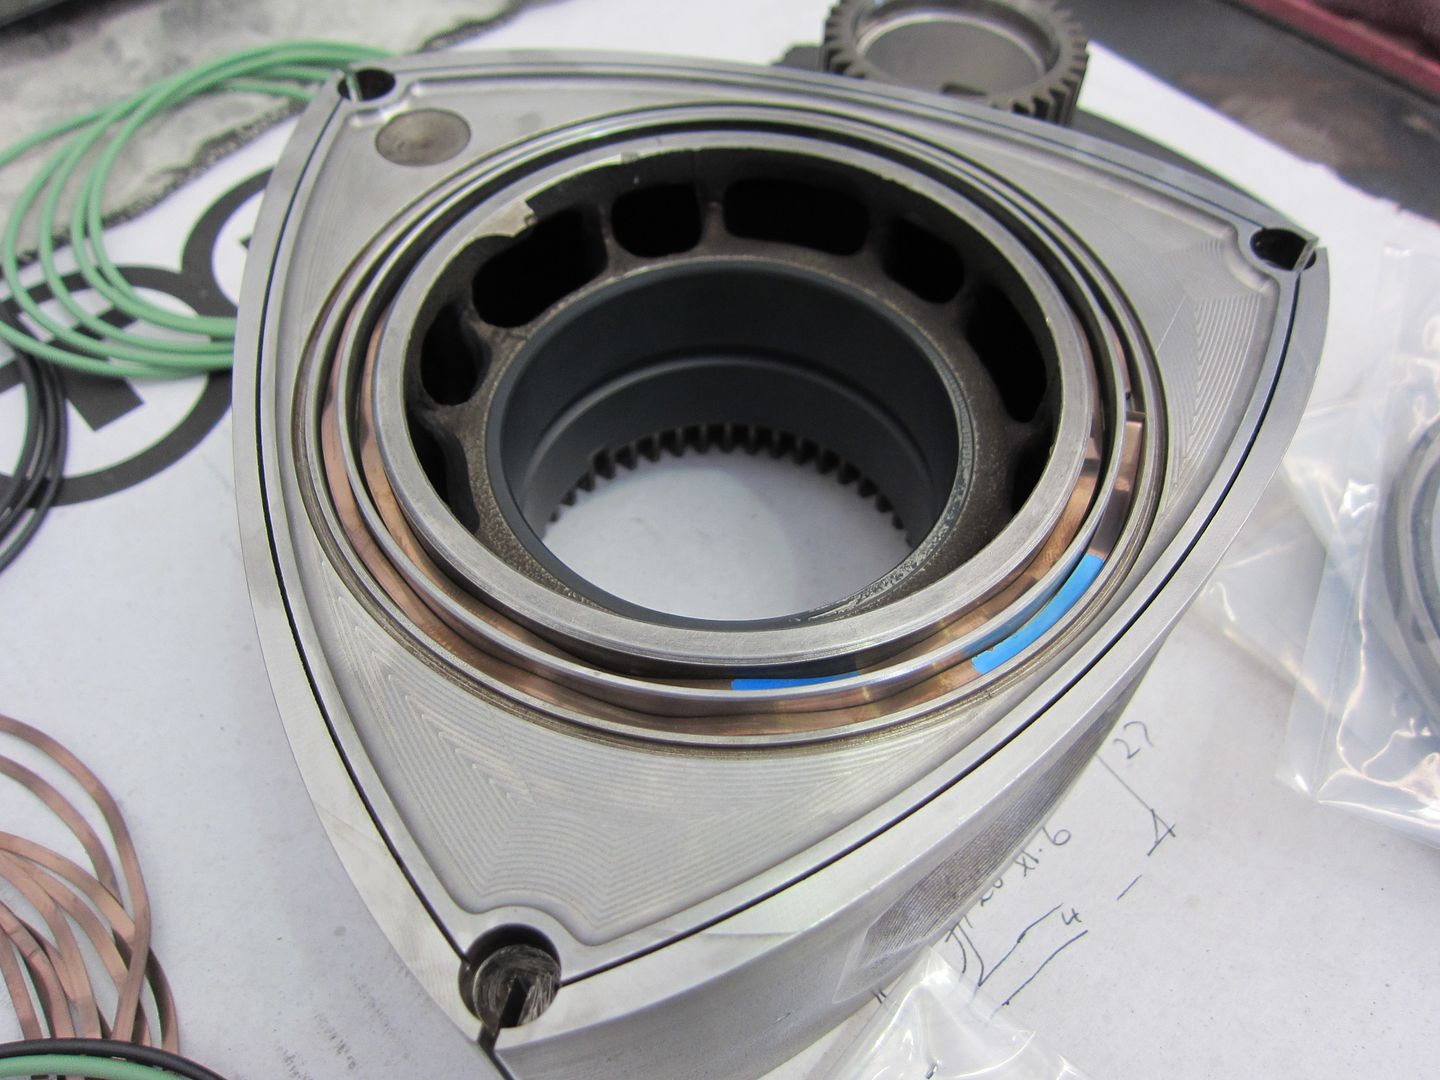
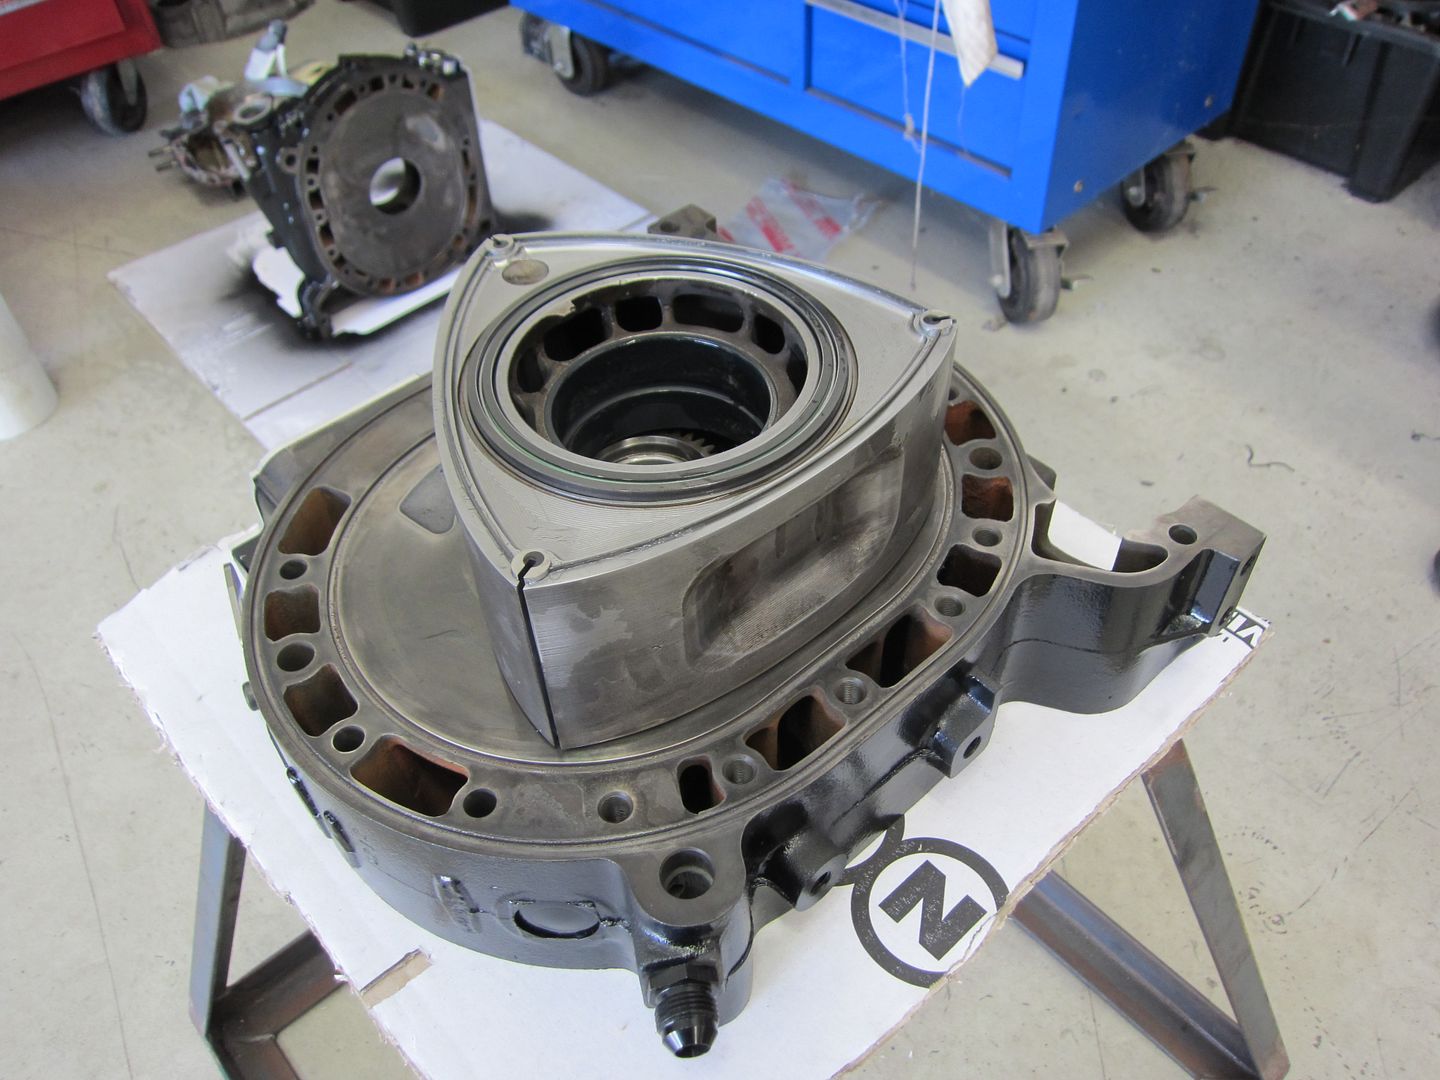
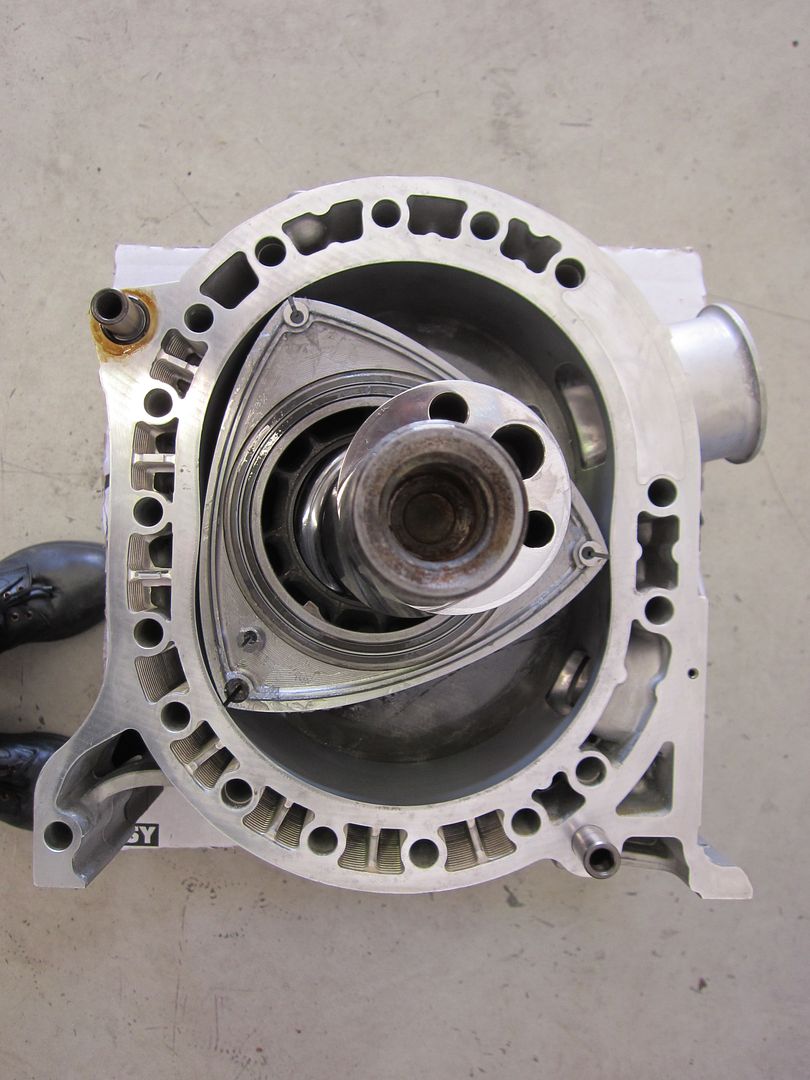
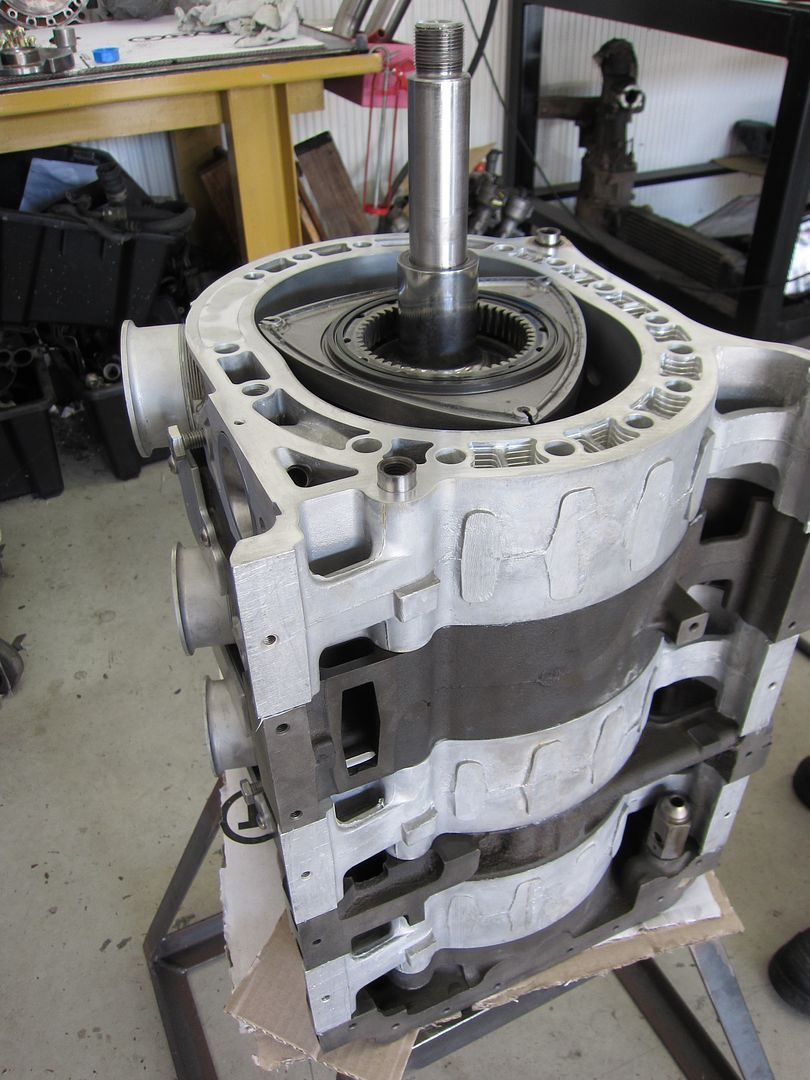
Starting at the “Thick” plate the first rotor was positioned.
Eccentric shaft in place.
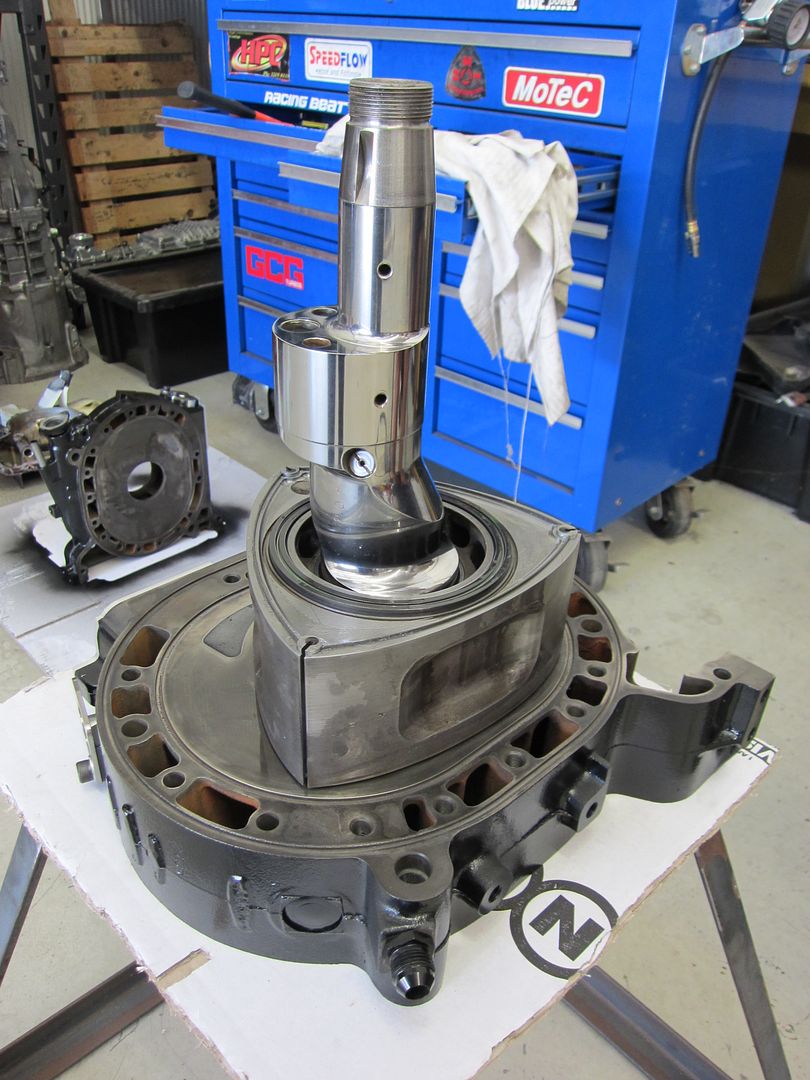
First rotor housing positioned and apex seals going in.
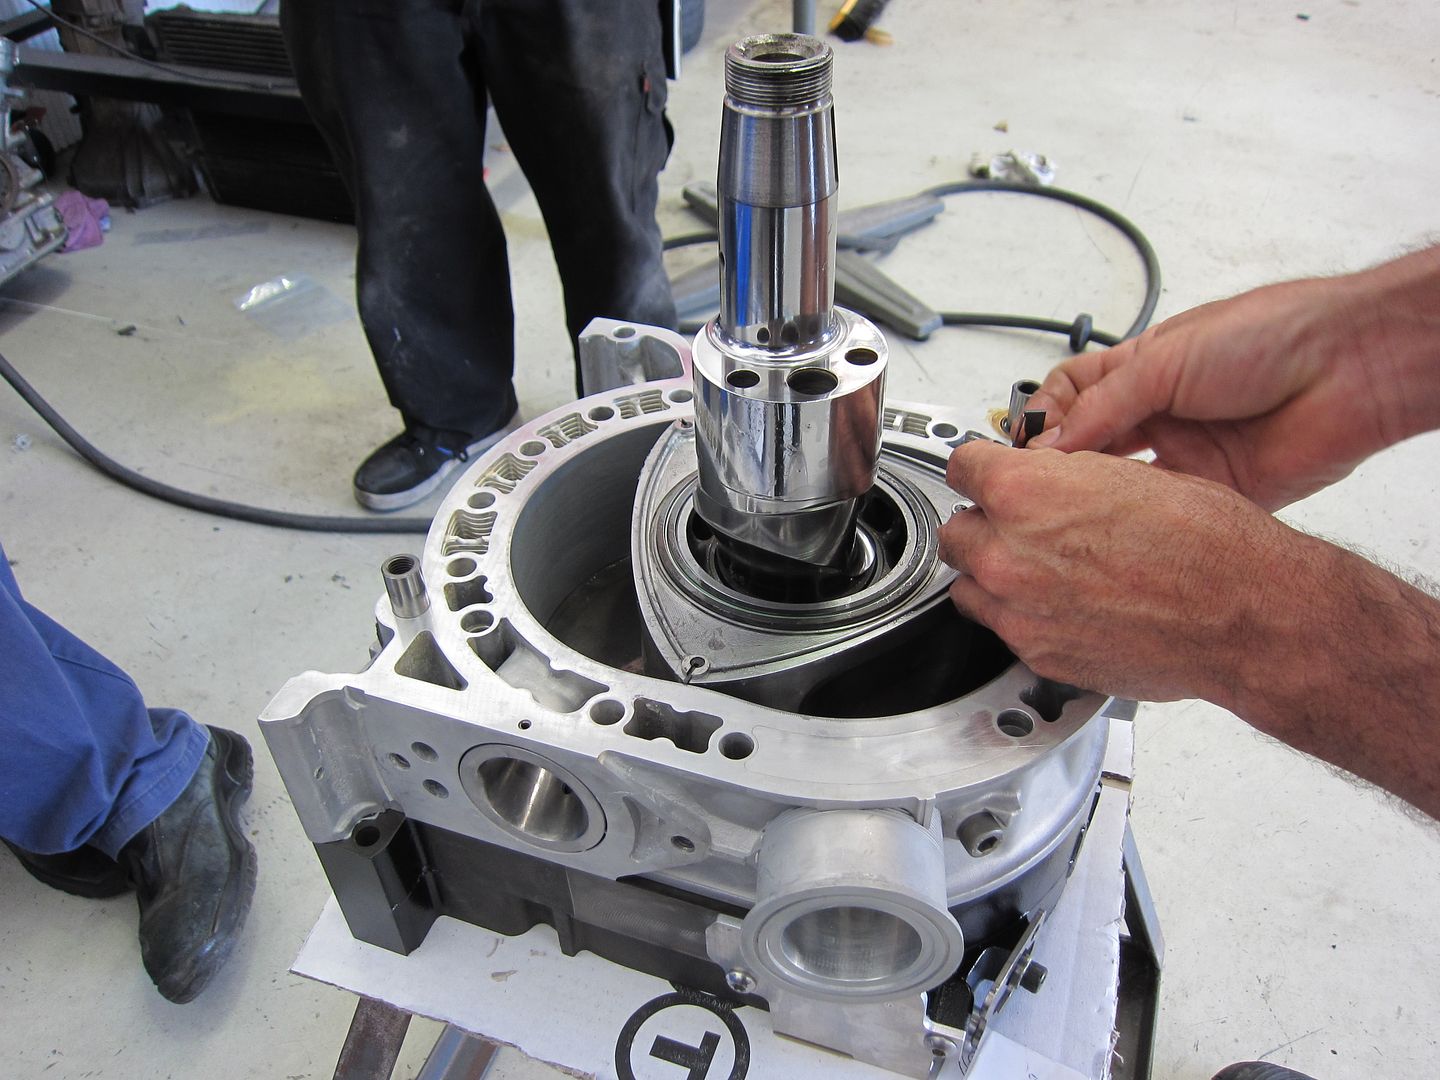

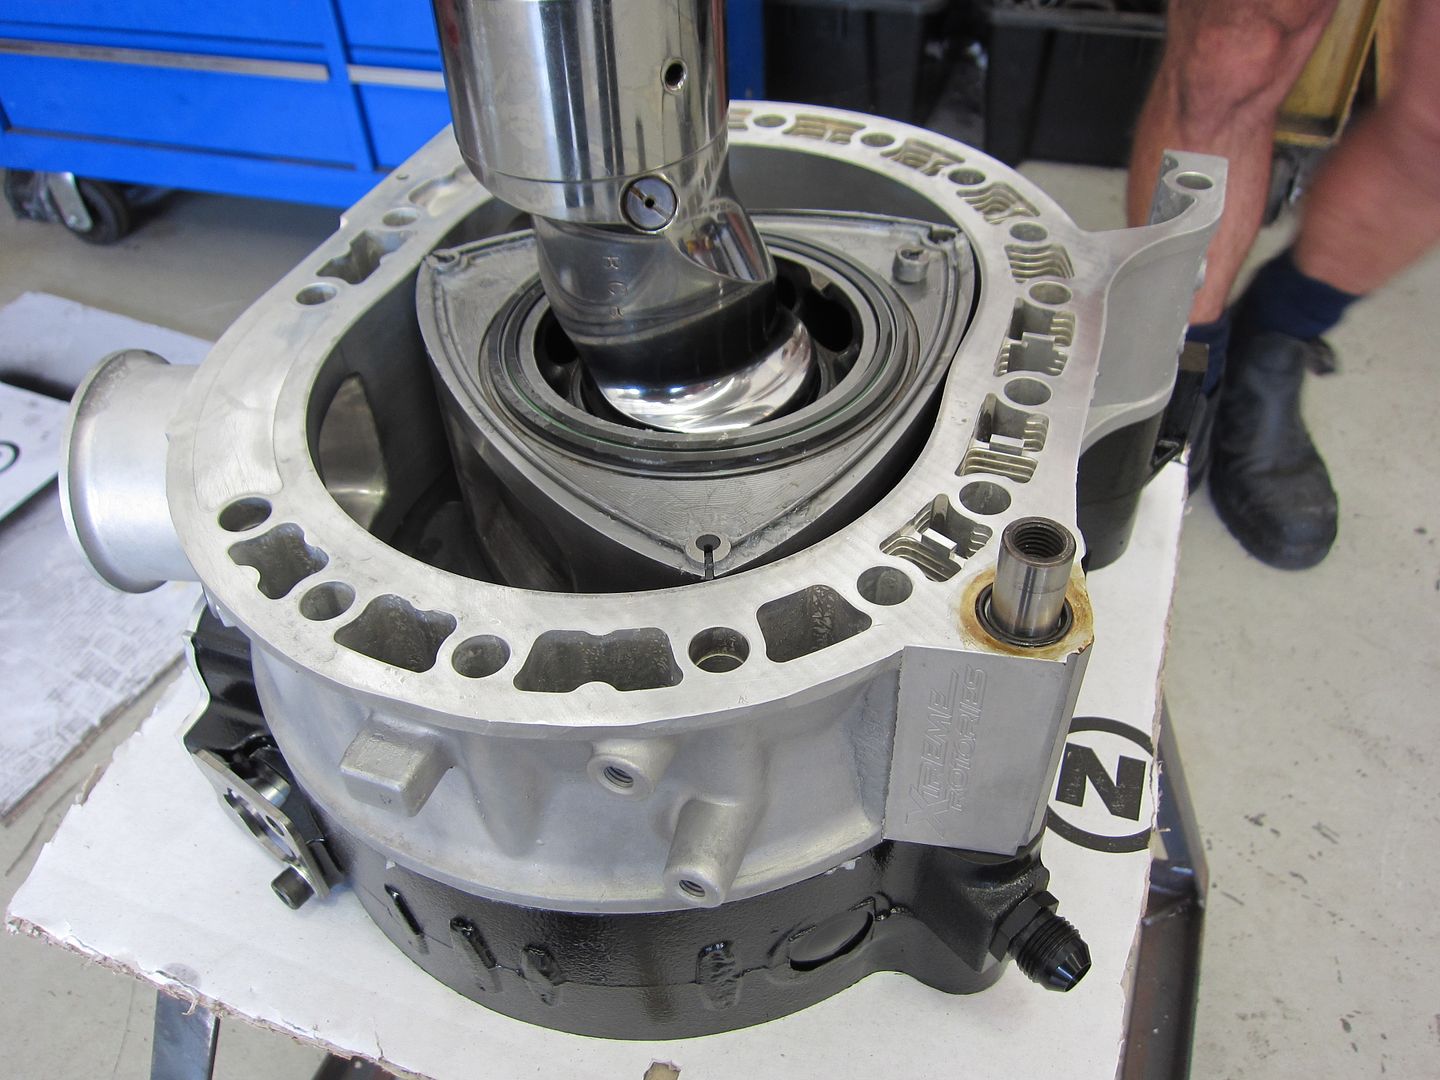
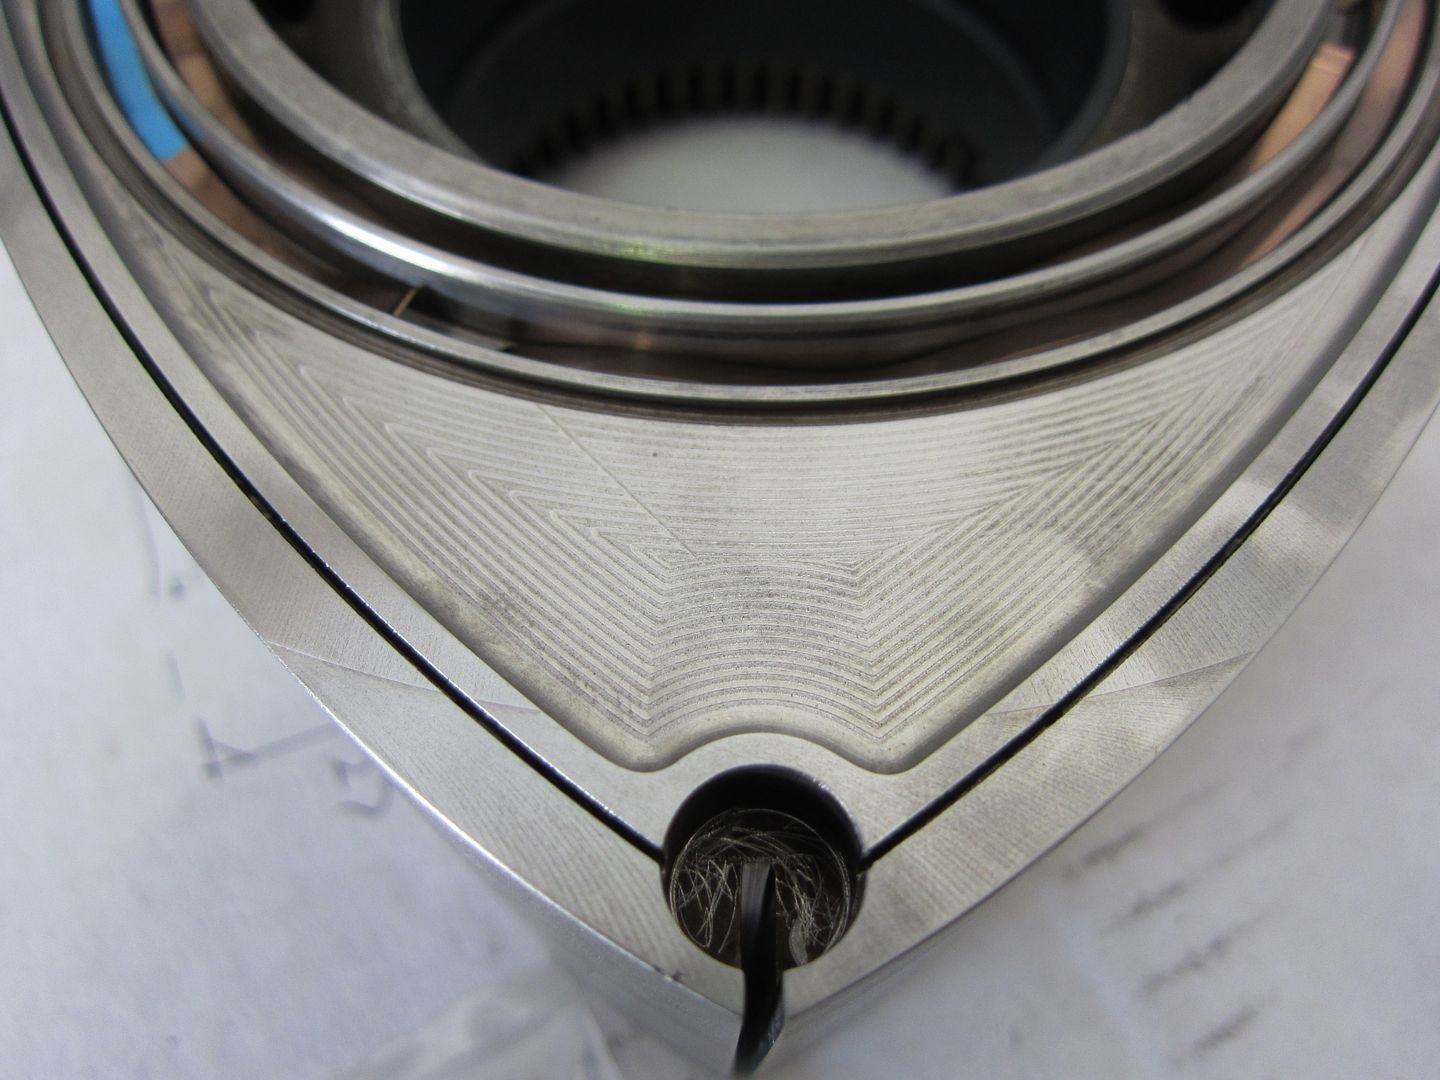
First chamber sealed
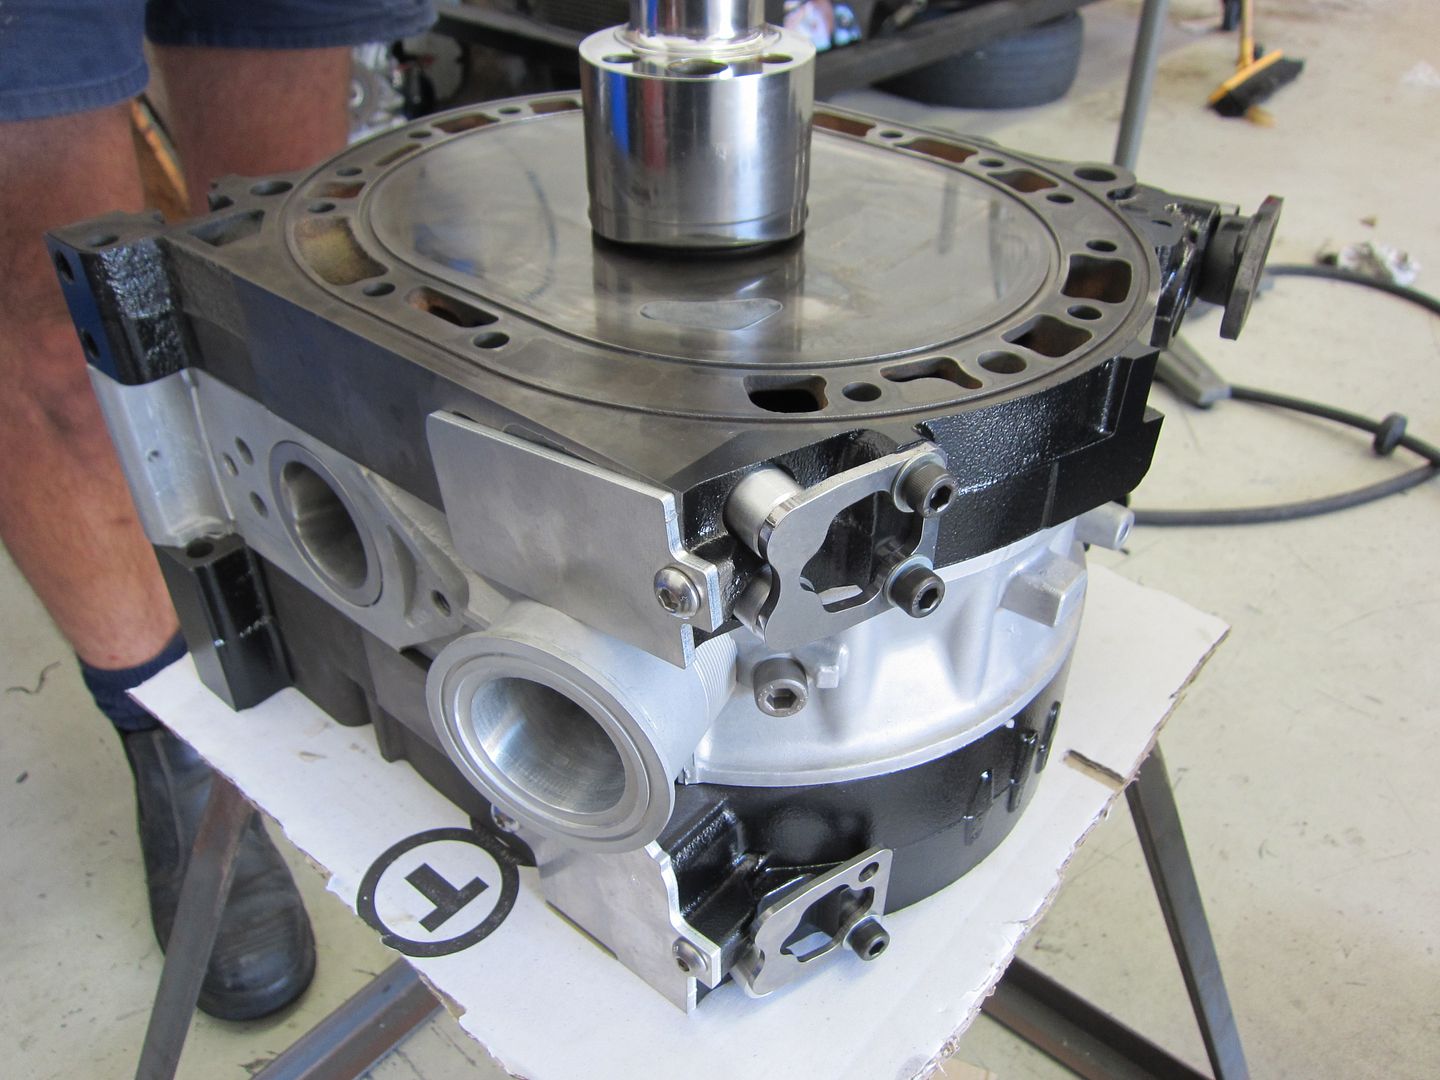
Second housing in place
And sealed….
Flipped over to add the last rotor…
Sealed up…

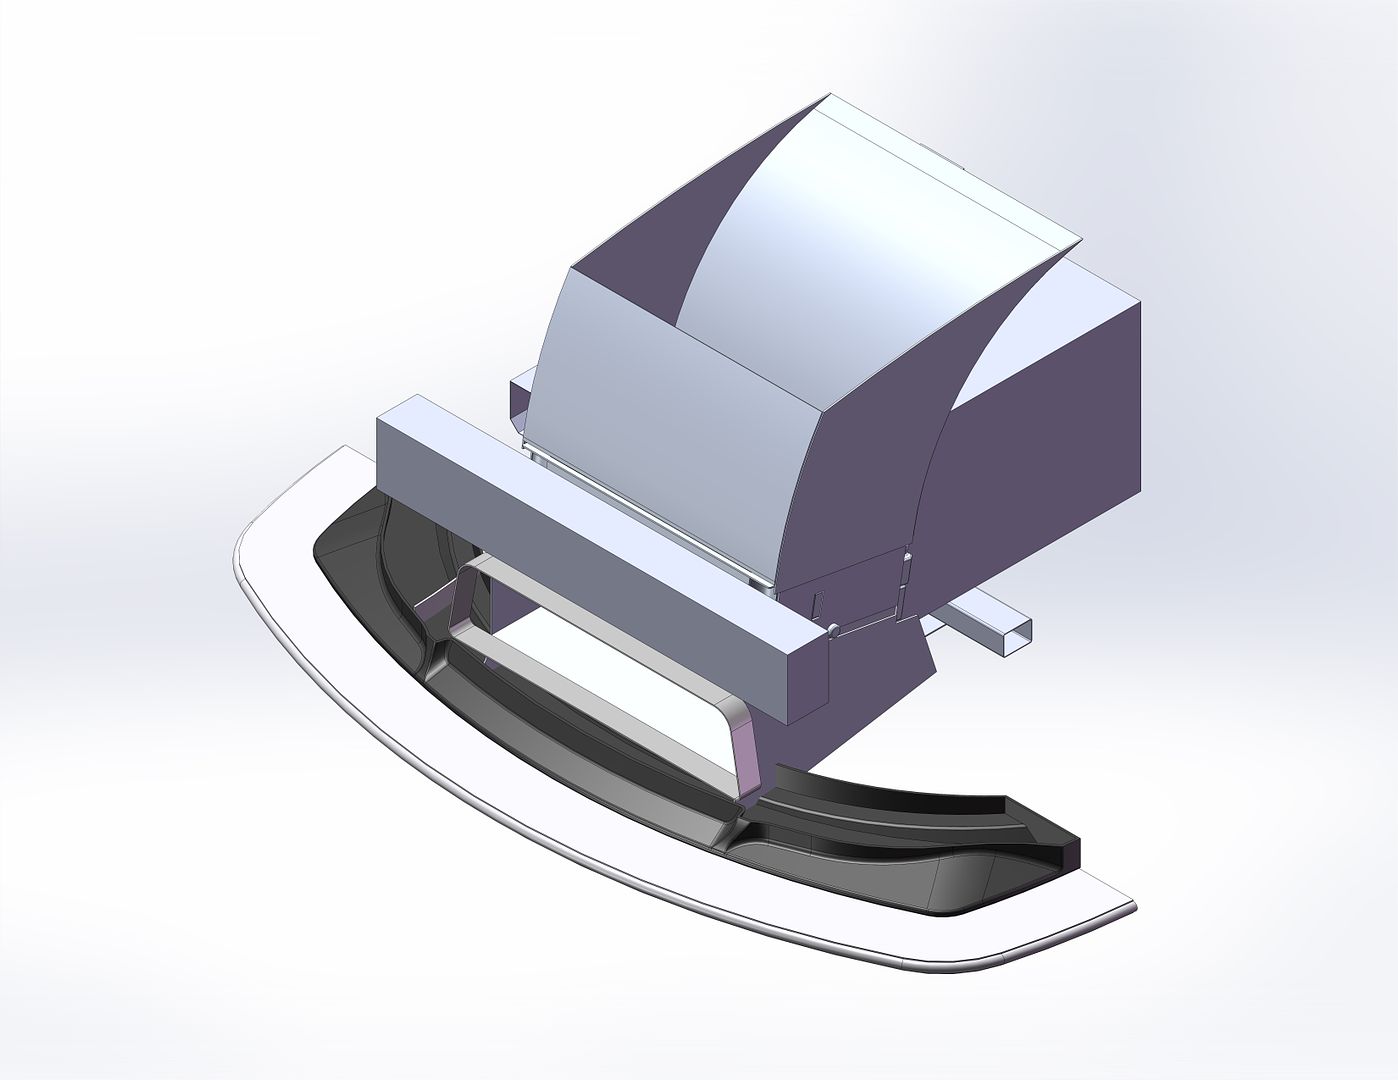
This is just a concept at the moment as there’s heaps more dimensions I need to confirm and give consideration to other items that need to be mounted.
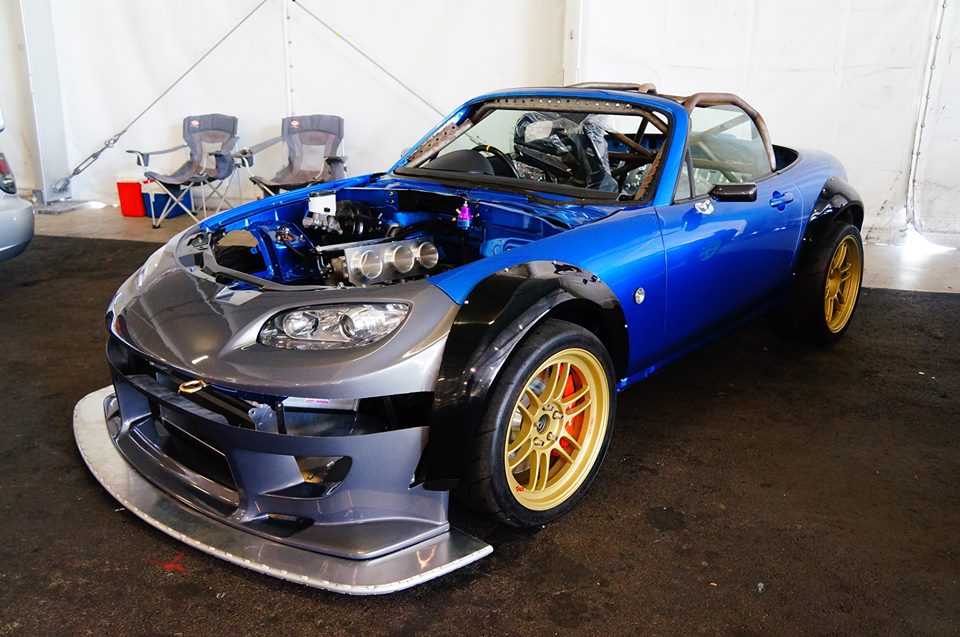
This is where the build stopped, and when most of us saw the Miata. I read that Danny said that the car will be running by the end of the month. So as this build continues we will post updates of it. Be sure to like their fan pages so you can follow the build yourself.
Automotive Plus’s Facebook page
20B PP powered Mazda MX5 Track Car
Thanks for looking!

Danny’s workshop MX5 Plus has done all the work on my MX5 NA6 naturally aspirated ITB build (now 85mm bore and stroke). Danny and all the people who work for him are brilliant people to deal with and passionate about their work.
Pingback: nice JDM pictures - no msg!! - Page 208