Mazda Protege 5 Track car project: Livery / Protege Field Trip / New Wheels / Brakes etc…
Its been about 6 months since an update on the Protege 5. I took a break on the car to focus on our Southrnfresh 10 event , but I was slowly making changes and working on the car. I just have failed to make any consistent posts. I made the decision to focus on making the car a little more appealing and make it be something to represent the brand, but still keep it as a track car.
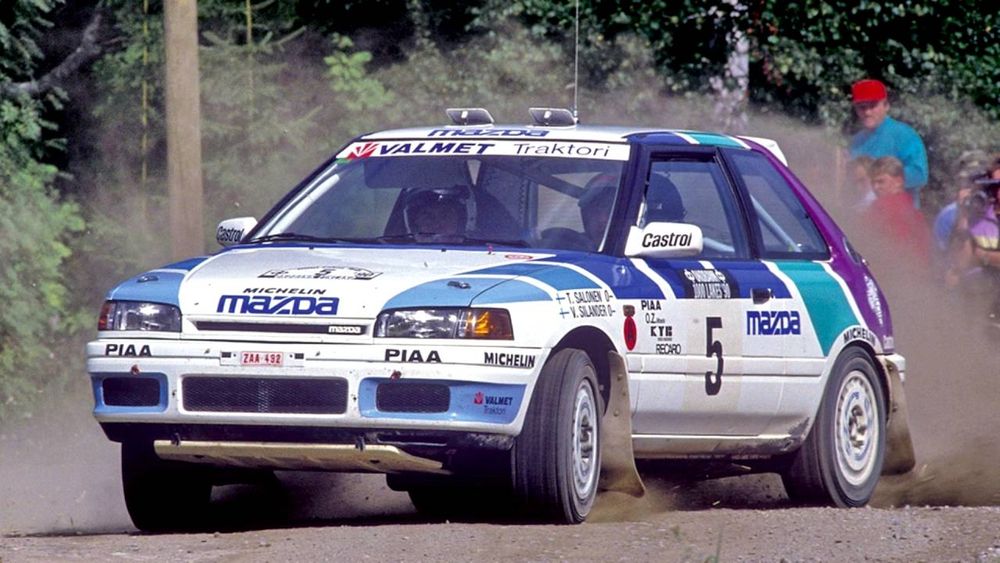
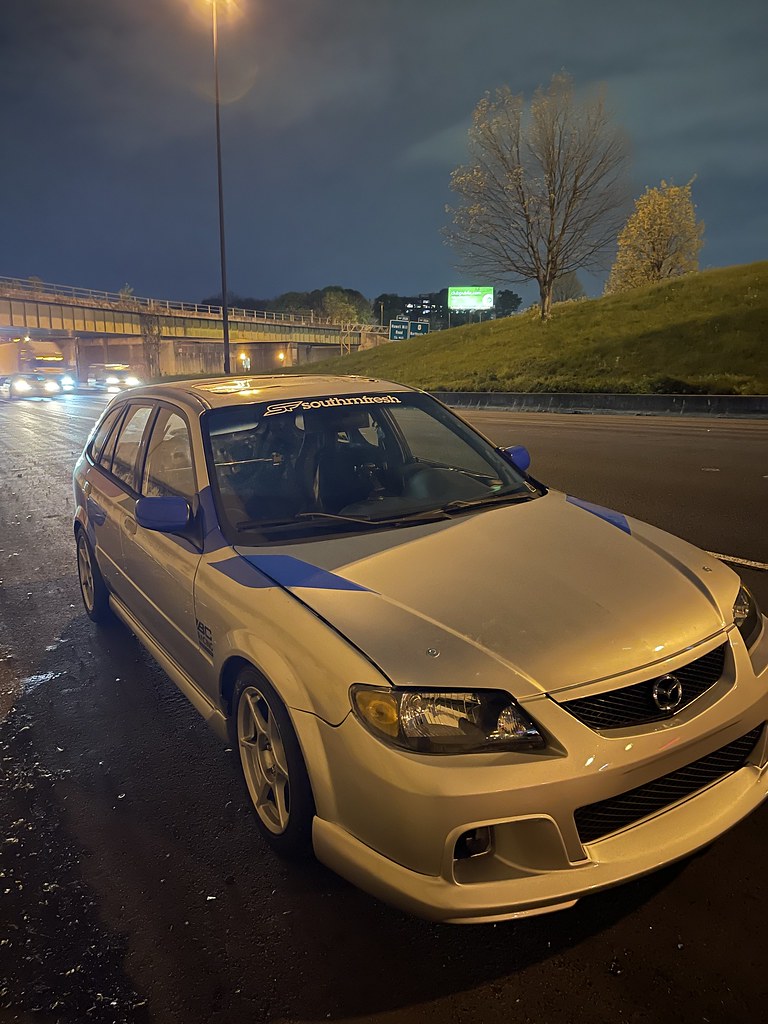
I had been wanting to do some sort of livery on the car for awhile, and finally set on a design to go with. The idea was for something like the classic Mazda Rally 323 cars from the 90s. Even though it was a rally livery, the motorsport history was still there. Mazda had several variations of this livery, but I settled on the one from the BG 323 version as shown above.
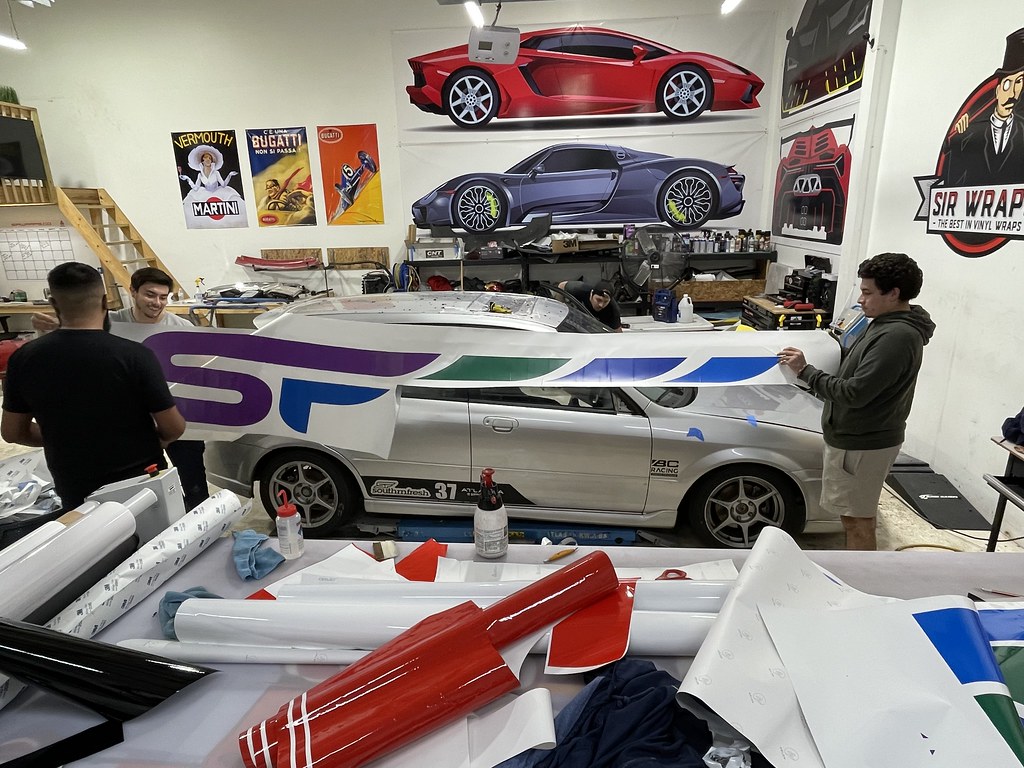
As always Guy Haynie came through with a version that incorporated Southrnfresh in the design.
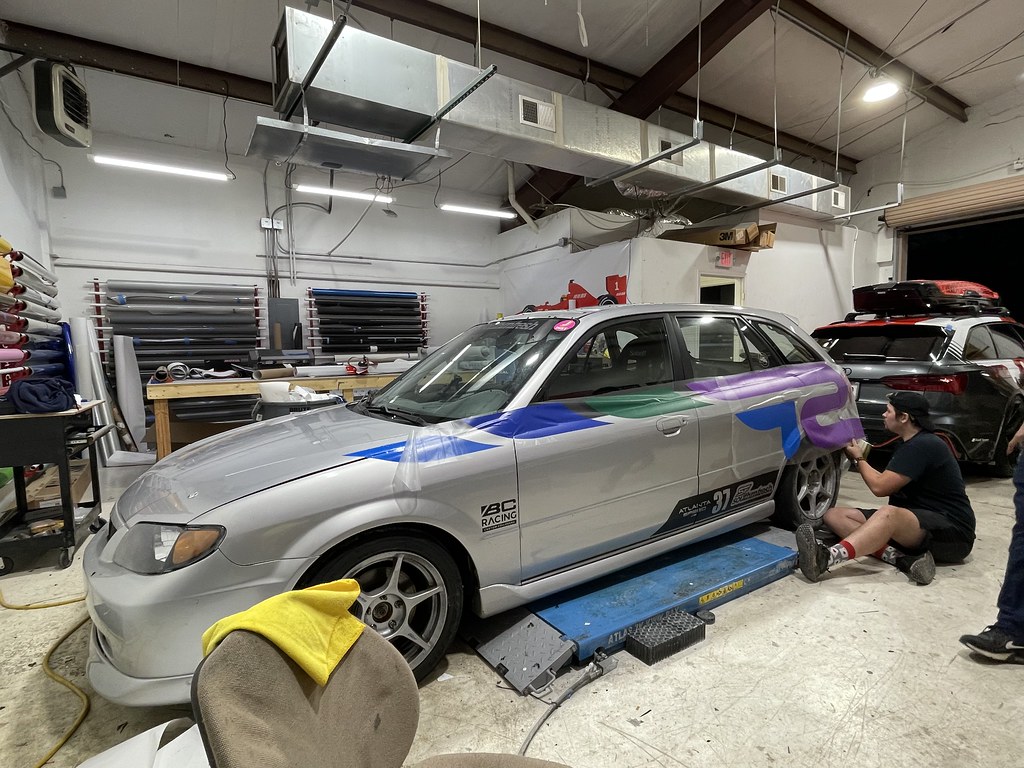
The guys at Sir Wraps came through last minute, printed and laid the vinyl as well as finally repair the damaged quarter panel from hitting the wall 2 years ago.

The night before Southrnfresh 10 I managed to get the car done. While the car was at Sir Wraps, I had my good friend Tommy repair and spray the front bumper and Mazdaspeed front lip.
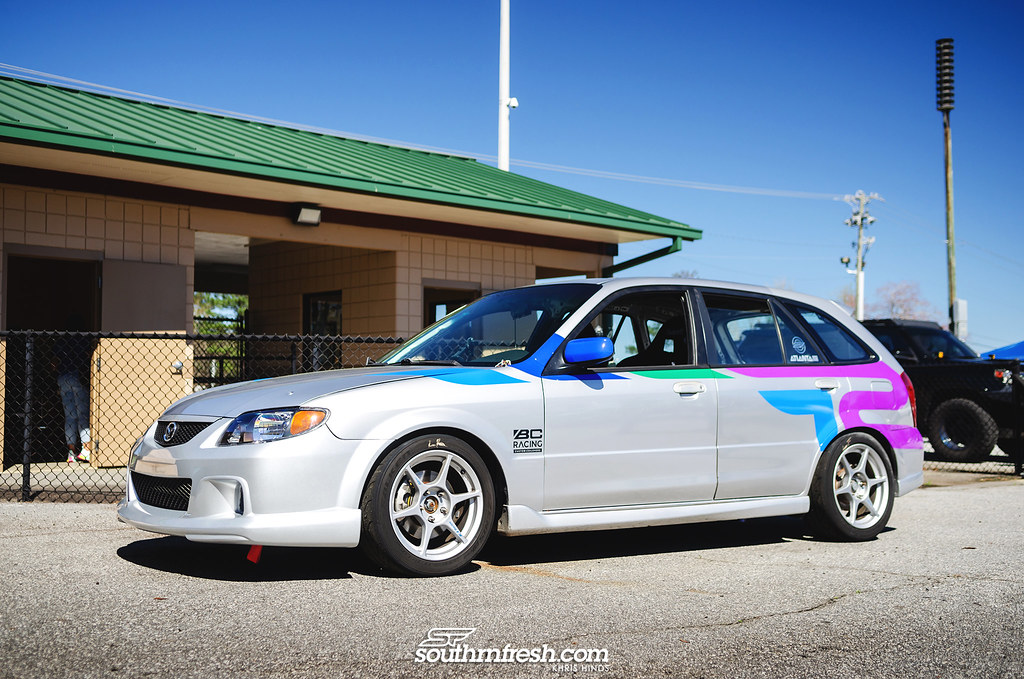
The Protege at Southrnfresh 10 looking better then ever. You can see the quarter panel finally repaired. We did not have time to have the quarter panel painted, so we wrapped the rear quarter silver to cover the bodywork. With the livery in place, it gave me a good canvas to build on.
Finally got another set of JDM tail lights!
Late night searching on Crooober came up with a TRUST axle back for the P5 at a steal of a price. Once I got it, I found out what it was so cheap. Something inside of it has rusted out and is floating inside of it. But its stuck here and I really liked the style of it.
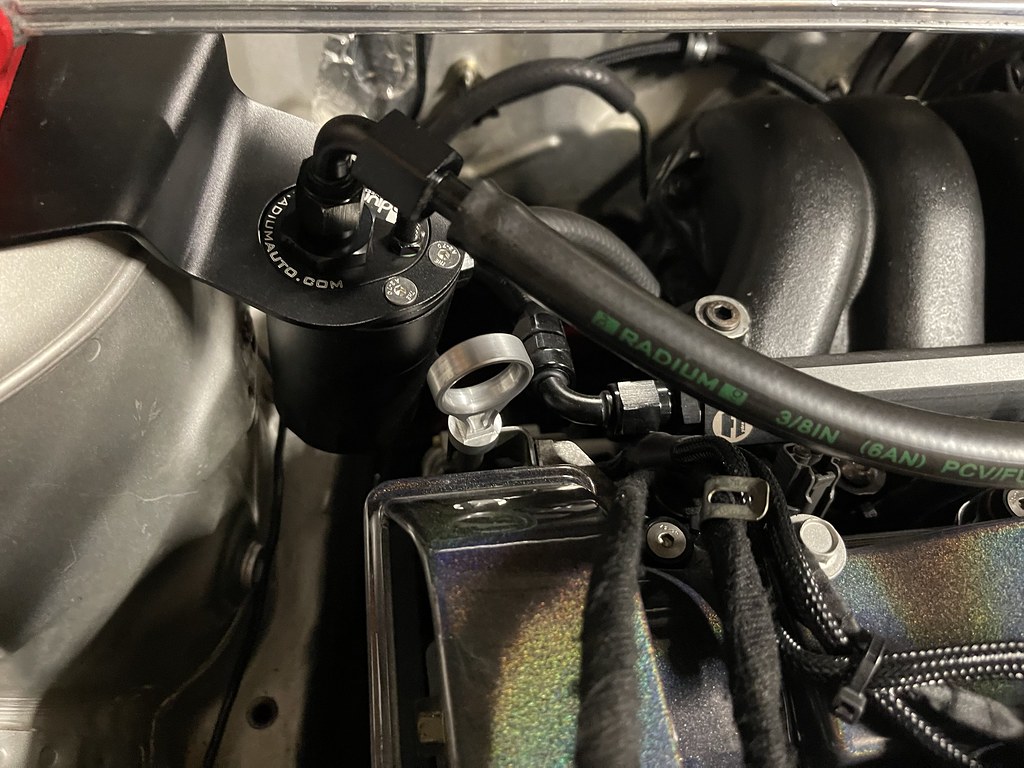
I am a fan of the big canister style..
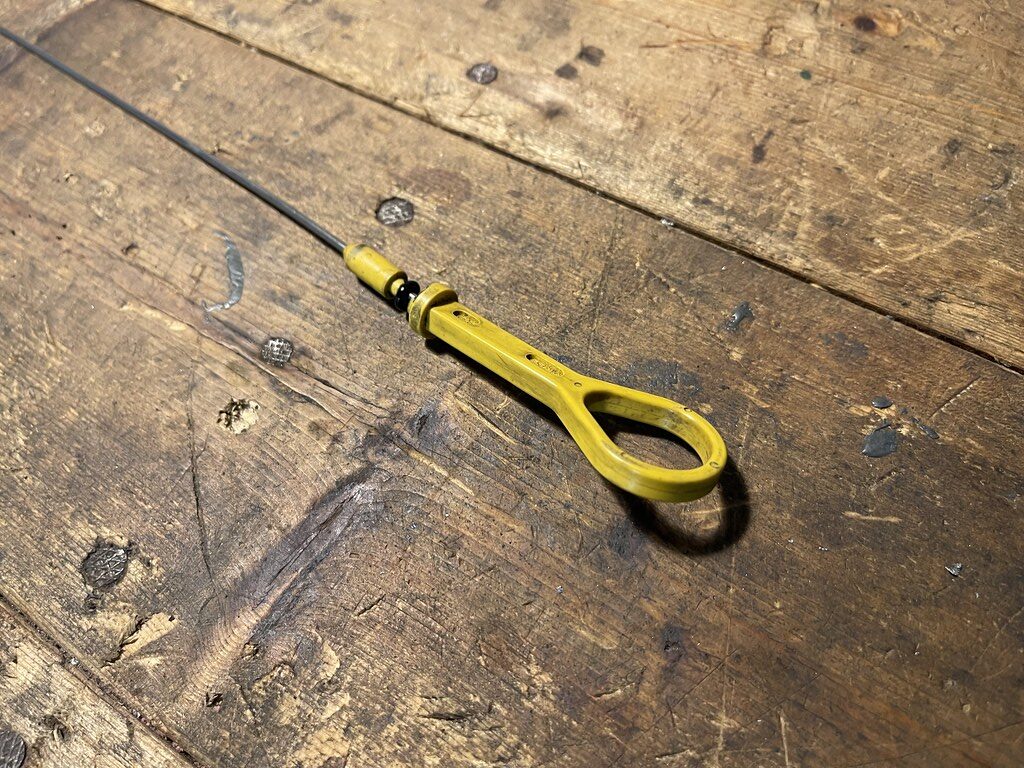
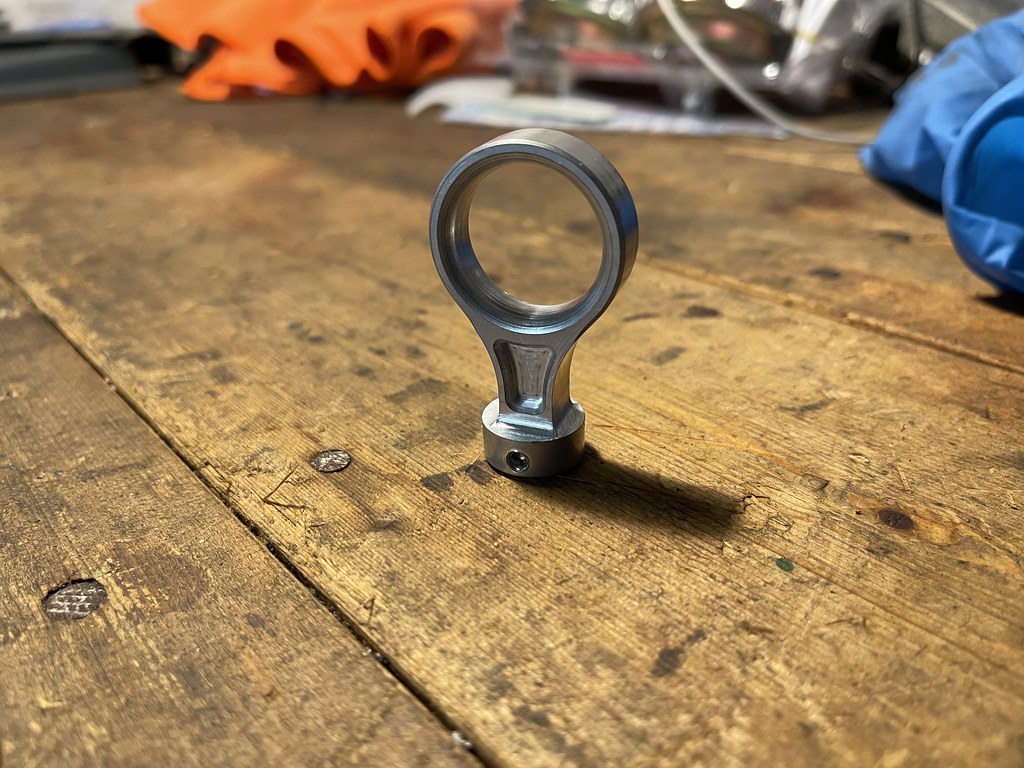
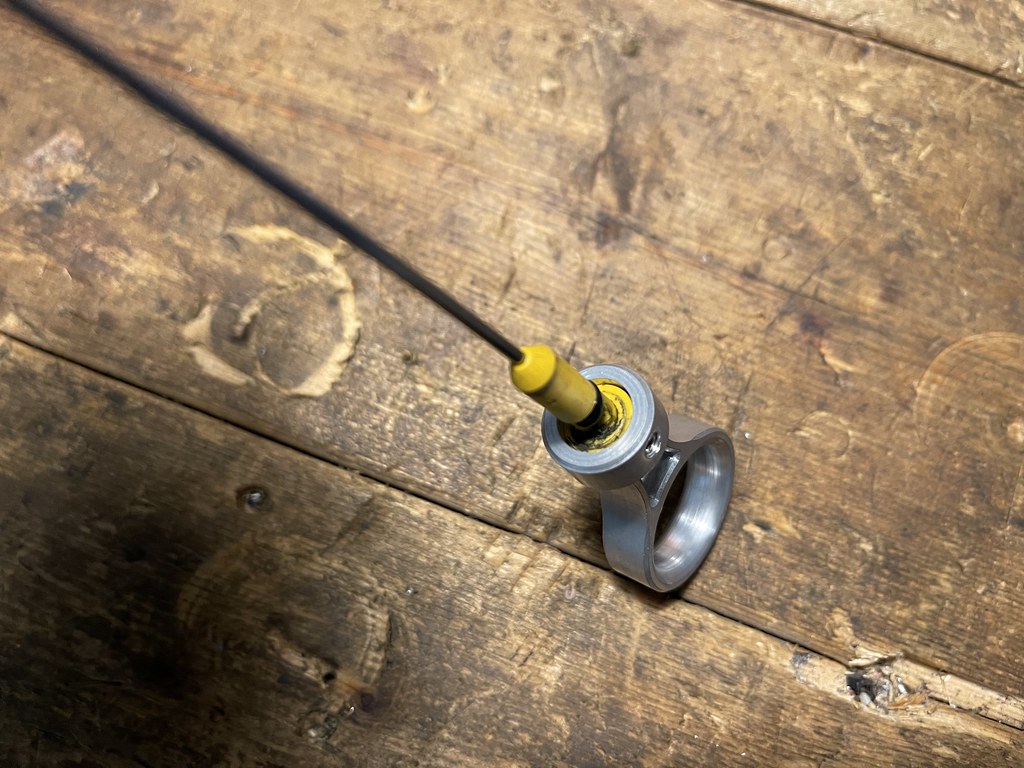
One of the members in the protege group put together a really clean dipstick handle the standard yellow plastic handle.
After sitting at the shop for a few weeks getting it ready to take a trip up to the Tail of the Dragon for a Protege gathering, I finally decided to take the car home. And about 10 minutes from my house, and I look down and notice the lights are dim inside. And as I try to give it more gas the car dies and I coast to a stop in the middle of downtown Atlanta on a Friday night. At the time the car would crank for a second, but after awhile it would do the same thing and cut off. I checked what I could, and almost tried to limp it home.. but luckily enough it was down in a pretty safe spot. So I had it towed home.
I got it home and thought it was my alternator failing, it was the only thing that I had never replaced on the car. I had a day or so before I was going up to the Dragon, so I just replaced it. I also remembered that this was not a issue at all prior.. but I did just recently replace my battery and I must have tugged the ground cable and it lost a solid ground. At the time I reinforced the ground and tightened and did not have an issue.
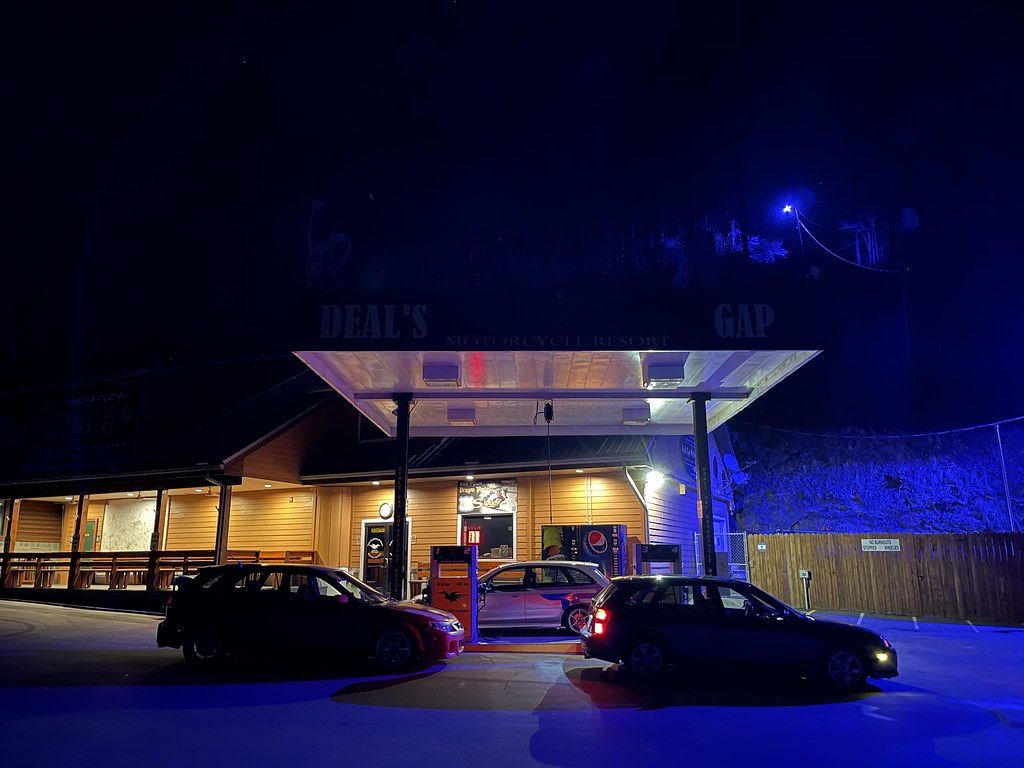
The car behaved great, and I was able to make the 4 hour drive up to the dragon safely.

Photo before our Dragon cruise..
A little late night dragon with the P5 homies…
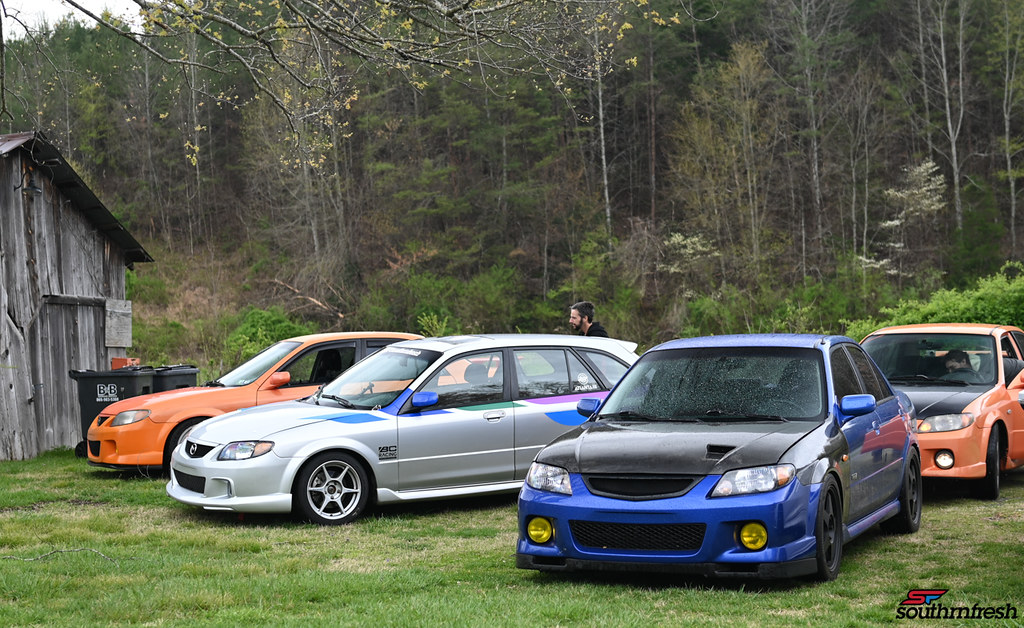
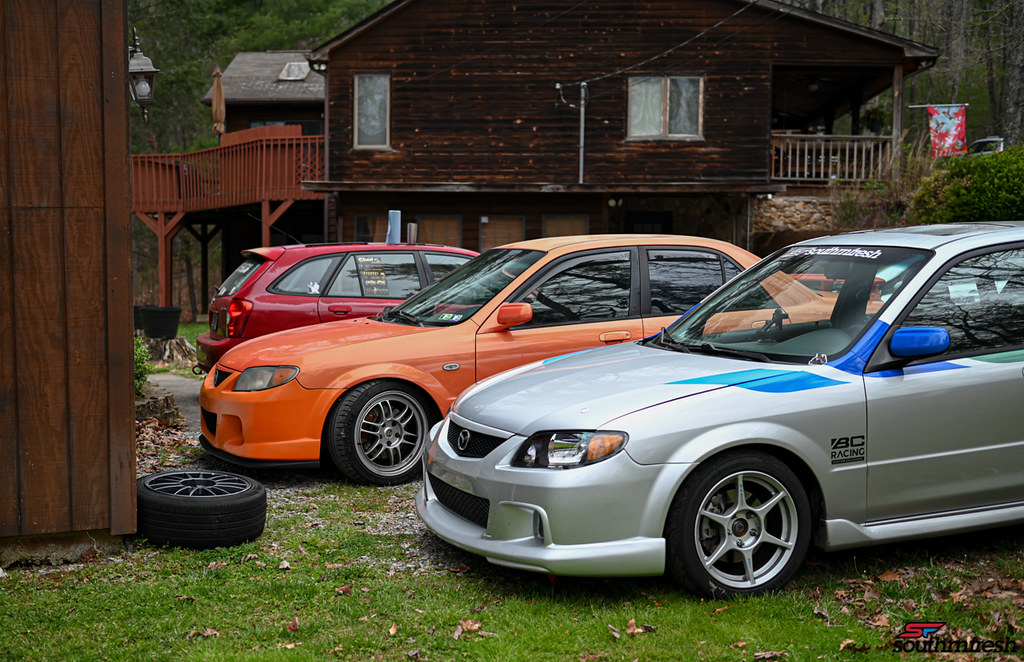
The weekend was dope. It was the first time meeting all of these guys, and was cool to see multiple Protege 5 , MP3s and Mazdaspeeds together. When I first put the car together I would go up to the dragon at least once a month. But at some point I just never felt comfortable pushing the car on the Dragon, I just could no relax my brain enough and shut out the dangers to push the limits and enjoy it to the fullest.
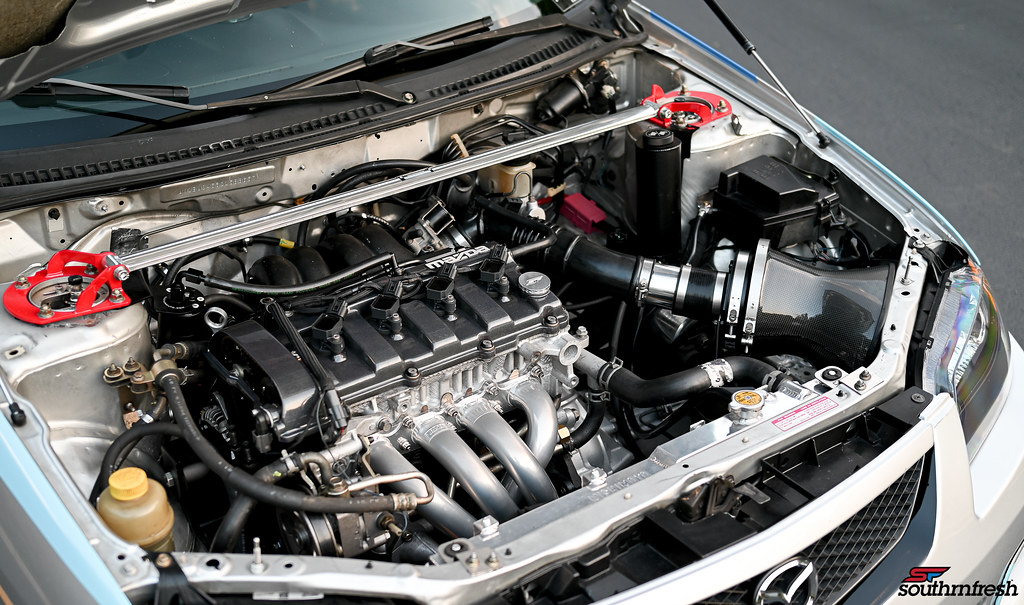
 I had this Autoexe Carbon Fiber Suction box for a few years on my Mazda 6. I had the bright idea to see if I can make it fit in the Protege’s engine bay.
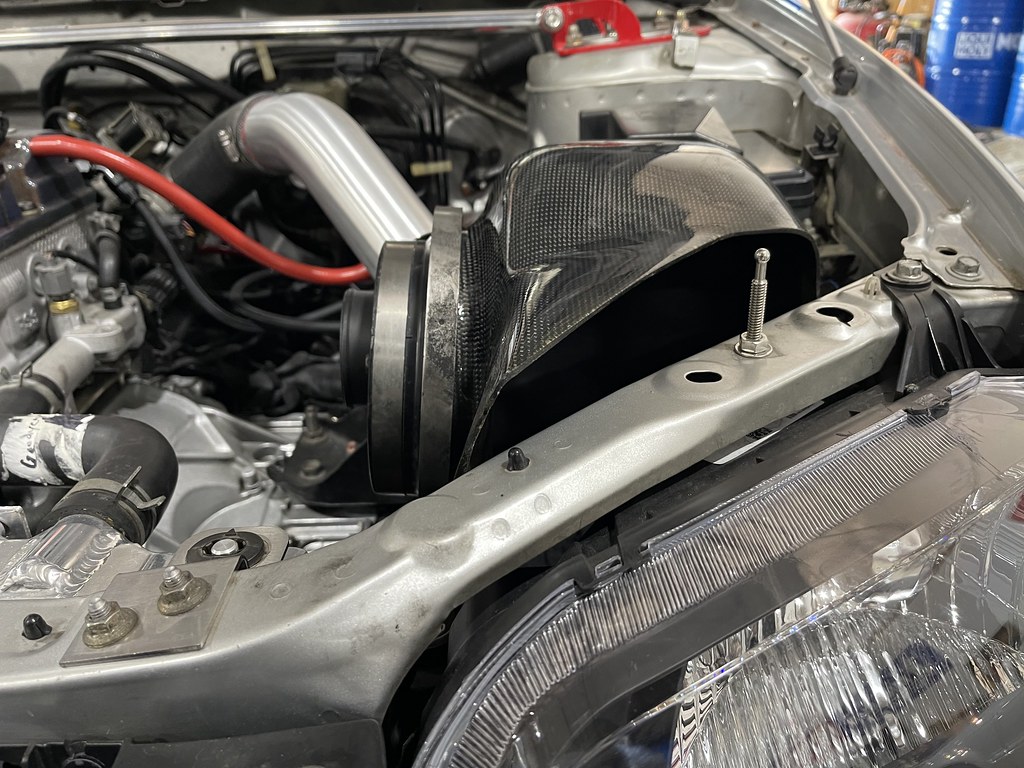
it does fit in the space, but as you can see it is much taller and wont clear the hood..
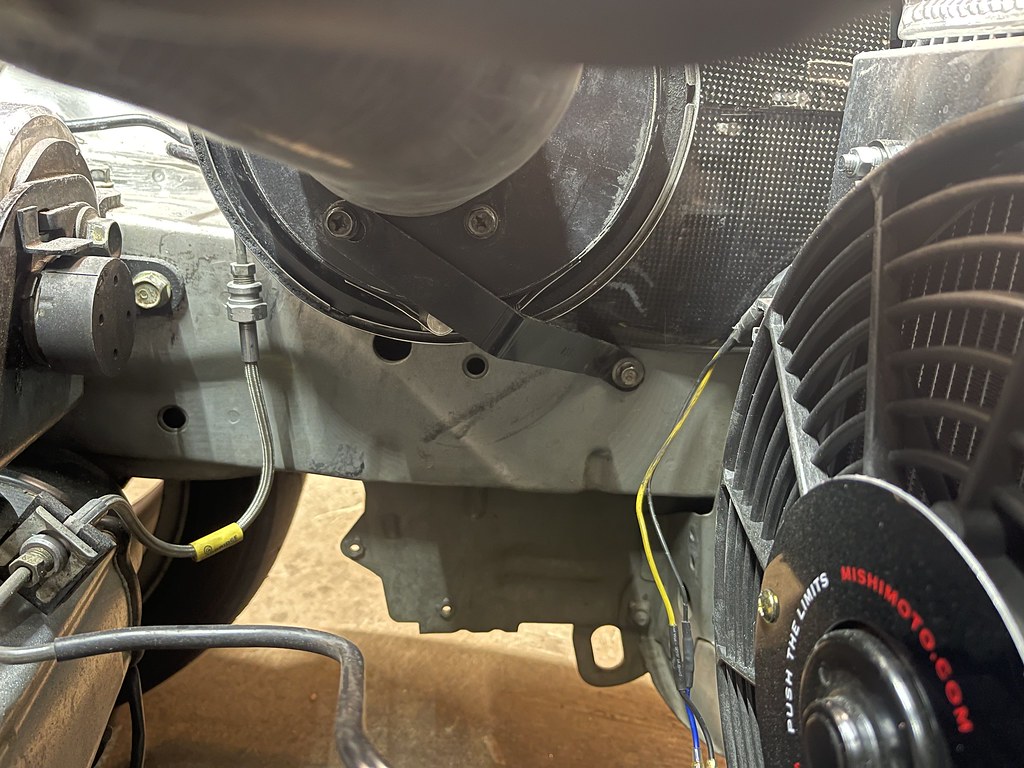
The bracket fits…
I trimmed the bottom portion which lowered it enough to clear the hood and tuck behind the headlight..
It may not be the most efficient, but it looked cool..
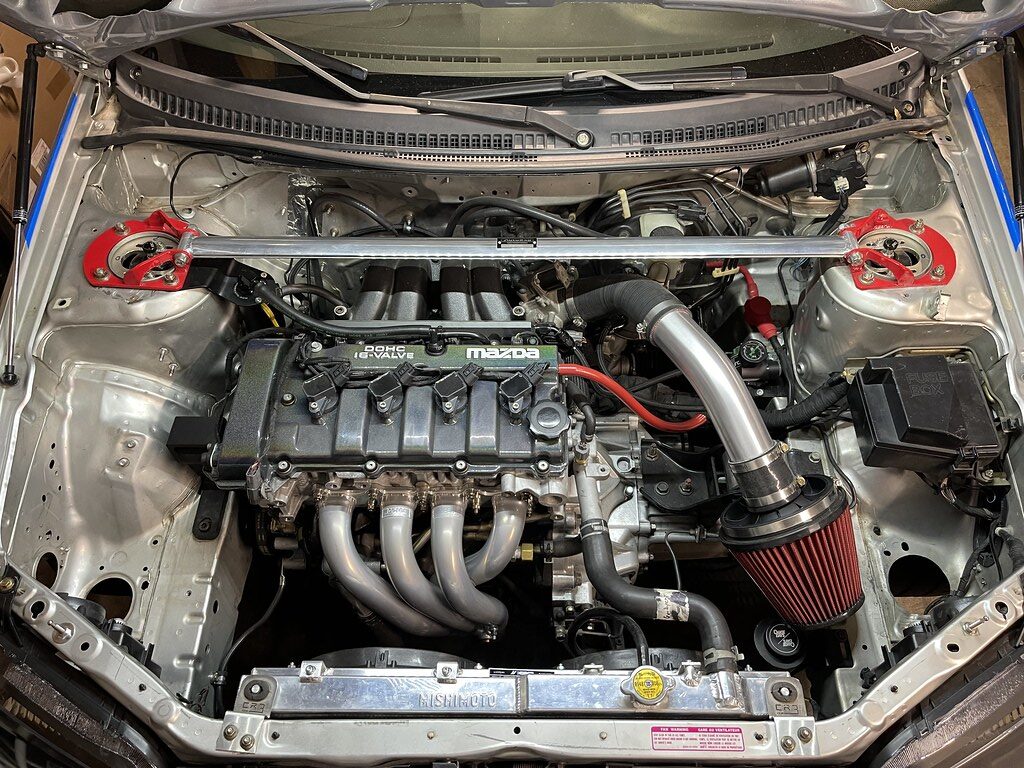
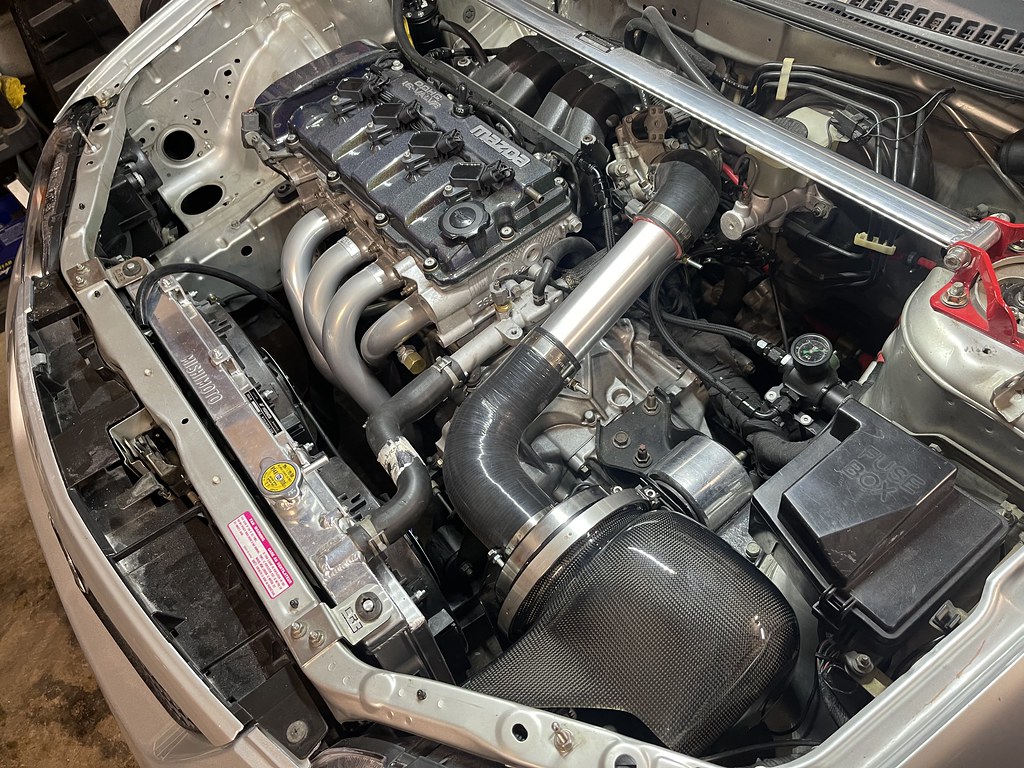
I still had the original intake setup to use on track day!
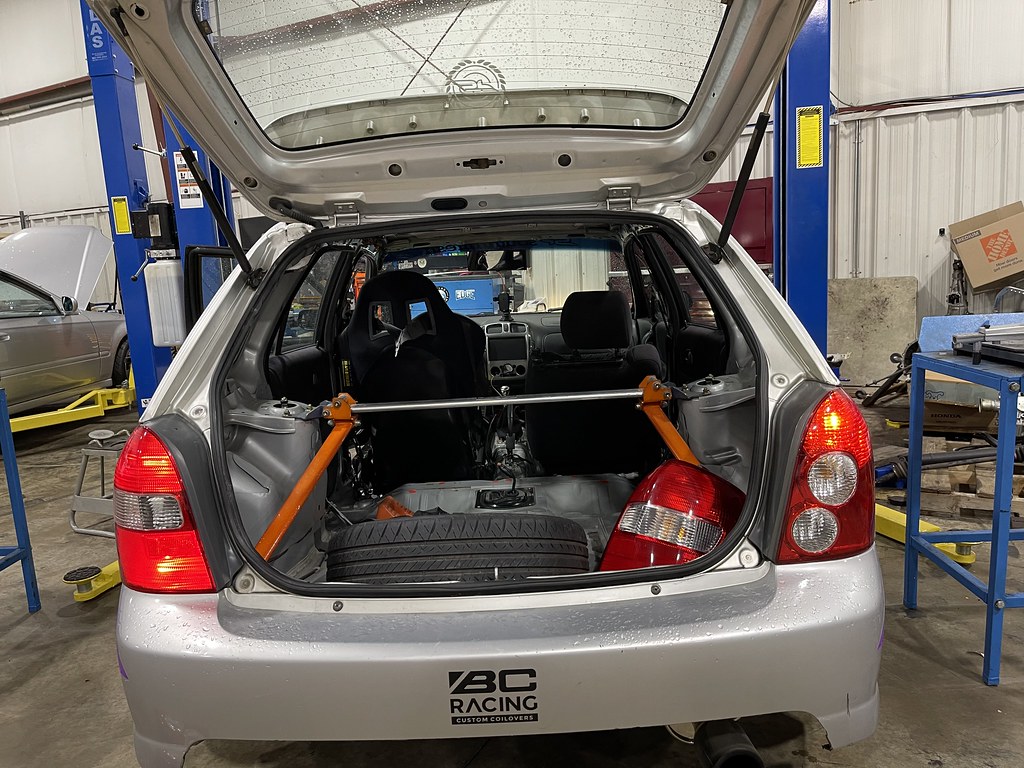
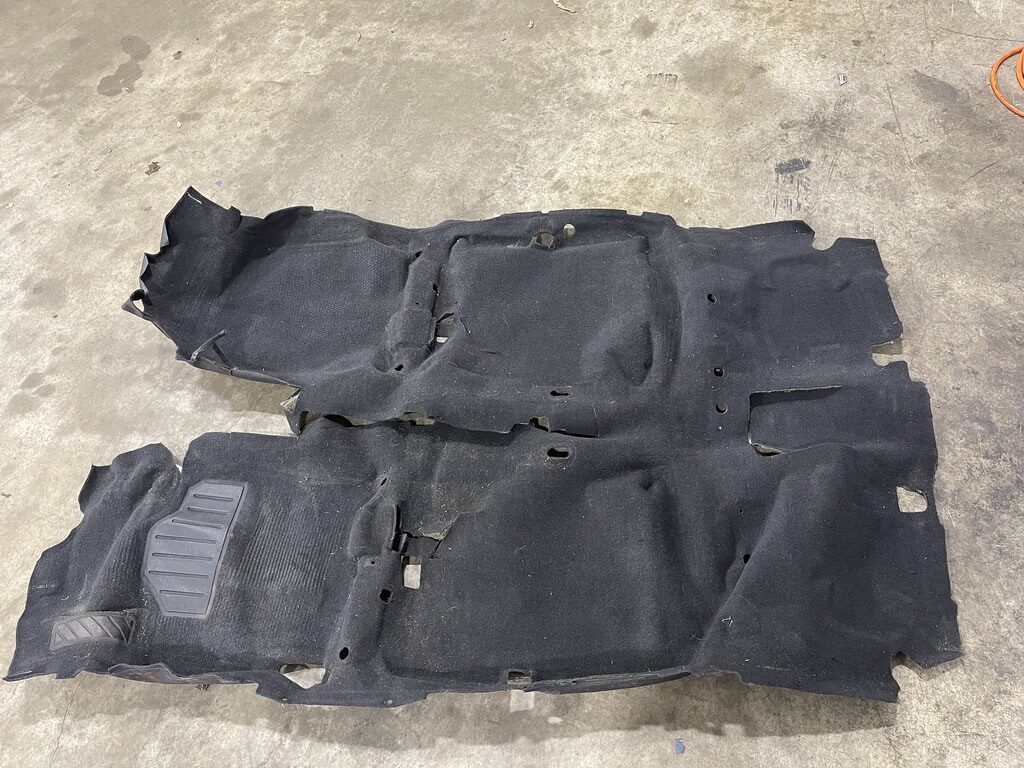 I had wanted to put the carpet back in the car for awhile. It would bug me how the interior looked without carpet, and how much dust and dirt would pile up in the car without the carpet to hide it. I got lucky and managed to find a really nice condition carpet at Pull a part.
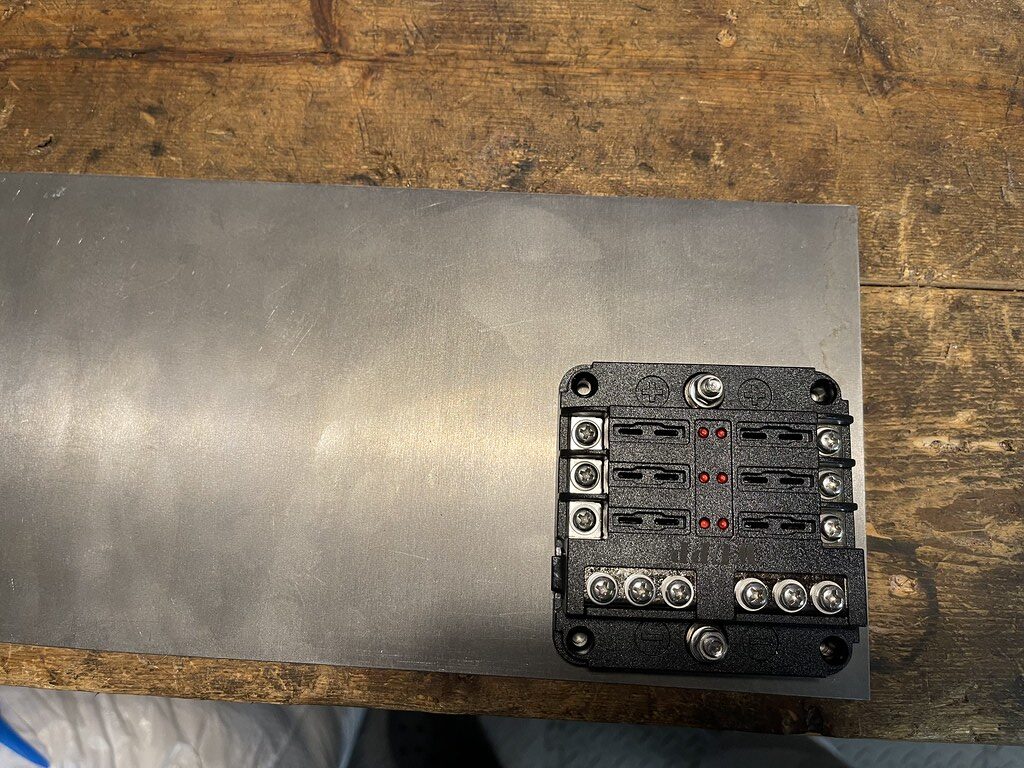
I got a fuse panel to help with adding gauges and other accessories in the future.
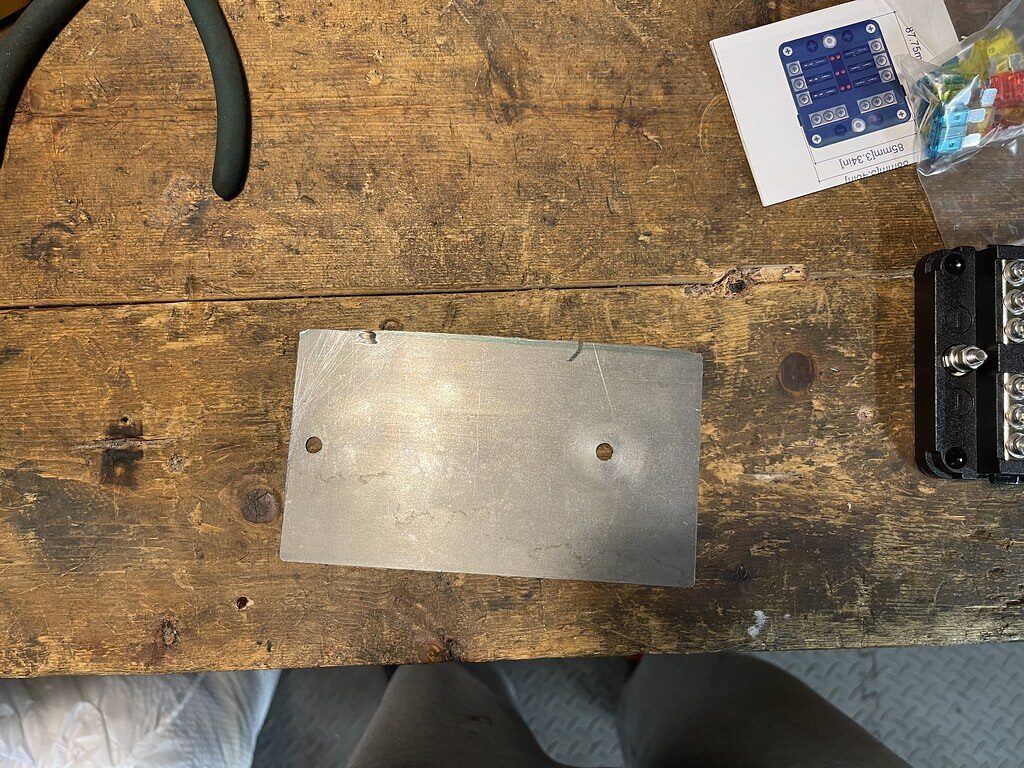
I did need to make a bracket to mount it behind the center console..
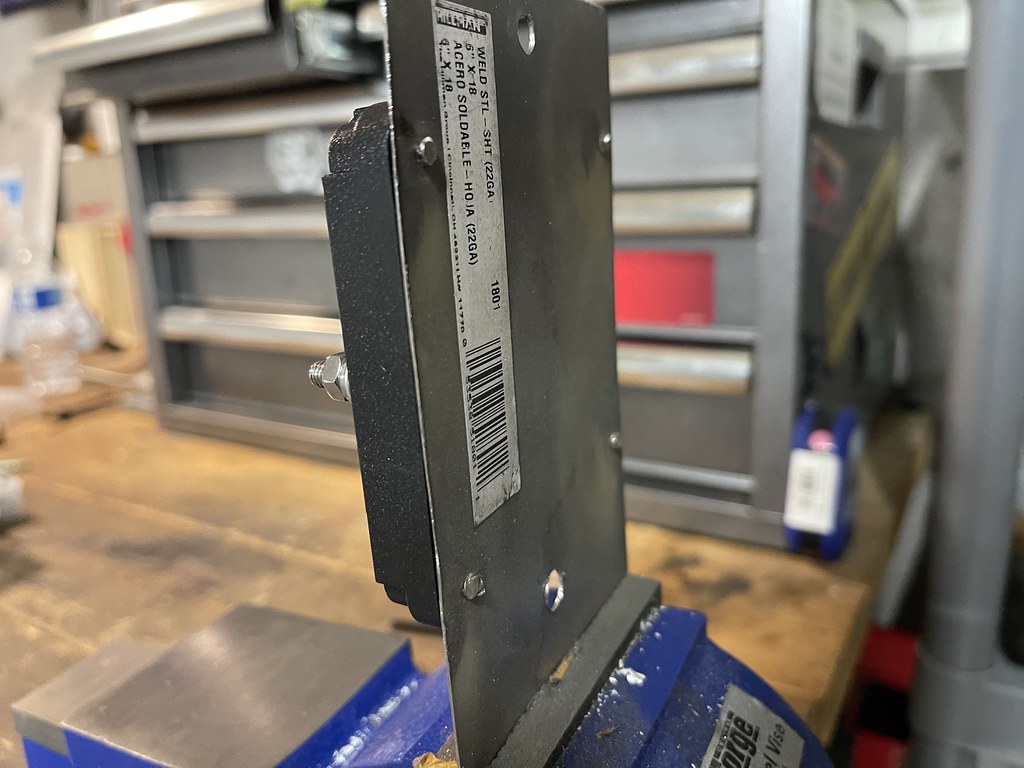
Fuse panel mounted…
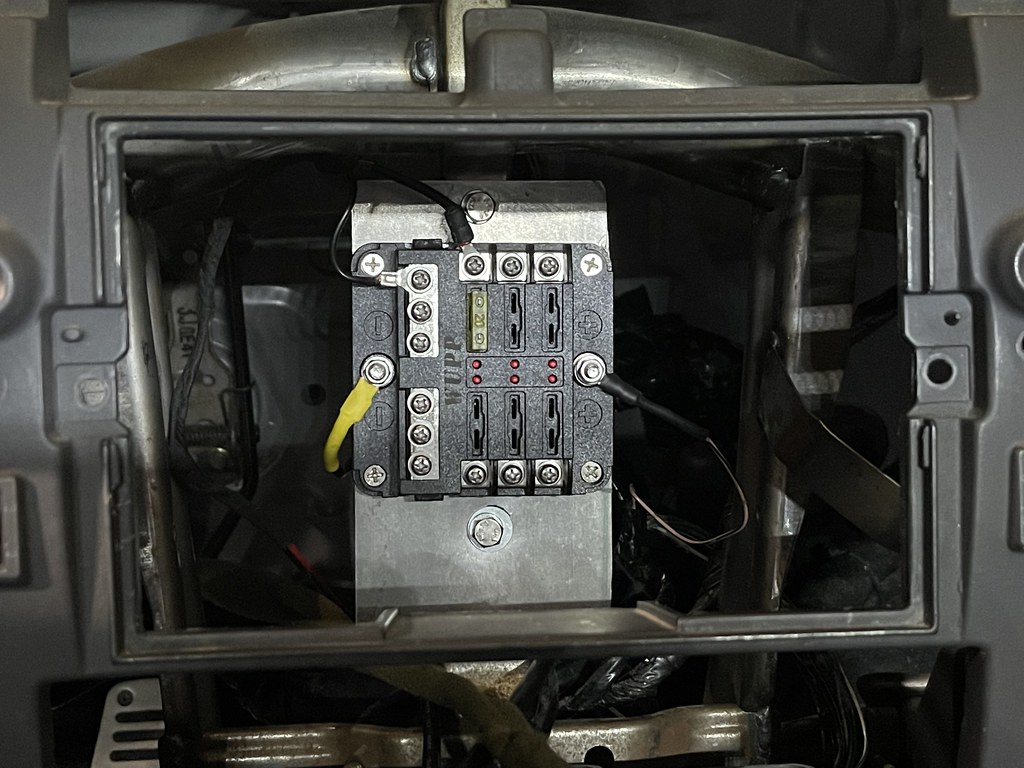
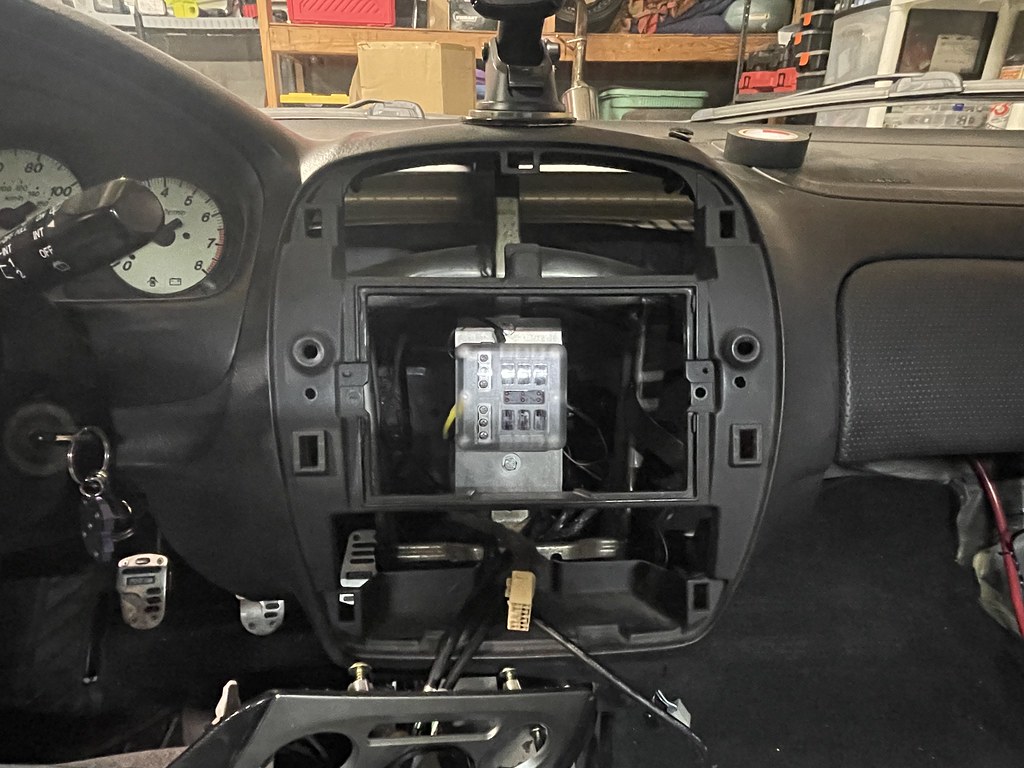
Mounted and tucked away behind the center console.
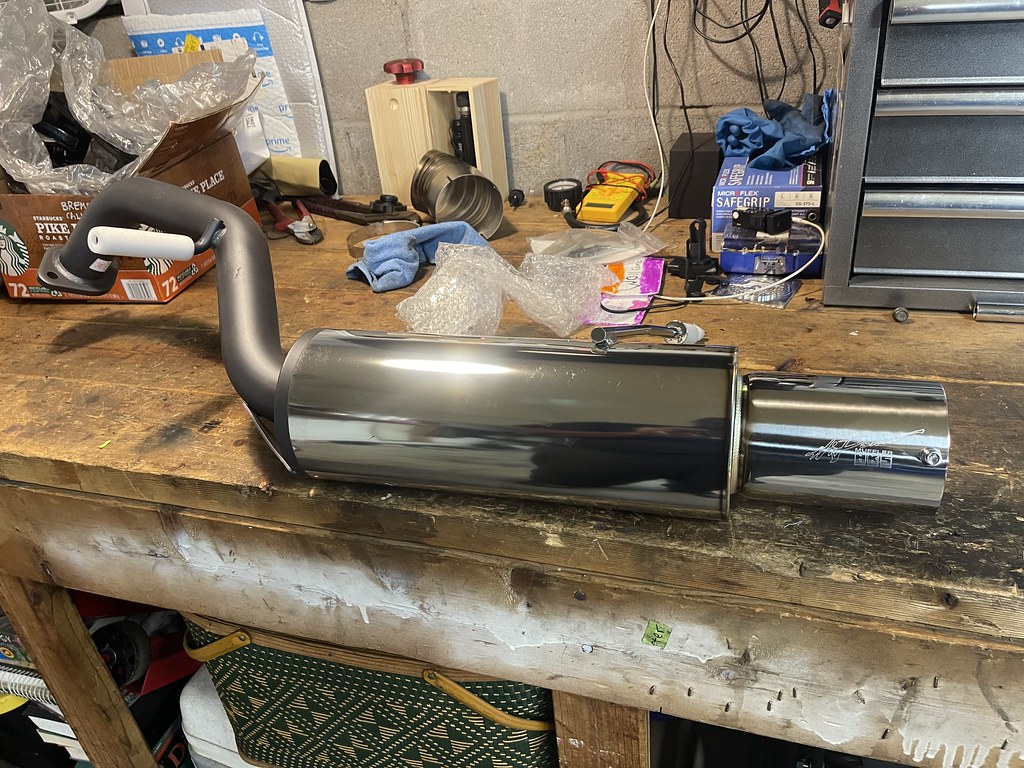
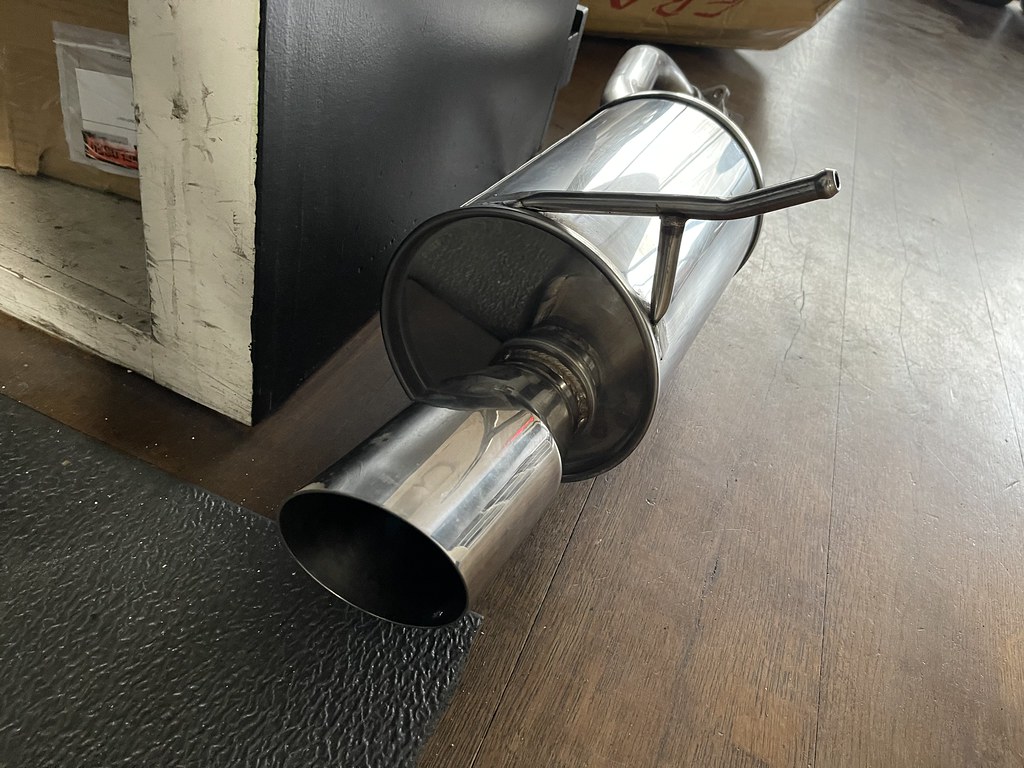
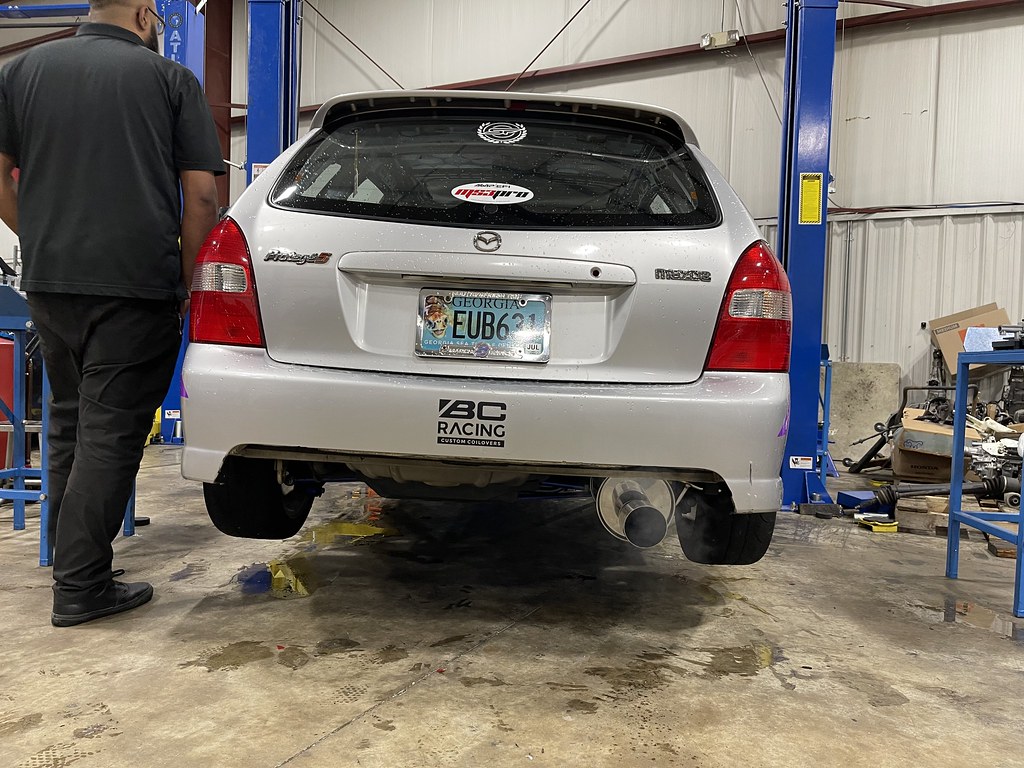
HKS Hi-Power axle back is one of the fee parts that are readily available for the P5 still. So I decided to get one while it was available.

I am not a huge fan of the can muffler style, but it has a great tone over the old Trust axle back..
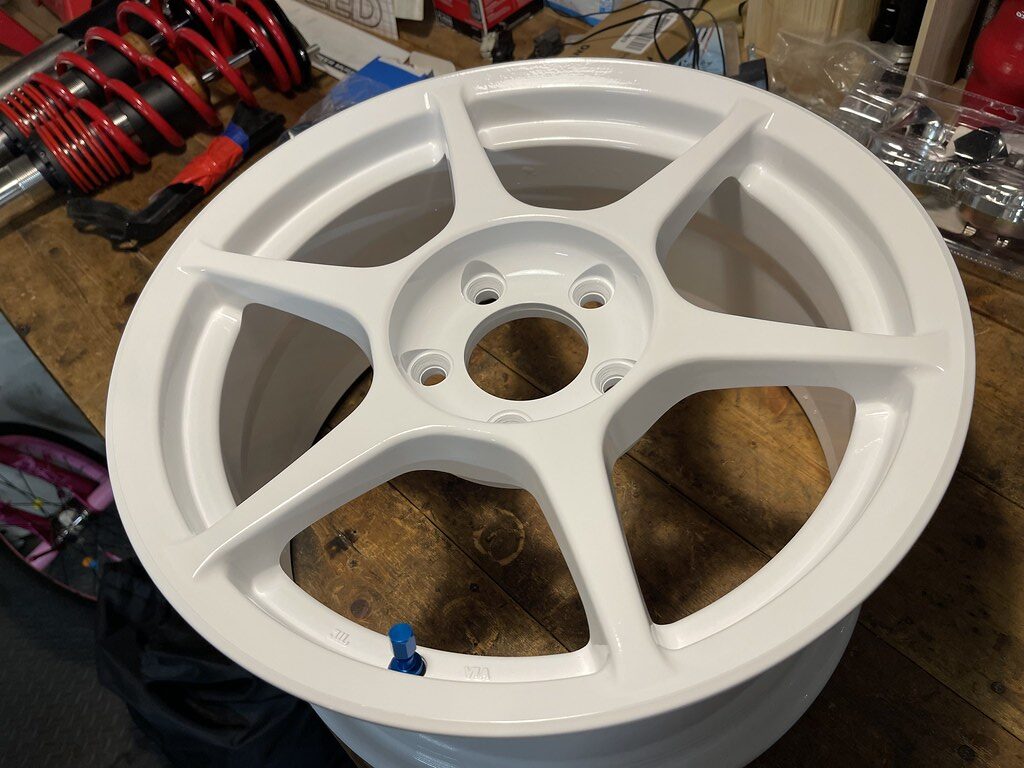
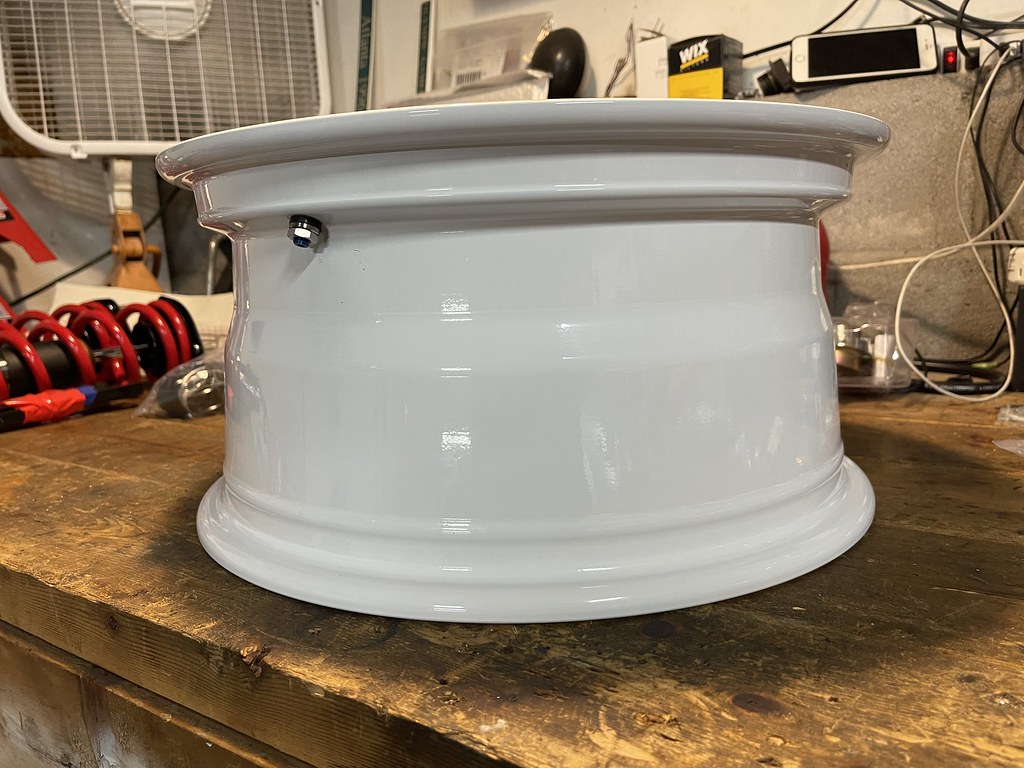
I decided to get the Koseis powder coated white to add a little color to the car. The wheels came out great, and looked brand new. Big thanks to Flower Shop Coatings out in Covington for knocking it out.
I took upon myself to get some more vinyl and add the vinyl on the front piece to complete the base of the livery. It took me about 4 hours to do it, but I did it…
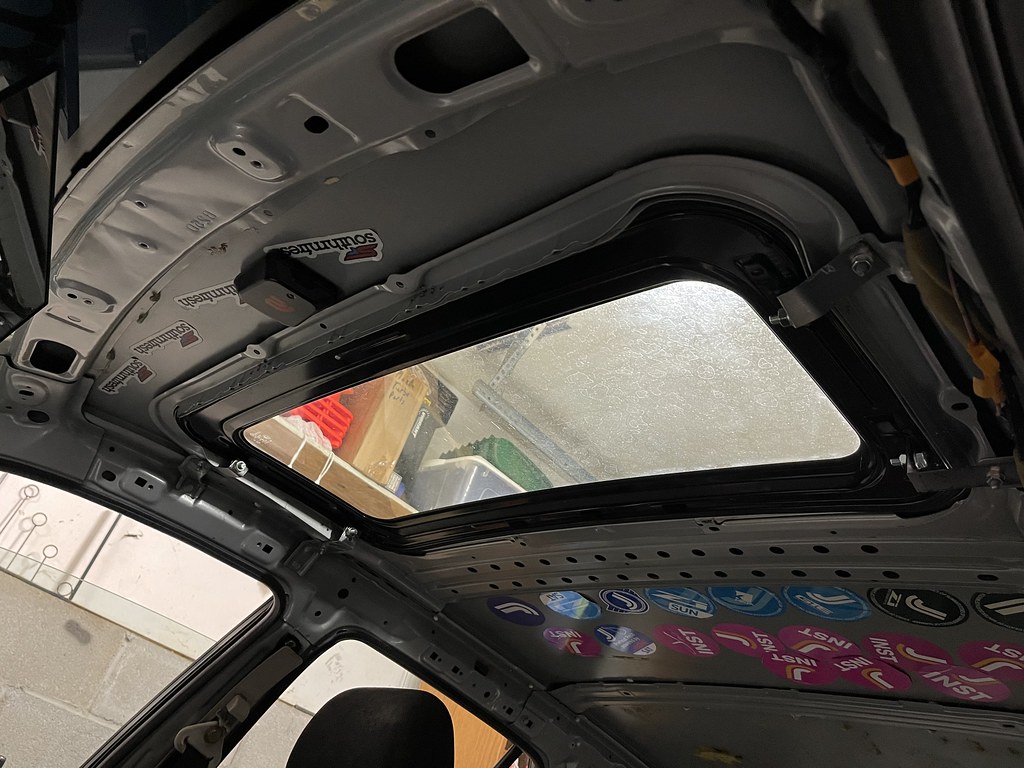
I was finally able to get rid of the thin metal sunroof plug. I fit the glass in, and made some brackets to bolt the glass to the original sunroof mounts…
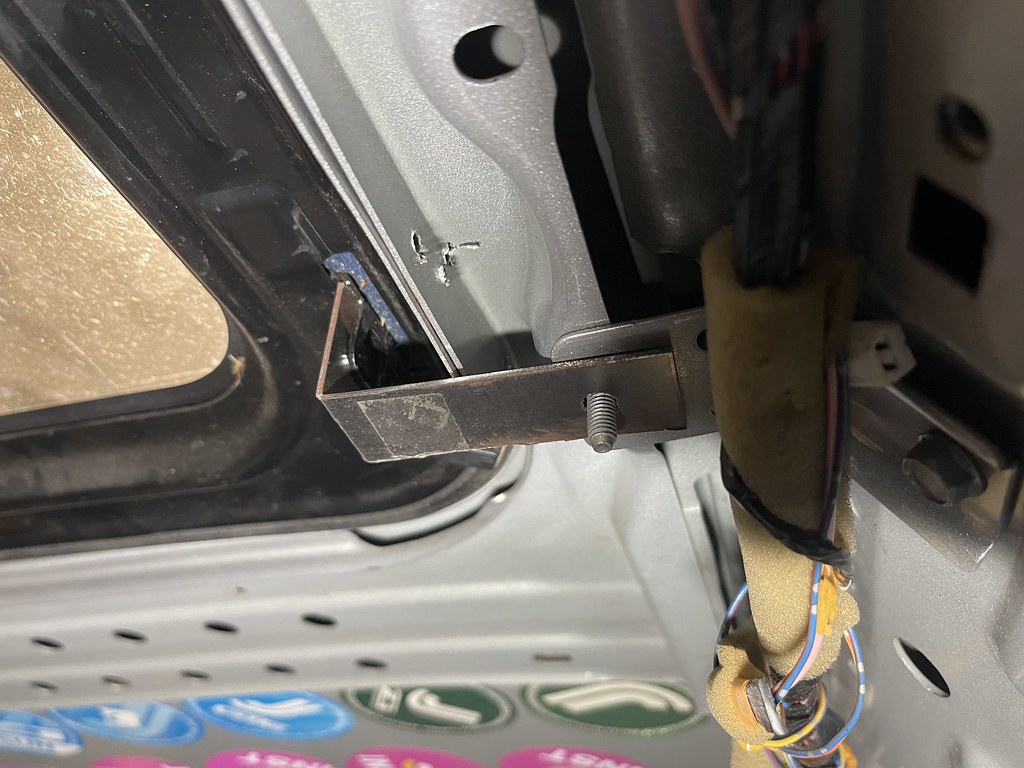
Such a simple thing to fix an issue that had annoyed me for so long..
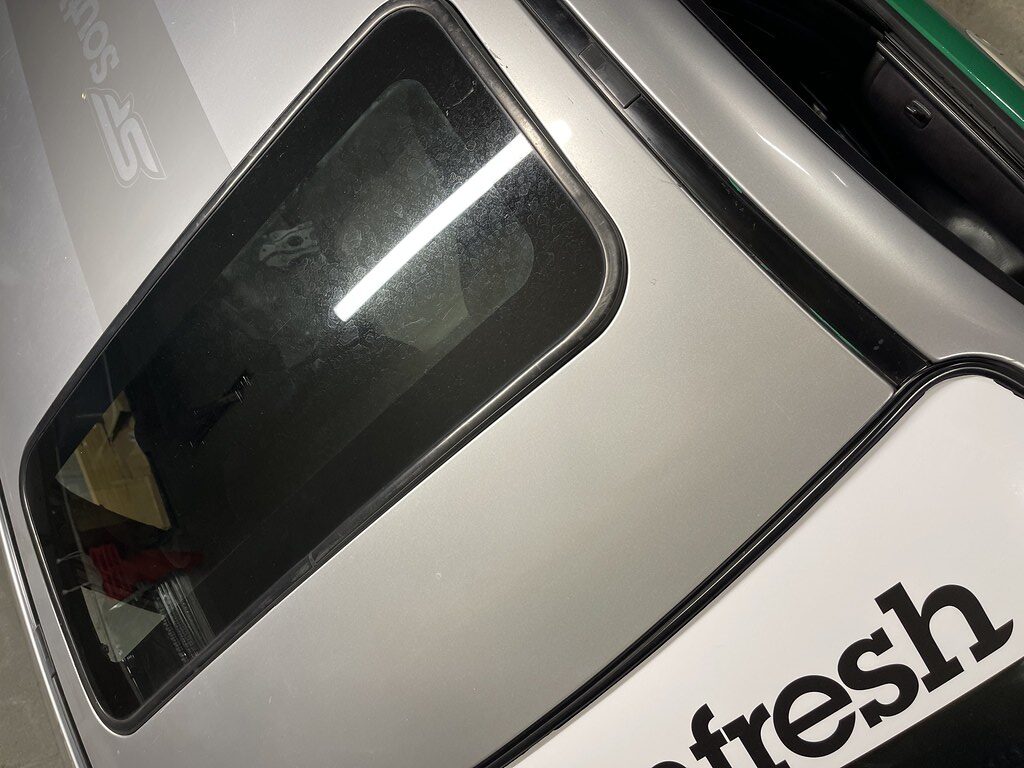
Glass in..
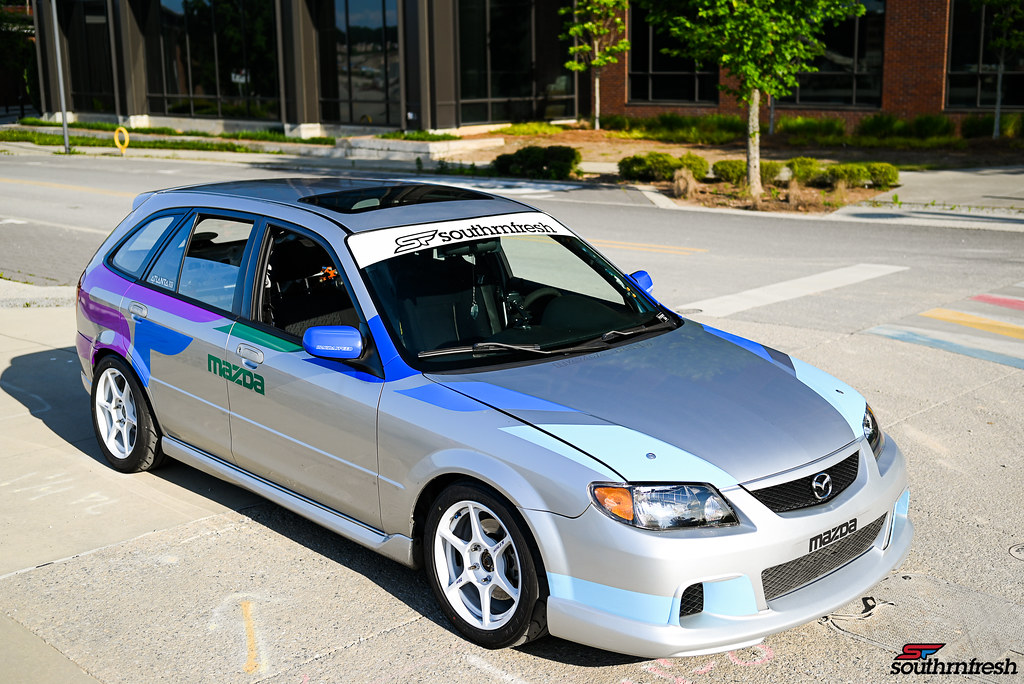
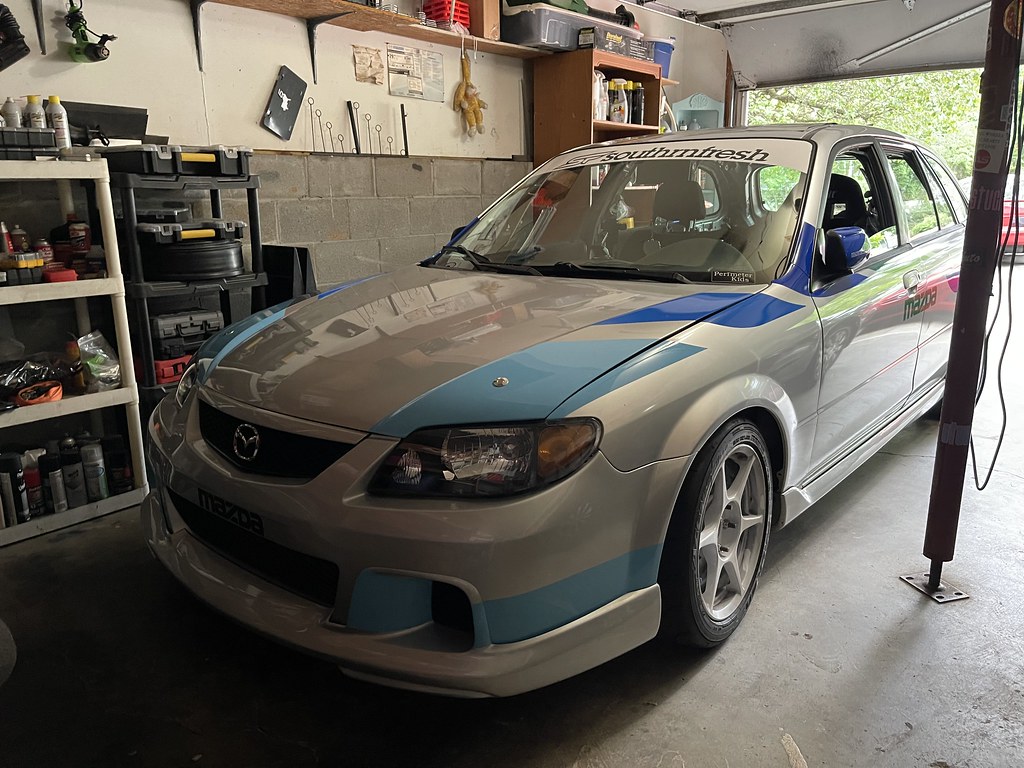
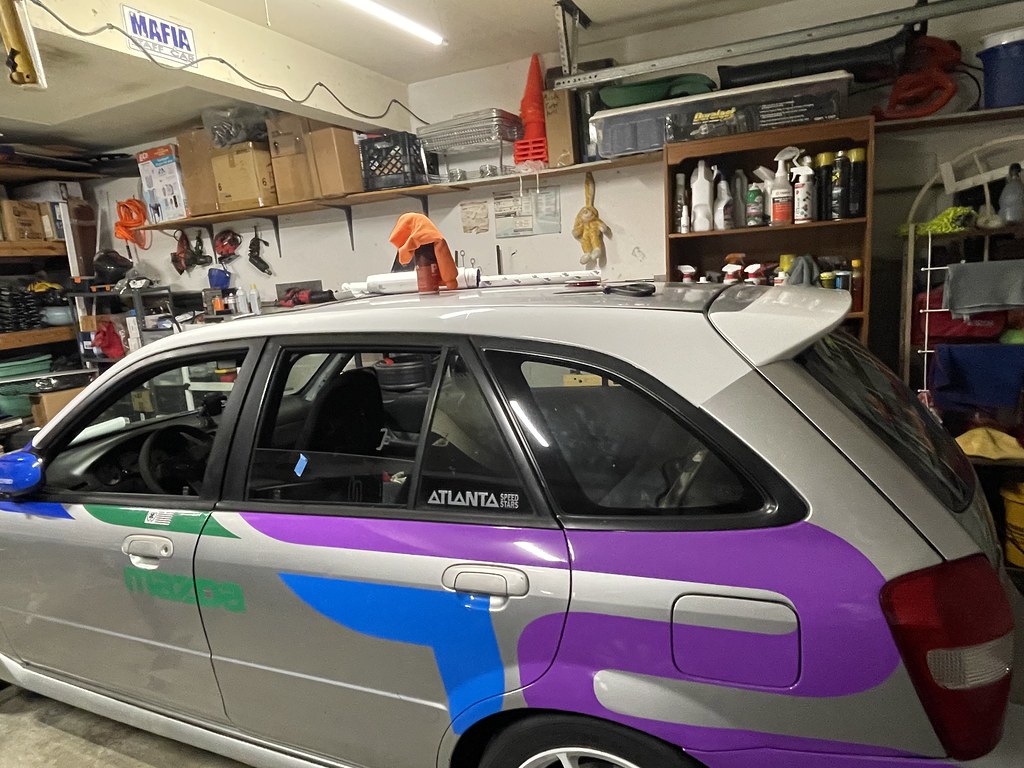
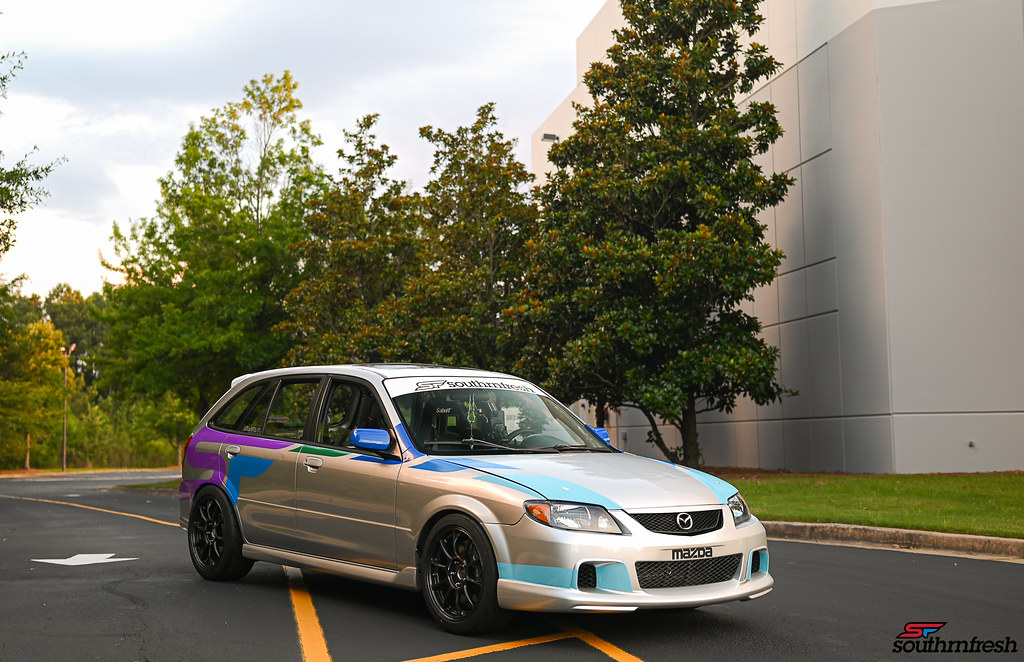
Took the car out for a photo session to show off the new look. With the little changes it made such a big difference.
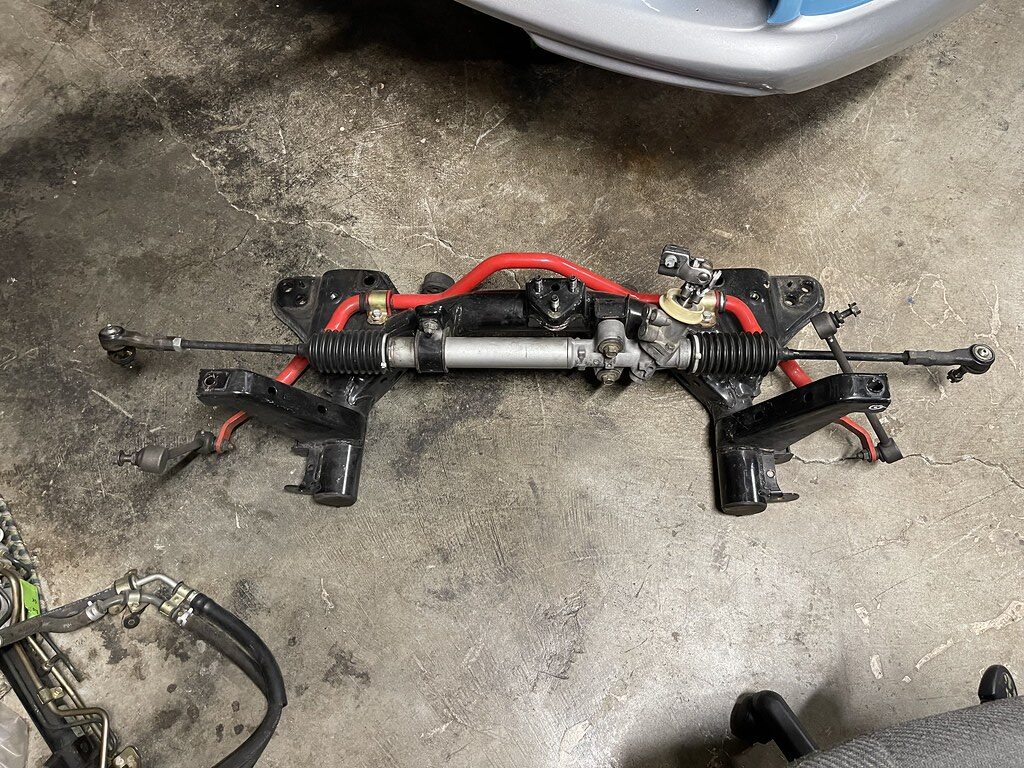
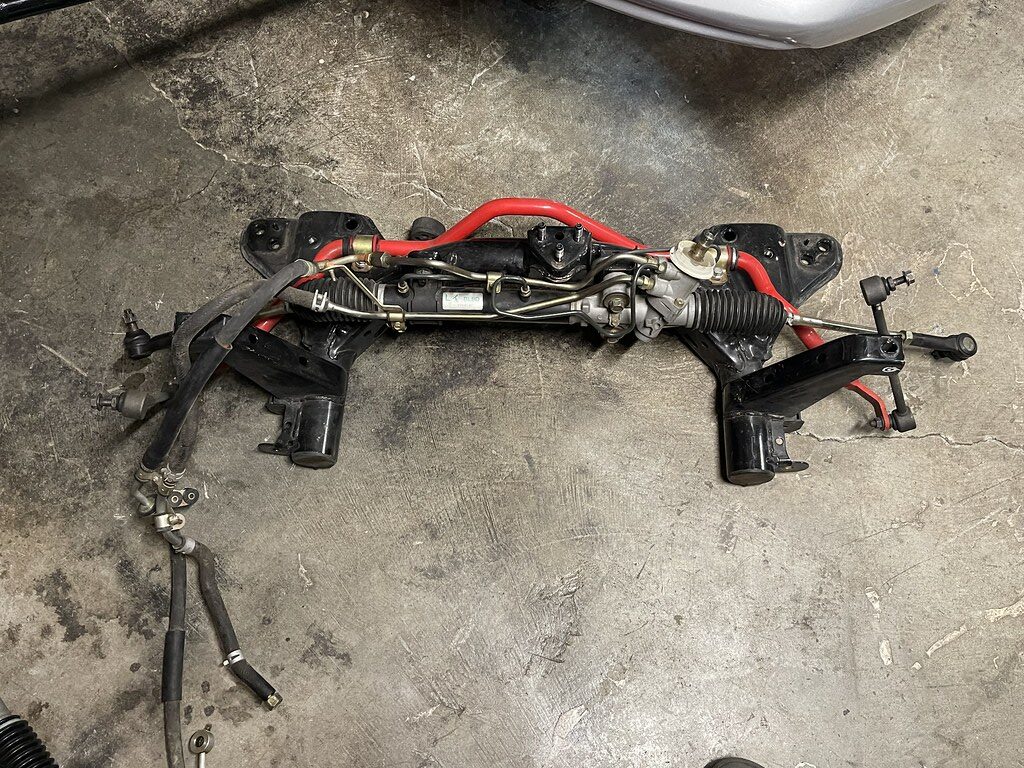
So after a few track days I regret removing power steering. While it did improve the feel, it made me work much harder on track and just distracted me from focusing on the road.
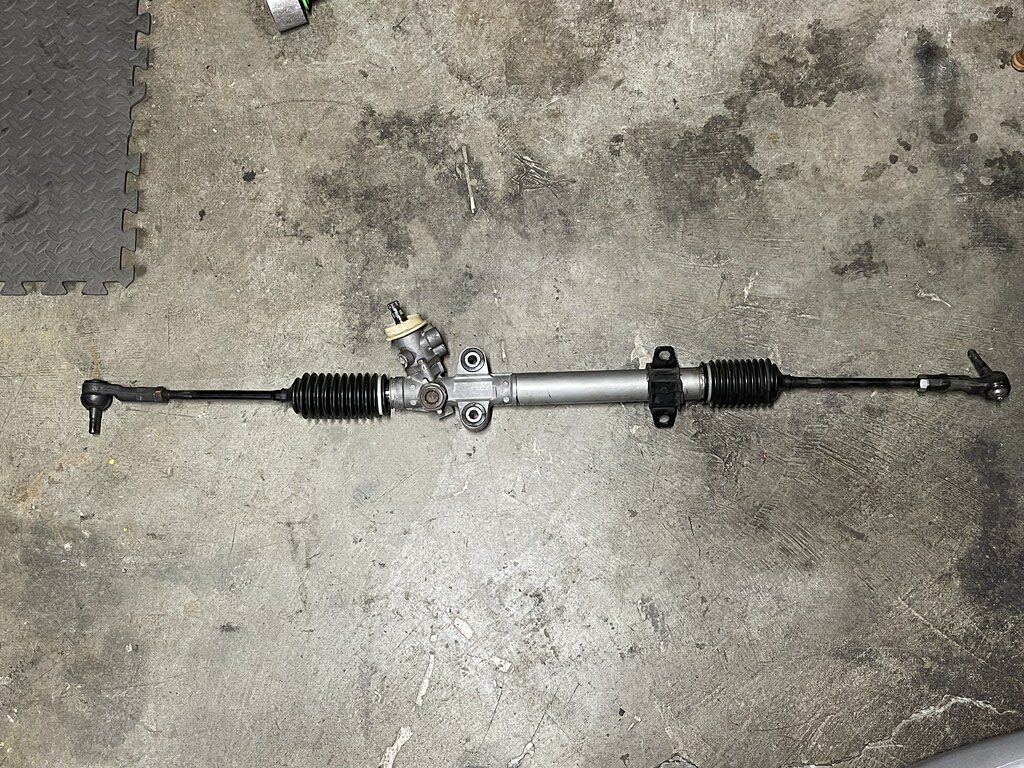
Manual converted rack out….
I had this steering rack for awhile, it was one of the low mileage oem steering racks that I got from Mazmart a few years ago.
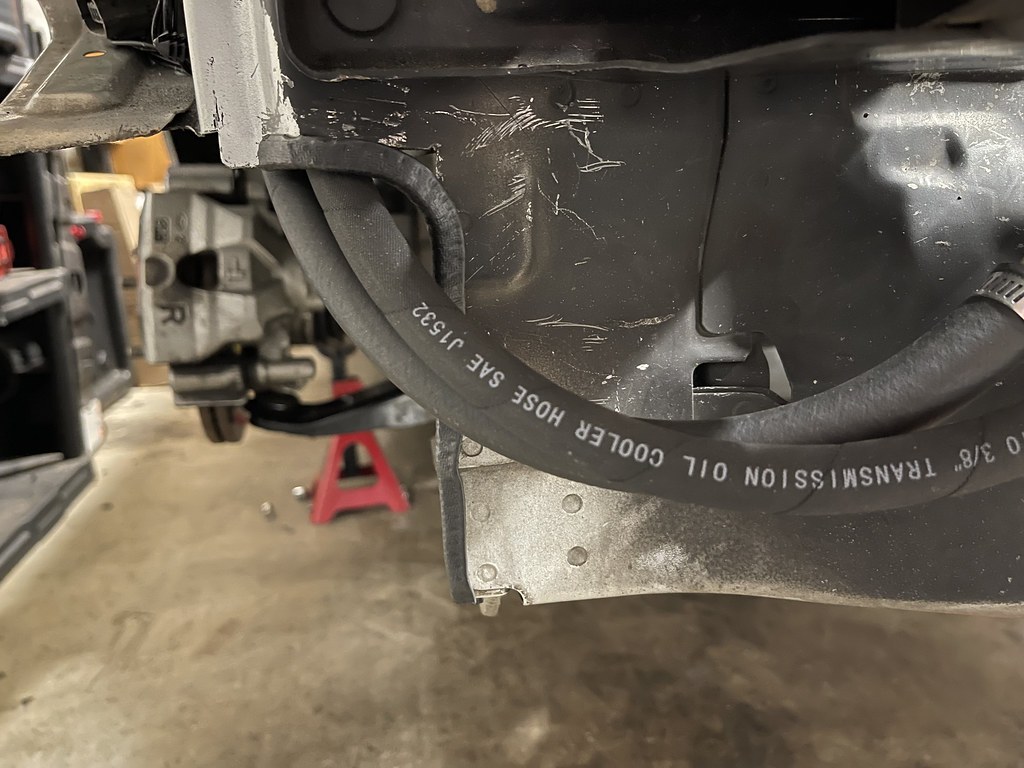
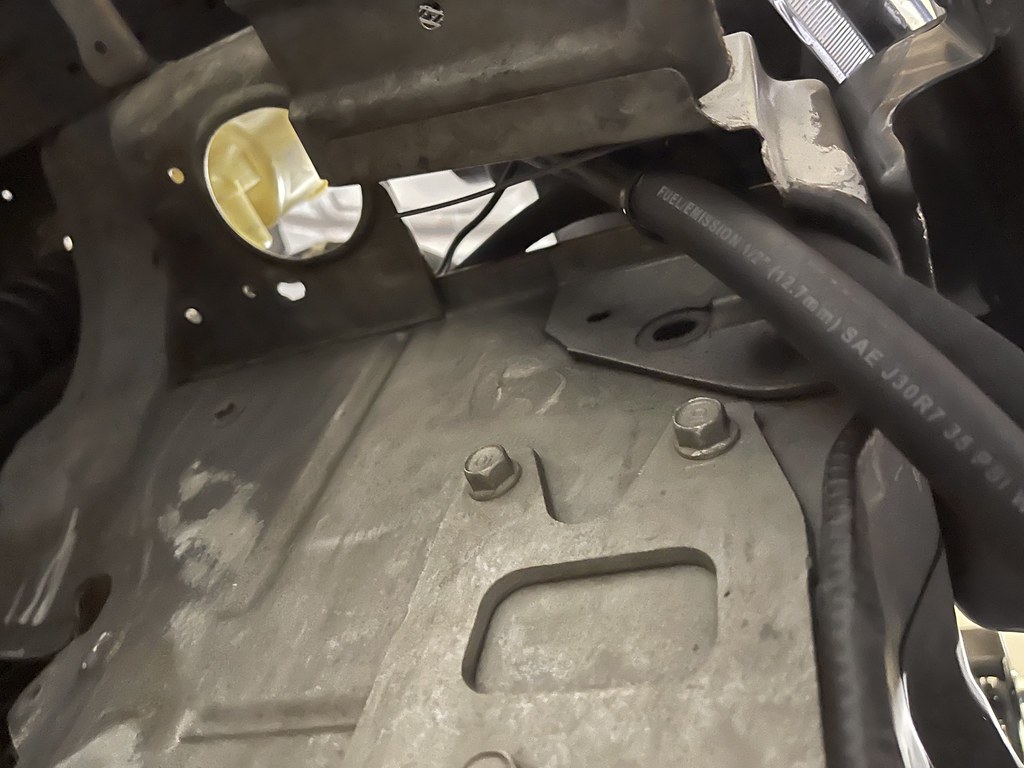
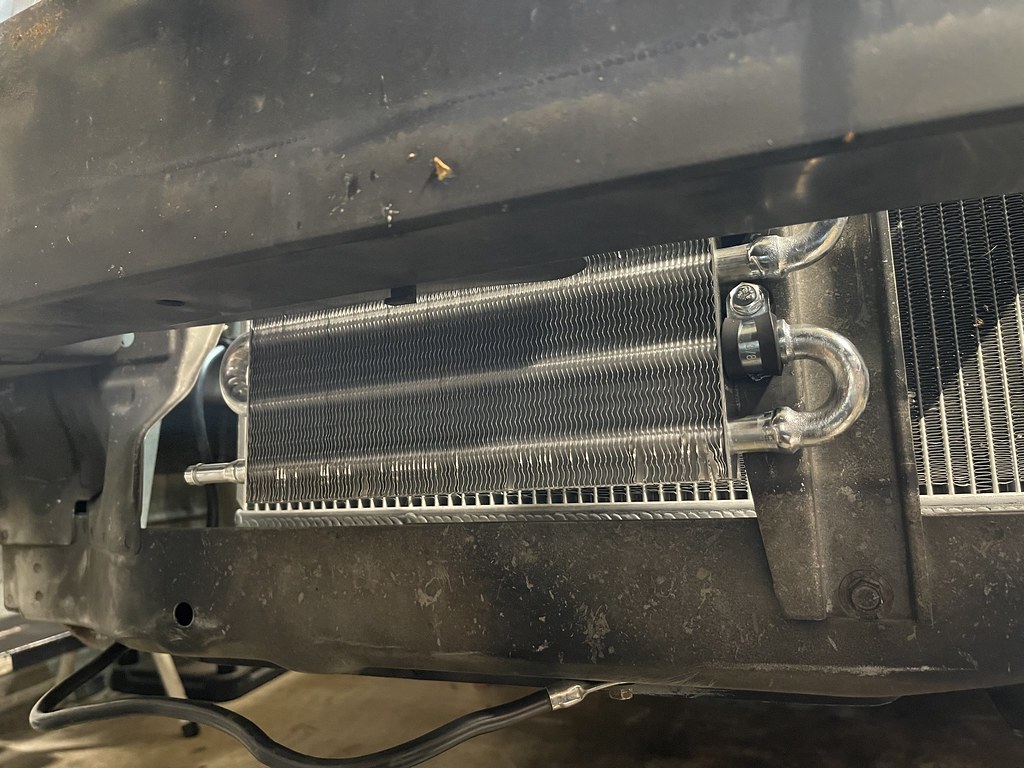
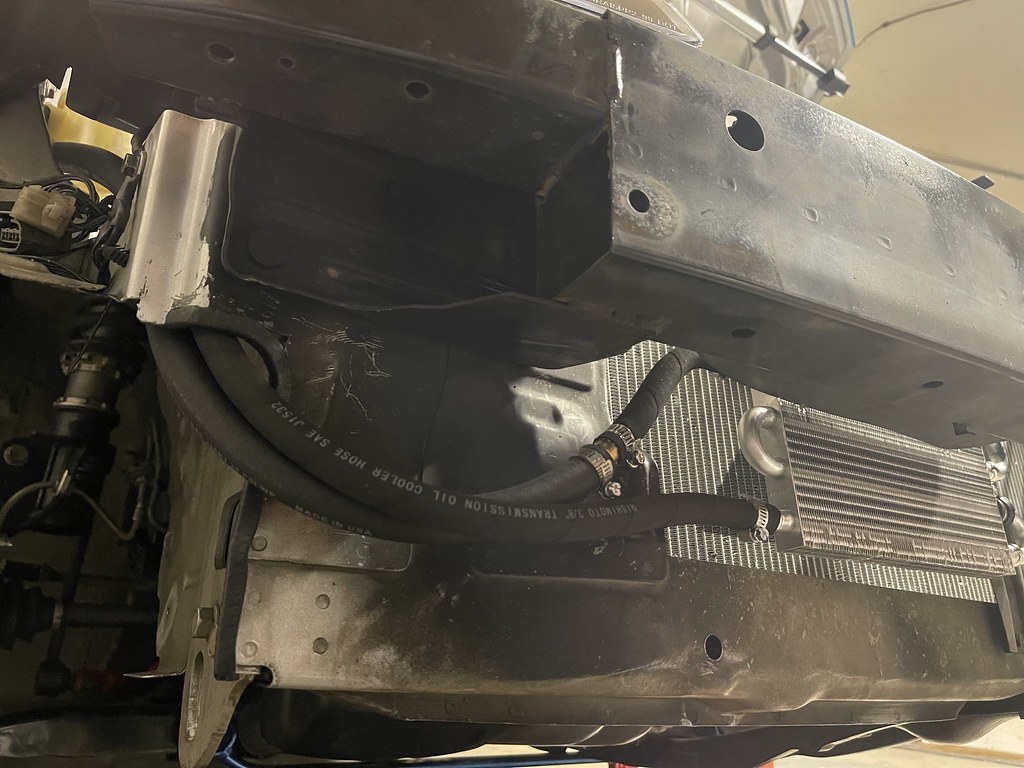
At the time I could not find the oem power steering cooler, so I had to improvise and upgrade to this universal one.
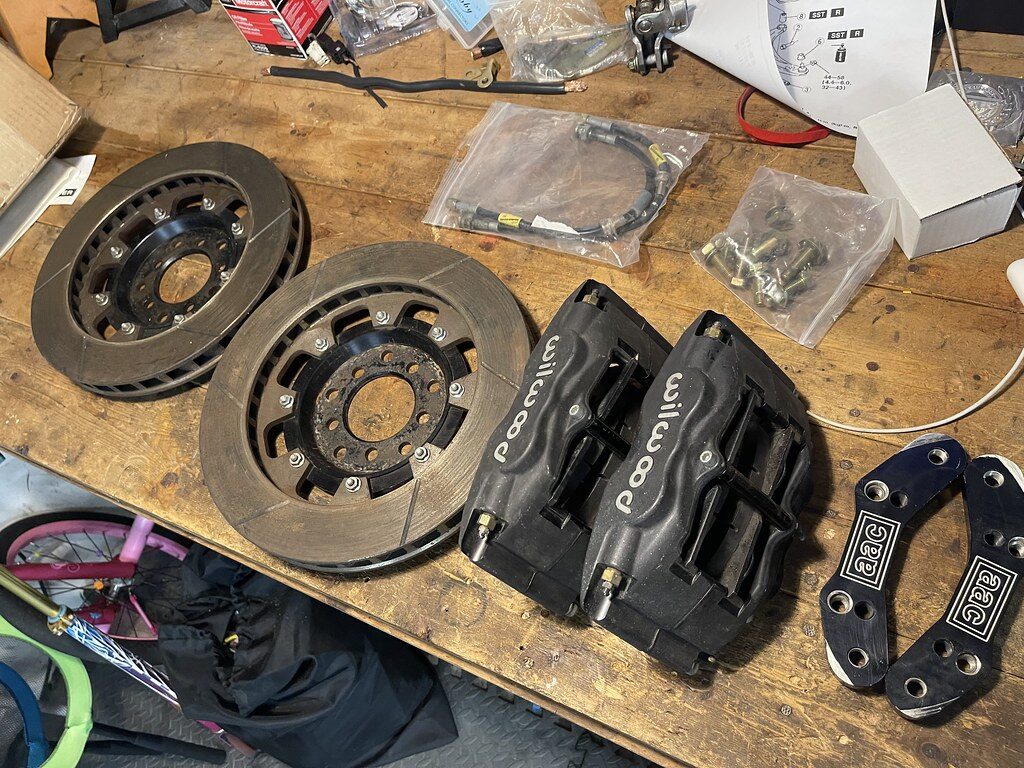
One of the members on Grassroots Motorsports reached out and said he had an old 13″ Wilwood Brake Kit for a Protege he owned years ago. The kit was an old kit produced by AAC in the Protege prime years using their bracket and off the shelf Wilwood calipers. Braking is not something the Protege lacked, but the weight savings were a 1/3 of the weight of the Mazda 6 calipers. And these calipers opened up a long list of pads!
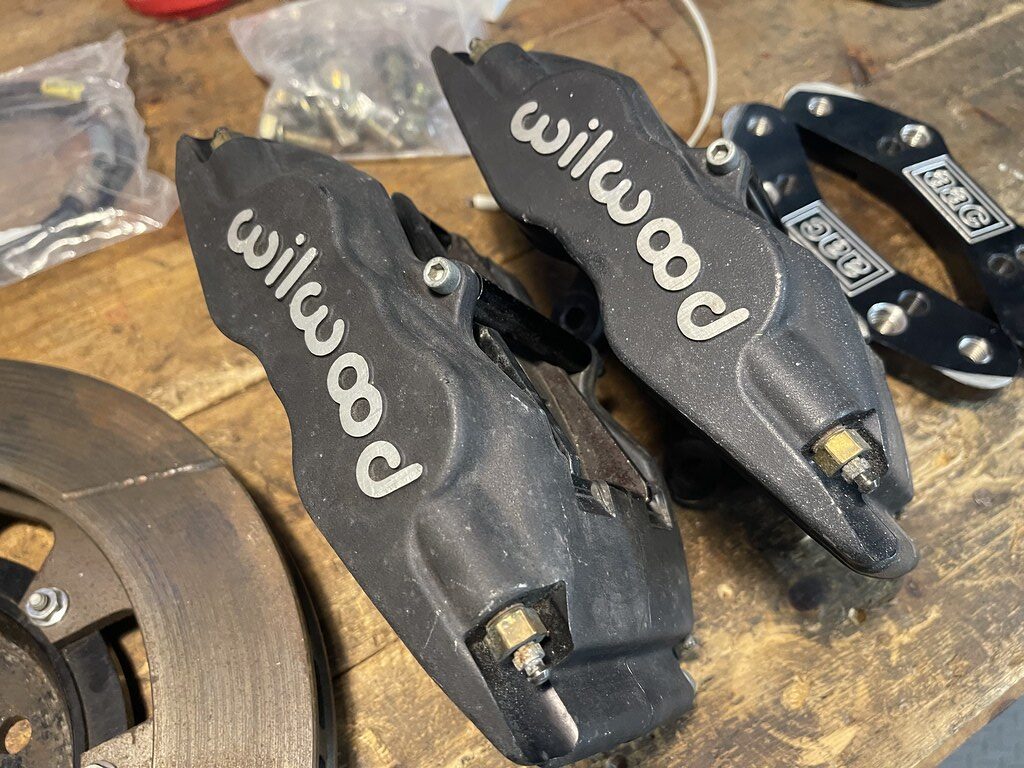
Everything looked to be in good condition and all in one piece. The kit was built around one of Wilwoods biggest calipers at the time so wheel fitment was going to be tight. But there was a chance the Koseis would fit…
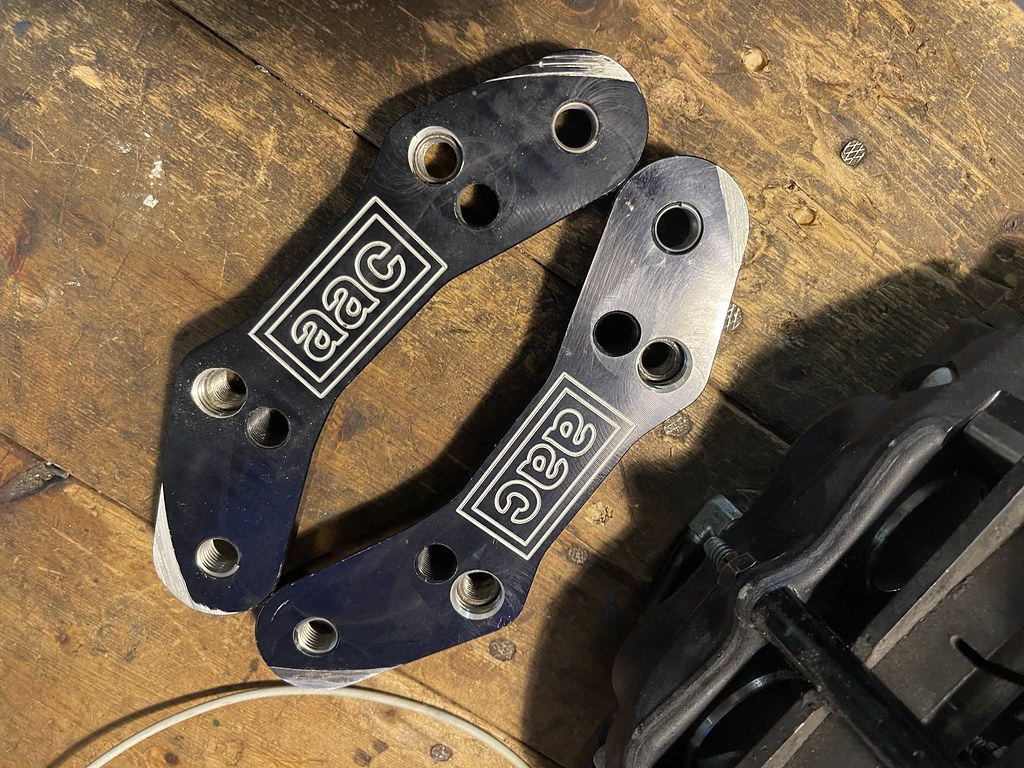
The AAC brackets were designed to be able to use 2 different caliper sizes to clear smaller wheels. But they never got around to completing that part of the kit back then so they were just sold to fit the 13″ Rotors.
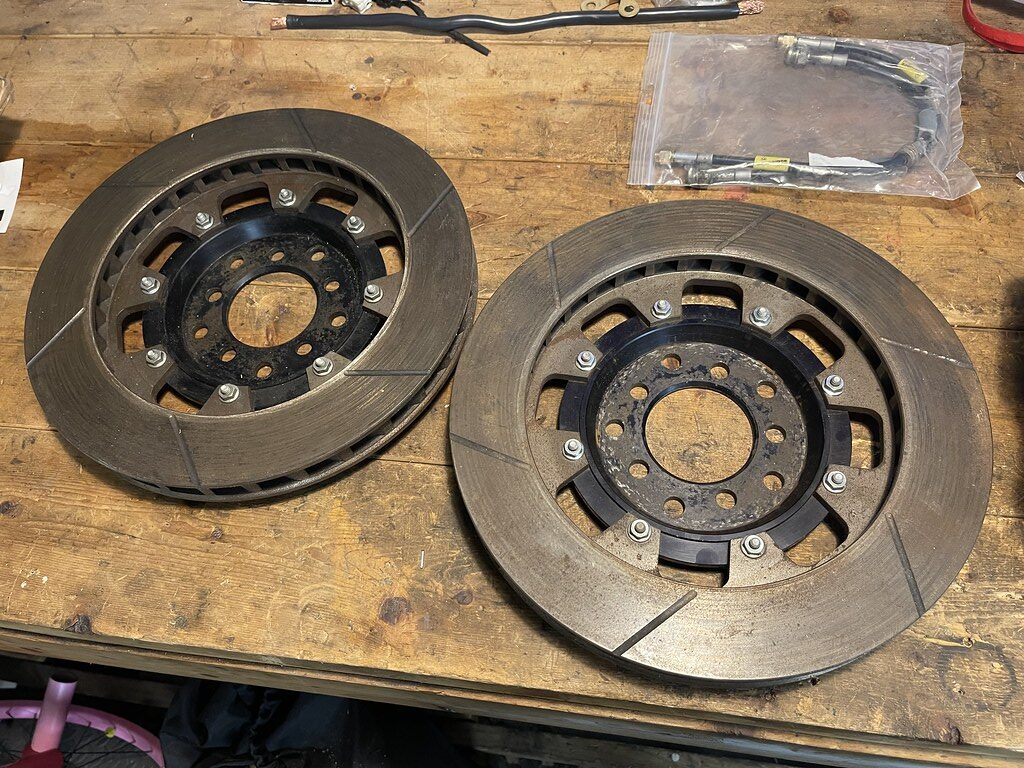
The rotors were the only specialty piece. I have the dimensions to replace them, but at the time they were not a off the shelf rotor. Hopefully in 2023 they are easier to come by.
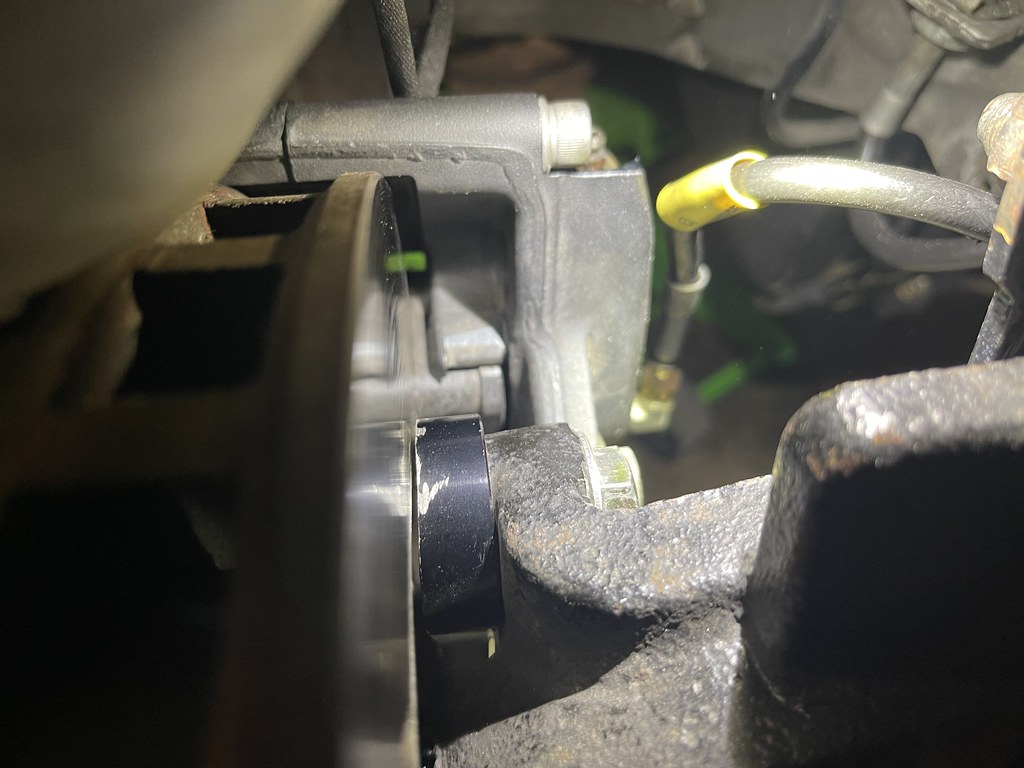
First test fit with the Koseis delivered bad news..
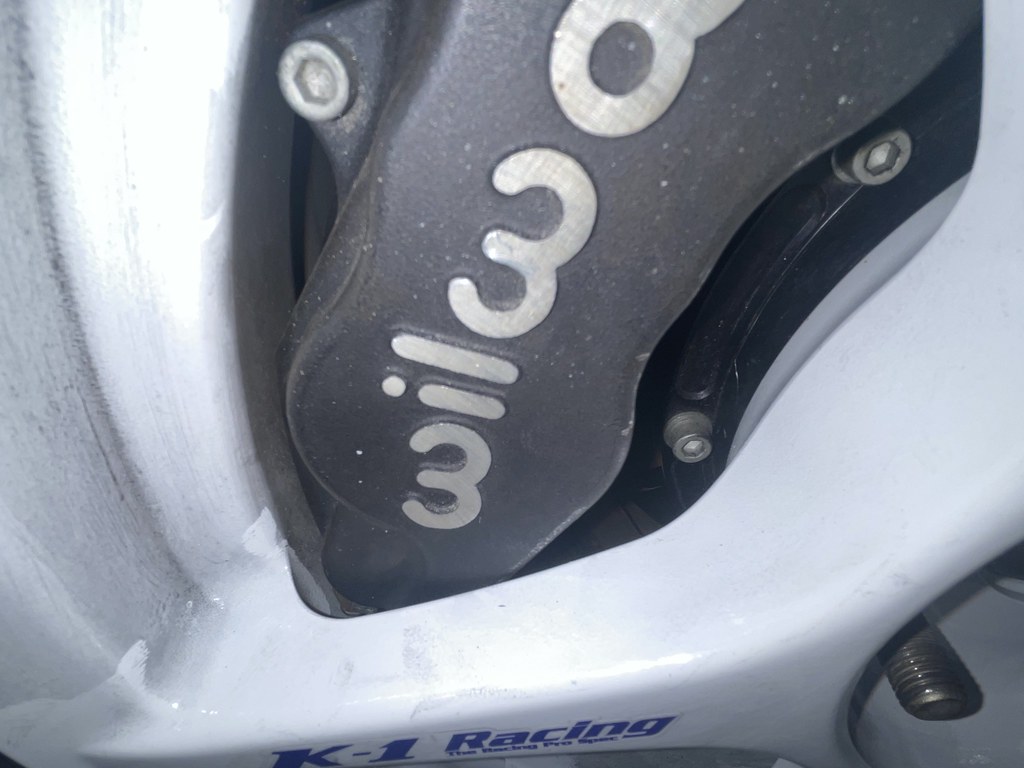

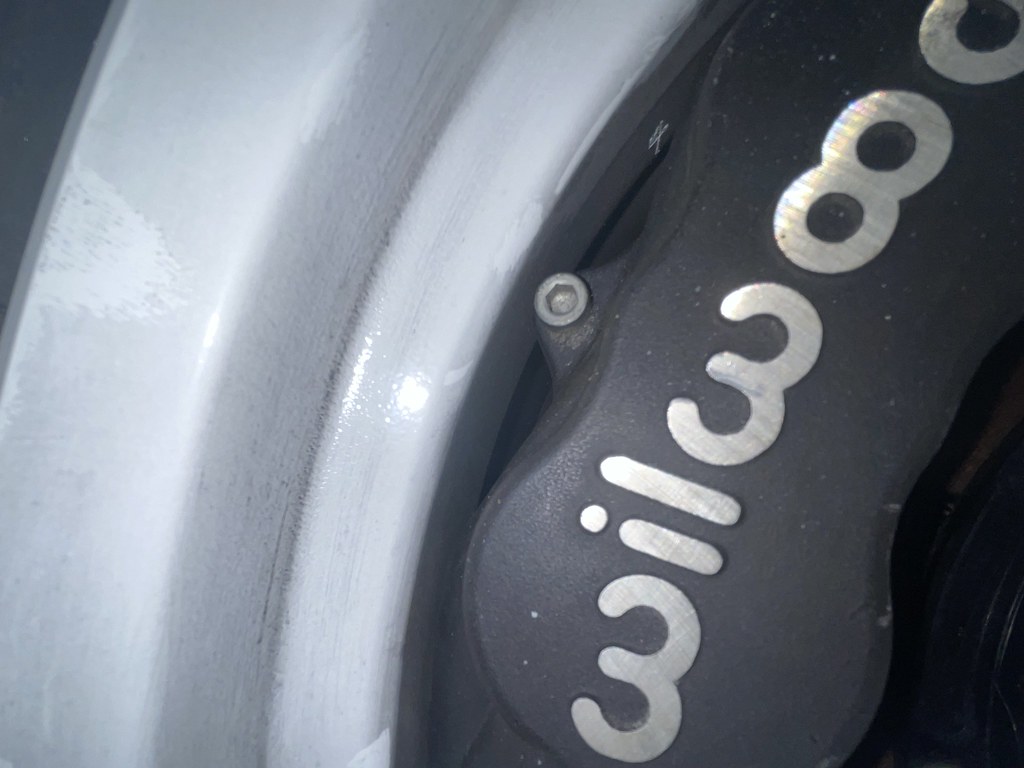
As seen in the photos the top and bottom of the caliper were millimeters and slightly resting on the inner barrel of the wheel.
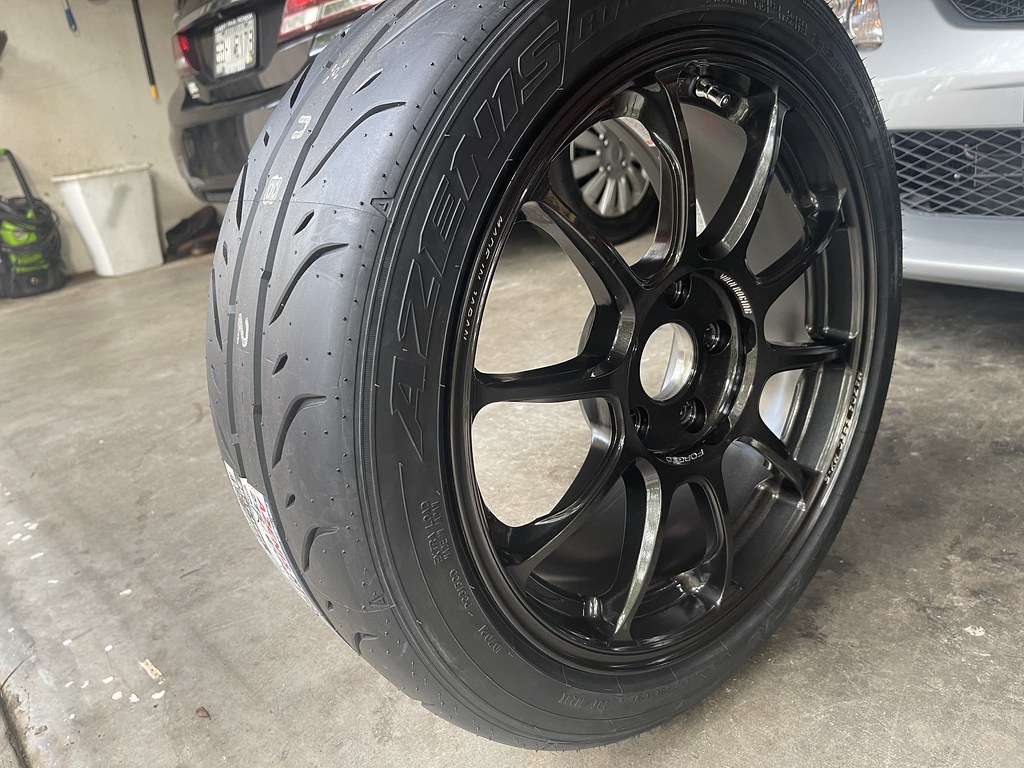
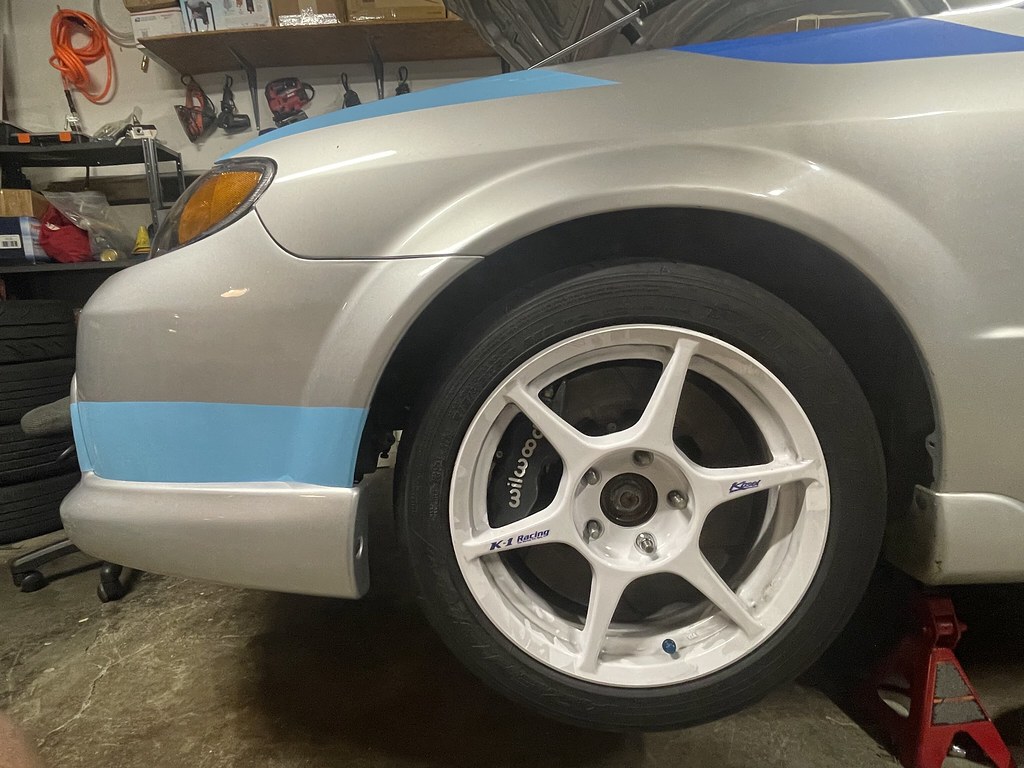
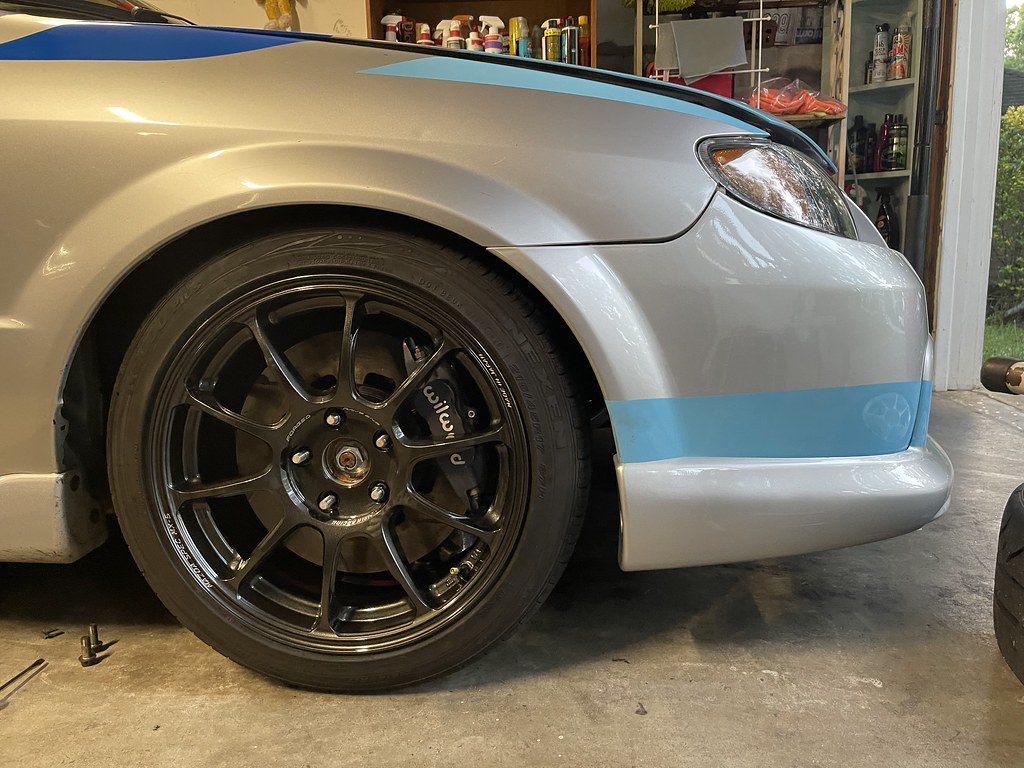
I searched for a few wheel options that may possibly fit in 16″. I decided to bite the bullet and gift myself a nice birthday present. These wheels are Mazda MX-5 Spec Volk ZE40 made for the NC miata. They come in 17×8 + 48MM and are weight 17lbs.
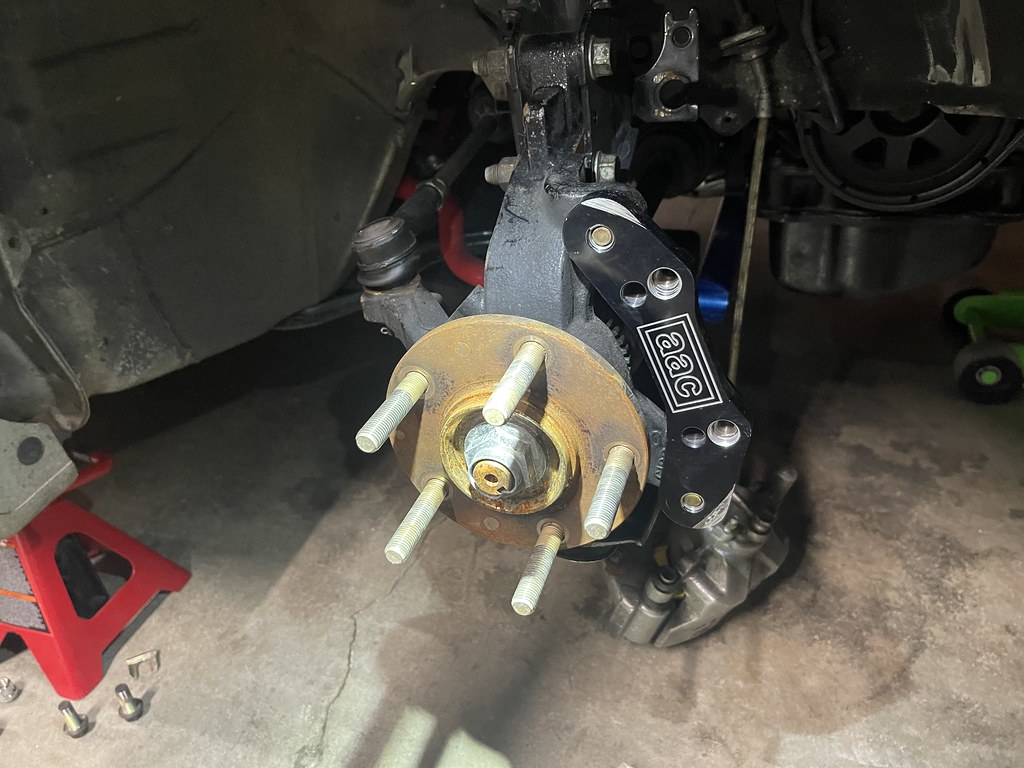
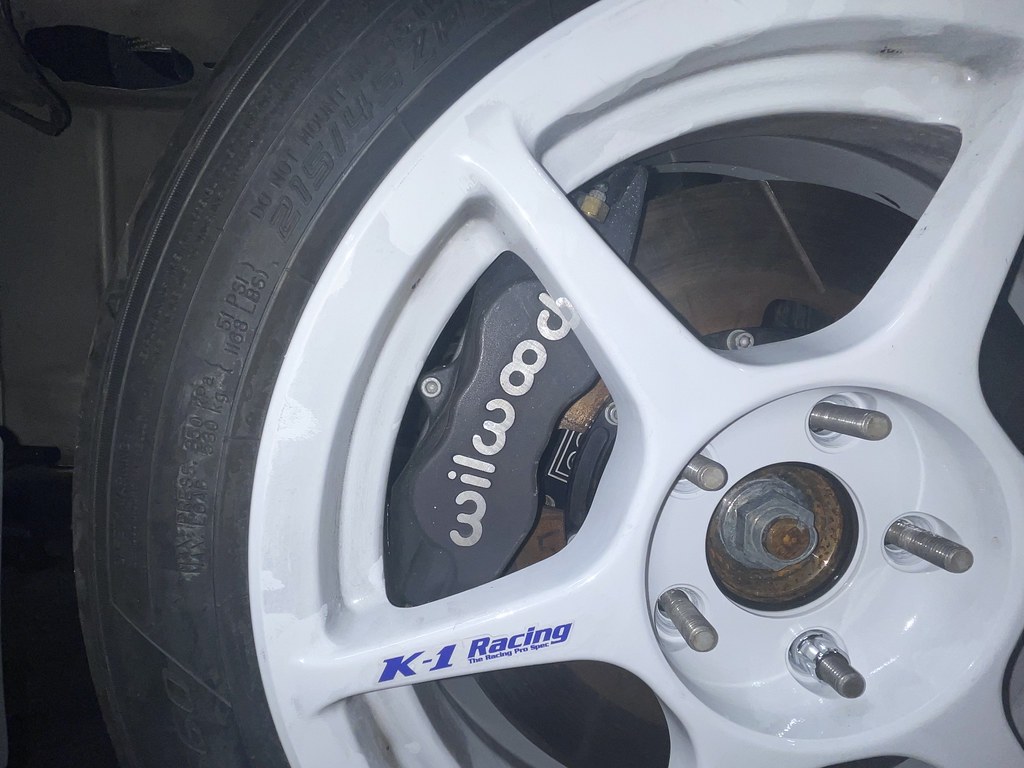
Caliper bracket bolted on..
Hardware mounts perfectly and flush in place..

Caliper mounted..
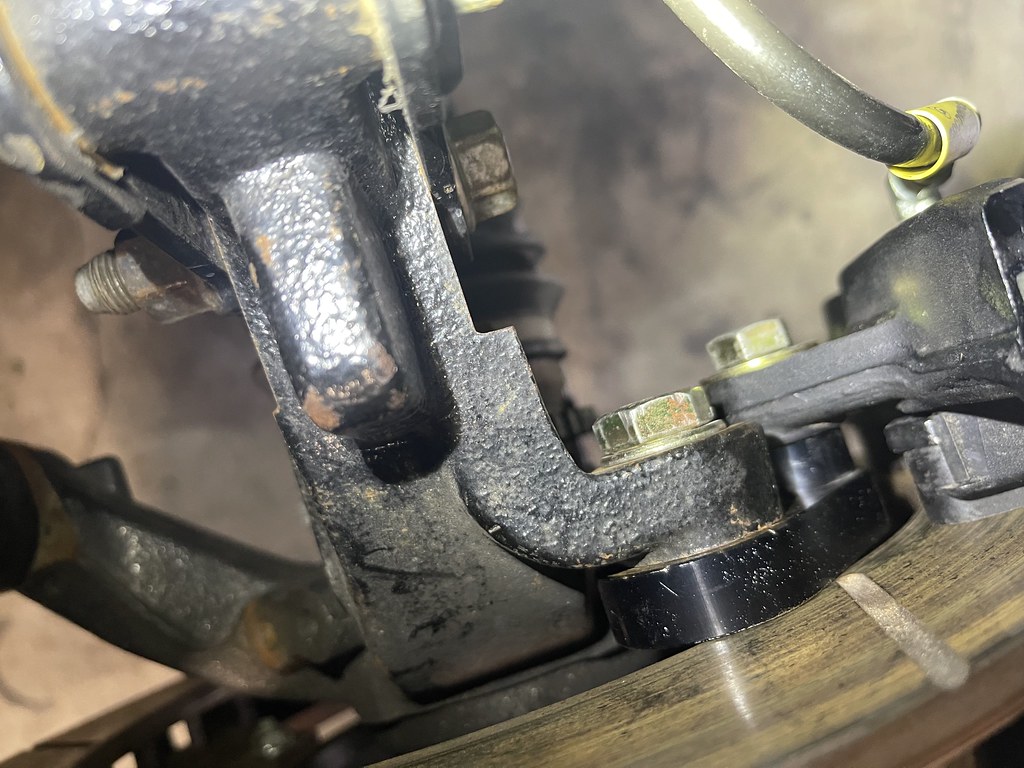
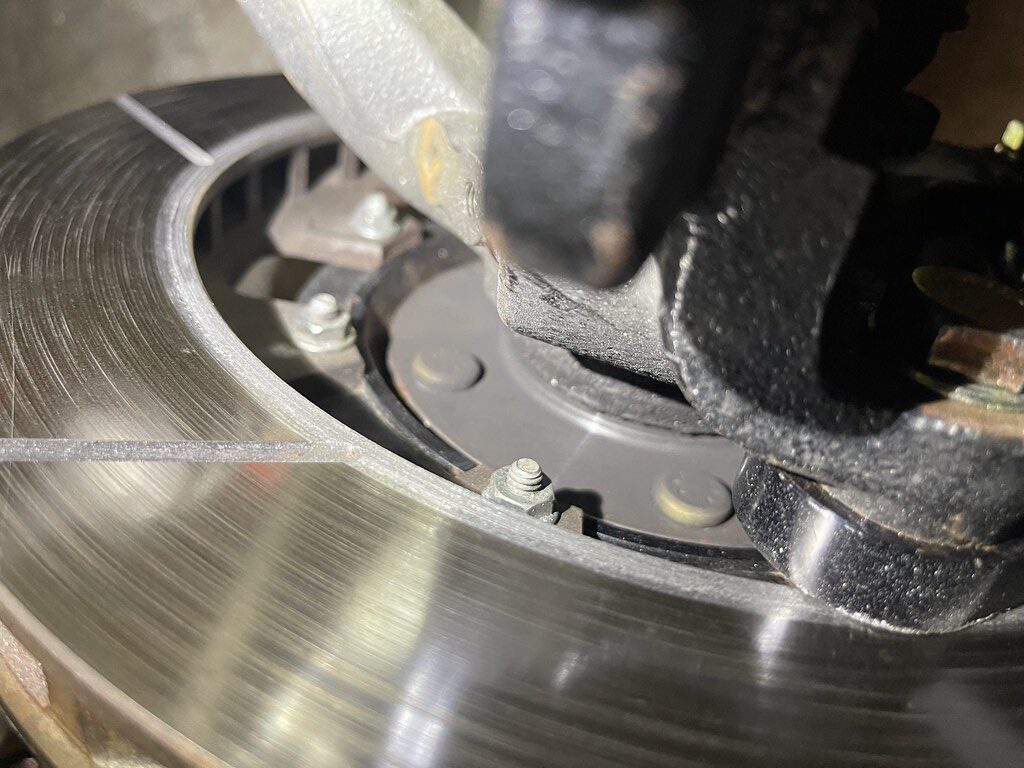
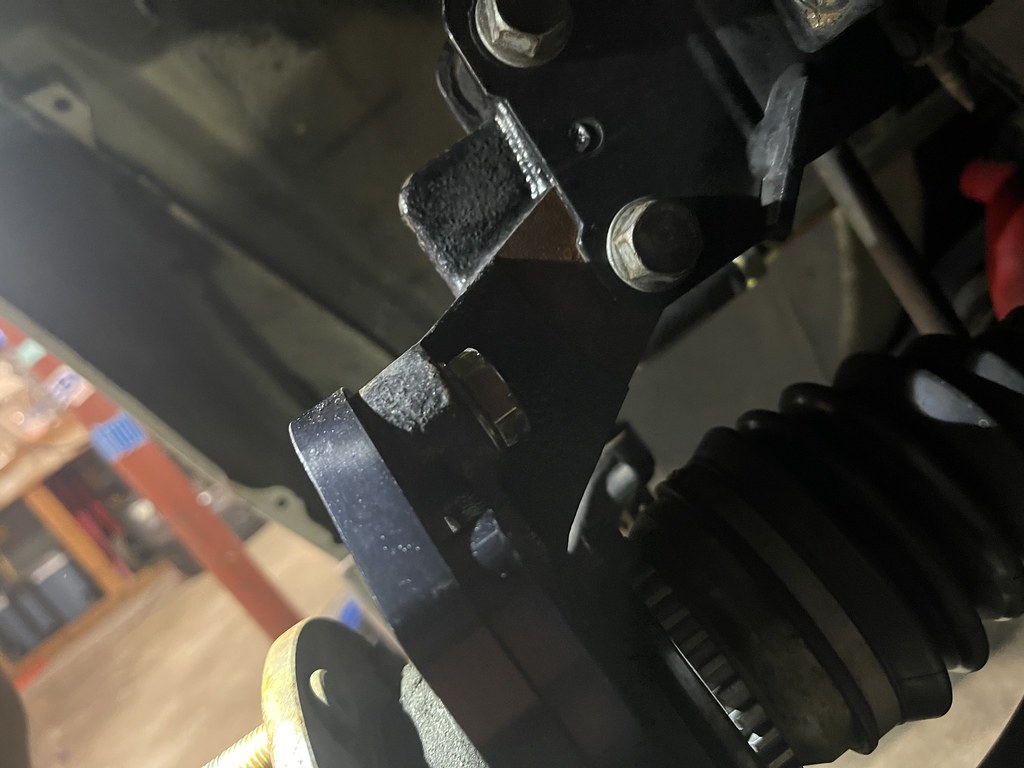
AS you can see from the photos it seemed to have some fitment issues and the rotor was touching on the bracket. I had noticed the slight damage to the brackets before. But figured it was already made its clearances. I went back over the brackets and went to town on the dremel and filed down the bracket to clear on both sides. Also one of my aftermarket knuckles had an extra lip on one of the mounting points that had to be grinded down.
Once all those issues were addressed everything was set and installed and looking great. The calipers still have the original pads on them and looked to be pretty old, so I do plan on rebuilding the calipers and have them powder coated and freshen up before I go back on track.
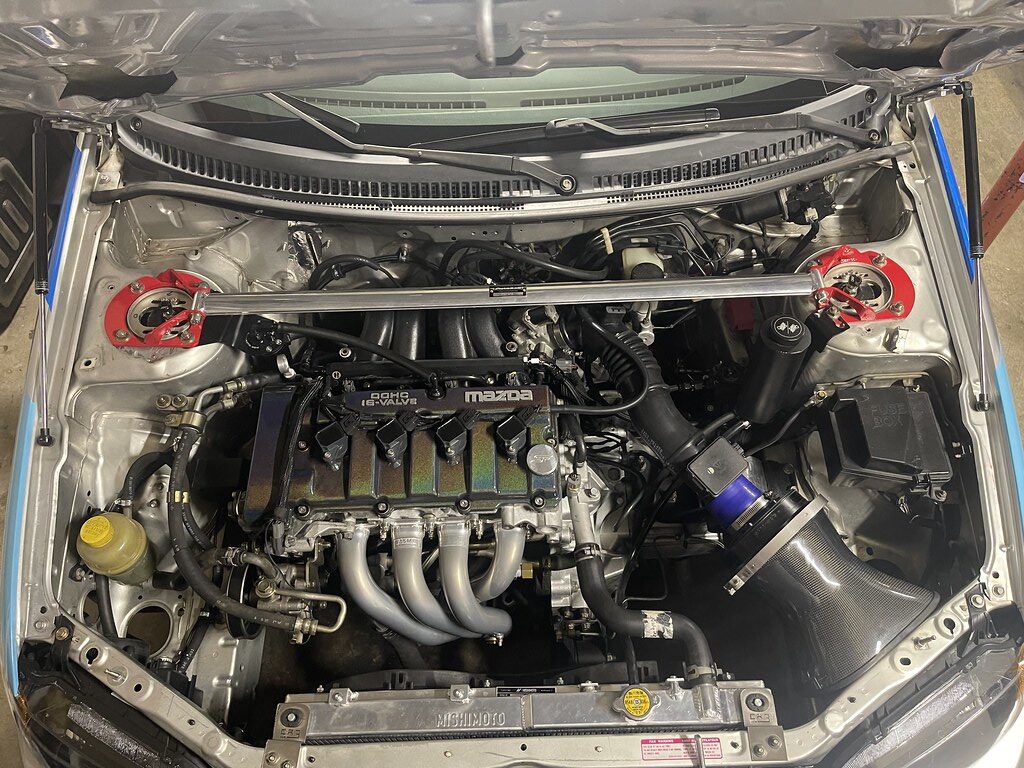
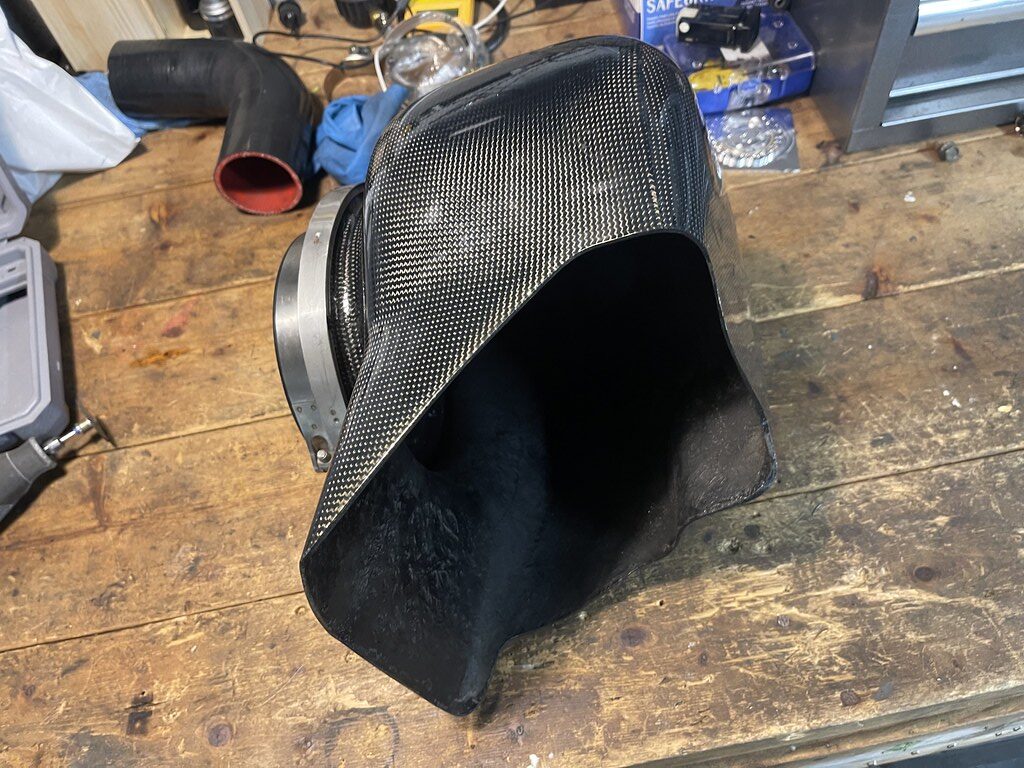
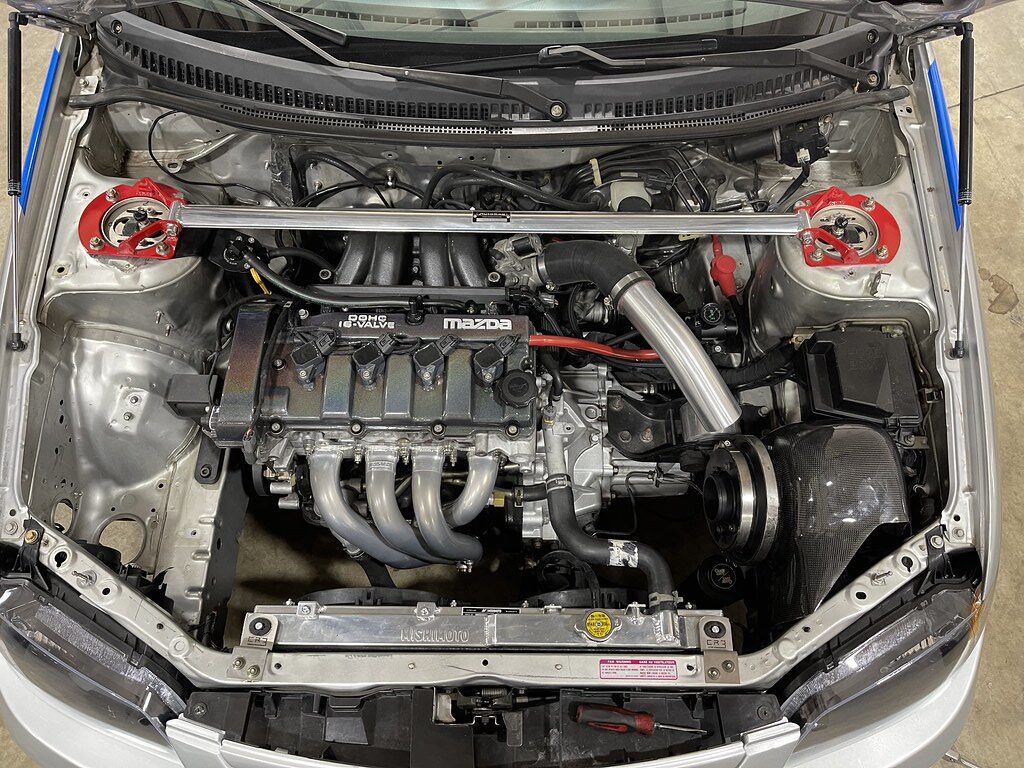
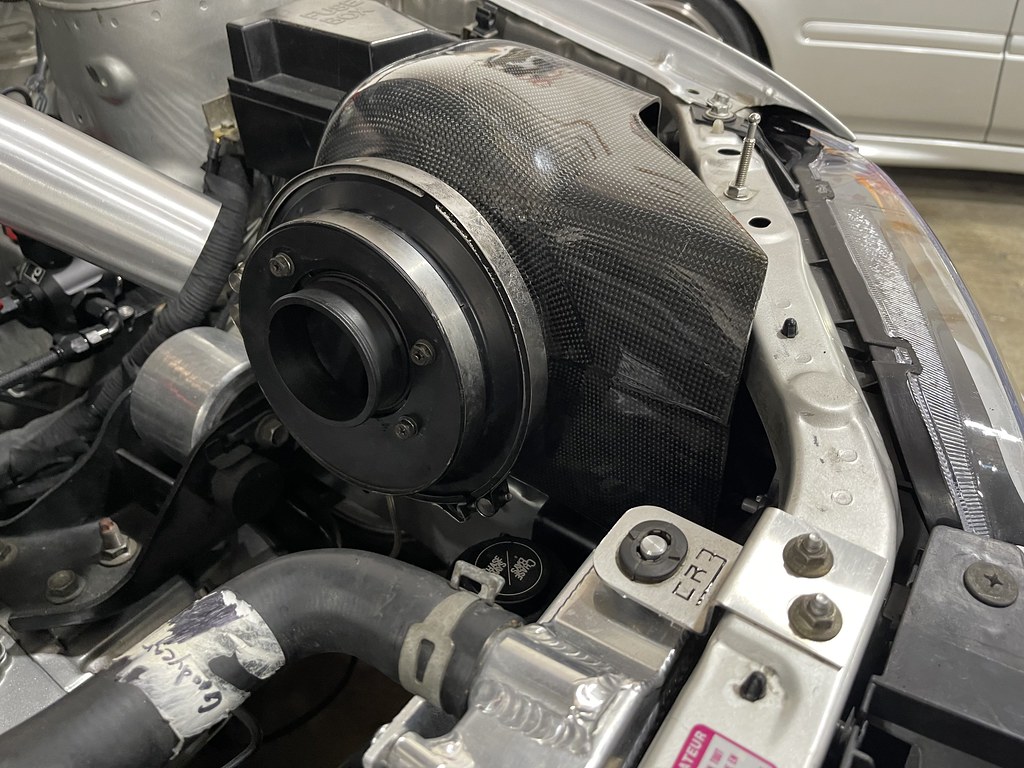
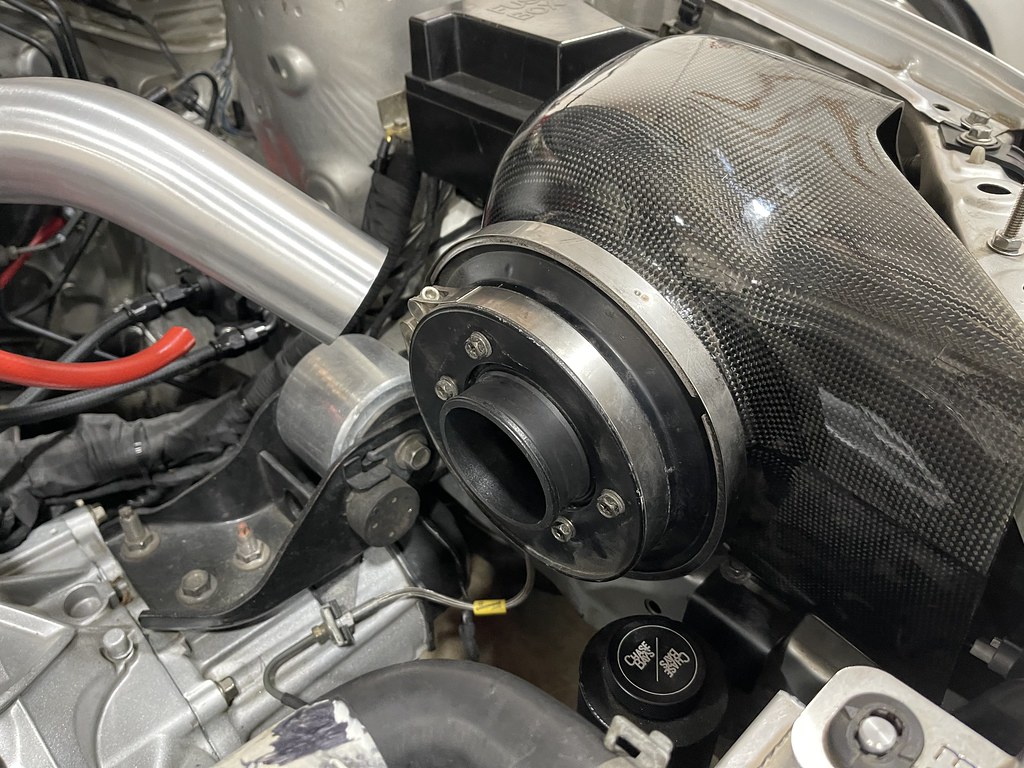
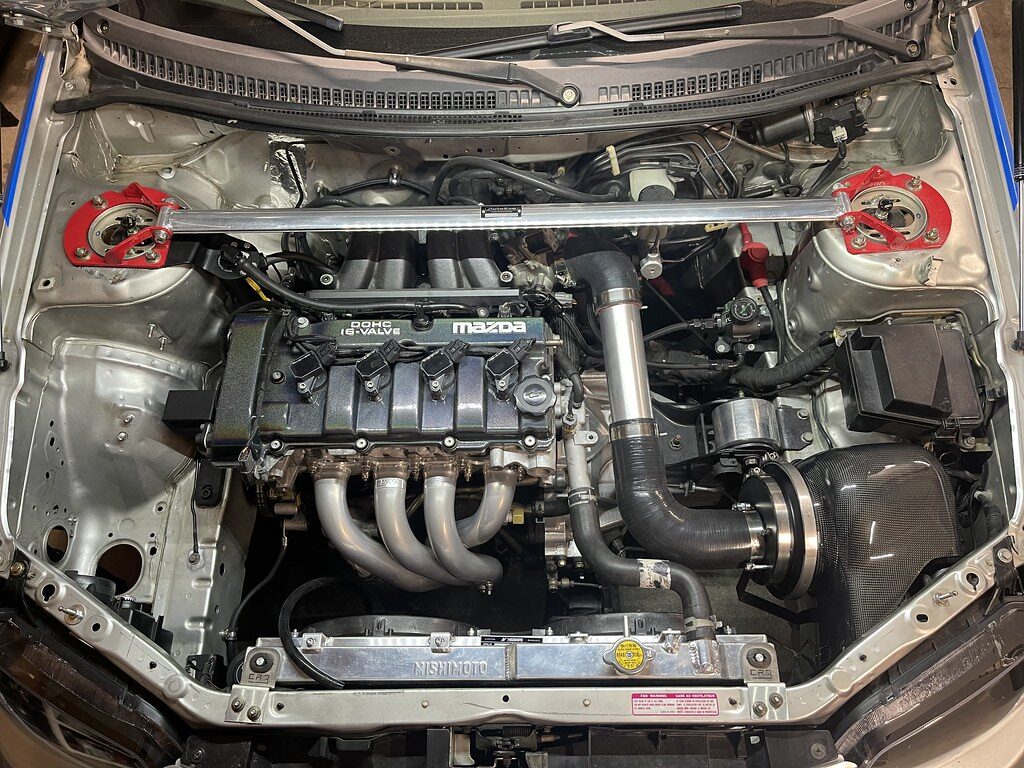
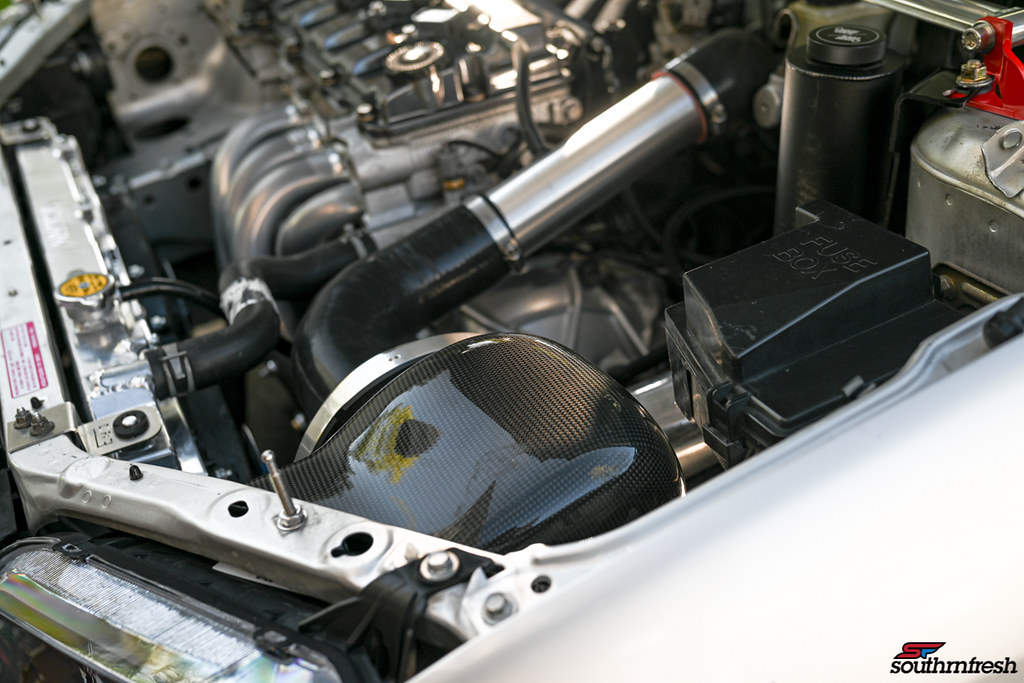
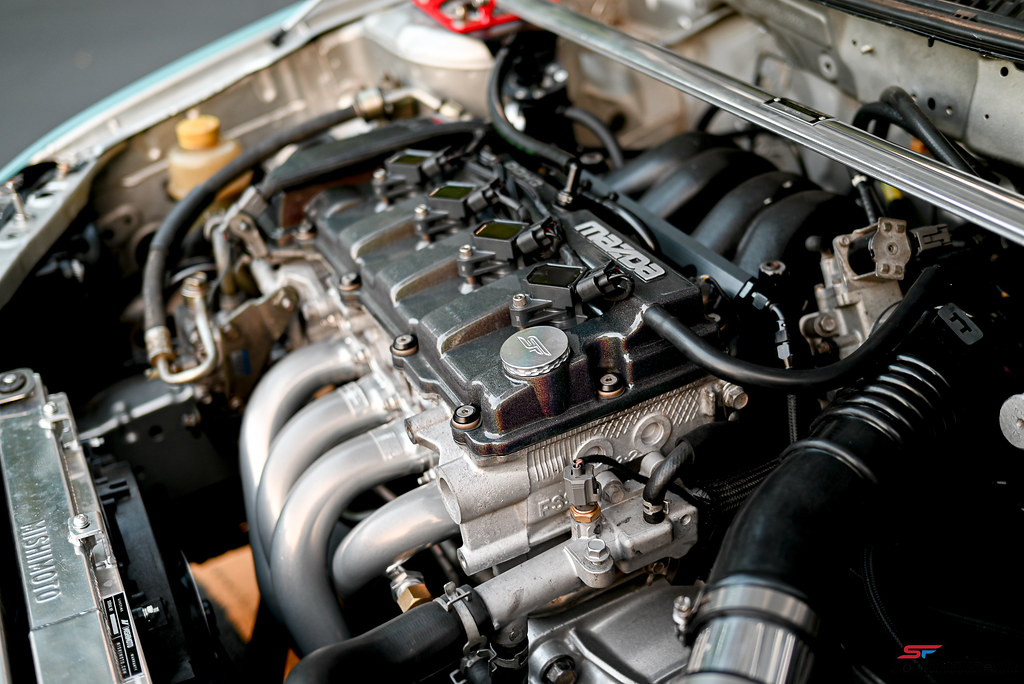
Another Autoexe piece that I had been looking for showed up on Yahoo Japan and I was able to snatch it up! The proper Carbon Induction box for the Protege. The part fit like a glove, and looked perfect in the bay. ..

I was feeling confident after doing the bumper, and decided to try and wrap the roof and the top of the pillar on the Protege in gloss white.
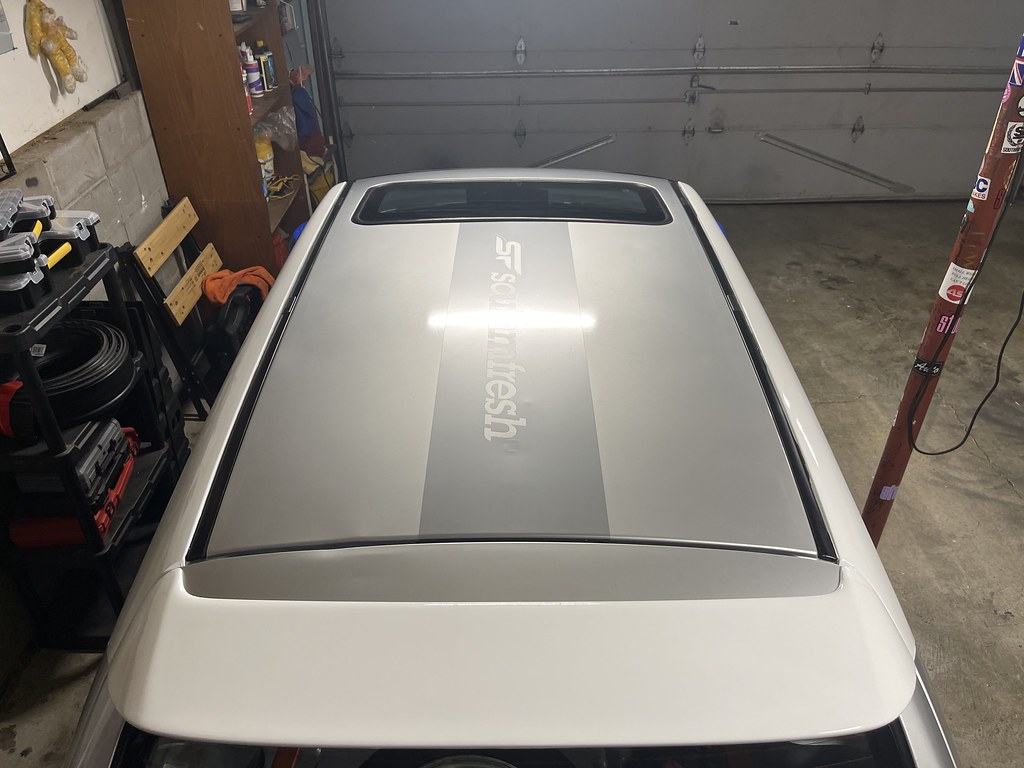
Sides and rear spoiler done.. These pieces were not that hard to do, being at eye level and being flat surfaces..
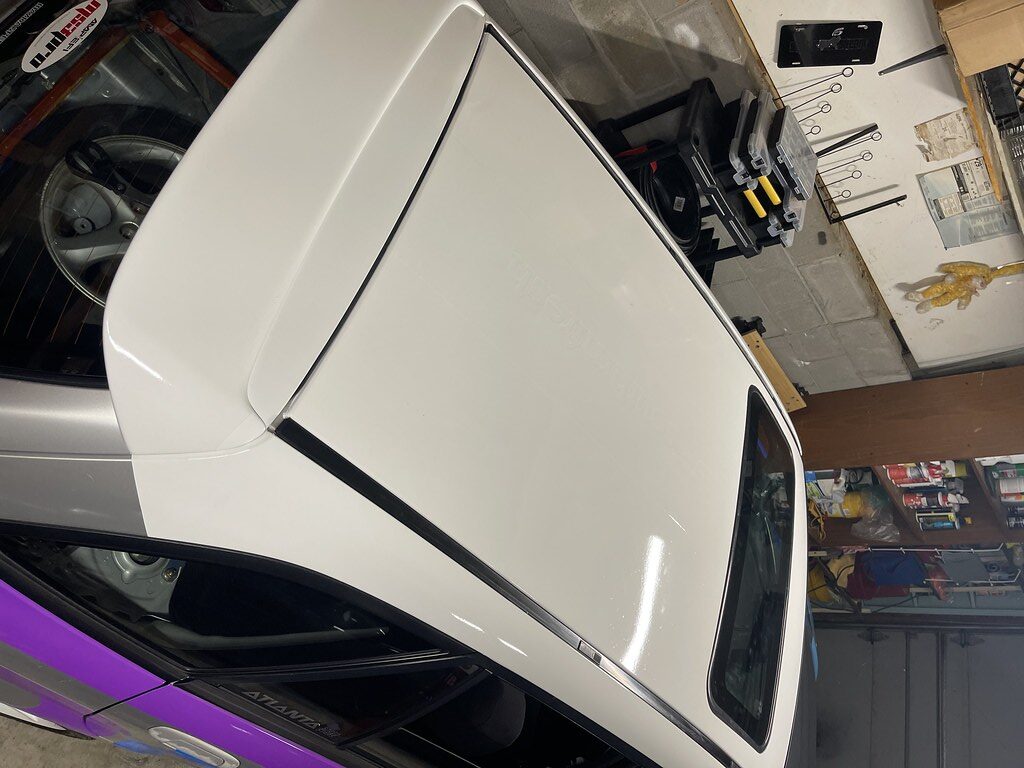
I decided to test my luck with the roof. After a few hours I was able to get it decent. The process was stressful and I damn near gave up in the middle of it when the vinyl started to ball up and I could not get rid of the bubbles. But patience is key with wrap, and I took my time and get it to lay smooth..
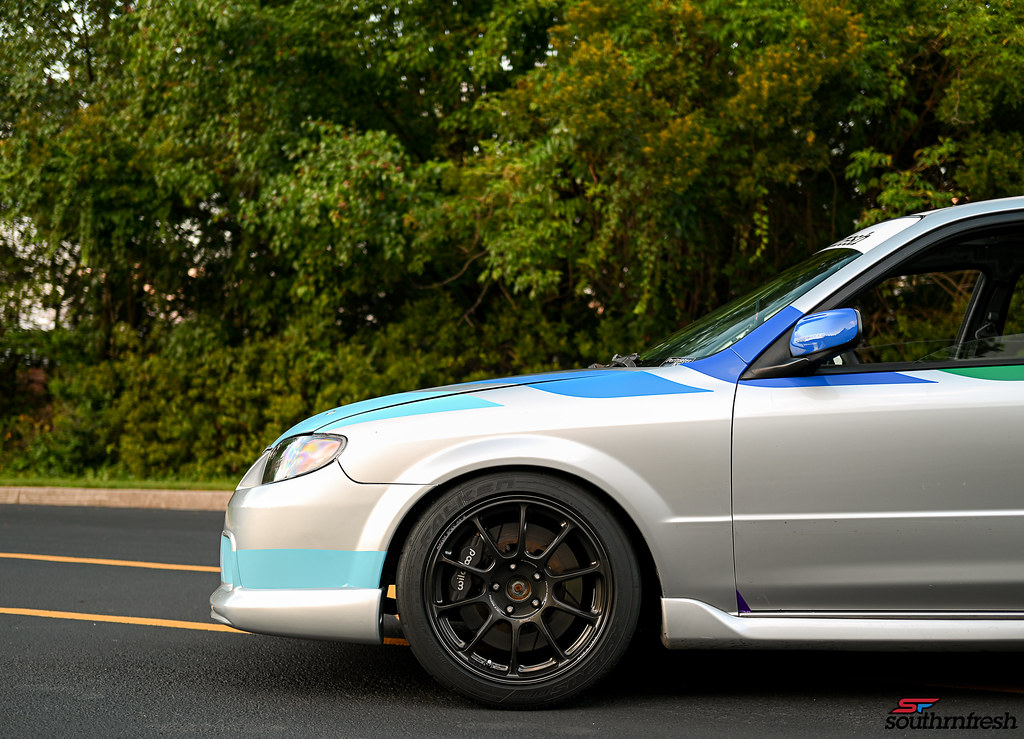
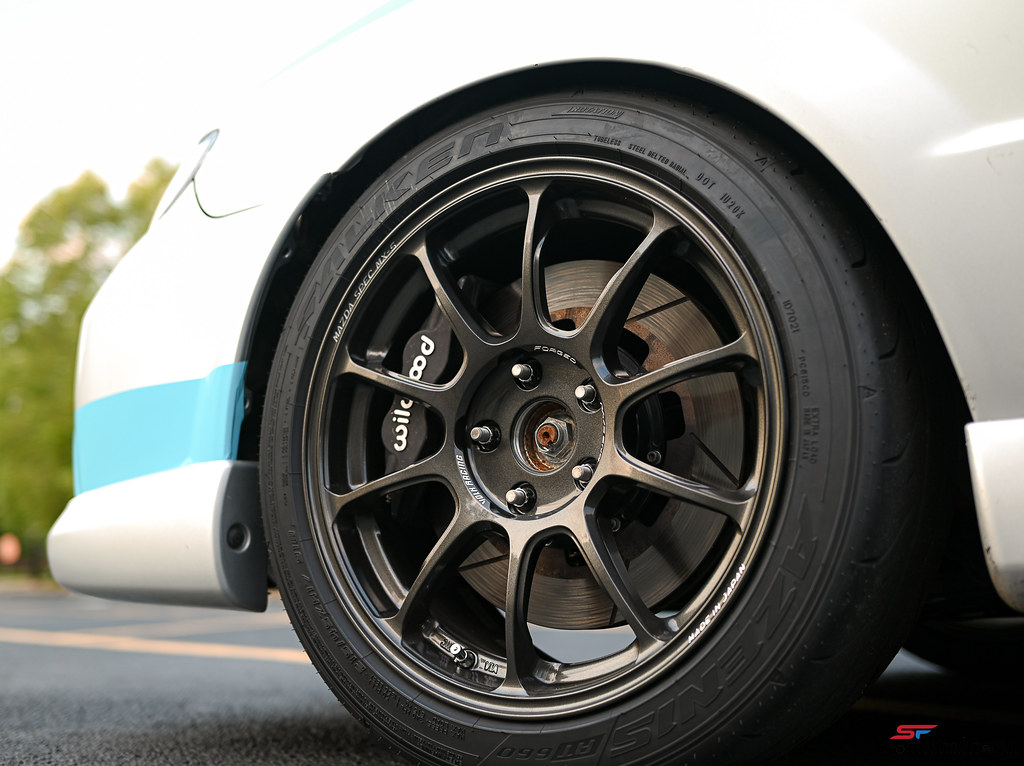
After all that it was time for another photo shoot with the new wheels and other updates. I initially was kind of against the dark colored wheels, but its growing on me. I think once I decide to get some color on the calipers and rotor hat it will wake it up..
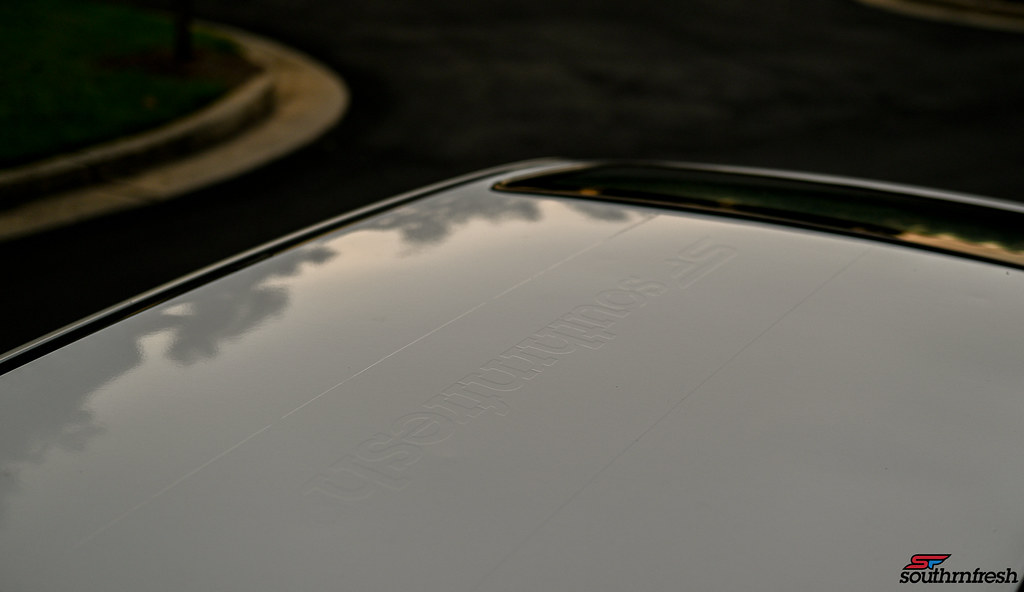
I left the roof banner on the roof to push through the white vinyl on the roof..

Installed the Momo / Greddy 350mm wheel for the time being, but will be using the 330mm Monte Carlo for track duty, while the Autoexe wheel gets a break!
I was able to get an aluminum piece to replace the MAF sensor for the Autoexe Intake. Im really in love with how the car is coming together. Being a fan of Autoexe products for many years, its dope to be able to get these parts on the P5 especially being so hard to find!
Here is a shot of the oil caps that I am looking to sell for the FS engines. These caps are billet aluminum and made to fit the exact diameter of the oil fill hole instead of big bulky plastic OE cap. It may not be the best for track duty, but its a beauty piece that will update the engine bay a bit.
I am at a stopping point with modifying the car, and just want to get back on track at this point. So I will be working on adding the other pieces for the livery. Look forward to being back on track in late August and September!