Mazda Protege 5 Track car project : Future Powerplant , AMP Trackday, Parts testing, and Rear Suspension Upgrades
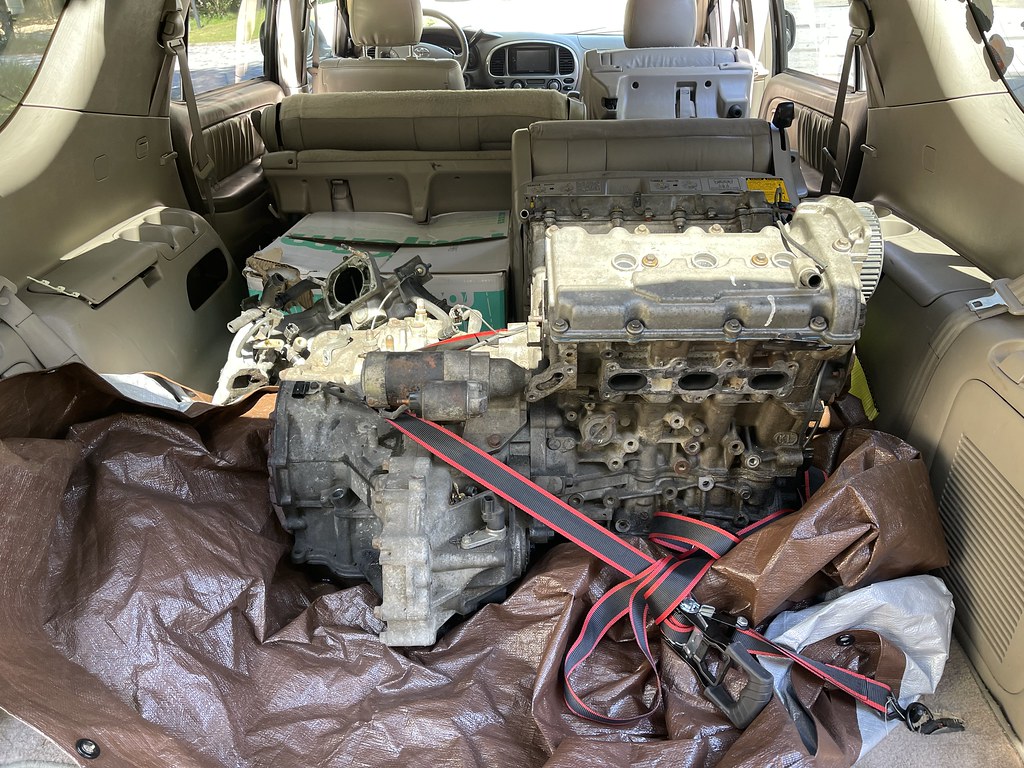
I received a message from a guy in the protege group that someone in Atlanta was looking to get rid of a KLZE that had been in storage for a few years. To me the KL has always been a perfect swap for the BJ chassis. I was lucky enough to do the swap in my old 1992 Protege many many years ago. Every since I started this journey the KLZE was the only swap I was interested in doing once I got to that point. If you are not familiar the KLZE is the Japanese version of the KLDE that is found in the MX6 , 626, and Millenia. The KLDE in the US is rated at 160hp, and the KLZE is a 200hp version with more aggressive cams and higher compression. The gentlemen I got the engine is a MX6 collector, and purchased the KLZE many years ago but had removed it due to the transmission failing for the 3rd time. Being that he has several engines he decided to pull the whole swap and go with a lower mileage one. And this one had been just sitting at his mechanics shop.
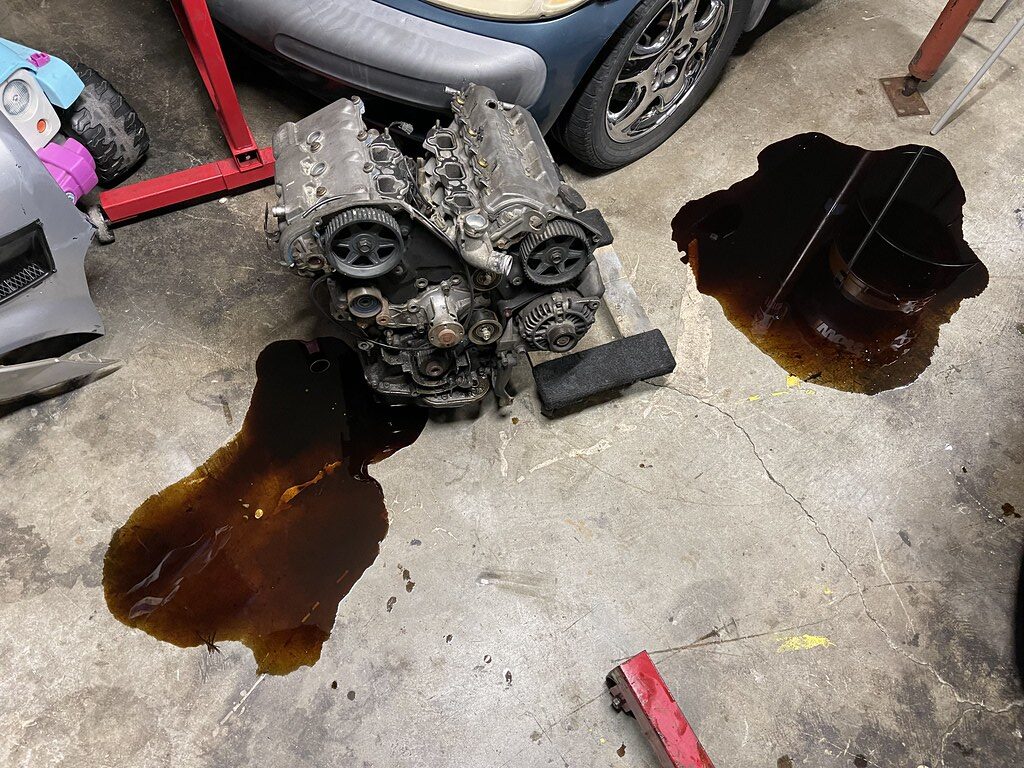
The moment I found out it was full of oil…
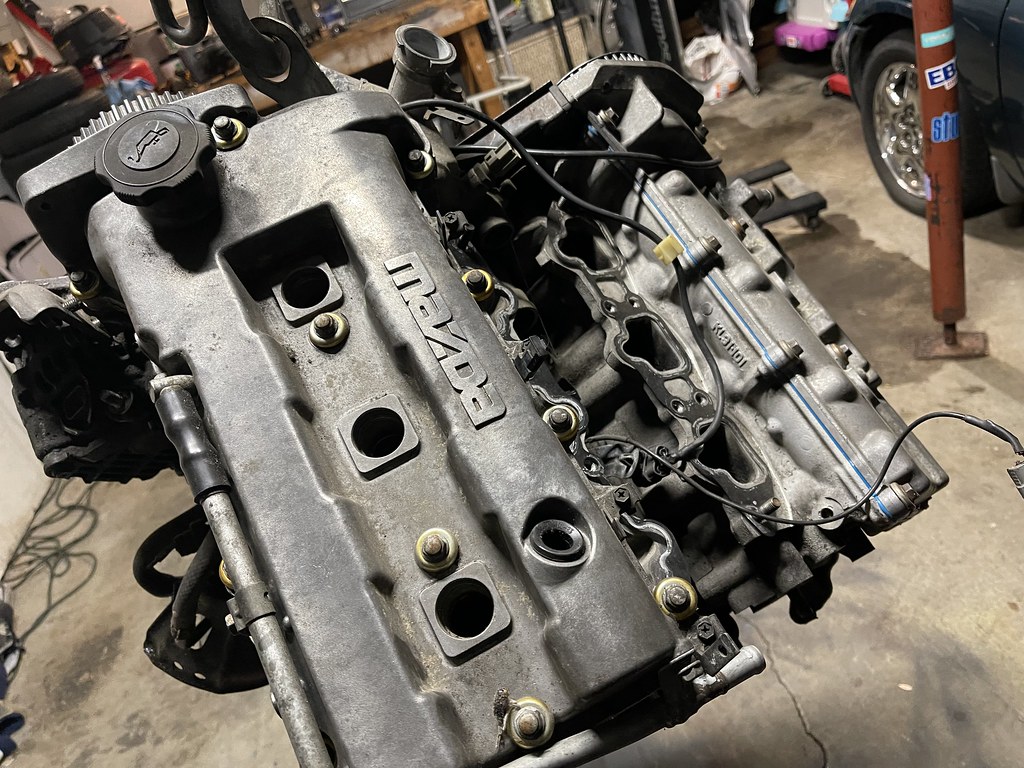
I initially thought about trying to source the other components and start on the swap, but I dont think I have reached a point where I really need to tear the car apart and do the swap. I am going to take it slow and get the block and the heads checked and possibly get head work done at a steady pace..
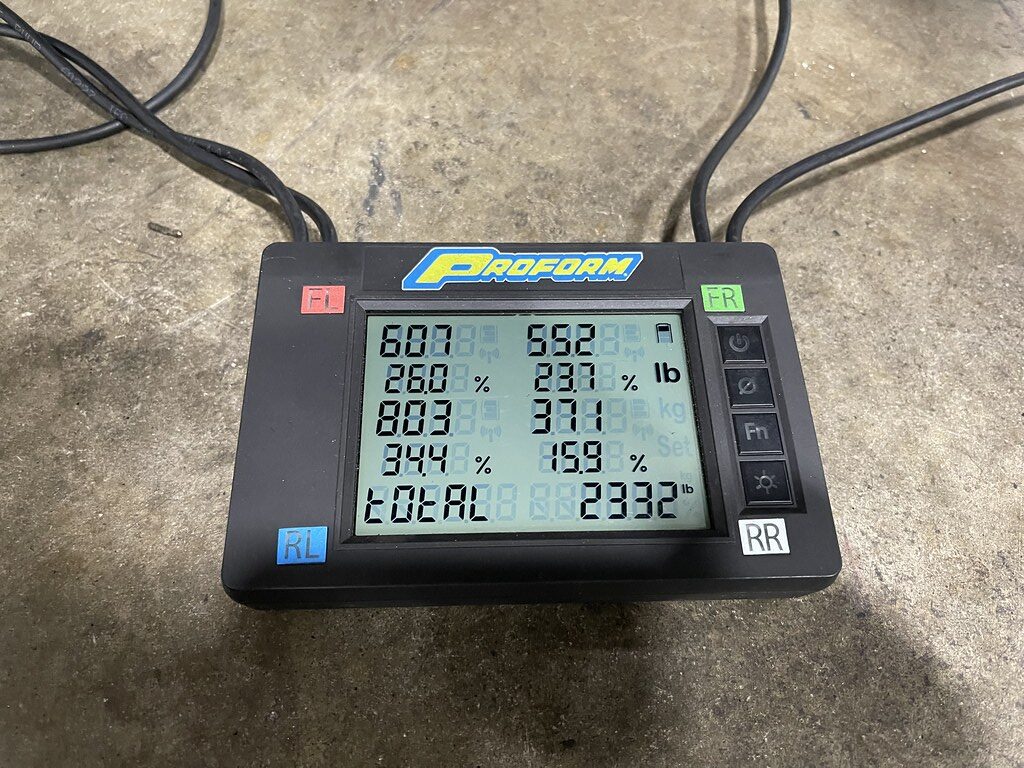
I got a chance to get back on the scales at work, and found that my preloads were all over the place in the passenger rear. I do remember messing with my height months ago, and that may have been when I screwed up the preload.
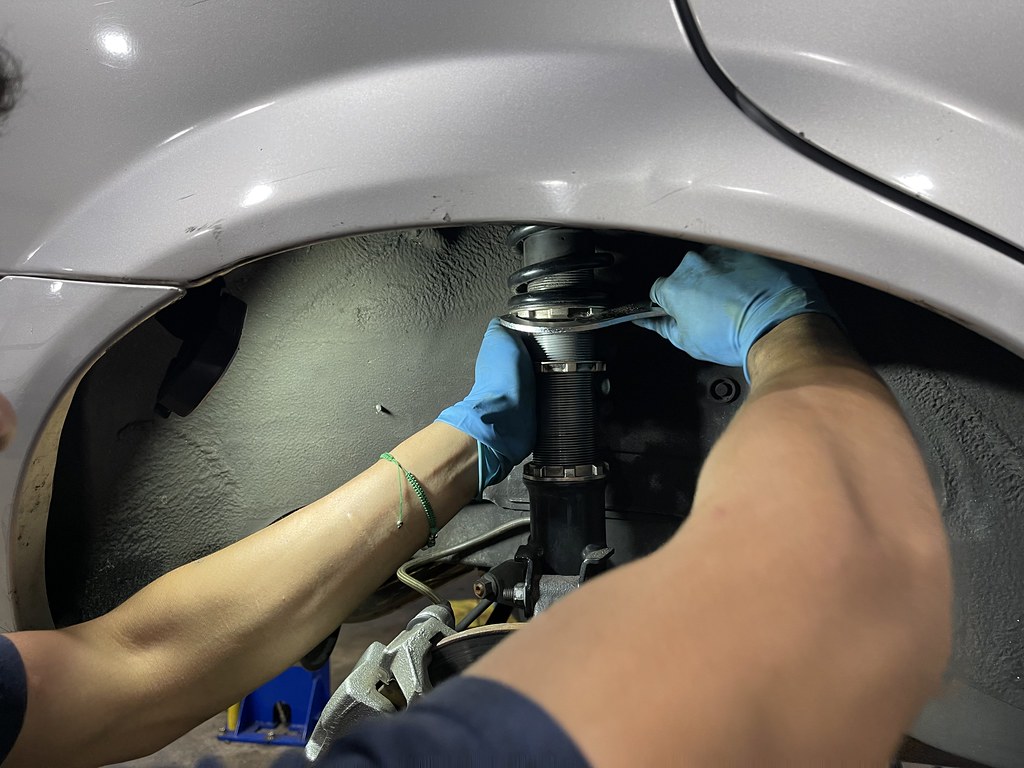
I had one of my coworkers set my preload properly to be sure it was correct this time.
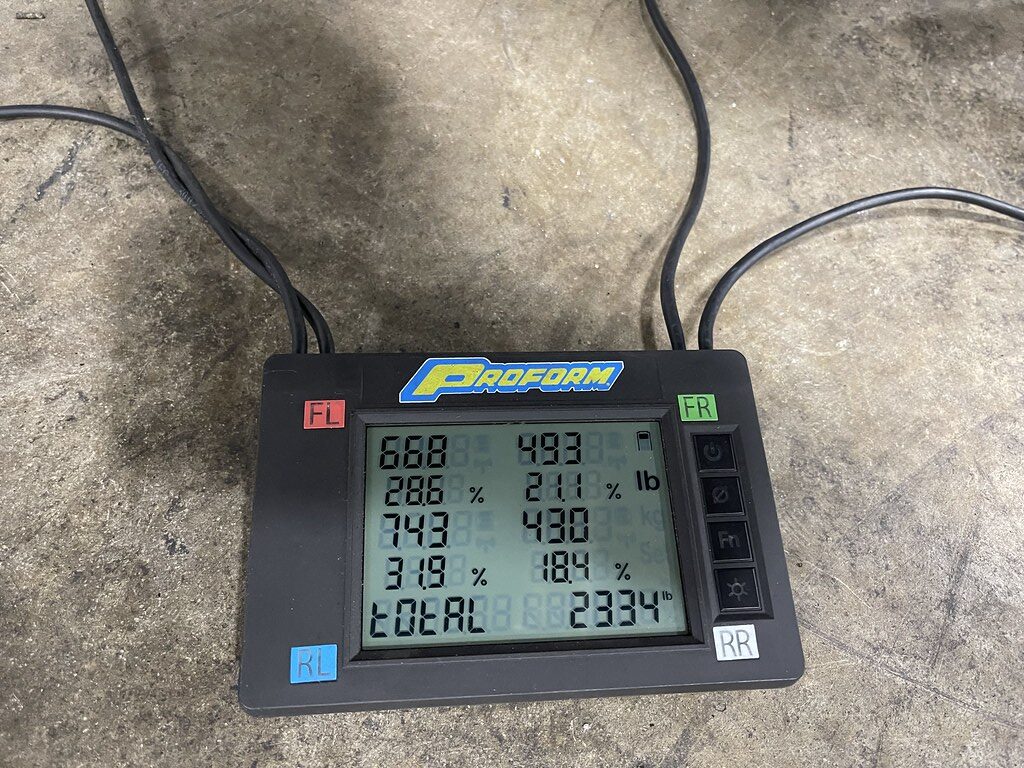
You can see that we shifted over 60lbs to the passenger rear, and were able to get the corner balancing set to as close to 50 \ 50 as we could…
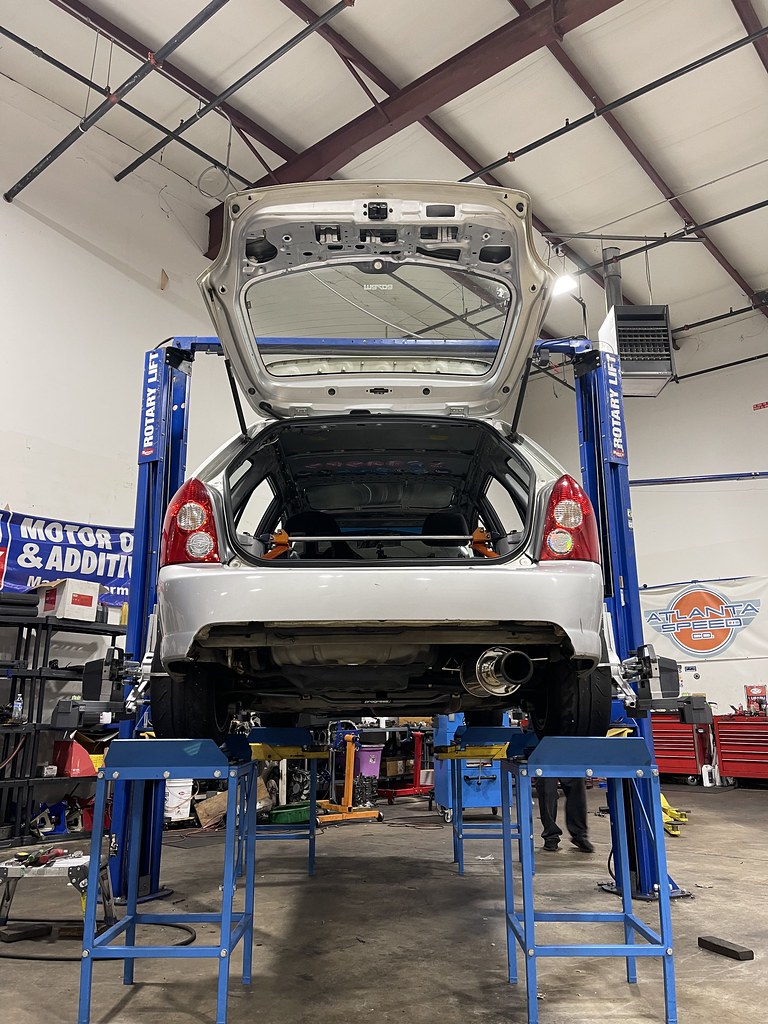
Alignment time!

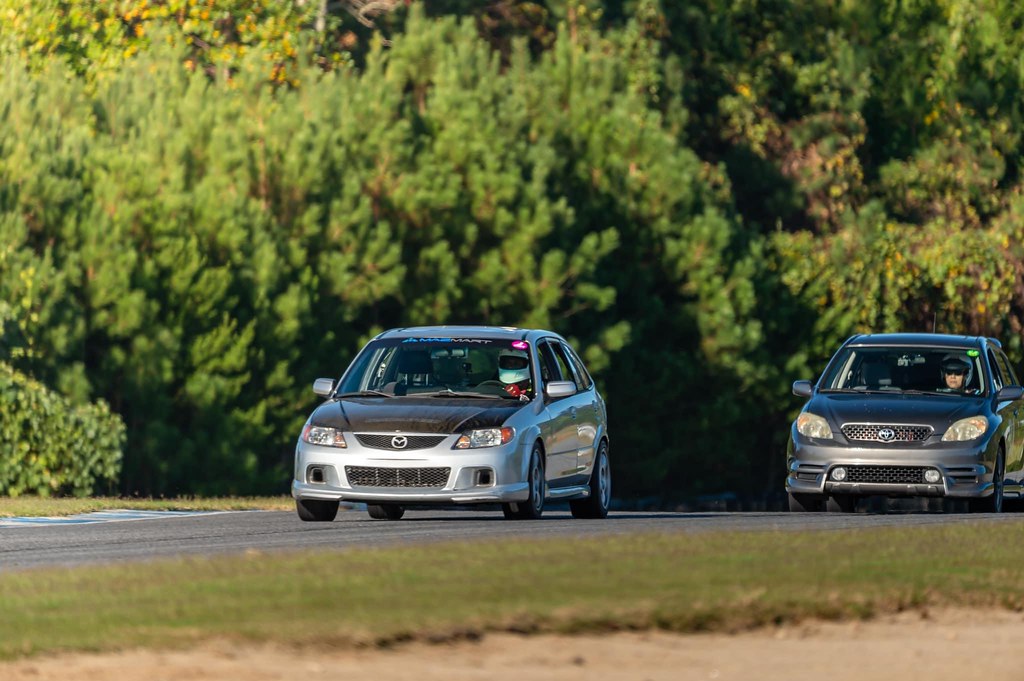
Back at Atlanta Motorsports Park with Jzilla Track days. My student for the day was in a Matrix XRS.
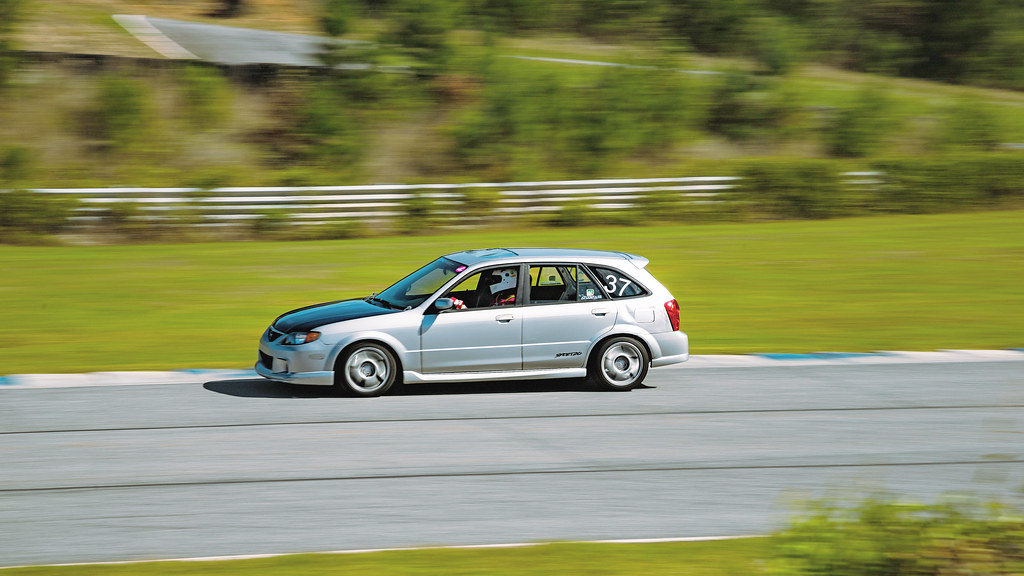
 The proper pre-load made a huge difference on the carousels. But early in the day I started to feel my tires loose their grip under braking. Normally I would chalk it up to a cold track. But as it warmed up, I had to start braking early because the car felt a little un stable under hard braking into Turn 1. The brakes worked, but I was getting closer and closer to losing grip every lap.
I was experimenting on no downshifting to 2nd gear into turn 6, and it felt alot smooter and it set me up much better for the rest of the track instead of fumbling with shifting and taking the hard right. The last dyno session gave me less torque, but it peaked at 3k RPM and flatlined to 7k. Instead of peaking at 6-7k, that change gave me the idea to hold 3rd and focus more on the lines. I was busy learning and never really felt liek i pushed it 10/10, but focusing on the lines and smoothing out the lines dropped me .5 of a second on my PB. So there was progress. But during all this my tires finally gave away, and it ended up 2021 track season for me a little prematurely. I wanted to make Barber the following month, but I decided to end it this year at AMP and start getting ready for 2022..
Video of me trying to keep up with a S2000..
.
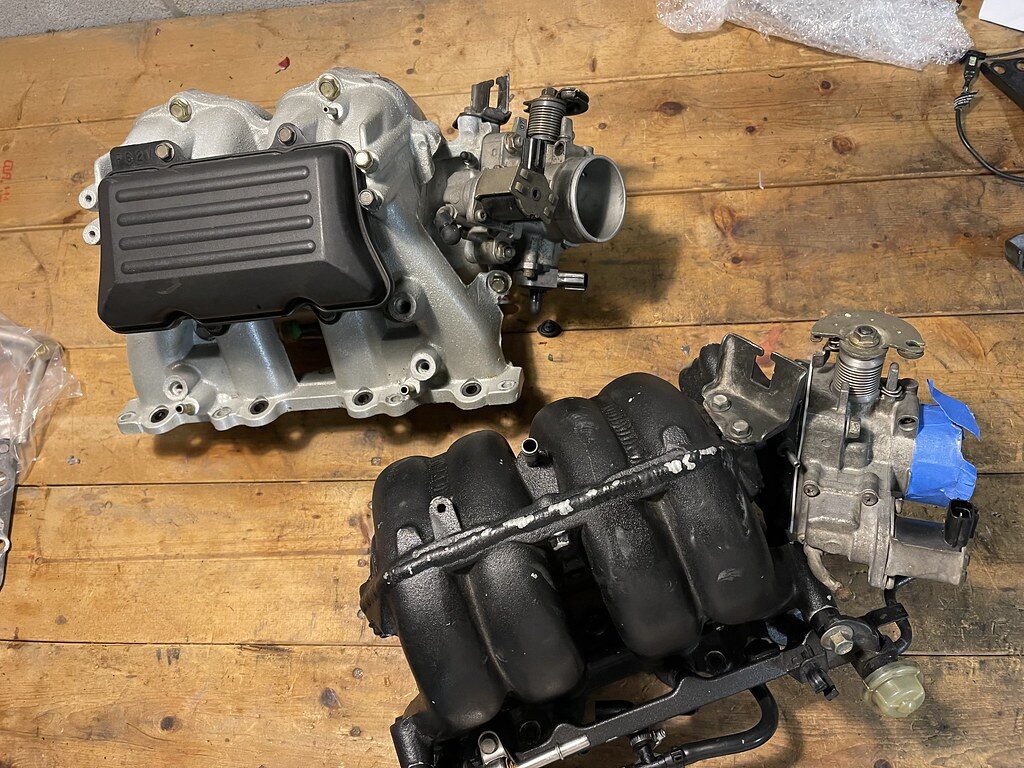
I had a FB Group member reach out about having me test out a ported manifold on the P5 to see the gains.
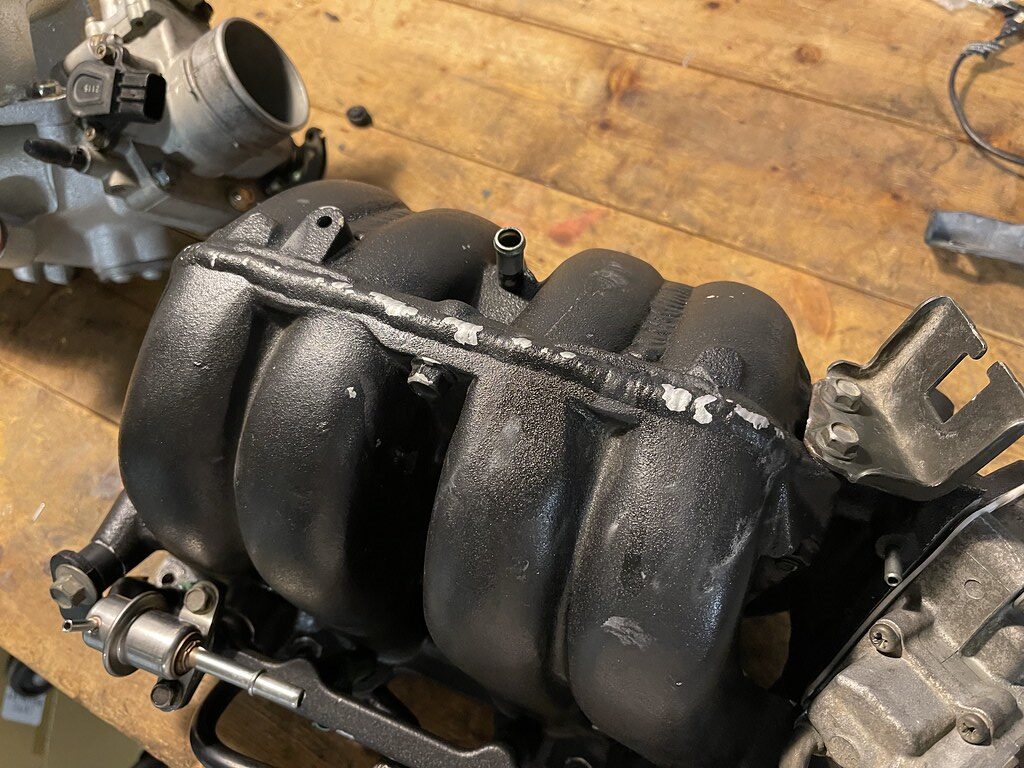
The most noticeable difference was that the manifold was welded to one piece and shaved. Most of the work had been done internally. Stock these manifolds have secondary valves that open and close at certain RPM for torque. It all has been removed, and the internals have been ported into 4 large runners, instead of split up by individual ports used to direct air through the valves.
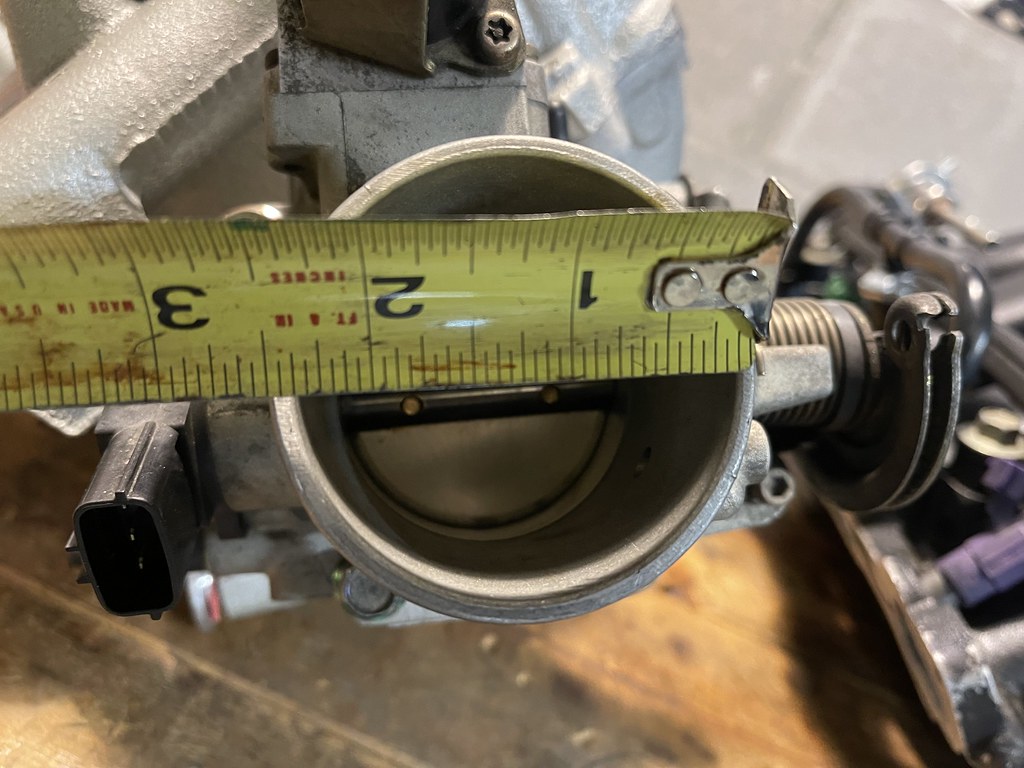
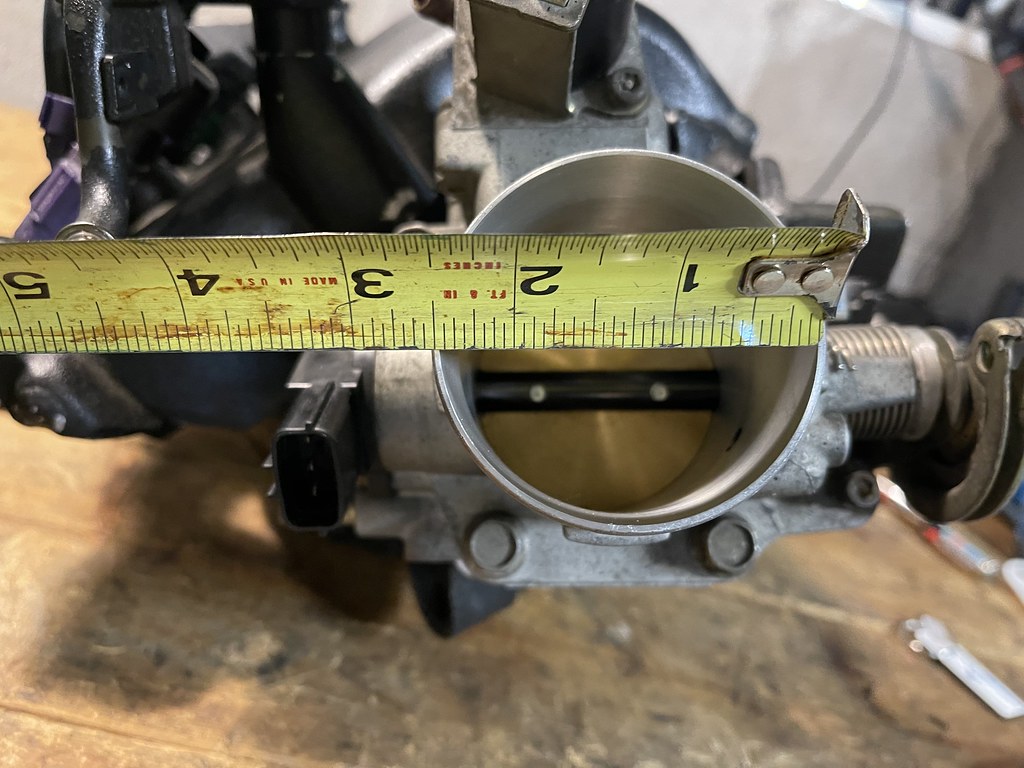
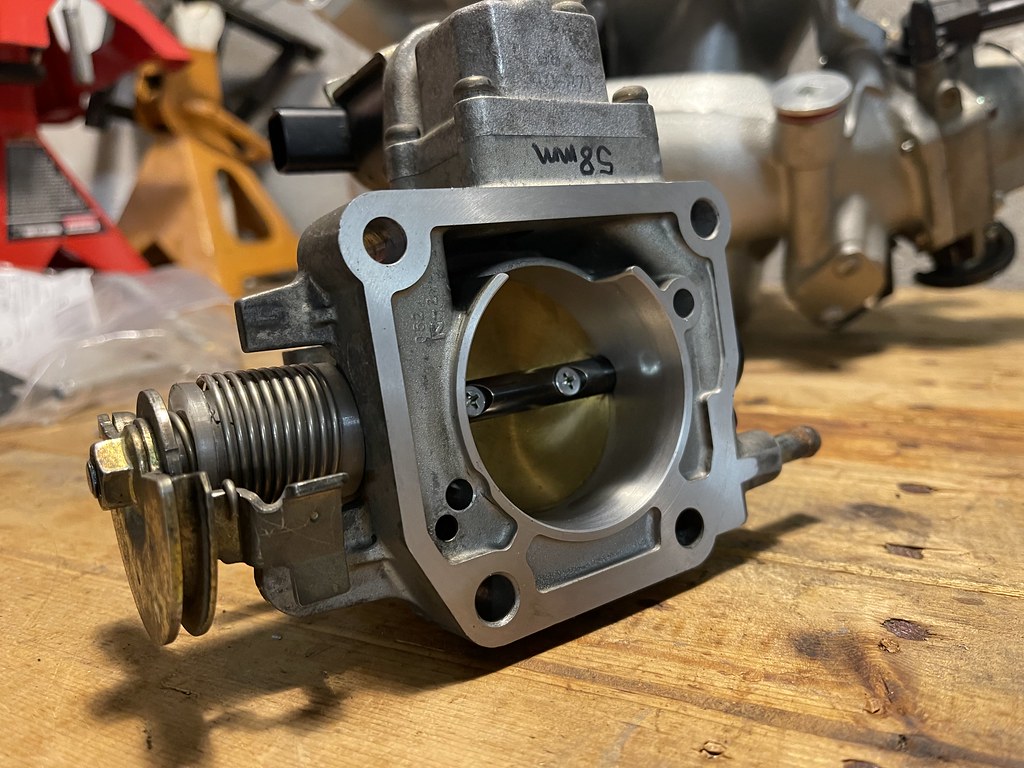
Also it has a ported throttle body. Stock size is 53mm and this one is 58mm.
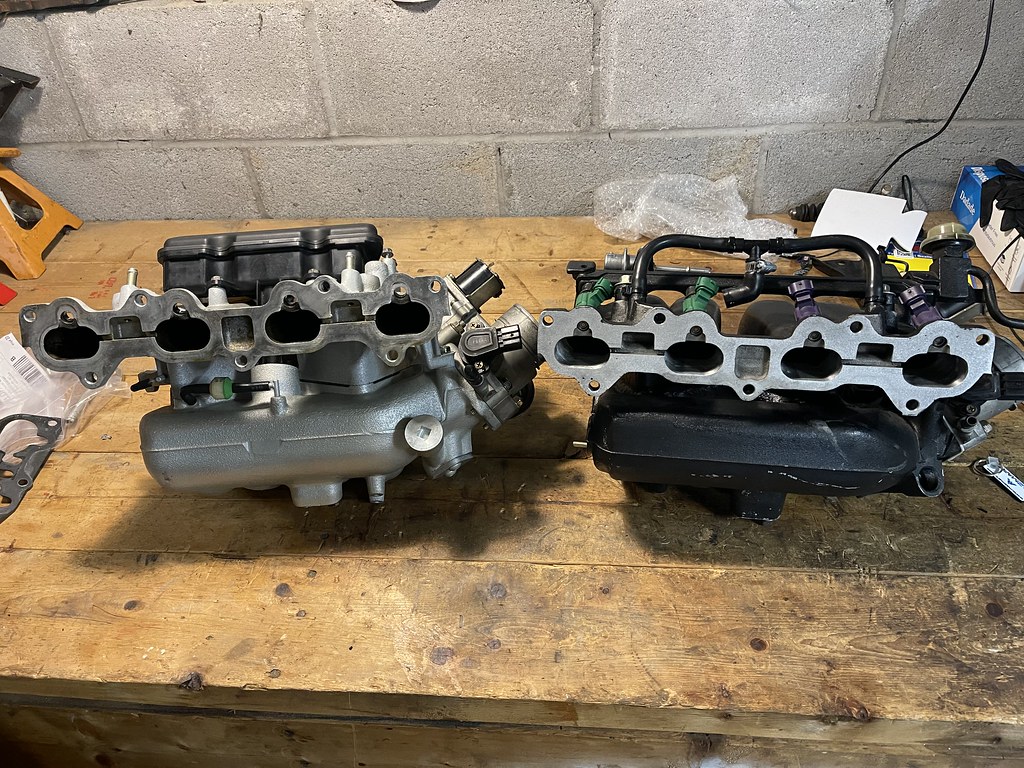
The ports were matched as well. Very interested to see the difference with this manifold on the dyno…
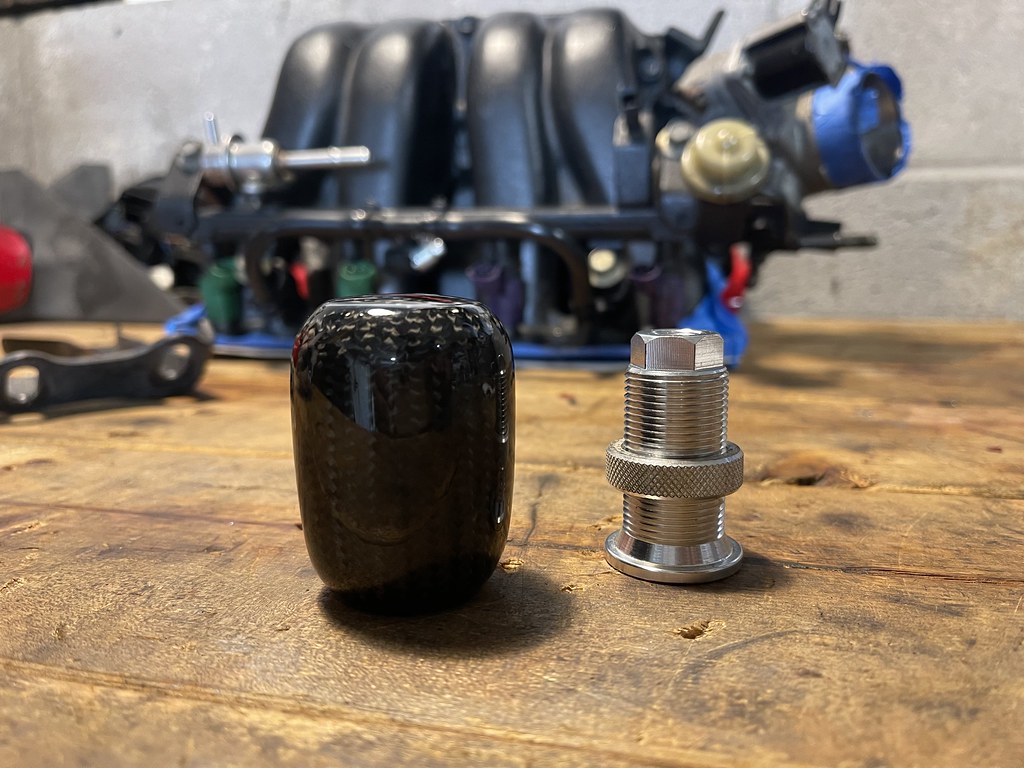
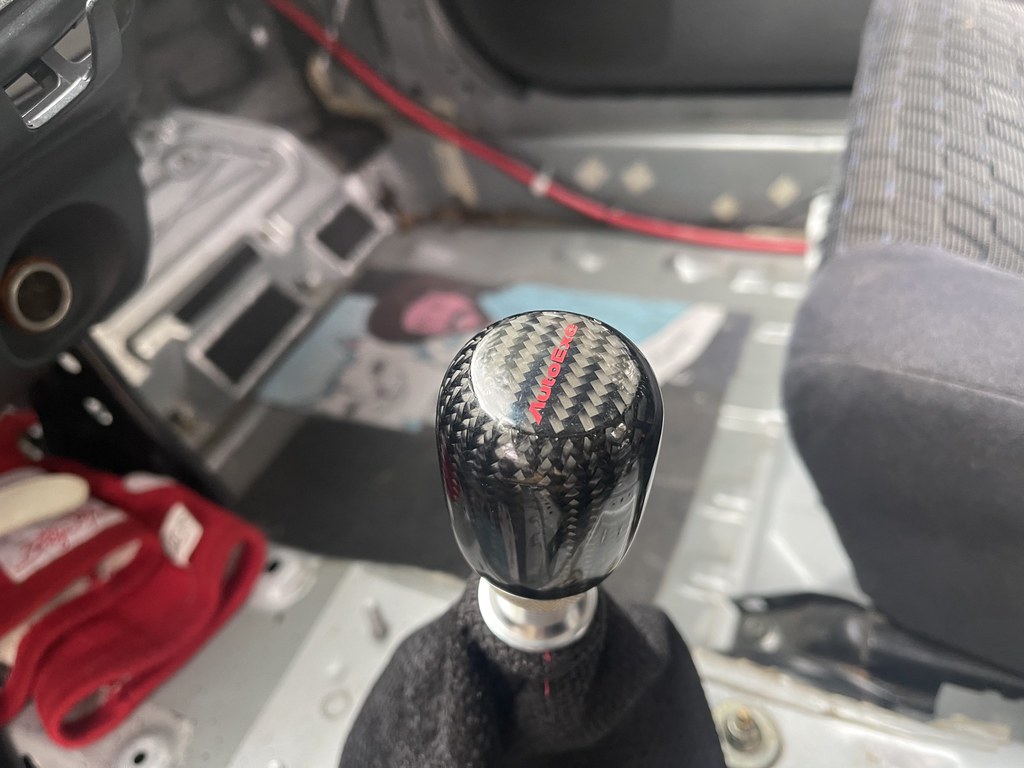
Gifted the race car with the elusive Autoexe carbon fiber shift knob..
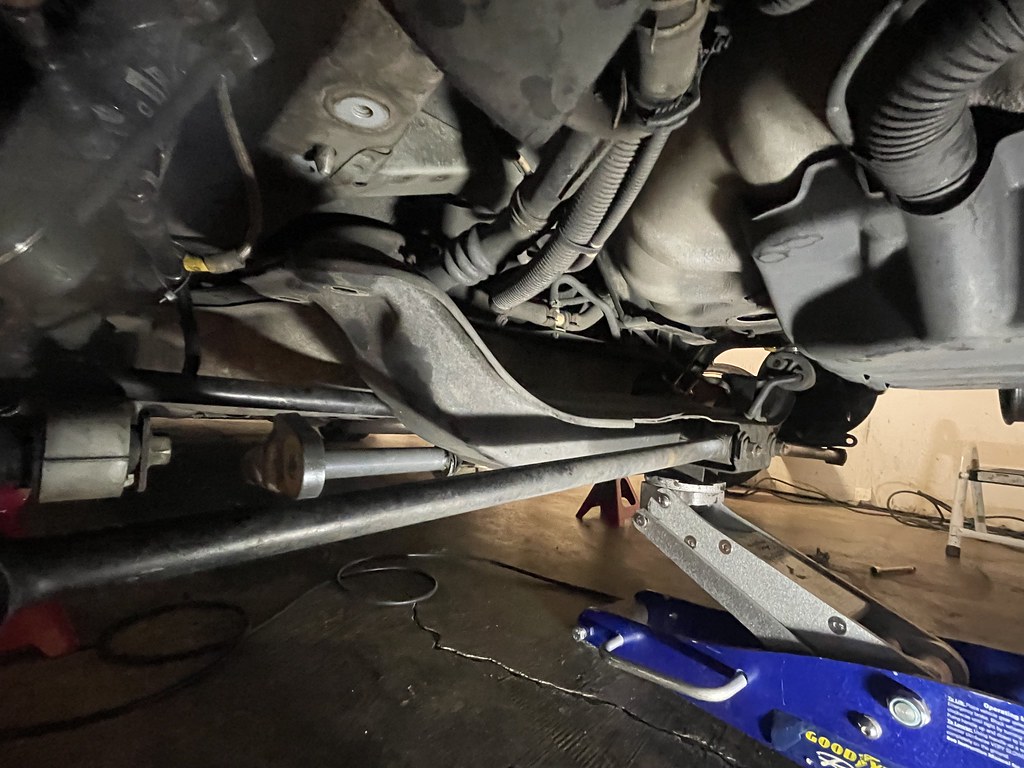
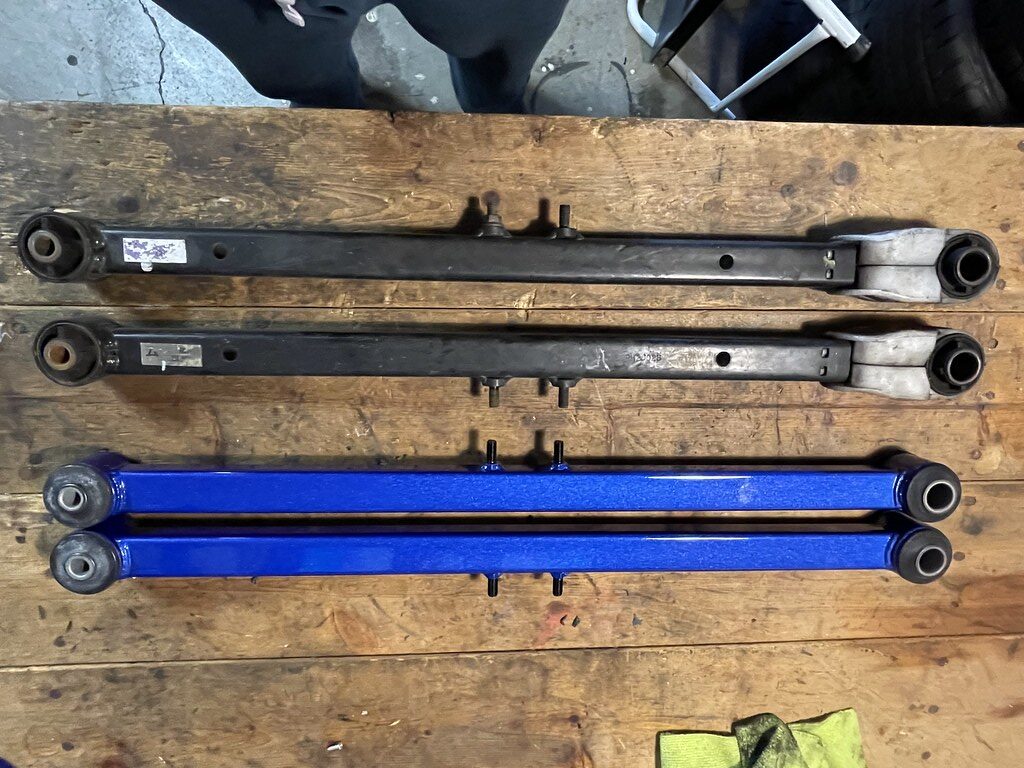
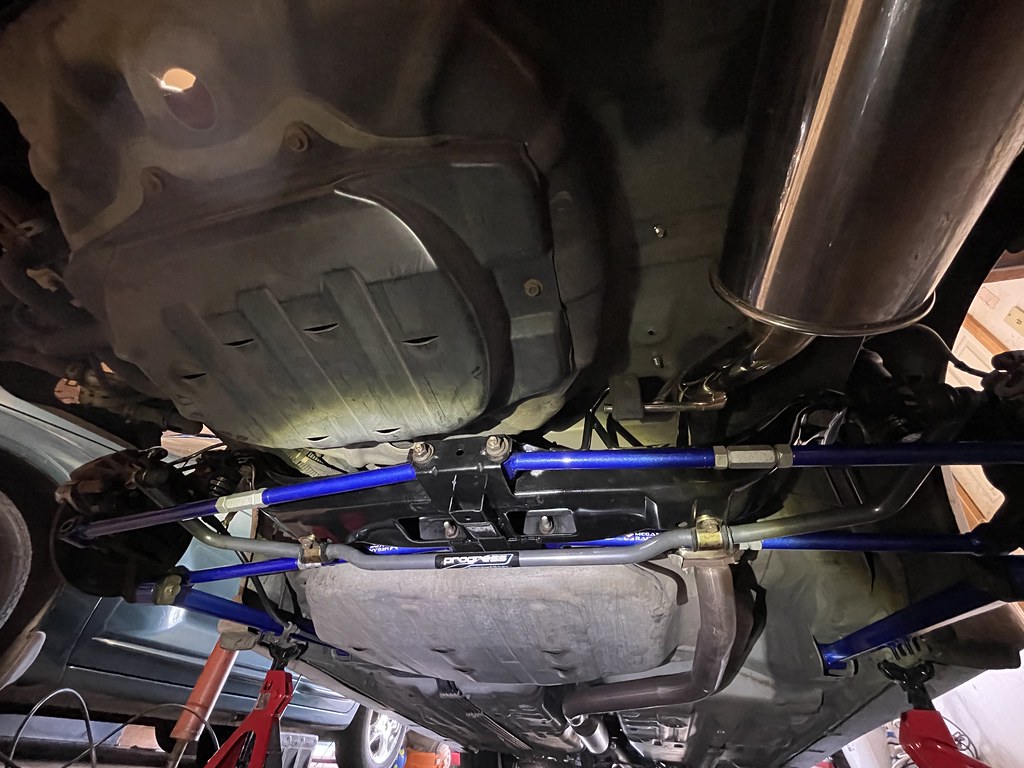
Since I finally had time I went started to install the megan racing control arms and trailing arms. This does require removing the rear subframe, which is a pretty straightforward job besides the really stubborn knuckle bolts..
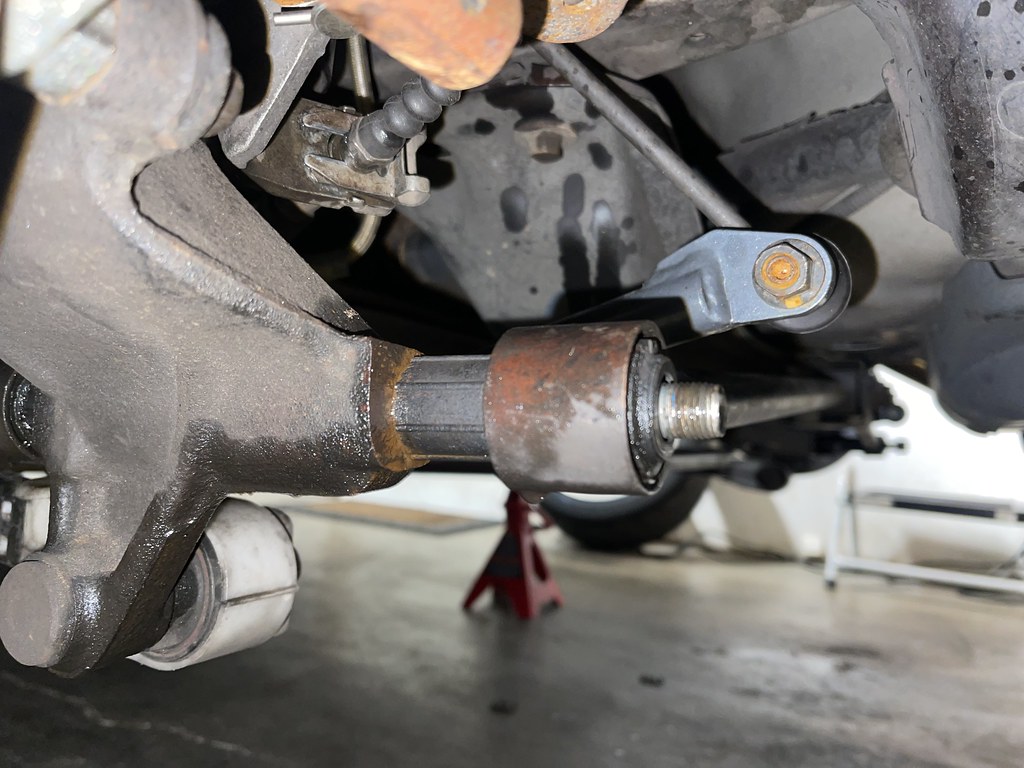
The nut can be loosened with a good impact. But the real tough part is getting the actual bolt out. Once you remove the nut, you need to spin the bolt free and slowly work it out of the lower knuckle and arms.
The bolt gets seized when it goes through the aluminum knuckle. I used a breaker bar and sprayed a good bit of lubrication to try and free it up. Once you get that initial turn its all downhill from there, but its tough. I did notice things started to free up once I concentrated the thread lube on the knuckle portion to free it up.
Once you get it to spin freely, you should be able to punch it out.
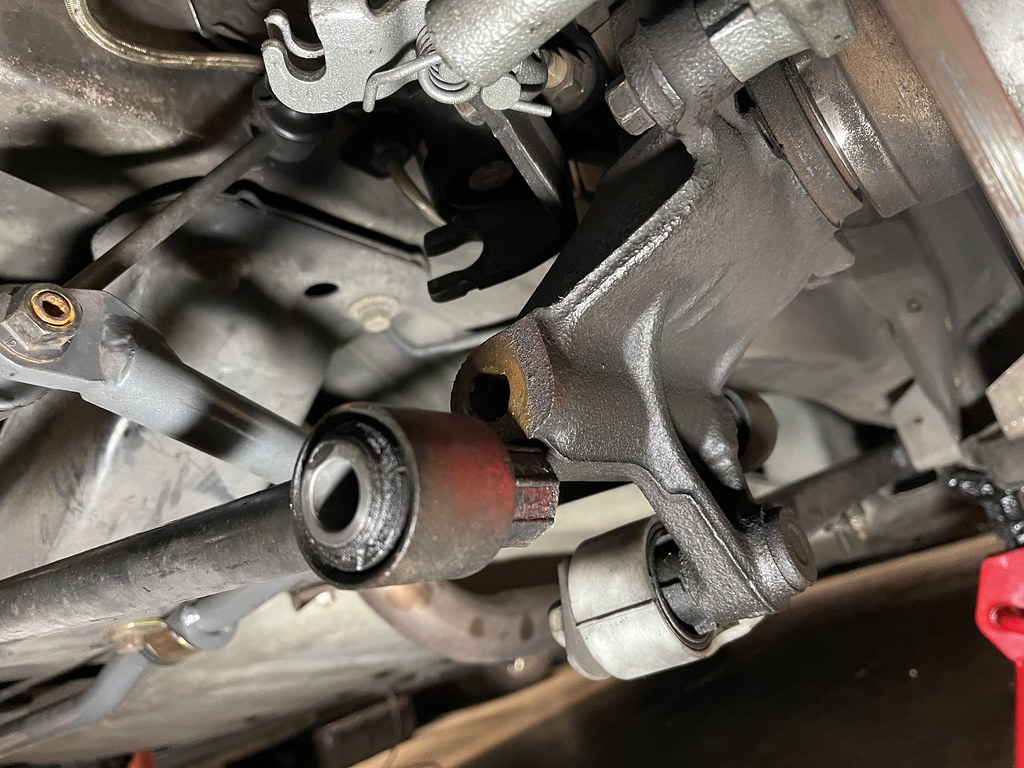
Once that is over everything else is simple..
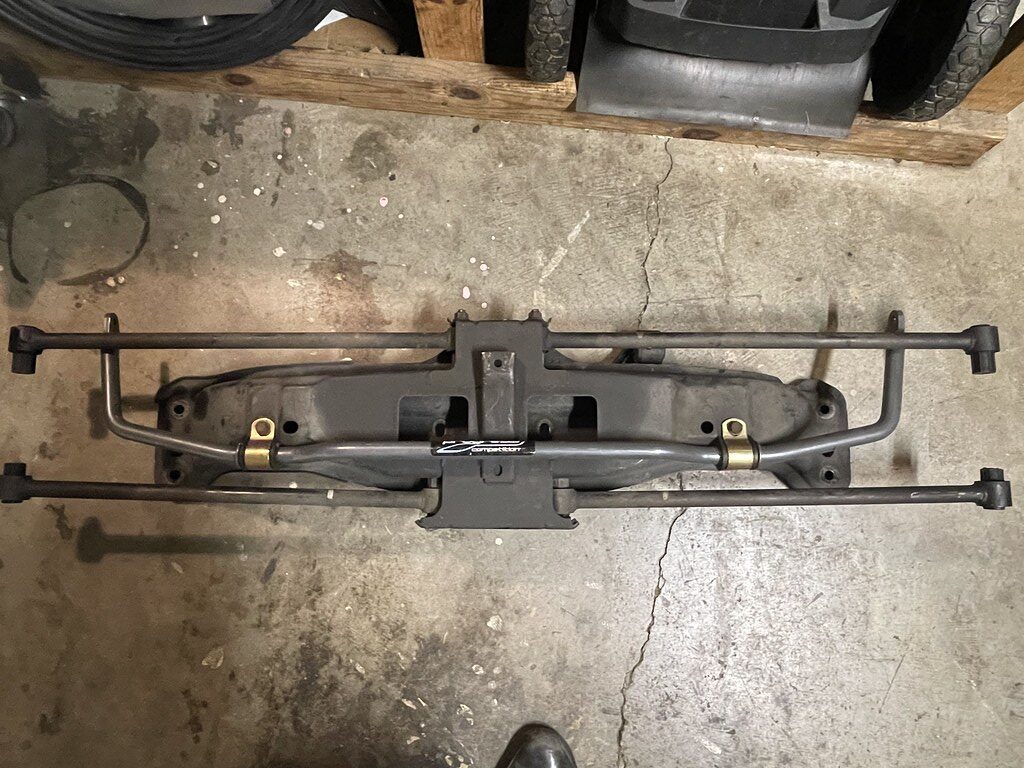
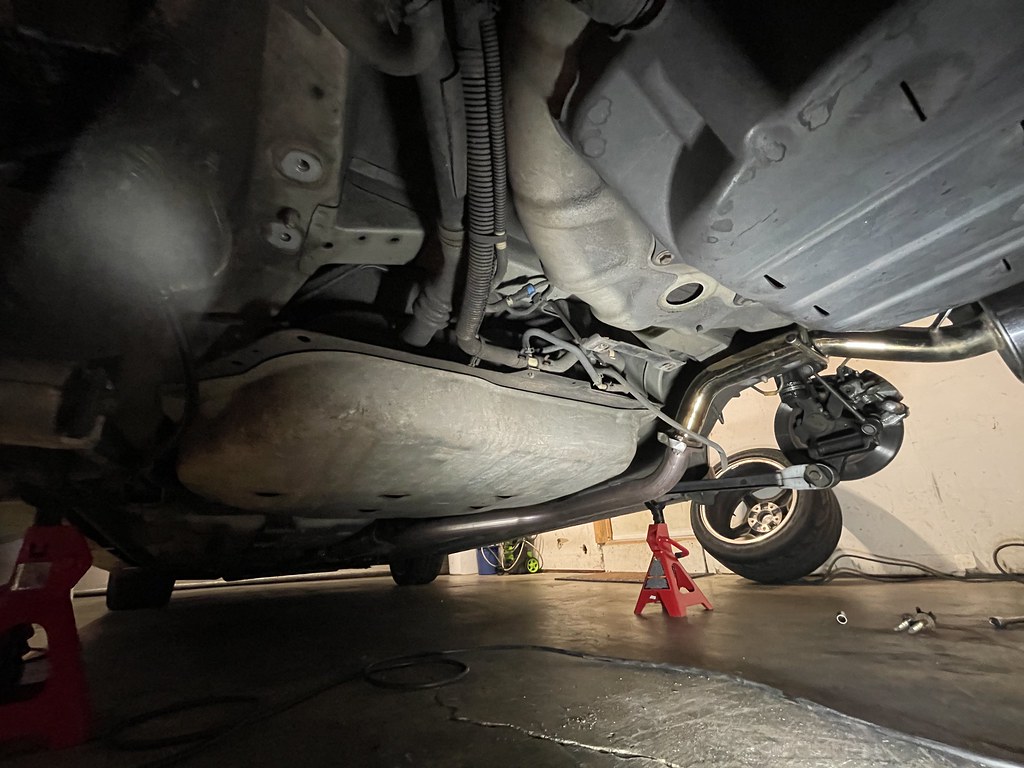
Rear subframe out!
Rear control arms, and subframe brace out..
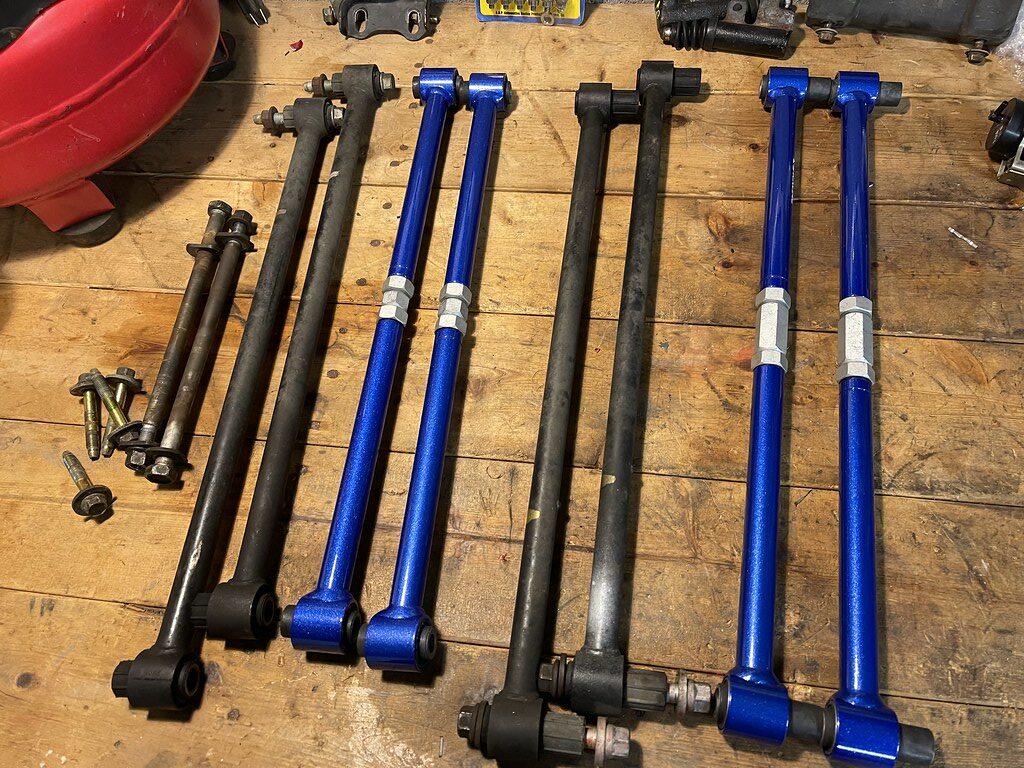
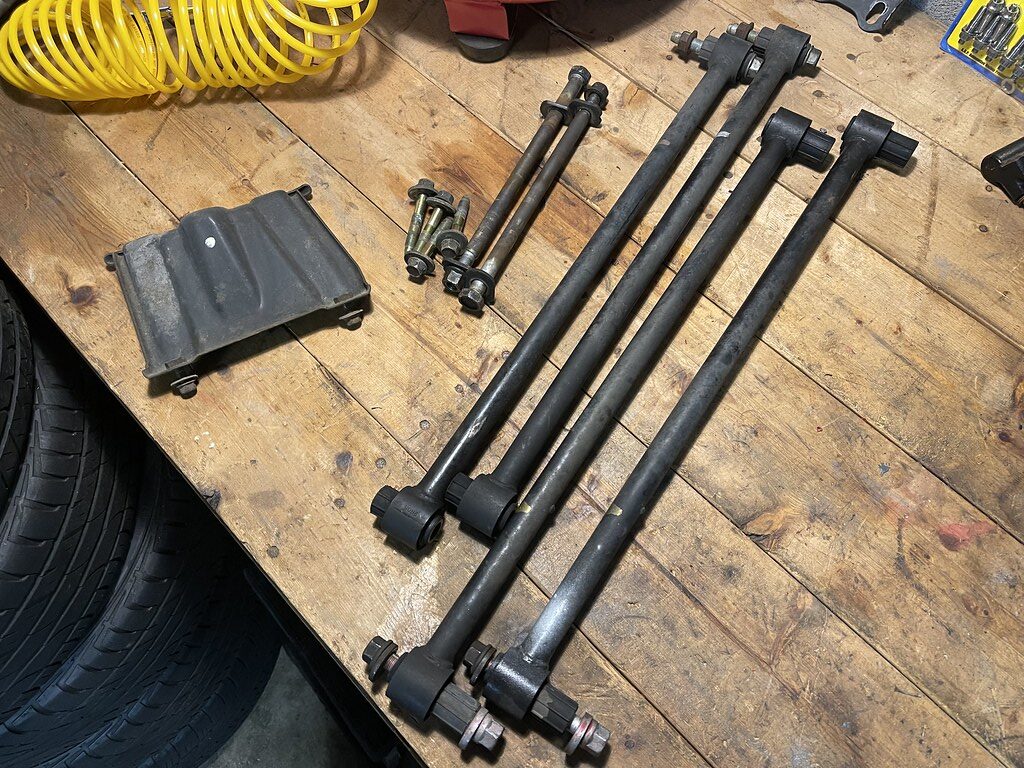
Comparison of the OE arms and Megan arms. The main reason for this is more camber adjustment in the rear and being able to get rid of the camber bolt for a more consistent alignment in the rear.
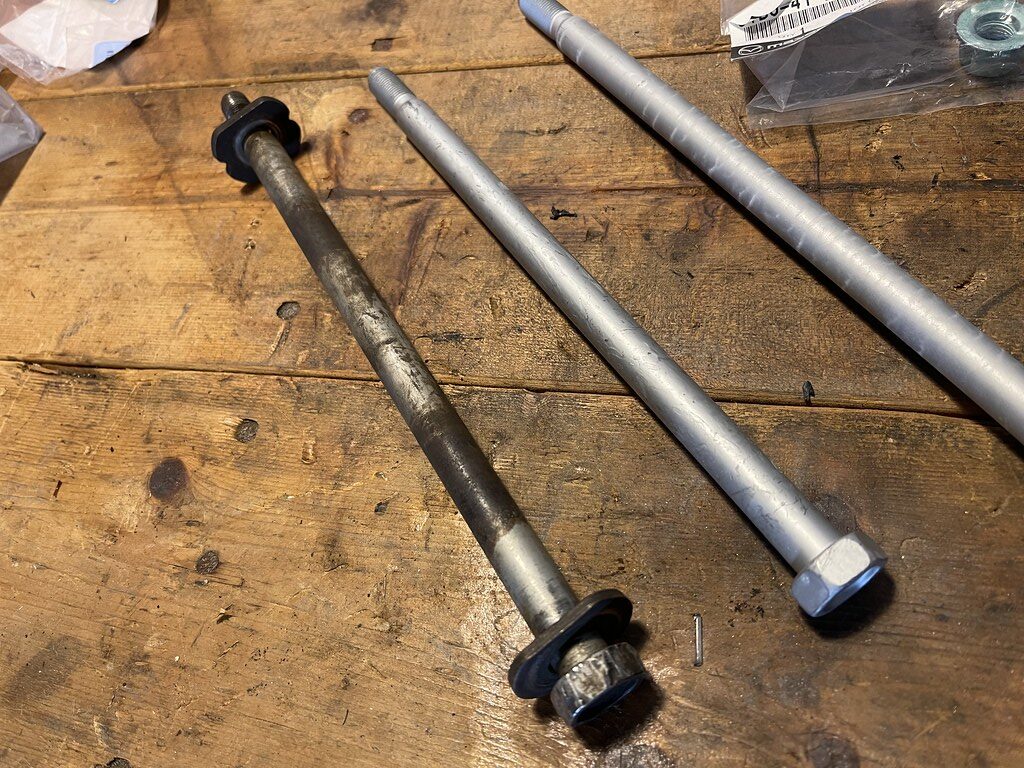
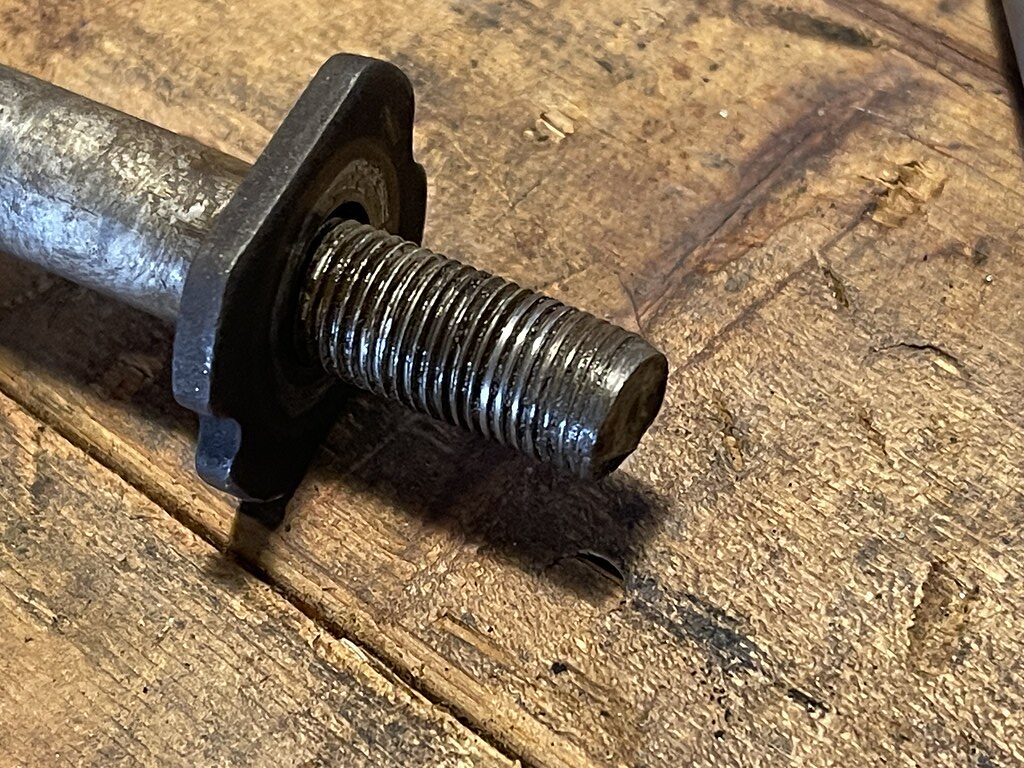
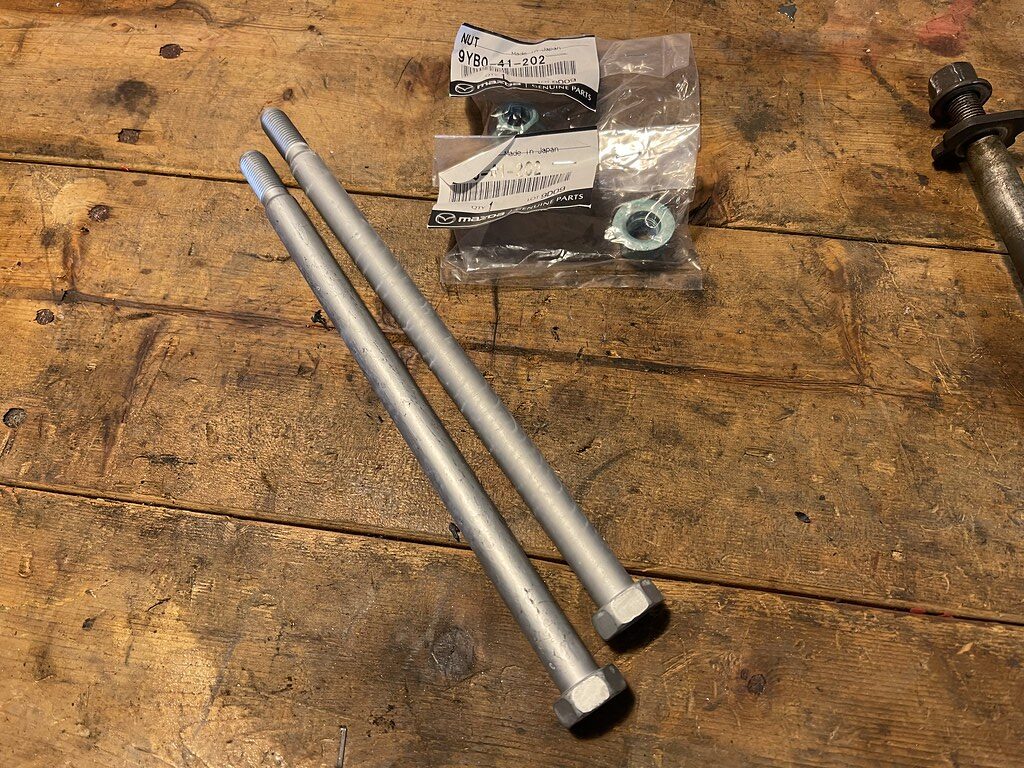
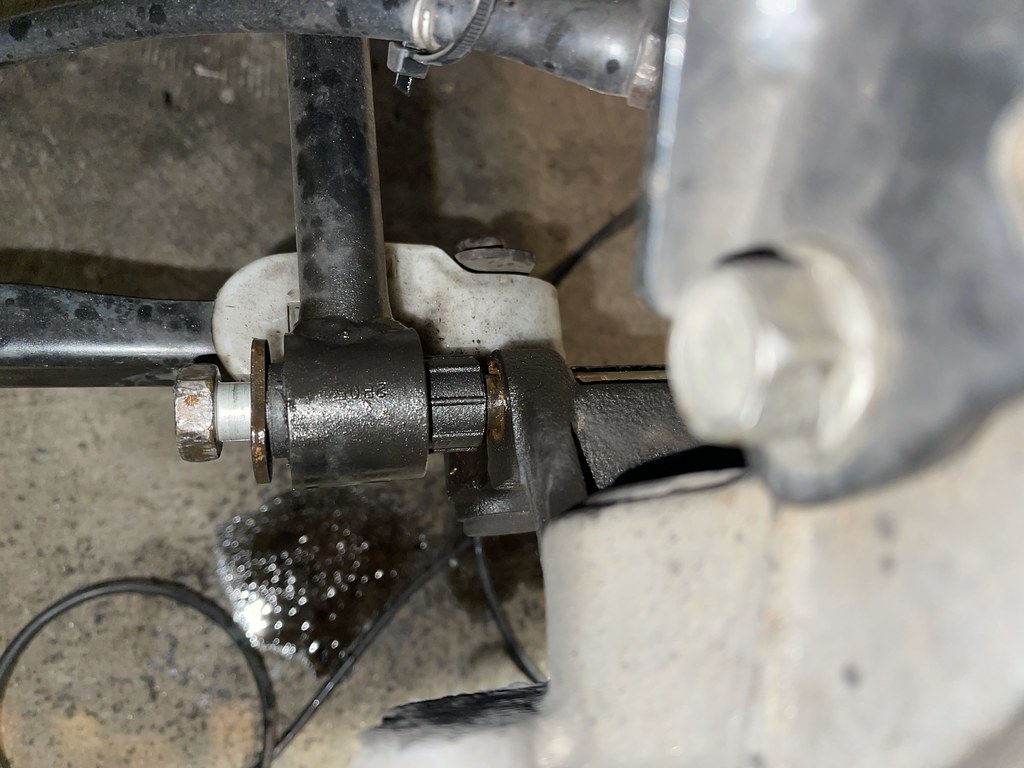
I got a little too happy with the punch, and damaged the lower control arm bolt when removing it. I went ahead and replaced them both with fresh bolts, they are about $22 a piece from Mazda.
I also had the trailing arms to go in..
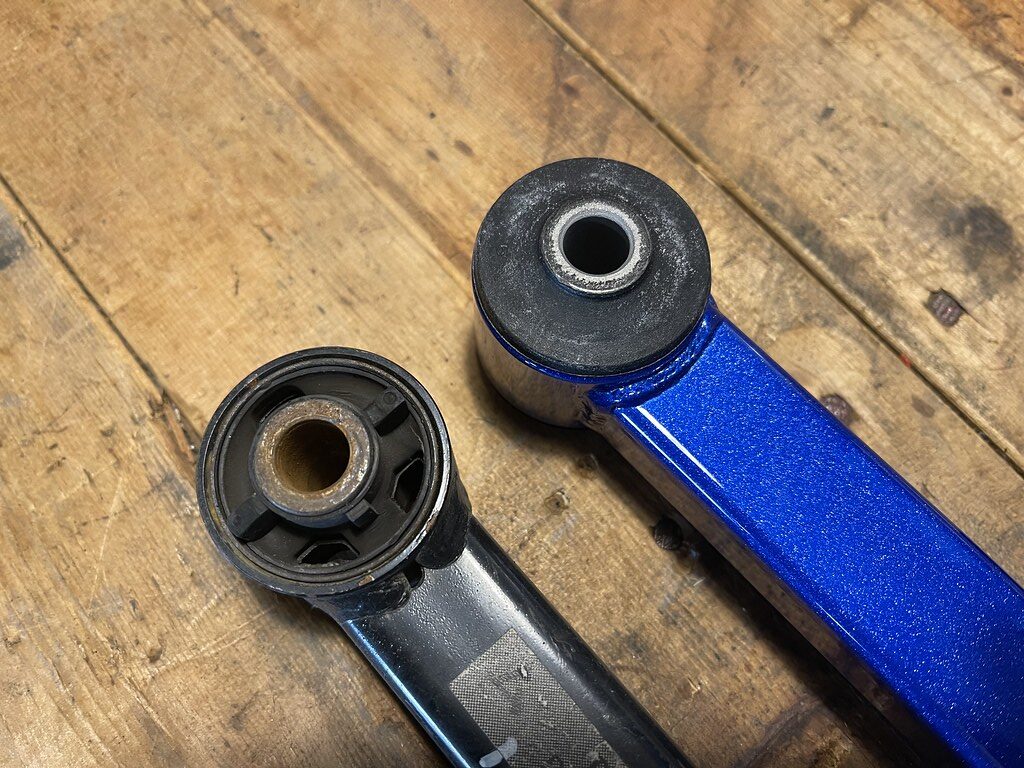
Comparison of the the OE bushing and the Megan bushings in the trailing arm.
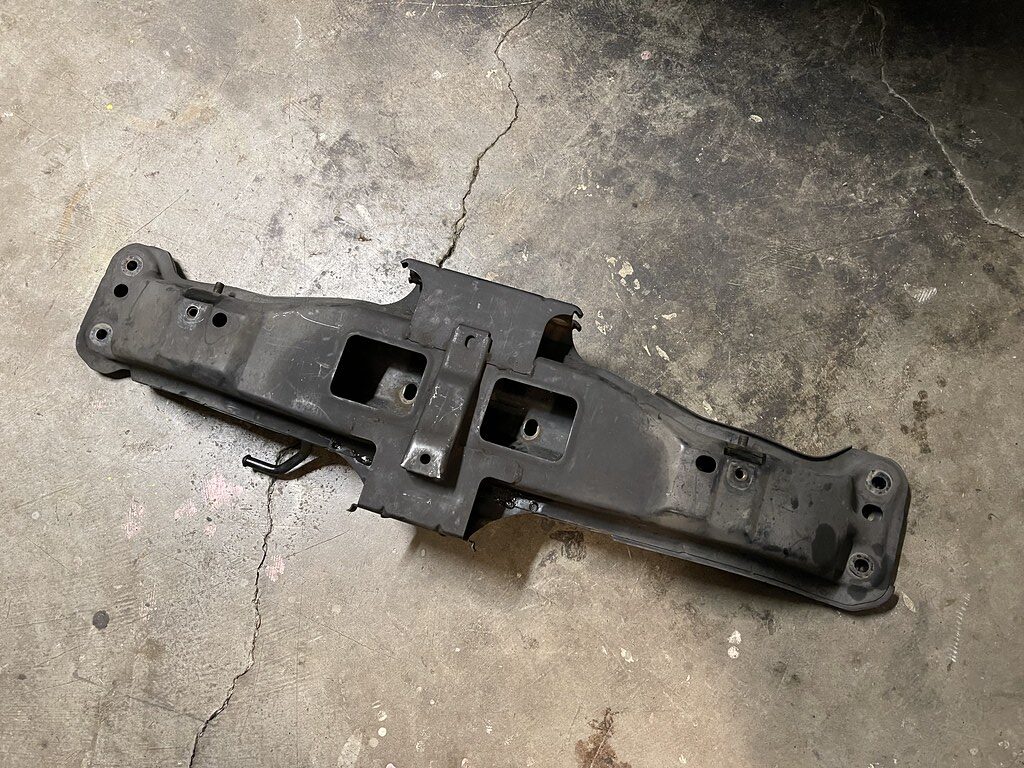
Rear subframe stripped of the arms and sway bar..
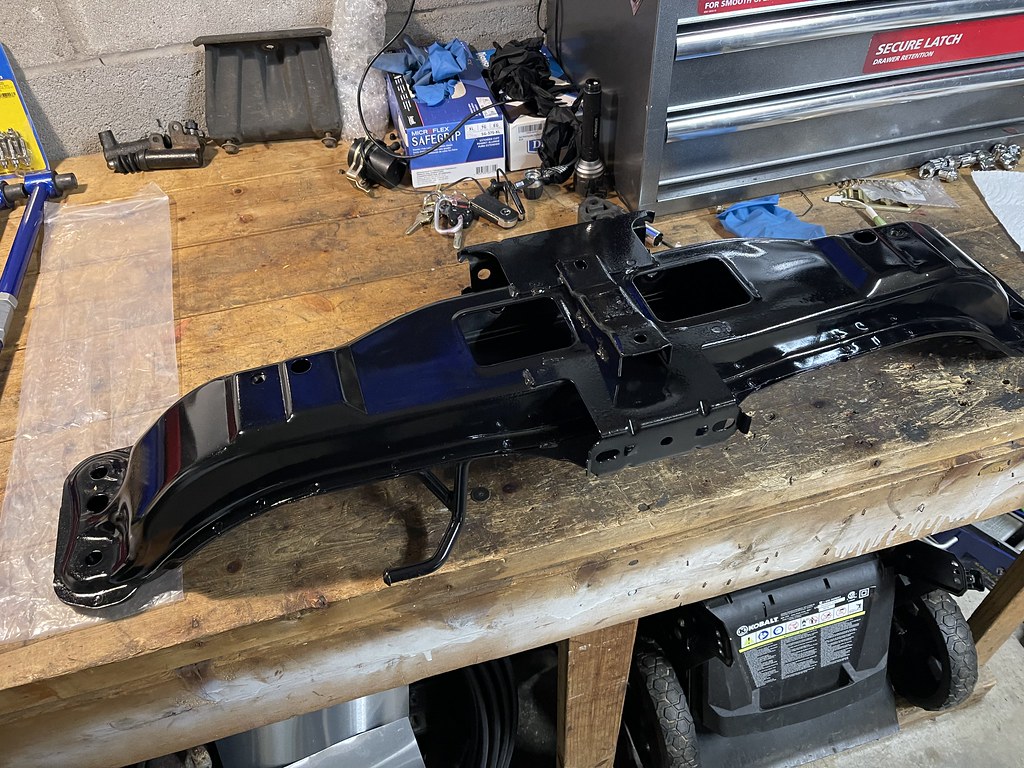
Subframe cleaned and sprayed
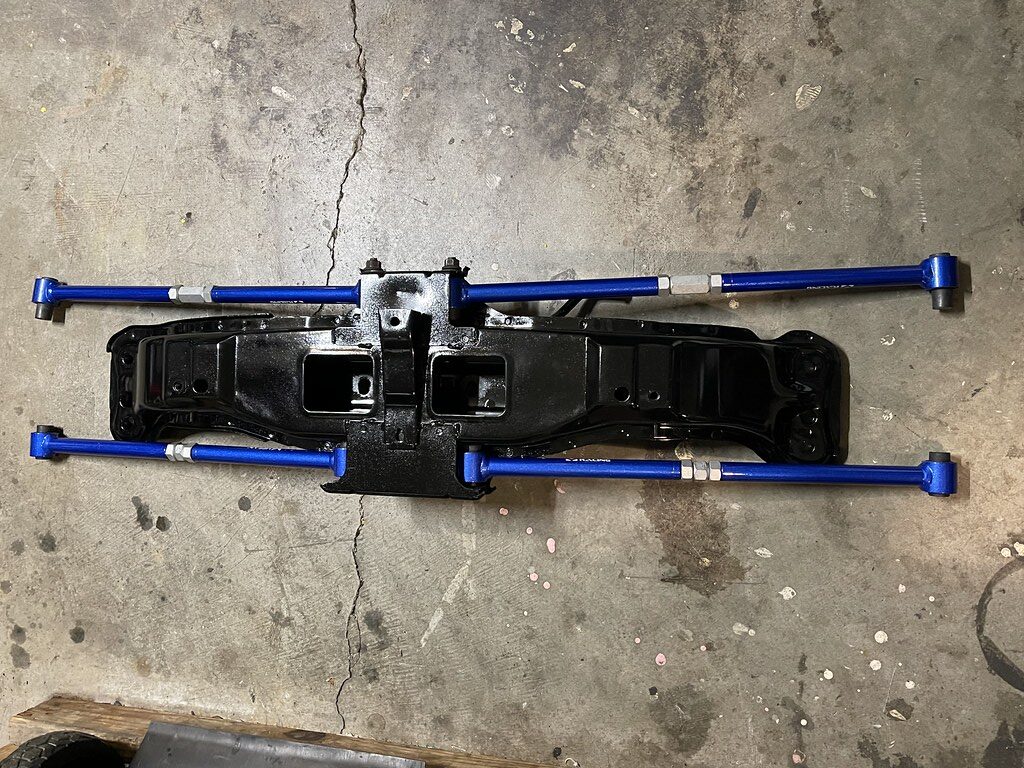
Arms installed and ready to go back in.
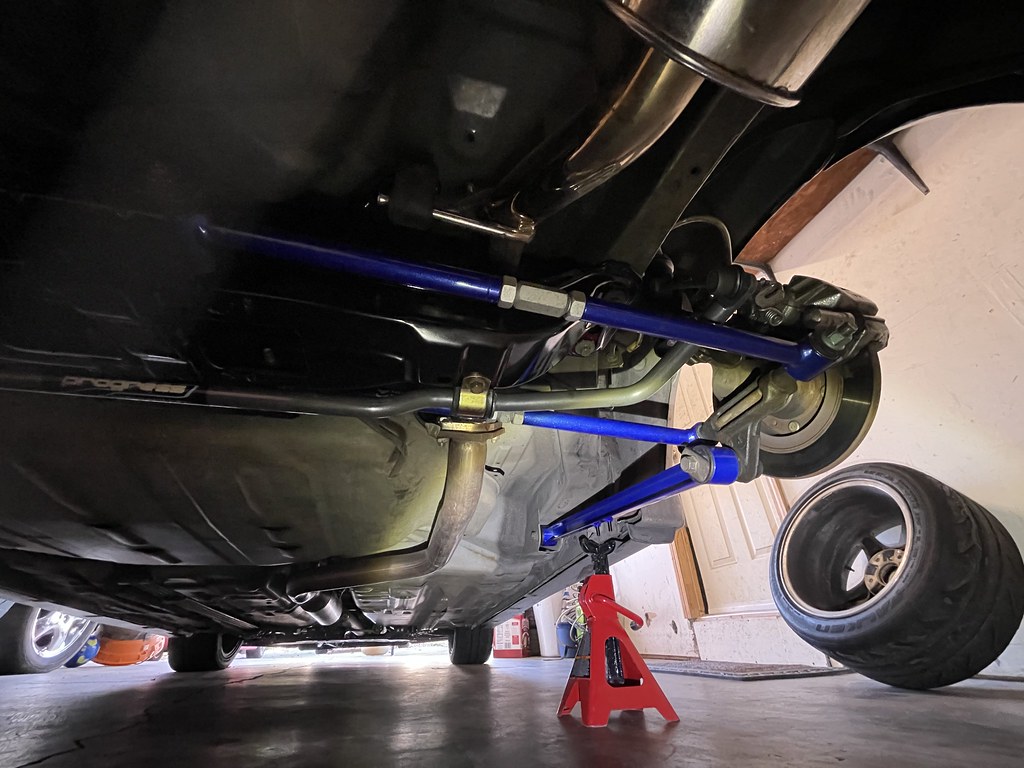
Installation was way less eventful then removing especially with fresh bolts and hardware. I set the control arms as best as possible until I can get it to work for the alignment!